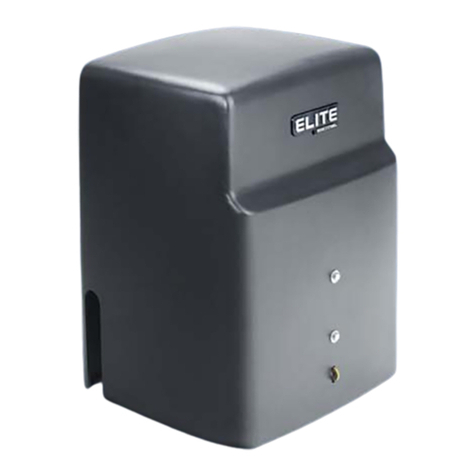
Elite access systems Sl-3000 series User manual

© COPYRIGHT 1988 BY ELITE ACCESS SYSTEMS, INC.
www.eliteaccess.com
HIGH TRAFFIC COMMERCIAL SLIDE GATE OPERATORS
INSTALLATION INSTRUCTIONS & MANUAL BOOK FOR
ARCHITECTS, GENERAL CONTRACTORS & DEALERS
SL-3000
™
SERIES

TABLE OF CONTENTS
1
PLEASE DO NOT TOUCH ME!...
...UNLESS YOU ARE AN AUTHORIZED SERVICE TECHNICIAN! THANK YOU.
© 1988 BY ELITE ACCESS SYSTEMS, INC.
ALL RIGHTS RESERVED. NO PART OF THIS MANUAL MAY BE REPRODUCED IN ANY MEANS:
GRAPHIC, ELECTRONIC OR MECHANICAL, INCLUDING PHOTOCOPYING WITHOUT THE
EXPRESSED WRITTEN PERMISSION OF THE PUBLISHER. MATERIALS, COMPONENTS AND
SPECIFICATIONS ARE SUBJECT TO CHANGE WITHOUT NOTICE. RELEASE 4
GATE POST WARNING . . . . . . . . . . . . . . . . . . . . . . . . . . . . . . . . . . . . . . . . . . . . . . . . . .2
WARNING SIGNS . . . . . . . . . . . . . . . . . . . . . . . . . . . . . . . . . . . . . . . . . . . . . . . . . . . . .3
TYPES OF INSTALLATIONS . . . . . . . . . . . . . . . . . . . . . . . . . . . . . . . . . . . . . . . . . . . . . . . .4
HOW TO CONNECT THE CHAIN FOR DIFFERENT TYPES OF INSTALLATIONS . . . . . . . . . .5
CEMENT WORK . . . . . . . . . . . . . . . . . . . . . . . . . . . . . . . . . . . . . . . . . . . . . . . . . . . . . . .6
DISTANCE BETWEEN THE OPERATOR AND GATE . . . . . . . . . . . . . . . . . . . . . . . . . . . . . . .7
CHOOSING MOVEMENT DIRECTION . . . . . . . . . . . . . . . . . . . . . . . . . . . . . . . . . . . . . . .7
HOW TO CONNECT POWER (120V) . . . . . . . . . . . . . . . . . . . . . . . . . . . . . . . . . . . . . . .8
ADJUSTING GATE TRAVELING DISTANCE . . . . . . . . . . . . . . . . . . . . . . . . . . . . . . . . . . . . .8
TWO-WAY ADJUSTABLE REVERSING SENSOR . . . . . . . . . . . . . . . . . . . . . . . . . . . . . . . . . .9
ADJUSTABLE TIMER & ADDITIONAL LIMIT SWITCH . . . . . . . . . . . . . . . . . . . . . . . . . . . . . .9
MASTER & SLAVE WITH TIMER . . . . . . . . . . . . . . . . . . . . . . . . . . . . . . . . . . . . . . . . . . . .10
MASTER & SLAVE / NO TIMER . . . . . . . . . . . . . . . . . . . . . . . . . . . . . . . . . . . . . . . . . . .11
THREE PUSH-BUTTON SYSTEM . . . . . . . . . . . . . . . . . . . . . . . . . . . . . . . . . . . . . . . . . . . .12
TERMINAL INPUT CONNECTIONS . . . . . . . . . . . . . . . . . . . . . . . . . . . . . . . . . . . . . . . . .13
SAFETY AND EXIT LOOP . . . . . . . . . . . . . . . . . . . . . . . . . . . . . . . . . . . . . . . . . . . . . . . .14
EMERGENCY RELEASE . . . . . . . . . . . . . . . . . . . . . . . . . . . . . . . . . . . . . . . . . . . . . . . . .15
HOW TO REPLACE THE CONTROL BOARD . . . . . . . . . . . . . . . . . . . . . . . . . . . . . . . . . .16
YOU WILL HEAR A “BEEP” SOUND WHEN . . . . . . . . . . . . . . . . . . . . . . . . . . . . . . . . . .16
TROUBLESHOOTING / LED INFORMATION CENTER . . . . . . . . . . . . . . . . . . . . . . . . . . . .17
SL-3000 PARTS . . . . . . . . . . . . . . . . . . . . . . . . . . . . . . . . . . . . . . . . . . . . . . . . . . . . . . .18
LIST OF SL-3000 PARTS AND MAINTENANCE . . . . . . . . . . . . . . . . . . .INSIDE BACK COVER

Fig.B1
Closing
CORRECT
.25"
3"
Fig.B2
2"x 2"
gate frame
catch roller
catch roller
Opening
5"
Fig. C wall
Fig. A
Closing
WRONG
GATE POST WARNING
IMPORTANT NOTICE!
Because the coasting distance may vary due to changes in temperature, Elite does NOT recommend
the installation of a stop or catch post in front of the gate's path as shown in Fig. A. To do so will
cause the gate to hit the post in certain instances. Elite only recommends installation of catch rollers
on the side of a catch post with a minimal distance of three inches between the rollers as shown in
Fig. B1 & B2. Also when fully open the end of the sliding gate must stop at least five inches from any
wall or other object as shown in Fig. C.
2

WARNING
Moving Gate Can Cause
Serious Injury or Death
KEEP CLEAR! Gate May Move at Any Time
Do Not Allow Children to Operate Gate or
Play in Gate Area
Operate Gate Only When Gate Area is in
Sight and Free of People and Obstructions
WARNING SIGNS
3
IMPORTANT!
Installers are required to adhere to this procedure:
The UL required Warning Signs must be installed in
plain view and on both sides of each commercial
gate installed. Each sign is made with fastening holes
in each corner and should be permanently secured in
a suitable manner. Also the warning sticker should
be placed on the operator so it is clearly visible.
Moving Gate Can Cause
Serious Injury or Death
WARNING
!
Operate Gate Only When Gate Area is in Sight,
Free of People, and Clear of Obstructions
Do Not Allow Children to Operate Gate or Play in Gate Area
This Entrance is for Vehicles Only. Pedestrians
Must Use Separate Entrance
Read Owner’s Manual and Safety Instructions
Free of People, and Clear of Obstructions
This Entrance is for Vehicles Only. Pedestrians

TYPES OF INSTALLATIONS
FRONT INSTALLATIONS
4
REAR INSTALLATIONS
CEILING MOUNT UNDERGROUND PARKING
Reason: Space efficient - chain is not visible.
Reason: Chain is not visible.
Reason: Cost efficient.

FRONT INSTALLATIONS
REAR INSTALLATIONS
REAR INSTALLATIONS: HOUSING MODIFICATION
The housing must be
modified for a rear
installation.
Cut the chain access
slots to the exact
specifications shown in
picture “B”at the right.
Weld front bracket with gate in open position. Weld rear bracket with gate in closed position.
Cut the cover by 171⁄2” Make sure the sprocket box is sealed.
5
HOW TO CONNECT THE CHAIN
Important: For safe
operation of the gate
opener do not cut the
slots any wider or
longer than shown.
Do not modify the
housing in any way
other than specified.
A B
171⁄2"
2"

CEMENT WORK FOR THE PAD AND GATE
6
1⁄2" x 31⁄2"
RED HEAD BOLT
CONCRETE
BED
BELL BOX
3⁄4" PVC
24"
22’
20’
12"
12"
8"
10"
24"
24"
6"
24"
Suggested installation for dirt ground.
The measurements depend on the type
of ground (ie., asphalt, cement, dirt)
6"
24"
24"
24"
10"
8"

DISTANCE BETWEEN THE OPERATOR AND GATE
4"
4"
CHOOSING MOVEMENT DIRECTION
MIN. OF 4"
SPACE
BETWEEN
GATE &
SPROCKET
7
INCORRECT INSTALLATIONCORRECT INSTALLATION
INCORRECT INSTALLATIONCORRECT INSTALLATION
“OPEN THE ELECTRIC BOX”
Plug the motor wires to left open socket.
Plug the motor wires to right open socket.

HOW TO CONNECT POWER (120V)
8
120V FIELD WIRING
COMPARTMENT
USE (U.L. LISTED) CONDUIT FOR
SUPPLYING POWER TO THE UNIT
USE PROPER
WIRE NUTS
DO NOT
DRILL
ADJUSTING GATE TRAVELING DISTANCE
BEFORE ADJUSTING, DO THE FOLLOWING:
1 – Shut off the power.
2 – Push the silver plate inward. Roll the green colored nut to the direction desired.
3 – Place the plate back in the notch.
4 – Turn the machine off.
5 – If you need more adjusting - repeat the process.
*Each notch indicates an estimated 1” of gate traveling distance.
BLACK = 115VAC
WHITE = NEUTRAL
GREEN = GROUND
SUGGESTION: Once you
are through wiring hook-
ups, you may want to seal
all open holes with silicon
or another substance.
WIRE GAUGE REQUIREMENT FOR 115VAC POWER SUPPLY: 1/2 HP & DUAL MOTOR ONLY
CAUTION: ELITE ACCESS SYSTEMS, INC. IS NOT RESPONSIBLE FOR CONFLICTS BETWEEN THE INFORMATION LISTED IN THE ABOVE CHART AND THE
REQUIREMENTS OF YOUR LOCAL BUILDING CODES. THE INFORMATION IS FOR SUGGESTED USE ONLY. CHECK YOUR LOCAL CODES BEFORE INSTALLATION.
16 GAUGE 14 GAUGE 12 GAUGE 10 GAUGE 8 GAUGE 4 GAUGE
150 FEET 250 FEET 400 FEET 650 FEET 1000 FEET 2200 FEET

J2
J3
J1
J4
W4
TWO WAY ADJUSTABLE REVERSING SENSOR
ADJUSTABLE TIMER & ADDITIONAL LIMIT SWITCH
9
Timer can be set from 0 to 60
seconds, or for push open/push
close type operation.
DO NOT TOUCH!
A
A
MIN.
MAX.
Adjusted by qualified
service personnel.
ON
OFF
TIMER
60 0
The level of sensitivity has to do with the weight of the gate and the condition of installation.
Too sensitive = if the gate stops or reverses by itself.
Not sensitive enough = if the gate hits an object and does not stop or reverse.
CAUTION: If the power supply to the gate operator is less than 99 volts you should adjust the alarm pot!
56
PRECAUTION: Adding an additional external
open limit switch as shown will prevent the
gate from closing upon activation of the
safety devices, (when the gate is fully open).
Photocell
Additional External Open Limit Switch,
(under the existing Open Limit Switch).
SAFETY DEVICES
Rubber
Bumper
COM
NC
NO
ON
OFF
TIMER
60 0

MASTER AND SLAVE WITH TIMER
10
MASTER
115 Volt 115 Volt
1. Connect pin #1 of J2 Master to pin #1 of J2 Slave.
Connect pin #2 of J2 Master to pin #2 of J2 Slave.
Connect pin #6 of J2 Master to pin #8 of J2 Slave.
Connect pin #5 of J2 Master to pin #7 of J2 Slave.
2. Turn the timer pod, in the slave gate operator, all the way counter clockwise.
3. For time range automatic close adjustment, use Master timer only.
4. Caution! Do not shut off any of the two timers. Place the timer switch on “ON” position only.
ON
OFF
TIMER
60 0
SLAVE
ON
OFF
TIMER
60 0
10 8 6 4 2
9 7 5 3 1
10 8 6 4 2
9 7 5 3 1
MASTER J2 SLAVE J2
PLACE 4 LOW VOLTAGE WIRES
BETWEEN OPERATORS
For time range automatic close adjustment, use Master timer only.

MASTER AND SLAVE / NO TIMER
MASTER
1. Connect pin #2 of J2 Master to pin #2 of J2 Slave.
2. Connect pin #1 of J2 Master to pin #1 of J2 Slave.
3. Place both timer switches on “OFF” positions.
IN ORDER FOR THE FOLLOWING OPERATION TO OCCUR, FOLLOW THE INSTRUCTIONS.
EXAMPLE: There is a double gate, the entry gate is to be opened with a radio transmitter and
the exit gate with a free exit loop. Only one safety loop system is to open both gates, and a
fire department switch should open both gates at the same time.
1. Connect the radio receiver to entry gate only.
2. Connect the exit loop to exit gate only.
3. Connect the safety loop to entry and exit gates.
4. Connect the fire department switch to entry and exit gates.
ON
OFF
TIMER
60 0
SLAVE
ON
OFF
TIMER
60 0
10 8 6 4 2
9 7 5 3 1
10 8 6 4 2
9 7 5 3 1
MASTER J2 SLAVE J2
PLACE 2 LOW VOLTAGE WIRES
BETWEEN OPERATORS
PARTIAL MASTER & INDIVIDUAL CONTROL
11
115 Volt 115 Volt

THREE PUSH-BUTTON SYSTEM
OPERATING INSTRUCTIONS FOR OPTIONAL SYSTEMS
12
THREE PUSH BUTTON SYSTEM (OPEN-STOP-CLOSE)
Step 1- Connect open push button to terminal #3 & 4 on the main terminal block.
Step 2- Connect close push button to pin #7 & 8 on the J2.
Step 3- Connect push stop button to pin #3 & 4 on the J2 and cut off the jumper wire #W4.
CAUTION! Make sure each push button is dry contact and there are no jumper wires
between them.
10 8 6 4 2
9 7 5 3 1
1 & 2 - Master & Slave (Opening orders) • See Master & Slave section.
3 & 4 - Output for Disconnecting Switch, • If this option is required, cut jumper W4
Push Stop or Pilot Door and connect Pin #3 to COM, & Pin #4
to N.C. on the switch or push button.
5 & 6 - Master (Timer output) • See Master & Slave section.
7 & 8 - Slave (Timer input) • See Master & Slave section.
9 &10 - Alarm output • 5 AMP. Dry contact relay
(Contactors N.O. & COM)
J2
W4
10 8 6 4 2
9 7 5 3 1
W4
CLOSE
STOP
OPEN
J2
STEP 1

TERMINAL INPUT CONNECTIONS
13
Output power
8 = ground (-)
10 = 24 DC (+)
8 = 24 volt
9 = relay
10 = radio power
12345678910
SAFETY LOOP
DIGITAL LOCK
EXIT LOOP
PHOTO CELL
RADIO RECEIVER
•
FIRE
DEPT.
1&2
•
STRIKE
OPEN
3&4
•
SAFETY
LOOP
5&6
•
EXIT
LOOP
7&8
•
RADIO
REC.
8&9&10
•
POWER
ON
•
OPEN
RELAY
RESET
MOTOR
•
GATE
LOCKED
ELEC.
BRAKE
FIRE KEY OR ANY KEY SWITCH
CARD READER
PUSH BUTTON
TELEPHONE ENTRY SYSTEM

SAFETY LOOP
EXIT LOOP
14
12’
4’
20’
4’
11⁄2”
1⁄4”
4’
4’
4’
8’
TWIST WIRES
20’
12’ 4’
8’
11⁄2”
1⁄4”
4’
4’
TWIST WIRES
The reason for an exit loop
is so the gate will open
automatically when a car
is exiting.
Suggested Safety Loop Installation:
WIRE SPECIFICATIONS: Follow the manufacturer’s instructions. Wire has to be wrapped inside the
groove three times. Once you have completed the process, fill up the grooves with a proper sealer.
The reason for a safety loop is, to prevent the gate from closing on a car or any other object while
it is exiting or stopped in the middle of the gate area.
4’
4’

EMERGENCY RELEASE
ADJUST THE CLUTCH
WITH A WRENCH.
STANDARD
OPTION 1: MODEL CP-17
OPTION 2: MODEL DC 1000-SL
15
1. Turn the power OFF
2. Make sure the crank tool fits the crank input, as shown above: Turn the crank to open the gate.
To speed up the process you may use a wireless power drill (6”/sec).
POWER BACK-UP
OPTION A: In case of power failure the
gate opens automatically one time and
stays open. when power is restored the
operator returns to normal condition.
OPTION B: In case of power failure the
gate will not open automatically until
activated by a key switch or push button.
FOR MORE DETAILS
ASK YOU LOCAL DEALER
The chain is held in place by
a spring loaded pin.
Pull firmly on the
“T” Handle to
release the chain.
Turn off the power to
operator and unlock
the fire box.

HOW TO REPLACE THE CONTROL BOARD
A B
2. Unwanted objects are on the gate track
including mud, rocks, dirt, etc.
1. The gate is too heavy.
3. The gate is hitting a wall or any other
object.
4. The gate has one or more broken wheels. 5. A car has hit the gate and the gate is off
of its track.
Pull out 2 plugs. Unscrew 3 nuts and pull out the
control board.
YOU WILL HEAR A “BEEP” SOUND WHEN
•
•
16
•
•
•
••
•
C
R
U
N
C
H
!

TROUBLESHOOTING/LED INFORMATION CENTER
17
•
FIRE
DEPT.
1&2
•
STRIKE
OPEN
3&4
•
SAFETY
LOOP
5&6
•
EXIT
LOOP
7&8
•
RADIO
REC.
8&9&10
•
POWER
ON
•
OPEN
RELAY
RESET
MOTOR
•
GATE
LOCKED
ELEC.
BRAKE
•
FIRE
DEPT.
1&2
•
STRIKE
OPEN
3&4
•
SAFETY
LOOP
5&6
•
EXIT
LOOP
7&8
•
•
RADIO
REC.
8&9&10
•
POWER
ON
•
OPEN
RELAY
RESET
MOTOR
•
GATE
LOCKED
ELEC.
BRAKE
•
FIRE
DEPT.
1&2
•
STRIKE
OPEN
3&4
•
SAFETY
LOOP
5&6
•
EXIT
LOOP
7&8
•
RADIO
REC.
8&9&10
•
POWER
ON
•
•
OPEN
RELAY
RESET
MOTOR
•
GATE
LOCKED
ELEC.
BRAKE
•
•
OPEN
RELAY
RESET
MOTOR
If the gate is not moving in any direction
and the reset motor light is on, take
a screwdriver and reset the motor as
directed in the picture.
EXAMPLE:
The radio receiver LED is on and the
gate remains open. The radio receiver
has malfunctioned in the "ON" position.
EXAMPLE:
The radio receiver LED is not on and the
gate will not open with the a transmitter.
The radio receiver has malfunctioned in
the "OFF" position.

SL-3000 PARTS
18
A H-110
Q003
Q004
Q005
Q006
Q008
Q009
Q010
Q013
Q014 Q015
Q016
Q017
Q018
Q020
Q021
Q022
Q023
Q025
Q026 Q027
Q028
Q029
Q030
Q031
Q032
Q033
Q114
Q101

SL-3000 PARTS LIST
MAINTENANCE
AH-110 - CHAIN #41
Q003 - CHAIN BOLT
Q004 - CHAIN BRACKET
Q005 - SL-3000 CHASSIS
Q006 - PC BOARD NUTS (SET)
Q008 - COVER - NON UL
Q009 - ELECTRONIC ACCESS PANEL
Q010 - LIMITED SWITCH COVER BOX
Q013 - IDLER SPROCKET
Q014 - DRIVE SPROCKET
Q015 - GEAR REDUCER
Q016 - LIMITED SWITCH DRIVE SPROCKET
Q017 - ELECTRONIC CONTROL BOARD
Q018 - 1/2 HP ELECTRIC MOTOR
Q020 - DRIVE BELT
Q021 - GEAR PULLEY
Q022 - ELECTRIC BOX
Q023 - LIMIT SWITCH BOX
Q025 - MOTOR PULLEY
Q026 - CRANK INPUT
Q027 - MOTOR CAPACITOR
Q028 - CRANK
Q029 - LIMIT SWITCH
Q030 - LIMIT SWITCH / CHAIN
Q031 - LIMIT SWITCH/ SHAFT
Q032 - LIMIT SWITCH NUTS
Q033 - LIMIT SWITCH SPROCKET
Q101 - LIMIT SWITCH BEARING HOLDER
Q114 - COVER - UL
1. MAKE SURE THE REVERSING SENSOR IS FUNCTIONING PROPERLY (SEE PAGE 9).
2. MAKE SURE THE GATE TRACK IS CLEAR OF DIRT, ROCKS OR OTHER SUBSTANCES.
3. MAKE SURE THE WHEELS ARE OPERATING SMOOTHLY ON THE TRACK.
4. IF YOU HEAR A “BEEP”, REFER TO PAGE 16.
5. CLEAN THE COVER ON A REGULAR BASIS.
6. FOR A LIST OF PARTS, SEE PAGE 18 AND ABOVE.
IF YOU NEED FURTHER ASSISTANCE, PLEASE CALL YOUR LOCAL SERVICE COMPANY.
Table of contents
Other Elite access systems Gate Opener manuals
Popular Gate Opener manuals by other brands
GiBiDi
GiBiDi F12E Instructions for installation

ZHEJIANG XIANFENG MACHINERY
ZHEJIANG XIANFENG MACHINERY K207A user manual

Toona
Toona series 4 installation manual

Chamberlain
Chamberlain Motorlift HC260ML instructions
CAME
CAME FROG series installation manual
DoorKing
DoorKing 9000-080 Installation & owner's manual

GTO
GTO 4000XL Hec1005a

Bandini Industrie
Bandini Industrie GI.BI.DI. DSK40 Instructions for installations

DITEC
DITEC GLOBE IP1839 Installation and maintenance manual
Beninca
Beninca PREMIER Operating instructions and spare parts catalogue

FAAC
FAAC 740-24V user guide

GFA
GFA ELEKTROMAT KE 40.40 FU-40,00 installation instructions
