ELJO SYS 2K-869MPV13 User manual

ELJO SYS 2K-869MPV13
Commissioning
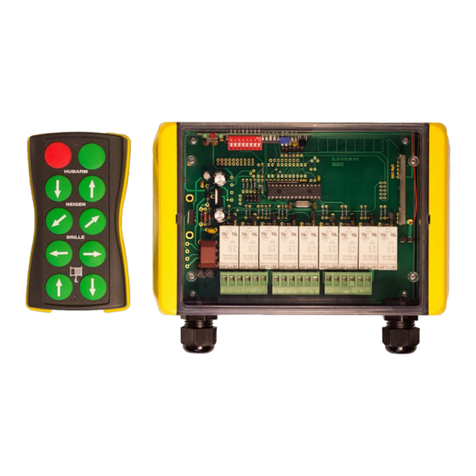
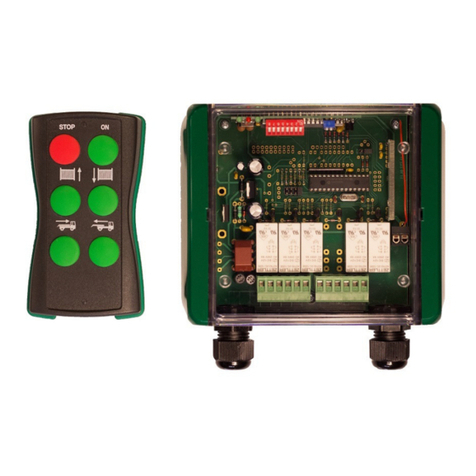
The SYS 2K-869MPV13 radio remote control system consists of the individual components
SYS 2K-869MPV13R (receiver) and the SYS 2K-869MPV13T (manual sender). The used
radio modules have obtained an approval the BZT (Federal office for approvals in the area
of telecommunication) and CEPT. The operation is free of charge. A special request at the
post office is thus not necessary. Approvals also exist in several European countries. The
certificates of approval can be made available on request.
The radio remote control system can be used for control of external resistive load with a
max. load voltage of 24VDC and 5A.
The customer is solely responsible for use of the components especially as the duty cycle
is concerned. The standard version contains an emergency stop of the cat. 0 that can be
initiated automatically or manually. (see emergency stop)
With this version integrated filters also permit to operate the receiver in interference-
polluted environments in a better way than with standard systems. (see section multiple
scanning)
Security against interferences, however, cannot be guaranteed with radio remote control
systems in this frequency range.
Electromotors and any kind of switching electronic circuits can be interfering components. A
sufficient interference suppression must be observed if these components are located close
to the system.
Operation
The frequency range of 868MHZ-870 MHZ is applied for high-frequency systems for
industrial, scientific, medical, domestic and similar purposes (ISM). A protection against
interferences caused by the devices and radio remote control systems mentioned above
cannot be guaranteed when operating in this frequency range.
Warning note
The use of this remote control system is only permitted for devices and systems where a
radio interference in the sender or receiver does not cause a damage on persons or
objects. Additionally a higher-level emergency-stop system which can be activated
manually should be integrated with the component to be controlled.
The remote control of devices and systems with increased risk of accident is not allowed.
No type of crane product is allowed to be used in conjunction with this system.
The guideliners acc. To ZH1/547 are not fulfilled.
This remote control system must only be operated in areas where the operating area of the
system is clearly visible.
We are not responsible for damages caused externally such as interferences or negligent
operation by the user .
Mounting
Mounting, setting and maintenance is only permitted by authorized personnel. With outdoor
installation the receiver housing must be fitted so that it is protected against direct solar
radiation and driving rain.
Mount the device on even ground since water may enter with deformation of the housing.
Fixing holes are located in the adjacent chambers of the housing.
Cable outlet towards the bottom.
Ensure correct connection of all cables. Once all components have been connected
connect supply voltage.
Supply voltage
Connect the 12...24VDC supply voltage after the settings mentioned in the following have
been made. (observe polarity). When the connection is correct, a green LED (LED 1)
flashes.
It is not allowed to connect 115V or 230V .The system will be
demaged, no guarantee
LED 1
LED 2
code switch 2
LED 3
code switch 1
+12-24V
receiver ELJO SYS 2K-869MPV13
output channel 2
output channel 1
ground

Technical Data
Supply voltage receiver 12...24V DC
Rest current receiver 12V typ. 25mA,24V typ. 35mA
Operating current receiver app. 50mA per channel
Load voltage max. 24V DC
Load current max. 5A per channel
Frequency FM 869,85 MHZ (SRD Band)
Display Standby green LED (LED 1)
Display ready for use green LED (LED 2)
Display reception red LED (LED 3)
Coding 8 bit 256 possibilities
Housing of receiver Plastics IP 67
150 mm x 80 mm x 60 mm
Manual sender 120 mm x 65 mm x 25 mm
Supply manual sender 3 * 1,5V AAA
Display sending red LED
Display battery change red LED
Troubleshooting
problem
Lack of transmission. Green LED light (LED1) is working. When button is pressed on
transmitter, the red LED (LED 3) does not function.
Check
Are receiver and transmitter properly encoded?
Solution
Input code for receiver and transmitter (see coding switch)
problem
Wireless control reeacts to proper transmitter. Red LED (LED 3) lights up after button is
pressend on the transmitter but the solenoid does not switch
Check
Is the green LED (LED 2) on? If not, system is in „Standby“
Solution
Set the transmitter in „Active modus“ Press the Button „on“ for three seconds (see also
Stop function)
problem
Wireless control reacts to proper transmitter. Red LED (LED 3) lights up after botton on
transmitter is pressed, green LED (LED 2) lights up, solenoids switching can be heard but
no voltage is measured at output.
Check
Is Output 1 or Output 2 connected correctly ?
Solution
Attach Output 1 ob 2 as described.
Problem
System works for a short period, then stops
Check
Is the system near a source of similiar frequency?
Solution
Turn off source of similiar transmission.
Problem
Effective area of transmission is too small.
Check
Is the second LED on the transmitter on?
Solution
Install a new batterie.
Check
Is the receiver installed close to an electric motor?
Solution
Move to a location away from electric motor.
function
The radio receiver operates with 2 switching channels and an emergency stop- class 0-
which resides above the other channels. After connection of the power supply the system
starts in the “Standby mode”. A green LED (LED 1) flashes. When in this position, no
transmission is possible. After the Button “on” has been activated for around 3 seconds,
the system is active. This position is signaled by a green LED light (LED 2) on the board.
The integrated stop relay is initiated and only after this activation can the winch in and
winch out function be used. If the receiver recognizes a valid signal, a red LED light
(LED 3) will light up on the receiver. For each channel there is a relay switch, which
switches the connected power and is turned on when the button belonging to this channel
is activated on the transmitter. Note: It is very important to keep the maximum electrical
current in mind. The system will shut itself down if there has been a five minute time
period with no transmission. Afterwards the system reverts to standby mode.
Emergency stop automatic stop of the category 0 type.
When the red button on the transmitter is depressed, the emergency stop of the category
0 type takes effect. When this happens, immediately the connection is cut to the outputs
(maximum of 24V DC 5A) The green LED light (LED 2) goes out. At this point the
system is returned to the Standby position. At the point the transmitter can be brought
back online by the steps shown above.
Emergency Stop: Automatically activated emergency stop category 0
The system continually tests if there is a similar transmission on the same frequency
within the utilization field. If there is interference, the system automatically initiates an
emergency stop – category 0. Turning on the unit is, then, only possible when the
interference has stopped. The system is also continually checking the strength of its own
signal. When the maximum range has been reached, the automatic stop is also initiated.
Turning on the unit is, then, only possible when the transmitter is within range.
Multiple scanning
In this operating mode the sent key codes and the set address are scanned and stored
twice in the processor. The transferred values are continuously compared with the stored
code. If the code does not match with the values for a certain time, the stored information
is deleted. Proceed as follows to set this operating mode:
The scanning time can be installed with coding switch B Attention: In this operating
mode a short delay of the switching relays must be taken into account.
Coding switches
Sender and receiver are assigned via the coding switches. (receiver: coding switch 1)
The coding of the sender and receiver must correspond. An asymmetric coding must be
selected in order to protect against unauthorized switching of the channels. The coding
switch 1 in the receiver must be coded before connecting the supply voltage , i.e. first set
the same code for sender and receiver before connecting the
receiver.
Connection of the antenna
An internal antenna is integrated in the housing as standard. The range of the system
depends on local conditions and can be very different . Athmospheric interferences may
influence the frequency. Interferences occur due to the operation and switching on/off of
electronic devices. High degrees of interference mainly occur due to transmission lines,
transformer stations, industrial and electronic data-processing stations. Interference fields
of electromotors must also be taken into account. Keep a large distance to the devices
mentioned above when installing the receiver. The largest range can be obtained if you
keep a long distance to metal items.
(
Observe the distance to live parts !! Interferences !! )
Other ELJO Remote Control manuals
