2/20
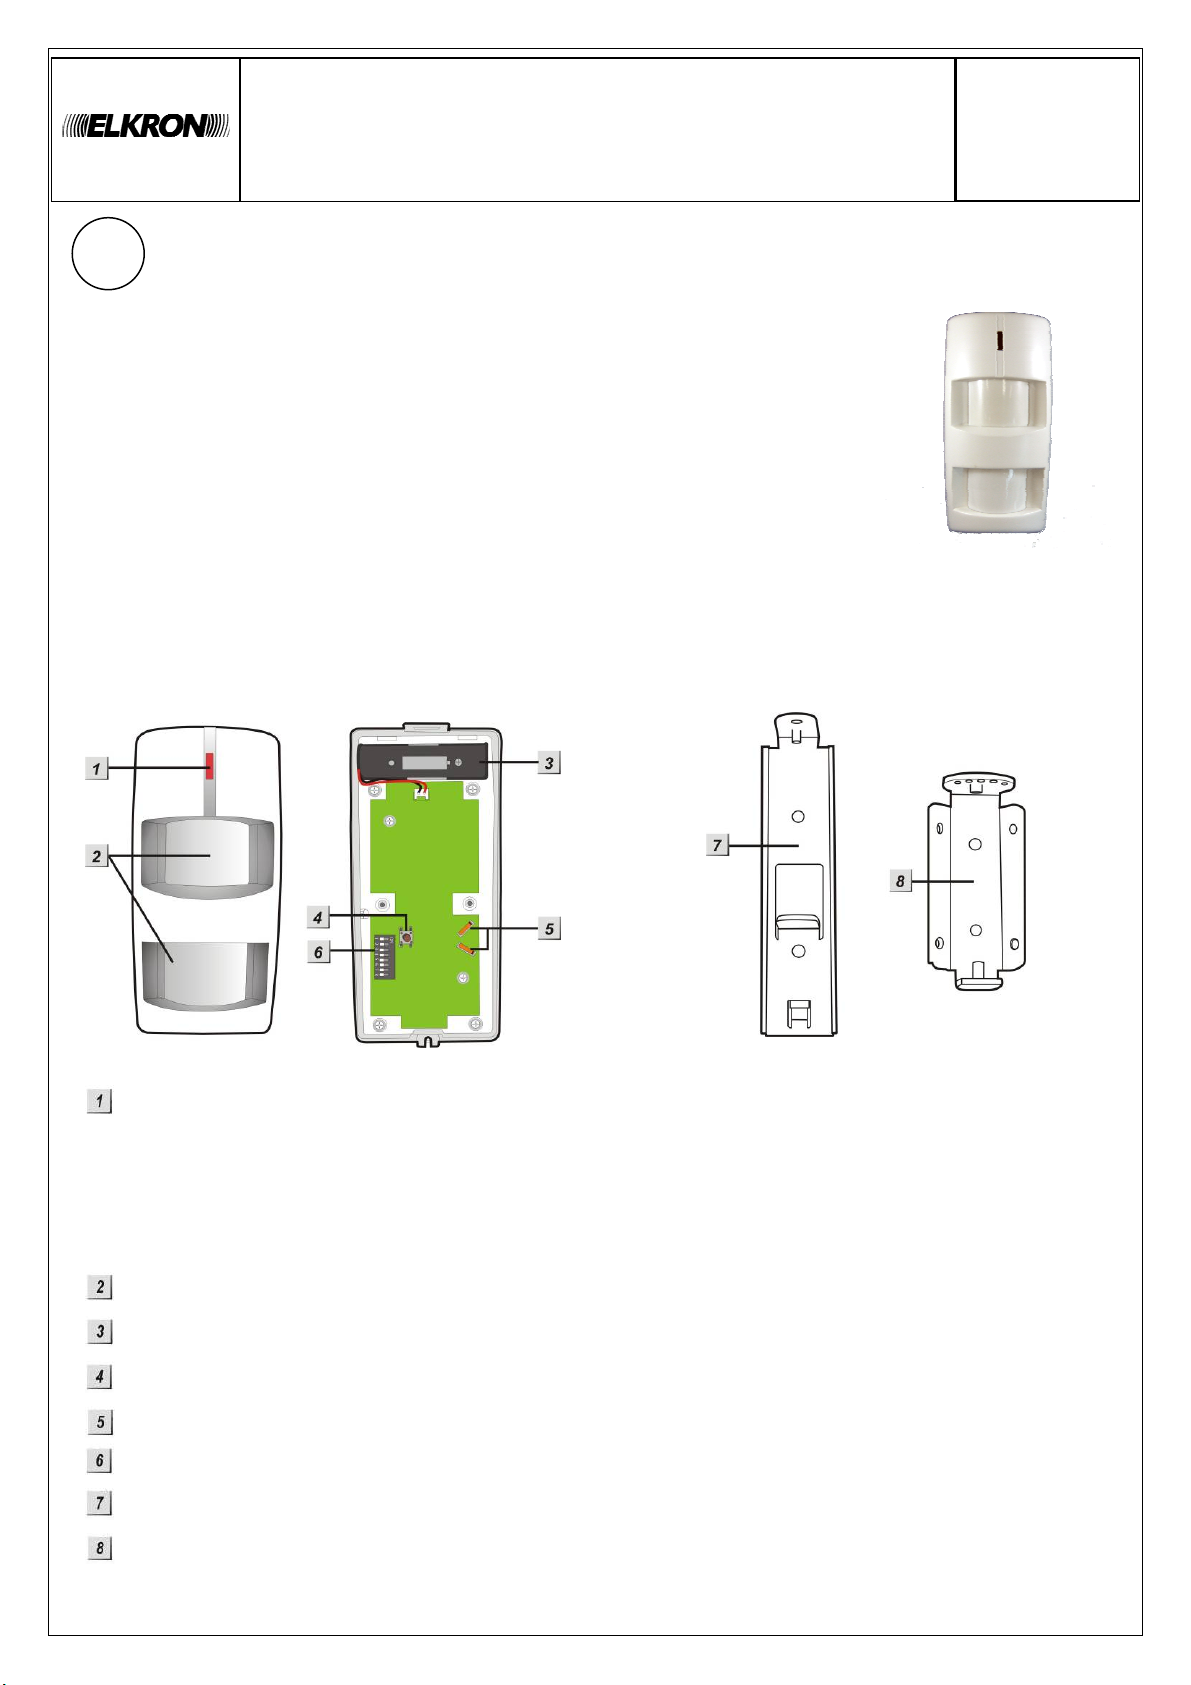
LED INDICATOR
In Normal operation mode, the LED Indicator remains off except:
•When the EIR is in low battery condition; each time it transmits a detected movement, the LED
will light up for about two seconds.
•When the cover is opened and Tamper Switch is violated or Tilt Switch is tilted, the LED will light
up for two seconds to indicate it is transmitting “Tamper” signal.
•When the Tamper condition persists, each time it transmits a detected movement, the LED will
light up for two seconds.
•In Test mode, the LED will light up for two seconds whenever a movement is detected.
TILT SWITCHES
When the EIR’s tilt angle is up to certain degrees (15° to right/left, or 90° forward/backward), a Tamper
alarm will be triggered. The Tilt Switch is disabled by factory default.
•To enable: Secure the EIR onto a wall or bracket, so that the Tamper Switch is pressed. Press & hold
the Test button (aka LED) for 8 sec. The LED will flash for 5 times, indicating Tilt Switch enabled.
•To disable: Release the Tamper Switch (so it is protruding). To enable again, please follow the
above procedure.
Note:
Tilt Switch can only be enabled when Tamper Switch is pressed. If the cover is opened and Tamper
Switch is violated after the Tilt Switch is enabled, you must enable again by following the above
procedure.
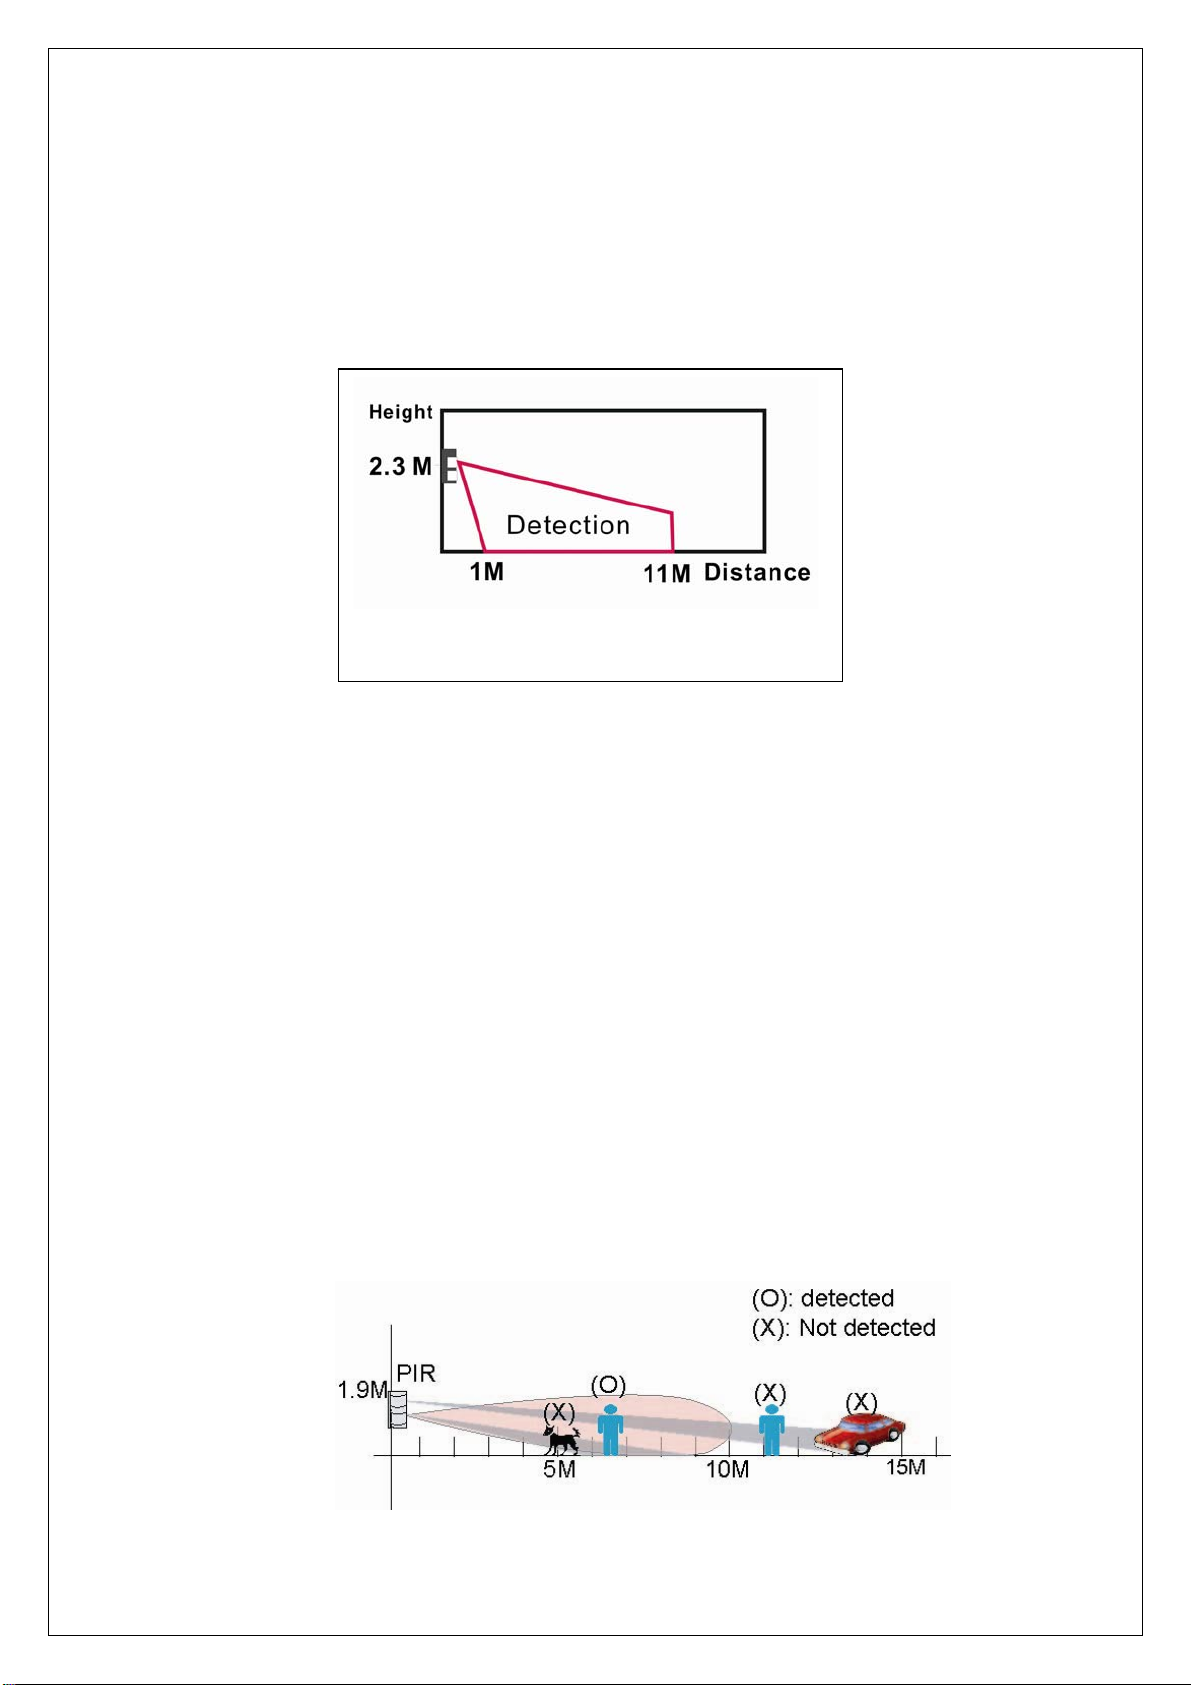
TEST MODE
The EIR can be put into Test mode for three minutes by pressing the Test button (aka LED) once. In
Test mode, sleep timer is disabled and LED indicator is enabled to light up for two seconds whenever a
movement is detected. The EIR will automatically exit Test Mode after three minutes, and return to
normal mode.
To put the EIR into constant Test mode, please adjust DIP switch 1 by referring to DIP Switch Position Table.
BATTERY
•The EIR uses two 3.6V AA size lithium batteries as its power source, with a battery life of
approximately three years at an average of 20 activations per day.
•Low battery detection operates where the EIR has enough reserve energy to typically operate for
a month before complete exhaustion. A low battery signal will be sent to the Control Panel along
with regular signal transmissions for the Control Panel to display the status accordingly.
•To Change Battery:
Step 1: Navigate the Control Panel into Programming mode.
Step 2: Remove the EIR from mounting position and unscrew to open top cover.
Step 3: Remove the old battery and press the tamper button a few seconds to fully discharge.
Step 4: Insert two new 3.6V AA size lithium batteries.
Step 5: Screw back the top cover.
Step 6: Mount back the EIR to location.
Step 7: Press & hold the test button for 8 sec to enable the Tilt Switch.
Step 8: Navigate the Control Panel to exit Programming mode and return to operation mode. The
procedure is complete.
SUPERVISORY SIGNAL
•After installation, the EIR will automatically transmit Supervisory signals periodically to the
Control Panel at random intervals of 30 min. to 50 min.
•If the Control Panel has not received the signal from the EIR for the preset period of time, the Control
Panel will indicate on its display that the particular EIR is experiencing an out-of-signal problem.
•For 433MHz AM: Supervision function unavailable.
•For 868.35MHz AM: Supervision function disabled by factory default.
•For 868.6375MHz FM / 868.35MHz FM / 433MHz FM: Supervision function enabled by factory
default.