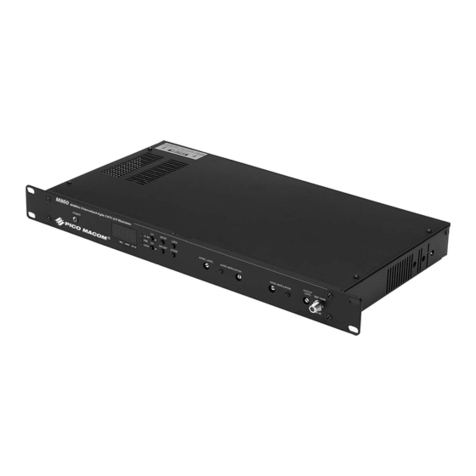
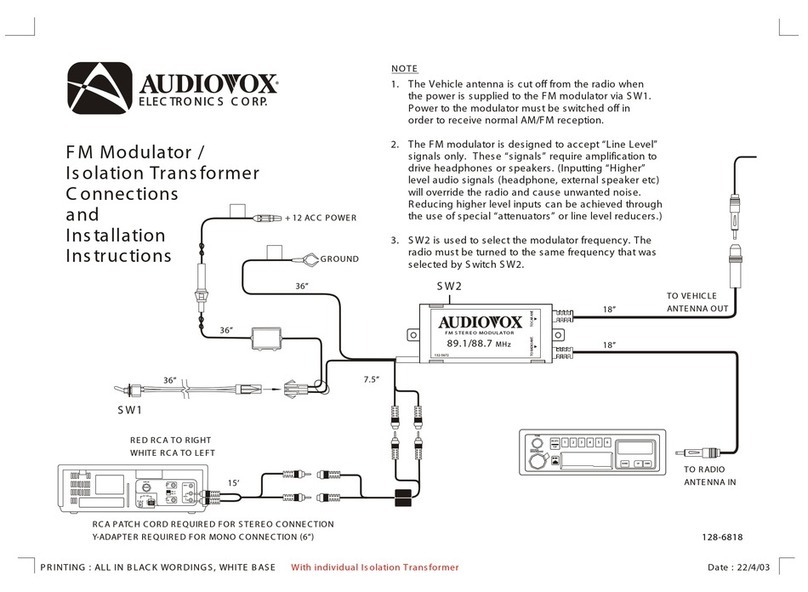
Ellies BPAVM3 User manual

Model: BPAVM3
Mini UHF - RF Modulator
With 3 Audio Video Inputs
Instruction Manual*
*Warranty Included
Before operating this product, please read the manual thoroughly
Website: www.jonsa.com.au

- 2 -
CONGRATULATIONS on purchasing the Ellies Three Channel RF Modulator, we wish
you years of enjoyment, reliability and continued viewing convenience.
SAFETY INFORMATION
CAUTION
Risk of electric shock, please do not open the unit.
WARNING
To prevent fire or a shock hazard, do not expose
the unit to rain or moisture.
SAFETY TERMS & SYMBOLS
Warning: Warning statements identify conditions or
practices that could result in injury or loss of life.
Caution: Caution statements identify conditions or
practices that could result in damage to this
product or other property.
Danger: Do not remove the cover to reduce the risk
of electric shock.
IMPORTANT SAFETY INSTRUCTIONS
1. The safety and operating instructions should be correctly followed and read before
the product is installed and operated.
2. The safety and operating instructions along with your original proof of purchase
receipt should be retained for future reference.
3. All of the warnings on the product and within the instruction manual should be
adhered to.
4. The instruction manuals operating instructions should be followed.
5. Unplug this product from the wall outlet before cleaning. Do not use liquid cleaners
or aerosol cleaners. Use a damp or dry cloth for cleaning.
6. Do not use attachments not recommended by the products manufacturer, as it may
cause a hazard.
7. Do not use this product near water, for example near a bath tub, wash bowl, kitchen
sink, laundry tub, in a wet basement, or near a swimming pool and the like.
8. Mounting of the product should only follow the manufacturer’s instructions, and
should only use a mounting accessory recommended by the manufacturer.
9. This product should only be operated from the power source indicated on the
marking label. If you are not sure of the type of power source in your home, consult
your product dealer or local Energy Authority. For products which are intended to be
operated from battery power, or other sources, refer to the instruction manual.
10. The power supply cord should be routed so that it is not likely to be walked on or
pinched by items placed upon or against them. Please pay particular attention to the
cord and plugs. For other sources, please refer to their instruction manual.
11. For added protection, if this product is left unattended and unused for a long period
of time, or during a lightening storm, unplug it from the wall outlet and disconnect
the cable system. This will prevent damage to the product due to lightning and
power line surges.
12. Never push objects of any kind into this product through openings as they may
touch dangerous voltage points or short out parts that could result in a fire or
electronic shock. Never spill liquid of any kind onto the product.
13. Do not overload the wall outlets, extension cords etc, as this can result in a risk of
fire or electric shock.
14. Unplug this product from the wall outlet and refer all servicing to a qualified service
technician, under the following circumstances.
yWhen the power supply cord or plug has been damaged.
yIf liquid has been spilt, or a foreign object has fallen into the product.
y

- 3 -
yIf the product does not operate normally by following the instruction manual,
only adjust the controls that are covered by the operating instructions. An
improper adjustment of other controls may result in damage and will often
require extensive work by a qualified technician to restore the product to its
normal operation.
yIf the product has been dropped or damaged in anyway.
yWhen the product exhibits a distinct change in performance this indicates a
need for service.
15. If replacement parts are required, be sure the service technician has used the
replacement parts specified by the manufacturer, or that the replacement part has
the same characteristics as the original part. Unauthorised substitutions may result
in fire, electric shock, or other hazards.
16. Upon completion of any service or repair to this product, please ask the service
technician to perform safety checks to determine that the product is in proper
operating condition.
17. The product should be situated away from heat sources such as radiators, gas heater
or open fires, electric heaters, stoves, or other electrical products including
amplifiers that produce heat.
Note:
This device has been tested and found to comply with the limits for a class B
digital device, pursuant to the FCC Rules, or BZT, CE EMC and C Tick directive. These
limits are designed to provide reasonable protection against harmful interference in a
residential installation. If not installed and used in accordance with the instruction, it
may cause interference to RF communications. However, there is no guarantee that
interference will not occur in a particular installation. If this device does cause
interference to RF or television reception, which can be determined by turning the
device off and on, the user is encouraged to try to correct the interference by one or
more of the following measures:
Increase the separation between the device and other equipment.
Connect the device into a power outlet on a circuit different from that to which the
other equipment is connected.
Use good quality, shielded coaxial cable and try to avoid sharp bends.
Consult the dealer or an experienced RF/TV technician for help.
Warning: Changes or modifications to this unit not expressly approved by the
party responsible for compliance could void the user authority to operate the
equipment.

- 4 -
Table of Contents
1. Introduction…………………………………………………………………………….........4
1.1 Overview……………………………………………………………………………………….4
1.2 Main Features……………………………...............................................................4
2. Check Contents Before Use……………………………………………………………….5
2.1 One RF Modulator Unit………..……………………………………….…………………. 5
2.2 One Power Adaptor………………………………………………………………………… 5
2.3 Three Video (RCA) Cables………………..………………….……………….................5
2.4 Three Audio (RCA to 3.5 mm) Cables…………………………………………………..5
3. Controls & Functions………………………………………………………………………. 6
3.1 RF Modulator Front...................................................................................…...6
3.1 RF Modulator Back...................................................................................…... 6
4. How to Connect the RF Modulator………………………………………………………7
4.1 Connecting AV Devices to the RF Modulator ………………………………………… 7
4.2 Connecting Security Cameras to the RF Modulator ………………………………… 8
5. Operations……………………………………………….…………………………………….9
5.1 Turn on the RF Modulators Power……………………………………………………….9
5.2 Adjusting the RF Modulator…………………………….…………………………………9
6. Troubleshooting…………………………………………………………….……………….9
6.1 No Picture or Sound………………………………………………………………………...9
6.2 Interference in the Image and Sound……………………………………………………9
7. Specifications………………………………………………………………………………… 10
8. Warranty………………………………………………………………………………………. 10-12
9. Notes…………………………………………………………………………………………….13-15
1. Introduction
1.1 Overview
The ELLIES RF Modulator has the ability to combine three Composite Audio Video signals
into one single UHF RF output. This device is perfect for home/office and commercial
applications.
1.2 Main Features
y3 x Composite Audio Video Inputs
y1 x F Type UHF RF Output
yLED Channel Display
yOn/Off Switch
yPower Indicator
yMOD Select Key & Indicators
yChannel Up & Down Keys
yLow Voltage Power Adaptor
©Copyright Jonsa Ellies Aust. Pty Ltd 2007

- 5 -
2. Check Contents Before Use
2.1 One RF Modulator Unit
2.2 One Power Adaptor
(9 VDC @ 300 mA)
2.3 Three Video (Yellow RCA) Cables
This cable is used to connect the composite video signal from the output of your AV
device to the ELLIES RF Modulator.
2.4 Three Audio (2 RCA to 3.5 mm) Cables
This cable is used to connect the composite audio L&R signal from the output of your
AV device to the ELLIES RF Modulator.
Note: If any of the accessories listed are missing, contact the dealer or sales
representative where you purchased this RF Modulator immediately.

- 6 -
3. Controls & Functions
3.1 RF Modulator Front
1. Power Indicator
2. Power Switch
3. LED Channel Display
4. Input A
5. Input B
6. Input C
7. MOD Select Key – Used to Select Modulator A, B or C for Setup
8. Channel Up
9. Channel Down
3.2 RF Modulator Back
10. RF Output – Connect to UHF Input of TV Set or Cable Converter
11. Gain Adj. – RF Output Level Control
12. C - Video Device Input
13. C – L&R Audio Device Input
14. B - Video Device Input
15. B – L&R Audio Device Input
16. A - Video Device Input
17. A – L&R Audio Device Input
18. Power Adaptor Input (9 VDC @ 300 mA)

- 7 -
4. How to Connect the RF Modulator?
4.1 Connecting AV Devices to the RF Modulator
Connect AV Devices with Composite Audio Video outputs directly into the A, B or C
inputs on the BPAVM3. All 3 AV inputs can be utilised at the same time.
The RF Output can be connected directly to a Display (TV) with an RF input.
Alternatively, the RF Output can be fed into a distribution system as shown below.
*EXAMPLEONLY–THEREAREMANY
OTHERSYSTEMCONFIGURATIONS*
Important: Please ensure the BPAVM3 is disconnected from the power when being
installed. Turn the power on once all connections have been done.
Note: To adjust the output level of the RF
Modulator please refer to the back of the
unit. The level adjusting pot is situated next
to the RF output. Turn this up to
half way and tune the displays according to
their instructions.
The displays will automatically or can be
manually tuned to find the new modulated
channels. The Audio Video signal level can
be adjusted accordingly.

- 8 -
4.2 Connecting Security Cameras to the RF Modulator
Connect Security Cameras with Composite Video outputs directly into the A, B or C
inputs on the BPAVM3. All 3 AV inputs can be utilised at the same time.
The RF Output can be connected directly to a Display (TV) with an RF input.
Alternatively, the RF Output can be fed into a distribution system as shown below.
*EXAMPLEONLY–THEREAREMANY
OTHERSYSTEMCONFIGURATIONS*
Examples of suitable Composite AV Devices: Pay TV Box, HDD/DVD Recorder, VHS
Recorder, DVD Player, Digital Set Top Box, Satellite Receiver, Camcorder, Security
Cameras, Hi-Fi System, Laser Disc Player, PC’s with AV Outputs etc.
Note: To adjust the output level of the RF
Modulator please refer to the back of the
unit. The level adjusting pot is situated next
to the RF output. Turn this up to
half way and tune the displays according to
their instructions.
The displays will automatically or can be
manually tuned to find the new modulated
channels. The Audio Video signal level can
be adjusted accordingly.

- 9 -
5. Operations
5.1 Turn on the RF Modulators Power
Once all AV & RF connections have been done and the RF Modulator has been connected
to the system correctly, the power to the RF Modulator can be turned on. The AV devices
and all displays can be turned on.
5.2 Adjusting the RF Modulator
1. Press the mode key to select the RF Modulators AV input A. The LED indicator for AV
input device A is lit up. The channel number is shown on the channel display.
2. Use the up and down key to select the desired channel. (The last channel selected
will be stored in the memory, even if the power goes out.)
3. Repeat steps 1 & 2 for the other two AV input devices B and C for channel selection.
4. Ensure each display (TV) has been tuned into the correct AV devices RF Channel on
the RF Modulator.
6. Troubleshooting
Please read this instruction manual carefully before using the AV system. If you still have
difficulties using the RF Modulator, please refer to the following, which will guide you on
how to solve most common problems.
1. No image or sound
a) Make sure the power switch is in the “ON” position. (Check AV devices/Displays)
b) Check the connections, to ensure all of the connectors and plugs are in the
correct input/output. (e.g. Yellow Video RCA Output to Yellow Video RCA Input)
c) Make sure the RF Modulator and the display (TV) are on the same channel.
2. Interruptions in image and sound
a) Make sure the RF Modulator and the display (TV) are using a free channel.
b) Shorten the signal transmission medium between the RF Modulator and Display
(TV). If possible keep the coaxial cable away from other cables, especially mains
wiring to avoid interference.
c) Please allow 2 channel spacing to inhibit interference for channel selection, it is
preferred that a channel higher or lower be skipped between A, B or C inputs.
This is to avoid co-channel interference. Example: RF Channel 23 is AV device
input A, for AV device input B, the channels 22 and 24 must be skipped. So
channels 21 or 25 would be the correct channels to use.
If you experience difficulties in installing, setting or using the camera, consult the
dealer or an experienced RF/TV technician for help.

- 10 -
7. Specifications
Item Specifications Remarks
Weight 860 grams
Dimensions GB 223 (L) x 195 (W) x 83 (D) mm (Gift Box)
Dimensions BPAVM3 132 (L) x 102 (W) x 32 (D) mm (BPAVM3)
Operating
Temperature - 10 ℃~ + 60 ℃Celsius
SPECIFICATIONS ARE SUBJECT TO CHANGE WITHOUT NOTICE
8. Warranty
The warranty repair card for this product is featured on pages 11 & 12. Please keep a
copy of your proof of purchase with this instruction manual/warranty card.

- 11 -

- 12 -

- 13 -
9. Notes
_____________________________________________________________
_____________________________________________________________
_____________________________________________________________
_____________________________________________________________
_____________________________________________________________
_____________________________________________________________
_____________________________________________________________
_____________________________________________________________
_____________________________________________________________
_____________________________________________________________
_____________________________________________________________
_____________________________________________________________
_____________________________________________________________
_____________________________________________________________
_____________________________________________________________
_____________________________________________________________
_____________________________________________________________
_____________________________________________________________
_____________________________________________________________
_____________________________________________________________
_____________________________________________________________
_____________________________________________________________
_____________________________________________________________
_____________________________________________________________
_____________________________________________________________
_____________________________________________________________
_____________________________________________________________
_____________________________________________________________
_____________________________________________________________
_____________________________________________________________
_____________________________________________________________
_____________________________________________________________
_____________________________________________________________
_____________________________________________________________
_____________________________________________________________
_____________________________________________________________
_____________________________________________________________
_____________________________________________________________
_____________________________________________________________
_____________________________________________________________
_____________________________________________________________
_____________________________________________________________

- 14 -
9. Notes
_____________________________________________________________
_____________________________________________________________
_____________________________________________________________
_____________________________________________________________
_____________________________________________________________
_____________________________________________________________
_____________________________________________________________
_____________________________________________________________
_____________________________________________________________
_____________________________________________________________
_____________________________________________________________
_____________________________________________________________
_____________________________________________________________
_____________________________________________________________
_____________________________________________________________
_____________________________________________________________
_____________________________________________________________
_____________________________________________________________
_____________________________________________________________
_____________________________________________________________
_____________________________________________________________
_____________________________________________________________
_____________________________________________________________
_____________________________________________________________
_____________________________________________________________
_____________________________________________________________
_____________________________________________________________
_____________________________________________________________
_____________________________________________________________
_____________________________________________________________
_____________________________________________________________
_____________________________________________________________
_____________________________________________________________
_____________________________________________________________
_____________________________________________________________
_____________________________________________________________
_____________________________________________________________
_____________________________________________________________
_____________________________________________________________
_____________________________________________________________
_____________________________________________________________
_____________________________________________________________

- 15 -
9. Notes
_____________________________________________________________
_____________________________________________________________
_____________________________________________________________
_____________________________________________________________
_____________________________________________________________
_____________________________________________________________
_____________________________________________________________
_____________________________________________________________
_____________________________________________________________
_____________________________________________________________
_____________________________________________________________
_____________________________________________________________
_____________________________________________________________
_____________________________________________________________
_____________________________________________________________
_____________________________________________________________
_____________________________________________________________
_____________________________________________________________
_____________________________________________________________
_____________________________________________________________
_____________________________________________________________
_____________________________________________________________
_____________________________________________________________
_____________________________________________________________
_____________________________________________________________
_____________________________________________________________
_____________________________________________________________
_____________________________________________________________
_____________________________________________________________
_____________________________________________________________
_____________________________________________________________
_____________________________________________________________
_____________________________________________________________
_____________________________________________________________
_____________________________________________________________
_____________________________________________________________
_____________________________________________________________
_____________________________________________________________
_____________________________________________________________
_____________________________________________________________
_____________________________________________________________
_____________________________________________________________

Table of contents
