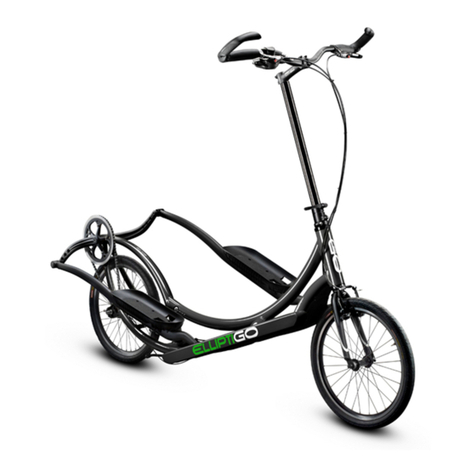
ElliptiGO 2015 User manual


2
Bike Owner's Manual
VERY IMPORTANT:
READ THIS GUIDE BEFORE ASSEMBLING OR RIDING YOUR ELLIPIGO BIKE. It contains very important information about safety and
performance, as well as instructions for how to assemble, ride and maintain your ElliptiGO bike. PAY PARTICULAR ATTENTION TO
THE SAFETY INFORMATION CONTAINED WITHIN –IT COULD SAVE YOUR LIFE. Keep this manual available for reference and if you
sell your ElliptiGO bike to someone else, make sure to transfer this manual to them.
The ElliptiGO bike includes many components made by other manufacturers. If the information in this manual conflicts with
information provided by a component manufacturer, always follow the component manufacturer’s instructions as they relate to
that component.
More information about safety, performance, assembly and service related to the ElliptiGO bike can be found on our website:
www.elliptigo.com/support. If you have any questions or do not understand something in this manual, please contact us at
ElliptiGO Owner’s Manual
3rd Edition, March 3rd, 2015
This manual contains the information
required to meet EN Standard 14781
where that standard reasonably
applies to the ElliptiGO bike.
ElliptiGO Inc.
722 Genevieve St., Suite O
Solana Beach, CA 92075
www.elliptigo.com

3
Bike Owner's Manual
Welcome to the ElliptiGO Family,
Thank you for purchasing an ElliptiGO. We have spent countless hours developing this fitness device and believe it to be the best
form of low-impact exercise available. We hope you enjoy many years of healthy exercise and fun while riding your ElliptiGO.
As you will see throughout this owner’s manual, we value your safety. We have designed your ElliptiGO bike to be a safe, fun
and effective workout system. However, the ElliptiGO is not a toy. It is an advanced piece of fitness equipment designed to be
used for exercise by responsible riders. Improper use of the ElliptiGO bike can result in destruction of property, serious injury,
maiming, or death. For your safety, before your first ride you should read the entire owner’s manual and pay particular attention
to Chapters I and II. This information is essential for understanding how to safely use and enjoy your ElliptiGO bike. Although
many of the bike’s components may look familiar to you, the ElliptiGO is very different from any other piece of fitness
equipment or vehicle you may have used in the past. As a result, it is VERY IMPORTANT that you read and understand the
information in this manual before riding it. Doing so could save your life.
In addition, we have safety and maintenance videos and information posted in the customer section of our website:
http://www.elliptigo.com/support.html. If you have any questions or concerns, especially about how to safely use your
Happy riding,
Brent and Bryan
ElliptiGO Co-Founders

4
Bike Owner's Manual
Table of Contents
I. IMPORTANT NOTIFICATIONS
1. Important Warnings
2. Parental Advisory
II. PROPER USE
1. General
2. Preparing to Ride
A. Basic Cycling Safety
B. Terminology and Component Overview
C. Steering Columns
D. Proper Handling & Carrying Procedure
E. Kickstand Operation
F. Pre-Ride Safety Checklist
G. Adjusting the Fit
H. Familiarization Ride
3. Riding Techniques
A. Normal Riding
B. Climbing and Descending Hills
C. Riding in Adverse Conditions
D. Competitive and Group Riding
III. COMPONENTS AND SERVICE
1. Components
A. Quick Release Clamping Systems
B. Brakes
C. Wheels, Tires and Tubes
D. Gear Selection
E. Adjustable Crank Arms
2. Servicing the ElliptiGO bike
A. Service and Maintenance
B. What Happens if I Damage My ElliptiGO?
Appendix A: Intended Use of ElliptiGO Cycles
Appendix B: How Long Will My ElliptiGO Last?
Appendix C: Torque Requirements for Screws and Fasteners
Appendix D: Satisfaction Guarantee and Limited Warranty
Appendix E: Maintenance Chart
IMPORTANT:
This owner’s manual contains information regarding your components and how to do basic maintenance and service on your ElliptiGO. However, it
is not intended to be a substitute for having your ElliptiGO serviced by a professional bicycle mechanic. YOU SHOULD HAVE YOUR BIKE ASSEMBLED,
MAINTAINED AND SERVICED BY A PROFESSIONAL BICYCLE MECHANIC.

5
Bike Owner's Manual
I. IMPORTANT NOTIFICATIONS
DO NOT SKIP THIS SECTION!
1. Important Warnings
Like running and cycling, riding an ElliptiGO involves a real risk of serious
injury, maiming and death. Each time you ride your ElliptiGO bike, you are
assuming this risk. We cannot stress enough how important it is to wear a
helmet and proper clothing, know and follow the rules of the road, ensure
your bike is in good working order before and during your ride, and to use
caution when riding. To help minimize your risk of injury when riding your
ElliptiGO it is critical that you read and understand the contents of this
manual and become familiar with operating and maintaining the bike before
you head out on the road.*
To highlight some of the most important safety concerns, this manual
contains many “Warnings”, “Cautions” and “Alerts” which are set out
conspicuously in the manual.
Safety Warning
The following symbol: WARNING! (the safety designator together with
the word WARNING!), calls attention to a potential hazard that, if not
properly addressed or avoided, could cause serious injury or death.
Safety Caution
The following symbol: CAUTION! (the safety designator together with
the word CAUTION!), calls attention to a potential hazard that, if not
properly addressed or avoided, could cause property damage or an injury.
Damage Alert
The designation ALERT! calls attention to a situation which, if not properly
addressed or avoided, could cause serious damage to your ElliptiGO bike
and/or void your warranty.
As you will see, most of the Safety Warnings and Cautions contained in this
Manual relate to conditions that could result in the rider losing control of
the ElliptiGO bike and suffering a fall. Every fall, regardless of the associated
speed or cause, can result in serious injury or death for the rider, and injury
to bystanders and property. As a result, a warning that indicates the rider
may lose control and fall if a situation is not properly addressed or avoided
may not also state that the resulting fall can cause serious injury or death.
You should understand that this fact is always implied by the possibility of
falling.
* It is impossible to cover all potentially hazardous situations that could
arise when riding a bike in a manual or any other form of communication.
As a result, we cannot provide guidance on how to safely ride the ElliptiGO
bike in every circumstance and under all conditions. There are many
unpredictable and unavoidable risks that accompany riding a bike and the
rider assumes the responsibility for choosing to expose himself/herself to
these risks.

6
Bike Owner's Manual
2. Parental Advisory
ElliptiGO cycles are specifically designed to be ridden on paved roads for
exercise by individuals weighing less than 250 pounds.
WARNING! ElliptiGO bikes should not be ridden by children at any
time. ELLIPTIGO BIKES DO NOT MEET SAFETY STANDARDS FOR CHILDREN.
Because the ElliptiGO lacks many of the safety features necessary for safe
use by children, failure to follow this warning could result in serious injury
or death to your child.
Children are naturally curious about many things that can seriously injure
them and your ElliptiGO bike is likely to be one. As with other hazards like
boiling water, sharp knives, tools, cars, and chemicals, you are responsible
for teaching your children not to use the ElliptiGO bike and to take active
measures to prevent them from doing so.
ALERT! If you purchased an ElliptiGO for your minor child, please contact
ElliptiGO Inc. for a full refund immediately.

7
Bike Owner's Manual
II. PROPER USE
1. General
The ElliptiGO bike is a completely new kind of exercise equipment and
performs differently from other devices you may have used in the past. If
you treat it with respect, keep it maintained, and use it as intended, your
ElliptiGO should provide you with many years of enjoyable outdoor exercise.
Before your first ride, you should read this manual in its entirety and get
clarity on all aspects of the bike’s performance, function, or design that
you do not understand. You should also consult your physician prior to
beginning any exercise plan, including exercising on your ElliptiGO bike, to
ensure that you are healthy enough for such exercise. You can reach our
customer service department to get any questions answered by sending an
Maximum Rider Weight of 250 Pounds
The maximum load-bearing capacity of the ElliptiGO bike is 290 pounds. The
ElliptiGO bike weighs approximately 40 pounds. Thus, the weight of the
rider plus any additional accessories such as water bottles and lights, as well
as spare parts kits, food, and clothing must weigh less than 250 pounds,
such that the combined weight of the outfitted rider and the ElliptiGO
together does not exceed 290 pounds. As a result, no rider that weighs
more than 250 pounds should ride the ElliptiGO bike. In addition, all riders
should be conscious of their fully-laden weight (their body weight plus
accessories), especially those who weigh close to 250 pounds.
Intended Use
The ElliptiGO bike is designed exclusively for exercise use on paved roads by
a single rider. It should never be used by children, people weighing more
than 250 pounds, or by two or more people simultaneously. Because the
ElliptiGO was designed to be ridden on paved surfaces by a single rider with
a fully-laden weight under 250 pounds, it has certain limitations and must
be treated with care and maintained properly in order for it to survive for its
useful life and deliver a safe exercise experience. At no time should it be
ridden “off road” or on any unpaved surface (including sand, gravel, and
dirt). Moreover, the ElliptiGO bike should never be used for stunts, jumps,
wheelies, or other abusive maneuvers. These activities will dramatically
reduce its service life and could cause a catastrophic failure of one or more
of its components, causing the rider to suffer significant injuries or death
from a resulting fall.
WARNING! THE ELLIPTIGO IS NOT A TOY AND IS NOT DESIGNED FOR
USE BY CHILDREN. The ElliptiGO bike does not meet the safety
requirements for use by children, nor is it configured for use by children.
Because it lacks the safety features required for children’s products,
children can be seriously injured or killed while using the ElliptiGO bike.
Consequently, DO NOT LET CHILDREN USE YOUR ELLIPTIGO BIKE. If you
purchased your ElliptiGO for a minor child, please contact ElliptiGO Inc. for
a full refund immediately.
WARNING! THE ELLIPTIGO BIKE HAS REAL LIMITATIONS IN WHAT IT
CAN SUSTAIN. Misusing the bike can be extremely dangerous. Improper
use of the bike, including riding with a gross combined vehicle and rider
weight that exceeds 290 pounds or stunt, trick, or off-road riding, can
cause a catastrophic failure of one or more components and result in the
rider suffering a serious injury or being killed.
ALERT! Misuse of the ElliptiGO bike, including use by children, people
weighing more than 250 pounds, or use for stunt, trick, or off-road riding
(including jumping off obstacles, including curbs), can significantly damage
the bike and void your warranty. DO NOT ENGAGE IN THESE OR OTHER
ABUSIVE ACTIVITIES.

8
Bike Owner's Manual
2. Preparing to Ride
Before you take your first ride, you should thoroughly review and
understand the sections below and follow any instructions contained
therein.
A. Basic Cycling Safety
Before riding your ElliptiGO, you should become familiar with the basics of
cycling safety. The following includes many of the fundamental aspects of
cycling safety; however, it is not an exhaustive list. For a more thorough
education on cycling safety we recommend that you contact a certified
bicycling instructor and enroll in a bicycle safety course. Here are the basic
principles you should adhere to:
1. Wear a Helmet, Protective Equipment and Appropriate Clothing
a. Always wear a Department of Transportation (DOT) approved helmet
when riding your ElliptiGO bike. Make sure to follow the helmet
manufacturer’s instructions related to proper fitting and care so it can
provide the most protection for your head during a fall.
WARNING! When riding the ElliptiGO bike, your head will be much
higher off the ground than it would be on a regular bicycle and you could
suffer even more damage to your head as a result of a collision or fall
than you might if you fell off a conventional bicycle. As a result, wearing
a helmet is even more critical when riding the ElliptiGO bike. Failure to
do so could result in serious injury or death.
b. In addition to an approved helmet, we recommend that you wear
closed-toed running or walking shoes with short shoelaces tied in a
double knot, cycling gloves, protective glasses with plastic shatterproof
lenses, and brightly colored clothing.
c. Before riding, always check your clothing to make sure there is nothing
dangling that could become caught in the moving mechanisms of the
ElliptiGO bike. Pay particular attention to shoelaces, wide-bottomed
pants, and long dresses as these could get caught in the drive train
mechanism, around the rear wheel, or in the drive tracks. If something
dangling from your body gets caught in any of these locations, it will likely
cause you to lose control of the ElliptiGO bike and fall, resulting in serious
injury or death.
d. Ensure that you have any other required safety equipment mandated
by your state or municipality. It is your responsibility to comply with the
law where you are riding.
2. Select a Safe Route and Riding Conditions
a. Choose a cycling route and time of travel that avoids high traffic areas
and dangerous streets. Choose routes that have few cars, well maintained
streets, and wide bike lanes.
b. If possible, always ride during good conditions and never at night or in
inclement weather.
WARNING! Riding at night or during inclement weather significantly
increases your chances of suffering a collision or fall that causes
significant injury or death.
WARNING! Wet weather adversely impacts visibility, traction,
braking and maneuvering for the ElliptiGO bike rider as well as other
cyclists and motorists. Emergency stopping distances increase
significantly. Always ride more slowly in wet conditions and begin
slowing down far earlier than would be necessary under dry conditions.
Never take sharp corners at high speed or attempt to corner while
braking in wet conditions.
WARNING! Riding during periods of low visibility, such as nighttime
and in areas of dense fog, drastically increases your chances of being
struck by a motorist or other cyclist and suffering significant injuries or
death. You should refrain from riding the ElliptiGO bike during these
periods.

9
Bike Owner's Manual
WARNING! Do not rely on reflectors to provide adequate lighting
during periods of low visibility, especially dense fog. Reflectors cannot
substitute for appropriate lights. DO NOT REMOVE THE INSTALLED
REFLECTORS FROM YOUR BIKE. Removing them can lower the chances
you will be seen during periods of low visibility, reducing your level of
safety. Inspect your reflectors often to ensure that they are clean,
straight, and undamaged. Have your reflectors repaired or replaced if
they are damaged or misaligned.
c. If you choose to ride during periods of low visibility, you should take
many precautions, including:
1. Wearing very bright clothing with integrated reflective materials and
several other highly-visible items such as an approved bicycle safety vest,
lights on your body, helmet and ElliptiGO bike, and reflective stickers or
straps on your helmet and clothing. Ensure that these reflective surfaces
are free from obstruction by objects you are carrying and your other
clothing.
2. Using head and tail lights (either battery or generator powered) that
are bright enough to enhance your ability to see and be seen and meet
all legal requirements for your jurisdiction.
3. Riding slowly and through well-lit areas with less traffic and designated
bike lanes or paths. When riding, choose a manner and path that
maximizes the chances that a motorist, cyclist or pedestrian will see you
while minimizing the chances that you will collide with them. Also, ride at
a speed that affords plenty of time to react to, and avoid, unexpected
obstacles.
4. Never making aggressive or unpredictable maneuvers that could catch
a motorist or cyclist off guard.
3. Understand and Obey the Law
a. In most jurisdictions, cyclists are subject to the same traffic laws as
motorists. Always stop at stop signs and red lights and use correct hand
signals.
b. Many jurisdictions have additional laws and regulations that only
pertain to cyclists. In particular, observe regulations about bicycle paths,
trails and routes, use of a bicycle on a sidewalk, proper front and rear
lighting, helmets, seating, signaling, reflectors, licenses and any special
bicycle traffic laws in your jurisdiction. As with every other aspect of the
administrative state, it is your responsibility to know the law and obey it.
Our failure to provide you with a component or specific safety device
required by the law in your jurisdiction does not relieve you of the
requirement to install that component or safety device on your ElliptiGO.
4. Ride Defensively
a. Even though you can see other motorists, cyclists and pedestrians,
always assume that they cannot or do not see you and take precautions
accordingly.
b. Anticipate obstacles and dangerous conditions by looking ahead and
paying attention to the environment around you. Always be ready to
avoid vehicles entering the bike lane, children and animals darting into
the roadway, poor road conditions (including potholes, rocks, sharp edges
at the road shoulder, and loose gravel), separations in the asphalt or
concrete, grates, glass and other sharp objects, pedestrians and the
unexpected opening of parked car doors.
c. Ride at a controlled speed, especially when descending hills or in
adverse weather conditions. The higher the speed, the less time you will
have to react to dangerous conditions, so always choose a speed that is
appropriate for your environment.
d. Use extreme caution when overtaking other cyclists, approaching blind
intersections, and when merging with vehicular traffic. Slow down and
look both ways whenever crossing an intersection.
e. Share the Road –stay to the right and avoid interfering with the
progress of motorists and faster cyclists. Always be prepared to yield to
motorists and pedestrians, even if you have the right away.
f. Maintain a sharp focus on your surroundings. Never wear headphones,
talk on a cell phone, or become distracted by electronic devices such as

10
Bike Owner's Manual
odometers, heart rate monitors, watches, and the like. These distractions
can delay your reactions to developing dangerous conditions and increase
your risk of suffering serious injury or death.
g. Avoid weaving through traffic and making unexpected maneuvers,
especially when in the presence of cars or other cyclists.
h. Never hold onto another moving vehicle, including another cyclist,
when riding the ElliptiGO bike. This behavior can be extremely dangerous
and result in the rider losing control of the ElliptiGO bike and suffering a
fall.
i. Never ride the ElliptiGO bike while under the influence of alcohol or any
other substance that impairs judgment, cognition, motor function or
balance. This increases the risks of colliding with another object or losing
control of the ElliptiGO bike and suffering a fall, either of which could
cause serious injury or death.
j. Never carry anything that could impede your vision or adversely impact
your ability to control the ElliptiGO bike.
Take Responsibility for Your Safety
As discussed above, you are responsible for the safe handling and
maneuvering of your ElliptiGO bike. Make sure to follow the instructions in
this owner’s manual. Get to know the mechanical workings of your bike and
always do a pre-ride safety check to ensure everything is in good working
order. Make sure that all quick releases and safety mechanisms are properly
engaged. Pay particular attention to the condition of your tires, brakes and
load wheels as a failure by one of these components would be particularly
dangerous. Double check the security of the steering column, ensure that it
is not above the “Max Extension” line, and that the safety mechanisms are
properly engaged. Always wear a DOT approved cycling helmet that meets
the latest certification standards and is appropriate for road cycling. Always
follow the helmet manufacturer’s instructions for fit, use and care of your
helmet. Many serious bicycle-related injuries include head injuries which
might have been avoided if the rider had worn an appropriate helmet.
Before riding your ElliptiGO, consult with your physician so he or she can
determine if you are healthy enough to do so.
WARNING! Riding without an approved helmet greatly increases
your chances of suffering serious injury or death during a crash or fall.
WARNING! Riding with damaged, poorly maintained or improperly
engaged components can result in an unexpected failure of a critical
element of the ElliptiGO bike. The failure of a critical element of the bike is
likely to result in the rider falling and suffering a serious injury or death.

11
Bike Owner's Manual
B. Terminology & Component Overview
1 FRAME
2 KICKSTAND
3 DRIVE ARM
4 DRIVE ARM AXLE
5 CRANK ARM
6 CHAIN RING
7 CHAIN
8 CHAIN RING GUARD
9 REAR WHEEL
10 INTERNALLY GEARED HUB
11 REAR BRAKE
12 FRONT WHEEL
13 TIRE
14 FRONT WHEEL QUICK-RELEASE
15 FORK
16 FRONT BRAKE
17 STEERING COLUMN
18 STEM
19 HANDLEBAR
20 SHIFTER
21 BRAKE LEVER
22 GRIP
23 CONTROL CABLES
4
2
5
3
7
6
8
9
11
10
12
16
13
15
14
1
22
17
18
21
20
23
The picture below gives an overview of the components which make up an ElliptiGO
bike. These names will be referred to throughout the Owner's Manual.
19

12
Bike Owner's Manual
C. Steering Columns
ElliptiGO cycles are equipped with two different types of steering columns
based on the model. The first type is the Non-Folding Steering Column which
is telescopically adjustable to accommodate riders of various heights. The
second type is the Folding Steering Column which features both
telescopically adjustable height and folding functionality for ease of storage
and transport.
1. Non-Folding Steering Column
The non-folding steering column consists of the following components:
1. The preload collar
2. The steering extender
3. The steering extender quick release
4. The safety index pin
The telescoping action of the steering extender allows for it to be easily
raised or lowered via a quick release lever and safety index pin to
accommodate riders of various heights. The steering height has a total
adjustable range of 160 mm.
To adjust the height of the steering extender, refer to the procedure
outlined in Section II. 2. G. 2.
The non-folding steering column may be put into the storage position by
removing the steering extender (2) from the preload collar (3). Refer to the
procedures that follow for placing the non-folding steering into the storage
position and riding position.
WARNING! The steering column is one of the most important
safety features on your ElliptiGO. Before you ride, it is critical that
you ensure it is secured properly, that the quick release is properly
closed, and the safety pin is inserted in a hole. Failure to properly
secure the steering column before riding can result in the
unexpected collapsing of the steering column, which will likely
cause the rider to fall and be seriously injured or killed.
3
2
1
4
Non-Folding Steering Column
1
2
3
4

13
Bike Owner's Manual
The Riding Position (Non-Folding Steering Column)
To place the non-folding steering column into the riding
position, follow these steps:
1. Open the steering extender quick release.
2. Insert the steering extender into the preload collar until it
gently seats against the safety index pin. Note: The groove
on the side of the steering extender should be lined up
with the small anti-rotation feature on the preload collar.
Also be careful to ensure that the control cables do not
get twisted during this process.
3. Pull and hold out the safety index pin with one hand while
further inserting the steering extender into the preload
collar until the desired extender position is achieved.
WARNING! ENSURE THE "MAX EXTENSION" MARK ON
THE STEERING EXTENDER IS BELOW THE TOP OF THE
COLLAR! Riding while the “MAX EXTENSION”mark is visible
above the collar could result in the steering extender
breaking during operation or being pulled out of the collar,
causing a fall. Never use the ElliptiGO bike with the steering
extender “MAX EXTENSION”mark situated above the collar.
4. Align the desired hole in the extender with the safety
index pin and release the pin. The pin should spring
completely back into place so that none of the red
markings are visible.
WARNING! INDEX PIN SHOULD BE FULLY SEATED SO
THAT NO RED MARKINGS ARE VISIBLE AFTER HEIGHT
ADJUSTMENT. Failure to fully seat the index pin could result
in the steering column collapsing during operation. This
would likely result in the rider losing control and falling.
5. Secure the steering extender quick release lever by
grasping the steering extender for leverage and using
enough force to leave an impression in your hand. Refer to
Section III. 1. A. for how to properly tighten and adjust
quick release mechanisms.
NO!
RED
MARKS
SHOULD
NOT BE
VISIBLE
“MAX
EXTENSION”
MARK
SHOULD NOT
BE VISIBLE
NO!

14
Bike Owner's Manual
The Storage Position (Non-Folding Steering Column)
To place the non-folding steering column into the storage
position, follow these steps:
1. Open the steering extender quick release.
2. Pull and hold out the safety index pin with one hand while
removing the steering extender from the preload collar with
the other hand.
3. The extender, stem, and handlebar assembly can now be
placed securely near the ElliptiGO bike for storage.
Note: Refer to Section III. A. for the procedure for proper
tightening and adjustment of quick release mechanisms.

15
Bike Owner's Manual
2. Folding Steering Column
Some ElliptiGO bikes are equipped with a steering column that telescopes
and folds. The folding steering column consists of the following
components:
1. The base
2. The collar
3. The column
4. The steering extender
5. The collar quick releases
6. The extender quick release
The telescoping action of the steering extender allows it to be easily raised
or lowered via a quick release lever to accommodate different riders. The
steering height has a total adjustable range of 150 mm.
To adjust the height of the steering extender, refer to the procedure
outlined in Section II. 2. G. 2.
The folding action of this steering column features two positions:
- The riding position
- The storage position
WARNING! The steering column is one of the most important safety
features on the ElliptiGO bike. Before you ride, it is critical that you ensure
it has been secured properly in the riding position and the quick release
lever is fully closed with the appropriate amount of tension. Failure to
properly secure the steering column into the riding position before riding
can result in the unexpected folding of the steering column and failure to
secure the quick release can result in the unexpected collapsing or
removal of the steering column extender, any of which will likely cause the
rider to fall and be seriously injured or killed.
1
3
4
2
5
6
Folding Steering Column

16
Bike Owner's Manual
Steering column shown in
locked riding position
The Riding Position (Folding Steering Column)
To place the folding steering column into the riding
position, follow these steps:
1. Open both collar quick releases.
2. Slide collar back along steering column to clear
pivot.
3. Rotate steering column upward until it is straight
in-line with the steering base.
4. Rotate the collar so index mark is aligned with the
"OPEN" marking on the right side of the steering
column base.
5. Slide the collar down over the pivot until the
bottom of the collar contacts the mating flange on
steering base. ENSURE THAT THERE IS NO GAP
BETWEEN THE BOTTOM OF THE COLLAR AND THE
STEERING BASE MATING FLANGE!
6. Rotate the collar clockwise until index mark on the
collar is aligned with "LOCK" marking on the back
of the steering column base.
7. Close both collar quick releases to lock the
steering column into the riding position.
Note: Refer to Section III. 1. A. for the procedure for
proper tightening and adjustment of quick release
mechanisms.
WARNING! ENSURE THE "MAX EXTENSION"
MARK ON THE STEERING EXTENDER IS BELOW THE
COLUMN QUICK RELEASE! Raising the steering
extender so that the “MAX EXTENSION”mark is
above the top of the column could result in the
steering extender breaking during operation or
being pulled out of the column, causing the rider
to fall. Never use your ElliptiGO when the “MAX
EXTENSION” mark is visible above the column.

17
Bike Owner's Manual
The Storage Position (Folding Steering Column)
To place the folding steering column into the
storage position, follow these steps:
1. Open both collar quick releases.
2. Rotate collar 90 degrees counter- clockwise until
index mark on collar lines up with "OPEN" mark
on base.
3. Slide collar up above folding pivot.
4. Fold the steering column inward toward the
center of the bike 90 degrees.
5. Slide the collar back so the groove on the collar
engages the steering base.
6. While holding the collar tight against the steering
base, close both collar quick-releases to lock into
the storage position.
Note: Refer to Section III. 1. A. for the procedure for
proper tightening and adjustment of quick release
mechanisms.

18
Bike Owner's Manual
D. Proper Handling & Carrying
Procedure
Picture 1 to the right demonstrates the proper
method for handling, lifting or carrying your
ElliptiGO. The bike should be handled with one
hand on the frame member which goes over the
top of the rear wheel and the other hand on the
steering column.
Picture 2 demonstrates an improper handling
method which could result in bodily injury to the
user.
CAUTION! The ElliptiGO should never be
picked up by any of the moving mechanism
components such as the drive arms, crank arms,
chain, chain ring or rear wheel. Doing so could
cause your hand, wrist or arm to get pinched by
the mechanism potentially causing a significant
injury.

19
Bike Owner's Manual
E. Kickstand Operation
The ElliptiGO is equipped with a very stable
double leg kickstand. To operate the
kickstand, follow these steps:
1. Retracting the Kickstand - To retract the
kickstand grab the steering column
with one hand and the frame member
which goes over the top of the wheel
with the other hand. Lift the back of the
frame while kicking the kickstand in the
rearward direction as shown.
2. Extending the Kickstand - To extend the
kickstand grab the steering column
with one hand and the frame member
which goes over the top of the wheel
with the other hand. Lift the back of the
frame while kicking the kickstand in the
forward direction as shown.
Kickstand Extended
Kickstand Retracted
ALERT! DO NOT STAND ON BIKE WITH
KICKSTAND EXTENDED.
STANDING ON THE BIKE WITH THE
KICKSTAND EXTENDED CAN CAUSE A FALL
OR DAMAGE YOUR FRAME AND KICKSTAND,
VOIDING YOUR WARRANTY.

20
Bike Owner's Manual
F. Pre-Ride Safety Checklist
Before riding, always visually and physically inspect the ElliptiGO to ensure
that it is in good riding condition. With the bike supported on its kickstand,
you should inspect the bike using the following checklist prior to each ride:
1. Thoroughly examine the front and rear tires on both sides for signs of
damage (this will require you to spin the tire periodically to observe the
part that was contacting the ground). Use a tire gauge to ensure that each
tire is inflated to the proper pressure annotated on the tire’s sidewall.
Adjust the tire pressure if necessary.
2. Inspect the front wheel quick release system to make sure that the hub
is securely seated on the fork and that the quick release has been closed
properly with the appropriate amount of force. The mechanism should
emboss the fork-ends when closed to the locked position. See Section III. 1.
A. Quick Release Clamping Systems for details on how to ensure the quick
release is securely fastened.
WARNING! An improperly secured quick release lever on the front
wheel can allow the wheel to disengage from the fork. This condition is
exceptionally hazardous and will cause the rider to suffer a fall that will
almost certainly result in serious injury or death. BEFORE RIDING ALWAYS
ENSURE THE FRONT WHEEL QUICK RELEASE IS PROPERLY SECURED.
3. With the kickstand retracted, raise the front end of the bike off of the
ground several inches and then drop it. Watch and listen for unusual
movements or noises as the bike strikes the ground. If you hear an unusual
noise, continue this test until you can locate the problem. Do not ride the
ElliptiGO until the problem is resolved. When in doubt, take the bike to a
professional bicycle mechanic for service or contact our service
department at service@elliptigo.com.
4. Inspect the wheels to ensure that they are true. Spin each wheel and
watch it to make sure it does not have a side-to-side wobble. Also, make
sure that the wheel does not rub intermittently against one or both brake
pads. Any side to side wobble or intermittent rubbing indicates that the
wheel is out of true.
WARNING! A wheel that is not true can present a very dangerous
situation because it interferes with the proper functioning of the brakes.
It requires expertise and proper tools to correctly true a wheel. Always
have a professional bicycle mechanic true your wheels. Riding on a wheel
that is not true could cause you to lose control and suffer a fall.
5. Make sure that the rims are not damaged or worn out, that the tops of
the rims are securely engaging the tire at the rim bead, and that the rim
braking surfaces are clean and undamaged. Feel the rim on both sides to
make sure the wear indictor is still present and that there is no bowing or
damage to the rims. They should be flat and smooth with a pronounced
wear indicator groove.
WARNING! Riding on damaged rims, worn out rims or rims that do
not secure the tire is extremely dangerous. Rims in these conditions can
catastrophically fail without notice, causing the rider to fall and be
seriously injured or killed. CHECK YOUR RIMS BEFORE RIDING!
6. Inspect the spokes on the front and rear wheels to ensure that none are
missing, that they are all tight, and that they are all properly aligned.
7. Inspect the front and rear brake pads to ensure they are in good
condition and securely attached.
8. Actuate the front and rear brake levers while watching the brakes to
make sure that both are functioning properly and that each pad contacts
the wheel rim in the correct position. Check that the brake elbow is seated
into the brake quick release system and the brake cable is seated into the
top end of the elbow and is free from pinches or sharp turns. Ensure that
the brake pads contact the rim within the first inch of pulling on the levers
and each brake pad lands completely on the rim. No brake pad should
contact the tire or overhang off of the rim and you should be able to apply
full braking power before the levers contact the handlebars.
Table of contents
Other ElliptiGO Bicycle manuals


