FRM anakin carbon User manual

MADE IN ITALY RF M B I
K
E
anakin carbon
User’s manual

MADE IN ITALY RF M B I
K
E

MADE IN ITALY RF M B I
K
E
anakin carbon
Manuale d’uso
Gentile cliente
Prima di tutto ci vogliamo congratulare per il suo
nuovo acquisto, siamo convinti che la Anakin le darà
grandi soddisfazioni
Ha appena acquisito un prodotto unico, con soluzioni
tecnologiche e materiali all’avanguardia,
Questo è il manuale d’uso dove potrà trovare tutte le
istruzioni necessarie per eseguire la manutenzione
basica di tutti i nostri componenti così come i disegni
tecnici per il corretto assemblaggio.
In FRM siamo sempre attenti ai nostri clienti, per
questo leggendo questo manuale si accorgerà che i
nostri componenti sono stati pensati per un uso
agonistico, quindi con una grande attenzione per
quanto riguarda facilità di montaggio e manutenzi-
one.
La sua Anakin se sottoposta regolarmente alle miglio-
ri cure e uso nel modo appropriato, la accompagnerà
fedelmente nel tempo mantenendo inalterate le
prestazioni.
MADE IN ITALY RF M B I
K
E

IL CONCETTO ANAKIN FULL
FRM Anakin Full è un telaio realizzato in Italia mediante
laminazione di fibre composite e cottura in autoclave.
Si tratta di un processo artigianale estremamente
accurato che ci permette di ottenere una peculiare
lucidità sulle parti in carbonio: per questo i nostri
prodotti sono privi di verniciatura.
Questo processo produttivo può essere testimoniato
da piccoli particolari quali presenza di fibra lungo le
giunture, linee di incollaggio visibili nelle connessioni
delle parti monolitiche e parti con lieve variazione di
lucentezza.
Queste imperfezioni sono da considerarsi caratteris-
tiche uniche del prodotto e ne testimoniano il proces-
so produttivo artigianale
TIPO DI UTILIZZO
La bicicletta FRM Anakin Full appartiene alla catego-
ria cross-country e marathon.
Nello specifico può essere utilizzata su strade asfal-
tate, piste ciclabili, strade campestri e ghiaiate.
Può essere utilizzata su sterrati anche non stabilizzati
che includano salti sporadici fino a 0,5 m.
Ricordiamo che i salti possono causare cadute
rovinose con forte incremento delle forze in gioco oltre
che provocare danni.
Si consiglia quindi di frequentare corsi di guida per
migliorare le proprie capacità e migliorare il livello di
sicurezza. Visionare accuratamente la bicicletta in
tutte le sue parti in caso di caduta o impatto anomalo
facendo controllare la bicicletta al proprio rivenditore
di fiducia FRM. Le bici FRM non possono essere
utilizzate su terreni rocciosi, con scalini e non posso-
no essere utilizzate per effettuare acrobazie.
Possono essere utilizzare su tracciati di categoria
cross-country, marathon e ciclocross ma non per
tracciati di categorie enduro, freeride, dirt, downhill,
slopestyle ed utilizzo aggressivo estremo.
Specifichiamo che il tipo di allestimento di cui dispon-
gono le nostre bici non consente l’utilizzo su strade
pubbliche, per tale utilizzo è necessario fornirle di tutti
i dispositivi a norma di legge e chiaramente rispettare
tutte le norme di circolazione.
Il peso massimo consentito complessivo tra bici,
ciclista ed eventuali zainetti è di 110Kg.
Non è consentito l’uso di rimorchi, seggiolini o
portapacchi.
FRM declina ogni responsabilità di garanzia in caso di
utilizzo di questi supporti.
MADE IN ITALY RF M B I
K
E
anakin carbon
Manuale d’uso
MADE IN ITALY RF M B I
K
E

DATI TECNICI
Escursione: ..................................................
Rapporto sospensioni .......................................
Lunghezza ammortizzatore .........................
Corsa pistone ................................................
Schema cinematica ................................
Fissaggio ammortizzatore ........................
Diametro canotto sella ...............................
Escursione forcella ..............................
Scatola movimento centrale ..........................
Corona max ........................................................
Larghezza massima copertone ..............
N.B.
Le dimensioni dei copertoni possono variare a
seconda della marca.
È importante accertarsi della dimensione prima
di sostituirli.
REGOLAZIONE FORCELLA E AMMORTIZZATORE
I manuali di utilizzo e settaggio della forcella e
dell’ammortizzatore sono a corredo della bici. Attener-
si alle singole specifiche fornite dalla casa produttrice
per ogni intervento necessario.
MOVIMENTO CENTRALE
Lo standard utilizzato nei telai ANAKIN è il press fit
92 il cui diametro interno è 41mm, l’Istallazione del
movimento centrale avviene tramite speciali attrezzi
(forniti con la bicicletta) e registrazione accurata del
gioco.
CONTROLLI BASE PRIMA DI OGNI USCITA
Le biciclette FRM sono montate e controllate più
volte durante la produzione e successivamente
verificate dai nostri tecnici prima della spedizione.
Prima di ogni utilizzo vi invitiamo ad eseguire le
seguenti verifiche in quanto in caso di trasporto o
spostamento le parti possono spostarsi e non
essere in perfetta efficienza con conseguente
rischio di anomalie ed incidenti.
1. Verifica fissaggio assi ruote
2. Verificare il buono stato dei pneumatici e che
abbiamo sufficiente pressione (range 1.3-2.5 atm)
3. Corretto centraggio dei cerchi e tensione di
tutti i raggi
4. Fare una prova di efficienza dei freni e verifi-
care che il punto di pressione della leva sia
rapido e stabile. Verificare lo spessore delle
pastiglie freno.
5. Verificare che non fuoriesca olio dall’impianto
frenante sulla pompa, pinza e relative giunture
cavo
ATTENZIONE
FRM non è responsabile per danni causati dal
mancato rispetto delle note indicate sopra.
La mancata osservanza delle istruzioni , l’uso
improprio, la negligenza ed un errato set up può
provocare
guasti ai componenti con conseguente perdita di
controllo della bici e portare a lesioni personali.
100mm
2.7
165mm
38mm
monocross
8x22mm
30.9mm
100-120mm
PF92
36T
2.3/60mm
MADE IN ITALY RF M B I
K
E
anakin carbon
Manuale d’uso
MADE IN ITALY RF M B I
K
E

MADE IN ITALY RF M B I
K
E
Coperture
Coperture
Freni (a disco)
Cavi dei freni/tubi
Ammortizzatore
Forcella
Forcella
Movimento centrale
Movimento centrale
Catena
Catena
Pedivella
Ruote / Raggi
Manubrio e attacco
manubrio
Serie sterzo
Serie sterzo
Mozzi
Mozzi
Cambio posteriore
Viti
Reggisella telescopico
Cuscinetti leveraggio
controllare la pressione di gonfiaggio
controllare l’altezza del profilo e fianchi
misurare lo spessore delle pastiglie
controllo visivo
ispezione
controllare le viti
cambiare l’olio, ispezione
controllare il gioco dei cuscinetti
ingrassare nuovamente
controllare e, se necessario, lubrificare
controllare e, se necessario, sostituire
controllare e serrare
Controllare la centratura e la tensione
Verificare
Controllare gioco cuscinetti
Ingrassare nuovamente
Controllare il gioco dei cuscinetti
Ingrassare nuovamente
Pulire, lubrificare
Controllare e se necessario serrare
Smontare ed ingrassare o nel caso di
carbonio nuova pasta di montaggio
Controllare e se necessario sostituire
Attività Prima di ogni uscita Mensile Annuale Varie intervalli
Se dispone di buone attitudini manuali, esperienza e
strumenti adeguati (p. es. chiave dinamometrica),
potrà eseguire personalmente i controlli.
Prenda subito provvedimenti se durante i controlli
dovesse rilevare dei problemi.
Gli intervalli di tempo riportati nella tabella seguente
sono dei riferimenti per i ciclisti che percorrono dai
750 ai 1.500 km all’anno (circa 50- 100 ore d’uso).
Gli intervalli d’ispezione si riducono in caso di un uso
regolare della bicicletta su strade in cattivo stato.
Componente
dopo 750 km
sostituire dopo
una caduta
Intervalli di
manutenzione

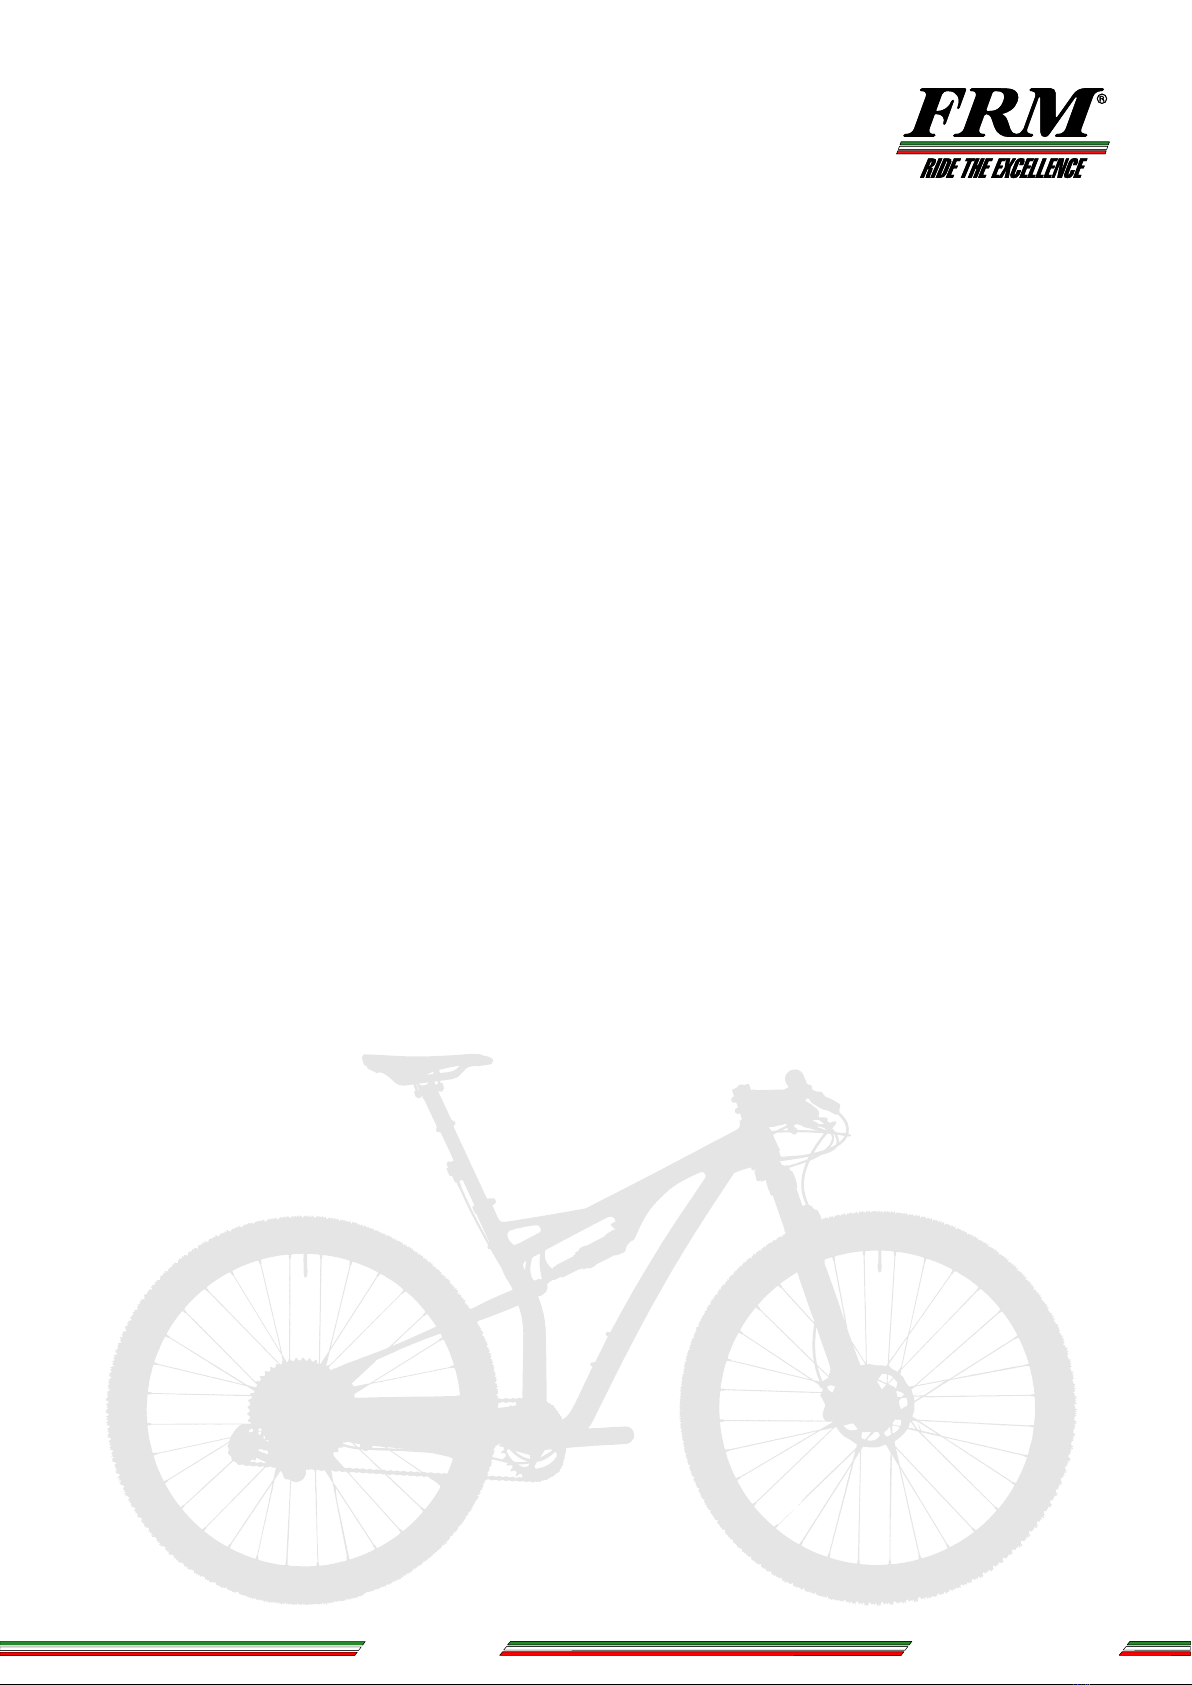
SMONTAGGIO DEL CARRO POSTERIORE
Sfilare i perni dell’occhio superiore ed inferiore
dell’ammortizzatore dopo aver svitato le viti a
brugola conica con chiave da 3mm. (A)
Smontare l’ammortizzatore dal telaio
Separare il braccio superiore del carro posteriore
dalla biella svitando i due bulloni di fissaggio con
due chiavi contrapposte a brugola da 6mm. (B)
Sfilati i bulloni si separa dalla biella un tubo distan-
ziale di irrigidimento. Attenzione alle rondelle
distanziali ed agli O-Ring che si trovano tra la biella
e le estremità della sospensione.
Controllare i movimenti sia della biella che della
sospensione sul telaio. Devono essere fluidi, omo-
genei e senza alcun gioco.
Separare la parte inferiore del carro dal triangolo
svitando i due bulloni di fissaggio con due chiavi
contrapposte a brugola da 6mm. Attenzione alle
rondelle distanziali ed agli O-Ring che si trovano tra
il telaio e le estremità della sospensione. (C)
Separare la biella dal telaio svitando i due bulloni di
fissaggio con due chiavi contrapposte a brugola da
6mm. Attenzione alle rondelle distanziali ed agli
O-Ring che si trovano tra il telaio e la biella. (D)
Se necessario, smontare i cuscinetti dalle loro sedi
e sostituirli con nuovi.
MADE IN ITALY RF M B I
K
E
Carro posteriore
MONTAGGIO
Ingrassare i sei cuscinetti su ambedue le loro facce
Ingrassare il filetto dei sei bulloni di alluminio e delle
due viti in acciaio a testa conica
Posizionare la parte bassa della sospensione in
corrispondenza del perno filettato del telaio, inter-
ponendo tra cuscinetti e telaio una rondella +
O-Ring per lato. Infilare due bulloni (corti) con il loro
O-Ring ed avvitarli con due chiavi a brugola da
6mm contrapposte. Serrare a 10Nm (C)
Verificare che il movimento braccio della sospensi-
one sia fluido, omogeneo e senza giochi
Posizionare i fori alti della biella in corrispondenza
del perno filettato del telaio, interponendo tra
cuscinetti e telaio una rondella + O-Ring per lato.
Infilare due bulloni (corti) con il loro O-Ring ed
avvitarli con due chiavi a brugola da 6mm contrap-
poste. Serrare a 10Nm (D)
Verificare che il movimento della biella sia fluido,
omogeneo e senza giochi
Posizionare la parte alta della sospensione in corri-
spondenza dei fori bassi della biella, interponendo
tra cuscinetti e biella una rondella + O-Ring per lato.
Inserire all’interno della biella il tubo distanziale in
alluminio filettato. Infilare due bulloni (lunghi) con il
loro O-Ring ed avvitarli al tubo distanziale con due
chiavi a brugola da 6mm contrapposte. Serrare a
10Nm (B)
Verificare che il movimento della sospensione sia
fluido, omogeneo e senza giochi
Inserire l’ammortizzatore infilando i relativi perni di
fissaggio.
Inserire le viti a testa svasata M5x10 nelle relative
rondelle coniche ed avvitarle nei perni di fissaggio
con chiave a brugola da 3mm. Serrate a 5Nm (A)
CUSCINETTI: 12-24-6 2RS (6 unità)
A
A
B
C
D

MADE IN ITALY RF M B I
K
E
MONTAGGIO ANAKIN
Per il montaggio dell’ Anakin non serve certo la
bacchetta magica; in ogni caso è necessario
procedere con prudenza e con cura.
Un montaggio effettuato da mani inesperte può
compromettere la sicurezza e funzionamento
della bicicletta.
Prima di tutto ti invitiamo a familiarizzare con i
componenti della tua Anakin
VERIFICA DEL CONTENUTO DELLA SCATOLA
Nella scatola è contenuto il telaio assemblato con
la ruota posteriore montata e tutti i componenti, la
ruota anteriore non montata (eventualmente
imballata in un’apposita borsa), la sella con il
reggisella
INDICAZIONI GENERALI PER IL MONTAGGIO
DELLA MTB
La tua Anakin è stata completamente assemblata
e testata dai nostri meccanici. Al termine delle
operazioni di seguito descritte, la bicicletta è com-
pletamente funzionante senza la necessità di
doverla regolare. Conclusi tutti i lavori effettuate
un giro di prova su un piazzale tranquillo o su una
strada poco frequentata.
Qui di seguito è disponibile una breve descrizione
su come montare la bicicletta. Se non disponi di
conoscenze o esperienza sufficienti, rivolgiti al tuo
meccanico di fiducia.
MONTAGGIO DELLA ANAKIN - UTENSILI
Per assemblare la tua Anakin sono necessari
i seguenti utensili:
-Chiave dinamometrica con inserti Allen da 6
e 4mm
-Torx T25
Per le operazioni di montaggio non fissare su
un cavalletto l`Anakin bloccandola su un tubo
del telaio, bloccarla invece sul cavalletto di
montaggio utilizzando il reggisella in allumin-
io.
Il montaggio può essere effettuato con mag-
gior facilità e sicurezza se si dispone di un
cavalletto di montaggio o se si ha un
aiutante.

MADE IN ITALY RF M B I
K
E
1- RUOTA ANTERIORE
Rimuovere il perno ruota anteriore già instal-
lato sulla forcella.
Togliere il separatore (01) plastico dalla pinza
freno anteriore facendo attenzione a non
azionare la leva del freno.
2A - Forcella FOX / DT SWISS
Montare la ruota anteriore ed assicurarsi che
il disco sia centrato tra le pastiglie. (02)
Inserire il perno da destra ed avvitarlo secon-
do coppia di serraggio consigliata.(03)
2B - Forcella Rock Shox
Nel caso del sistema con perno passante
Maxle con leva di serraggio, introdurre la
ruota anteriore nella forcella e contempora-
neamente infilare il disco del freno nella
pinza.(02)
Centrare la ruota anteriore tra i forcellini ed
inserire il perno dal lato destro con la leva di
bloccaggio rapido Maxle aperta.(03)
Accertarsi che la leva di bloccaggio rapido
sia completamente aperta e posizionata
nell’apposita cavità del perno. Quando il
filetto del perno avrà fatto presa sul filetto del
fodero sinistro, ruotare il perno in senso
orario. Per i primi giri il perno passante deve
girare senza resistenza.
Ruotare ora la leva con forza in senso orario
fino a che il perno sarà ben avvitato.
Per concludere serrare la leva di bloccaggio
rapido Maxle come una comune leva di
bloccaggio rapido. La leva di bloccaggio
rapido non deve sporgere in avanti o all’in-
fuori ma deve aderire al fodero.(04)
01
02
03
04

MADE IN ITALY RF M B I
K
E
MANUBRIO
Togliere le 4 viti del frontalino dell’attacco
manubrio.
Posizionare il manubrio in base alle marca-
ture all’interno della zona di bloccaggio.
Controllare che i cavi bowden e tubi non
siano storti o piegati e che scorrano con raggi
uniformi al manubrio o al freno.
Inserire il frontalino dell’attacco manubrio.
Avvitare le viti di serraggio del frontalino
dell’attacco manubrio in modo alternato e
uniforme fino a fissare leggermente il manu-
brio.
Verificare che le fessure tra il coperchio
dell’attacco manubrio e il corpo dello stesso
siano parallele (05) e che abbiano la stessa
ampiezza sia in alto che in basso. Eventual-
mente allentare nuovamente le viti di serrag-
gio, avvitandole leggermente in modo
uniforme.
Serrare quindi le 4 viti seguendo una seguen-
za a X, sull’attaco manubrio troverà indicata
la coppia di serraggio ottimale.
1 4
32
Seguenza serraggio viti
MAX. 5Nm
05

MADE IN ITALY RF M B I
K
E
REGGISELLA TELESCOPICO
Tenere il reggisella con una mano e con
l’altra infilare la estremità del cavo gia monta-
to nella guiana situata in prossimità del colla-
rino reggisella. (prima di inserir eil cavo nella
guaina posizionare il capoguiana presente
nella scatola in dotazione.(06)
Far scivolare il reggisella nel telaio senza
che sia necessario spingerlo o ruotarlo. Se
ciò non dovesse essere possibile, aprire
ulteriormente la vite di bloccaggio del
reggisella.
Assicurarsi che la guaina entri correttamente
nella sede posta nella parte inferiore del
carter del meccanismo di attuazione del
reggisella. (07)
Posizionare il reggisella all’altezza desider-
ata e bloccarlo stringendo l’apposita vite
posta nel collarino reggisella. (controllare la
coppia di serreggio).
Inserire quindi la curva metallica dotata di
registro nel comando remoto. (08)
Inserire il cavo del reggisella all'interno della
curva e del foro del comando remoto.(09)
Tenere in tensione il cavo ed avvitare il grano
di serraggio. (10) Tagliare il cavo ed istallare
il capocorda.
Nel caso fosse necessario, svitare legger-
mente il registro in modo tale da aumentare
la tensione del cavo.
Max. 300mm
Mín. 200mm
Mín. 90mm
Max. 190mm
06 06
07
08
09
10

Dear customer
First of all we want to congratulate you for your new
purchase, we are convinced that the Anakin will give
you great satisfaction.
You have just acquired a unique product, with
state-of-the-art technological solutions and materials,
This is the user's manual where you will find all the
necessary instructions to carry out the basic mainte-
nance of all our components as well as the technical
drawings for the correct assembly.
In FRM we always pay attention to our customers,
that's why by reading this manual you will realize that
our components have been designed for competitive
use, therefore with great attention to ease of assem-
bly and maintenance.
If your Anakin is regularly serviced and used in the
right way, it will accompany you faithfully over time,
maintaining its performance unaltered.
MADE IN ITALY RF M B I
K
E
anakin carbon
User’s manual
MADE IN ITALY RF M B I
K
E

THE ANAKIN CONCEPT
FRM Anakin Full is a frame made in Italy by laminat-
ing composite fibers and firing them in an autoclave.
This is an extremely accurate artisanal process that
allows us to obtain a particular glossiness on the
carbon parts: for this reason our products are not
painted.
This production process can be proven by small
details such as the presence of fiber along the joints,
visible gluing lines in the connections of the monolith-
ic parts and parts with a slight variation in gloss.
These imperfections are to be considered unique
characteristics of the product and bear witness to the
artisanal production process.
USAGE
The FRM Anakin Full bicycle belongs to the
cross-country and marathon category.
Specifically, it can be used on paved roads, bicycle
paths, country roads and gravel roads.
It can also be used on non-stabilized dirt roads that
include sporadic jumps up to 0.5 mt.
Remember that jumps can cause ruinous falls with a
strong increase in the forces involved as well as caus-
ing damage.
It is therefore advisable to attend riding courses to
improve your skills and enhance your safety level. In
the event of a fall or abnormal impact, have all parts of
your bike checked by your trusted FRM dealer. FRM
bicycles cannot be used on rocky terrain, with steps
and cannot be used to perform stunts.
They can be used on cross-country, marathon and
cyclo-cross tracks but not for enduro, freeride, dirt,
downhill, slopestyle and extreme aggressive use.
We specify that the type of equipment that our bikes
are equipped does not allow the use on public roads,
for this use it is necessary to provide them with all the
devices in accordance with the law and clearly
observe all traffic rules.
The maximum weight allowed between bike, rider and
any backpack is 110Kg.
The use of trailers, seats or luggage racks is not
permitted.
FRM declines all responsibility for warranty in case of
use of these supports.
MADE IN ITALY RF M B I
K
E
anakin carbon
User’s manual
MADE IN ITALY RF M B I
K
E

TECHNICAL DATA
Excursion: .....................................................
Suspension ratio .................................................
Shock absorber length ................................
Piston stroke ..................................................
Kinematics diagram ...............................
Shock absorber fixing ...............................
Seat tube diameter .....................................
Fork travel ..............................................
Bottom bracket shell ......................................
Max sprocket ......................................................
Max tire width ..........................................
N.B..
Tire sizes may vary by brand.
It is important to make sure of the size before before
replacing them.
ADJUSTING THE FORK AND SHOCK ABSORBER
Fork and shock manuals are included with your
bicycle. Follow the individual specifications provided
by the manufacturer for any necessary adjustments.
BOTTOM BRACKET
The standard used in ANAKIN frames is the press fit
92 whose internal diameter is 41mm, the installation
of the bottom bracket is done with special tools (sup-
plied with the bike) and accurate adjustment of the
play.
BASIC CONTROLS BEFORE EVERY OUTING
FRM bicycles are assembled and checked sever-
al times during production and then checked by
us before shipping. Before every use we invite
you to perform the following checks because in
case of transport or movement the parts may
move and not be in perfect working order with the
consequent risk of anomalies and accidents.
1. Checking the fixing of the wheel axles
2. Check that the tires are in good condition and
that they have sufficient pressure (range 1.3-2.5
atm).
3. Correct centering of rims and tension of all
spokes
4. Make a test of the brakes efficiency and verify
that the pressure point of the lever is fast and
stable. Check brake pad thickness.
5. Check that no oil is leaking from the braking
system onto the master cylinder, caliper and
relative cable joints.
ATTENTION
FRM is not responsible for damage caused by
failure to comply with the above notes.
Failure to follow the instructions, improper use,
negligence and incorrect set up may cause
failure of components resulting in loss of control
of the bike and personal injury.
100mm
2.7
165mm
38mm
monocross
8x22mm
30.9mm
100-120mm
PF92
36T
2.3/60mm
MADE IN ITALY RF M B I
K
E
anakin carbon
User’s manual
MADE IN ITALY RF M B I
K
E

MADE IN ITALY RF M B I
K
E
Tires
Tires
Disc brakes
Brake hose
Rear Shock
Fork
Fork
Bottom bracket
Bottom bracket
Chain
Chain
Crankset
Wheels / Spokes
Handlebar and stem
Headset
Headset
Hubs
Hubs
Rear derailleur
Screws
Dropper seatpost
Linkage bearings
check air pressure
check the tire condition
measure the thickness of the pads
visual inspection
inspection
check the screws
inspection, replace oil
check bearings play
grease
check and, if necessary, lubricate
check and, if necessary, replace
check and tighten
Check alignment and tension
Check
check bearings play
grease
check bearings play
grease
clean and lubricate
check and, in necessary tighten
Remove and grease, and n case of carbon
seatpost put new mounting paste
check and, if necessary, replace
To do Before every ride Monthly Annual Various intervals
If you have good manual skills, experience and the
right tools (e.g. torque wrench), you can carry out the
checks yourself.
Take immediate action if you detect problems during
the checks.
The time intervals listed in the following table are
references for cyclists who ride 750 to 1,500 km per
year (approx. 50 to 100 hours of use). The inspection
intervals are reduced in case of regular use of the
bicycle on roads in poor condition.
Part
every 750km
replace after
a fall
Service
intervals

DISASSEMBLING THE REAR TRIANGLE
Remove the upper and lower eye pins of the shock
absorber after unscrewing the tapered Allen screws
with a 3mm wrench. (A)
Remove the shock absorber from the frame
Separate the upper arm of the rear triangle from the
connecting rod by unscrewing the two fixing bolts
with two opposing 6mm Allen keys. (B)
Once the bolts have been unscrewed, separate a
stiffening spacer rod from the connecting rod. Pay
attention to the spacer washers and O-rings
between the connecting rod and the ends of the
suspension.
Check the movement of both the connecting rod
and the suspension on the frame. They should be
smooth, even and without any play.
Separate the lower part of the carriage from the
triangle by unscrewing the two fixing bolts with two
opposing 6mm Allen keys. Pay attention to the
spacer washers and O-rings between the frame
and the suspension ends. (C)
Separate the connecting rod from the frame by
unscrewing the two mounting bolts with two oppos-
ing 6mm Allen wrenches. Pay attention to the
spacer washers and O-rings between the frame
and the connecting rod. (D)
If necessary, remove the bearings from their seats
and replace them with news.
MADE IN ITALY RF M B I
K
E
Rear triangle
ASSEMBLING THE REAR TRIANGLE
Grease the six bearings on both sides.
Grease the threads of the six aluminum bolts and
the two steel tapered head screws.
Place the lower part of the suspension in correspon-
dence of the threaded pin of the frame, interposing
between bearings and frame one washer + O-Ring
per side. Insert two bolts (short) with their O-Ring
and screw them with two 6mm hex wrenches oppo-
site each other. Tighten to 10Nm (C)
Check that the arm movement of the suspension is
smooth, homogeneous and without play.
Position the top holes of the connecting rod in corre-
spondence of the threaded pin of the frame, inter-
posing between bearings and frame one washer +
O-Ring per side. Insert two bolts (short) with their
O-Ring and screw them with two 6mm Allen
wrenches opposite each other. Tighten to 10Nm (D)
Check that the movement of the connecting rod is
smooth, homogeneous and without play.
Place the upper part of the suspension in corre-
spondence of the low holes of the connecting rod,
interposing between bearings and connecting rod
one washer + O-Ring per side. Insert the threaded
aluminum spacer rod inside the connecting rod.
Insert two bolts (long) with their O-Ring and screw
them to the spacer tube with two 6mm Allen
wrenches opposite each other. Tighten to 10Nm (B)
Check that the movement of the suspension is
smooth, homogeneous and without play.
Insert the shock absorber by inserting the relative
fixing pins.
Insert the M5x10 countersunk head screws in the
relative tapered washers and screw them into the
fixing pins with a 3mm Allen key. Tighten at 5Nm (A)
BEARING TYPE: 12-24-6 2RS (6 pcs)
A
A
B
C
D

MADE IN ITALY RF M B I
K
E
ASSEMBLING THE ANAKIN
Assembly the Anakin certainly does not require a
magic wand; in any case it is necessary to
proceed with caution and care.
Assembly by unskilled hands can compromise the
safety of your bike.
First of all we invite you to familiarize yourself with
the components of your Anakin
CHECKING THE CONTENTS OF THE BOX
The box contains the assembled frame with the
rear wheel mounted and all the components, the
unmounted front wheel (possibly packed in a
special bag), the saddle with the seatpost.
GENERAL INDICATIONS FOR ASSEMBLING
THE MTB
Your Anakin has been completely assembled and
tested by our mechanics. At the end of the opera-
tions described below, the bike is fully functional
without the need to adjust it. Once all the opera-
tions have been completed, take it for a test ride in
a quiet square or on a road with little traffic.
The following is a brief description of how to
assemble your bicycle. If you do not have
sufficient knowledge or experience, you should
contact your local mechanic.
ASSEMBLING THE ANAKIN - TOOLS
The following tools are required to assemble
your Anakin:
-Torque wrench with 6 and 4mm Allen bits
-Torx d 25
When assembling the Anakin, do not clamp it
to a frame tube, but instead clamp it to the
mounting stand using the aluminum seat-
post.
Assembling can be done more easily and
safely if you have a mounting stand or if you
have an assistant

MADE IN ITALY RF M B I
K
E
1- FRONT WHEEL
Remove the front wheel axle already mount-
ed on the fork.
Remove the plastic spacer from the caliper,
being careful not to operate the brake lever.
(01)
2A - FOX / DT SWISS fork
Mount the front wheel and make sure the disc
is centered between the pads. (02)
Insert the axle from the right and tighten it
according to the recommended torque.
2B - ROCK SHOCK FORK
In the case of the Maxle thru-axle system
with quick-release lever, insert the front
wheel into the fork and simultaneously slide
the brake disc into the caliper. (02)
Center the front wheel between the dropouts
and insert the axle from the right side with the
Maxle quick-release lever open. (03)
Make sure the quick-release lever is fully
open and seated in the appropriate recess of
the axle. When the thread of the pin has
engaged the thread of the left side chainstay,
turn the pin clockwise. For the first few turns,
the through-bolt should turn without resis-
tance.
Now turn the lever clockwise with force until
the axle is firmly screwed in.
Finally, tighten the Maxle quick-release lever
like a normal quick-release lever. The
quick-release lever must not protrude
forwards or outwards, but must fit flat against
the fork leg. (04)
01
02
03
04

MADE IN ITALY RF M B I
K
E
HANDLEBARS
Remove the 4 screws of the stem faceplate.
Position the handlebar according to the mark-
ings inside the clamping area. Check that the
bowden cables and tubes are not twisted or
bent and that they run regularly to the handle-
bar or brake.
Insert the stem faceplate.
Tighten the stem faceplate clamping screws
alternately and evenly until the handlebars
are lightly secured.
Make sure that the slots between the stem
cover and the stem body are parallel and
have the same width at the top and
bottom.(05) If necessary, loosen the clamp-
ing screws again, tightening them slightly and
evenly.
Tighten the 4 screws in an X pattern. The
optimum tightening torque is indicated on the
stem.
1 4
32
Tightening sequence
MAX. 5Nm
05

MADE IN ITALY RF M B I
K
E
DROPPER SEATPOST OBI1
Hold the seatpost with one hand and with the
other, insert the end of the already assem-
bled cable into the sleeve located near the
seat collar. (Before inserting the cable into
the sleeve, place the ferrule provided in the
box.).(06)
Slide the seatpost into the frame without
pushing or turning it. If this is not possible,
unturn the seatpost locking screw.
Make sure the housing fits properly into the
slot on the underside of the seat post actua-
tor housing. (07)
Position the seat post at the desired height
and secure it by tightening the seat post
clamp screw. (check the tightening torque).
Then insert the metal curve with register in
the remote control. (08)
Insert the seat post cable into the metal hous-
ing and hole of the remote control. (09)
Tension the cable and tighten the grub screw.
(10) Cut the cable and install the cable end
cap.
If necessary, slightly unscrew the adjuster in
order to increase the cable tension.
Max. 300mm
Mín. 200mm
Mín. 90mm
Max. 190mm
06 06
07
08
09
10
Table of contents
Languages:
Other FRM Bicycle manuals