ELMETRON CO-505 User manual

LABORATORY
OXYGEN
METER
CO-505
USER’S MANUAL


USER’S MANUAL
LABORATORY
OXYGEN METER
CO-505
Before use please read the instruction carefully!


CONTENTS
I. INTRODUCTION 1
1. Exploitation notices 3
2. Characteristics of the meter 4
3. What is the meter designed for 4
4. The outside view 5
5. Switching the meter on and off 8
6. Preparation to work 9
6.1. Choosing the kind of temperature compensation 9
6.2. Changing resolution of the measurements 10
6.3. Changing the sensor number 11
6.4. Readout of the last calibration date 12
6.5. Entering the calibration validity time 13
II. DISSOLVED OXYGEN MEASUREMENT 15
7. Basic information about the dissolved oxygen measurement 17
8. Entering the oxygen meter parameters 19
8.1. Changing the unit 19
8.2. Compensation of the salinity influence 20
8.3. Manual introduction of the salinity value 20
8.4. Automatic compensation of the air pressure influence 22
9. Calibration of the dissolved oxygen sensor 23
10. Oxygen concentration measurement 25
10.1. Measurement with automatic temperature compensation 25
10.2. Measurement with manual temperature compensation 26
III. ATMOSPHERIC PRESSURE MEASUREMENT 27
11. Atmospheric pressure measurement 29
IV. TEMPERATURE MEASUREMENT 31
12. Temperature measurement 33
V. OTHER 35
13. Clock with date 37
13.1. Clock 37
13.2. Date 37
13.3. Setting time and date 38
13.4. The LCD backlight mode 38
13.5. The brightness control 39
13.6. Readout of the software version number 40
14. Storing and readout of the results 41
14.1. Parameters of storge and readout from the memory 41
14.2. Memorising single redouts 43
14.3. Storing the measuring series 43
14.4. Reviewing the results 44
14.5. Deleting stored results 44
15. Co-operation with a PC 45
16. Technical data 46
17. Equipment 47


- 1 -
I. INTRODUCTION

- 2 -
User‘s manual for CO-505 dissolved oxygen meter v1.50

- 3 -
1. EXPLOITATION NOTICES
Dear User!
We present you a device distinguished by accuracy according to the
technical data and by high stability of the displayed results. We believe that
measurements would not cause you any trouble and that the meter would
operate without any inconvenience. Wide range of additional functions
requires careful reading of the manual, in other case some of the
features may stay unused or using the meter may be troublesome.
Accuracy of the dissolved oxygen measurements depends on the sensor
calibration and regular conservation which consists in replacing the
membranes, electrolyte and cleaning the electrodes. Neglecting of these
activities after some time would make measurements impossible.
Please turn your attention to the fact that stabile measurement is
possible only with simulated or natural measured water flow.
The essential feature of our products is their low failure frequency. However,
if your meter fails, our firm immediately performs its warranty repair.
We wish you a pleasant and trouble-free work with our meter.

- 4 -
User‘s manual for CO-505 dissolved oxygen meter v1.50
2. CHARACTERISTICS OF THE METER
The CO-505 dissolved oxygen meter belongs to the newest generation of
measuring devices which offer wide range of additional functions. The meter
ensures high accuracy and repeatability of readings. The electronic elements
of the newest generation used in the meter made its memory independent
from power supply. The internal clock is powered from battery which holds
its charge for many years. The meter is equipped with a custom, backlit LCD
display, which enables observing the measured function simultaneously with
the temperature value. Additional graphic symbols make working easier.
Main features of CO-505 are:
-high accuracy and stability of readings;
-automatic and manual temperature compensation;
-possibility of compensation of the salinity influence on the oxygen
measurements
-measurement and automatic compensation of the atmospheric pressure
influence on the dissolved oxygen concentration;
-possibility of introducing the time of calibration validity and signalling its
expiry;
-remembering the measurements results with time, date, individually or
taking series of measurements with set time interval;
-USB port;
-large LCD backlight display with brightness control;
-real clock and date.
3. WHAT IS THE METER DESIGNED FOR
Dissolved oxygen meter CO-505 is a precise and easy-to-use meter
designed for measurements of oxygen dissolved in water in % of saturation
or mg/l and atmospheric pressure measurement in hPa. The meter may also
be used for accurate temperature measurement of solutions and air in °C.
The meter is used in chemical, pharmaceutical, power industries, in water
treatment stations, laboratories, agriculture, universities, scientific
laboratories etc.
The meter is prepared to work with galvanic oxygen sensor manufactured by
our company. It may cooperate also with Pt-1000 temperature probe with
Chinch connector.
The meter may collect measurements taken as single or series of
measurements with set time interval.
The built in USB port enables sending the data to the PC. There is a
possibility of sending current results of measurements or the stored data
together with date and time thay have been collected.
In case of necessity to collect series exceeding the memory capacity it is
possible to use a special PC software offered by our company.

- 5 -
4. THE OUTSIDE VIEW
In the upper part of the meter there is an LCD display (Pic. 1), on which
depending on the chosen function following symbols are displayed:
-result of the oxygen measurement in % or mg/l
-time and date.
A particular function is chosen with specific button which is signalised by
lighting LED diode placed on this button.
The temperature value in oC is displayed simultaneously with the result.
Symbols of units are displayed next to the results.
Pic. 1.
Beside the temperature value there is a symbol (automatic temperature
compensation) or a
symbol (manual temperature compensation) displayed.
CAL symbol on the left side of the display informs that the meter is in the
calibration mode. The number of the chosen electrode is displayed on the left
side (E1, E2, E3). It informs which of the characteristics would be taken into
consideration during all calculations. Flashing symbol of the electrode
number informs that the characteristic has been deleted, the calibration
validity has expired (point 6.5), or that the last calibration has shown that the
electrode had lost its efficiency. The number of detected calibration point is
displayed during calibration between the upper and lower rows of digits (P1,
P2, P3, P4, P5).
When pressing the button, all parameters introduced by the user and
the atmospheric pressure value are displayed.

- 6 -
User‘s manual for CO-505 dissolved oxygen meter v1.50
The keyboard (Pic. 2) placed under the display is used for switching the
meter on and off, choosing the measuring function, calibration, entering the
parameters and memorising the results.
- switches the meter on and off;
- chooses the dissolved oxygen measuring function;
- displays the time and date;
- holding this button enters the calibration mode (CAL symbol
displayed). Short press in this mode confirms the calibration
result;
- short press causes memorising single results or measuring
series, holding enters the stored results readout mode;
- chooses the entered parameter;
, - buttons for entering the parameters.
On the back wall of the meter there are inputs placed with the symbols given
below:
O
2
- connector for dissolved oxygen sensor;
temp - the Chinch connector for temperature probe;
USB - then USB port for connecting the meter with the PC;
POWER - connector for power adapter.

- 7 -
Pic. 2.
- 8 -
User‘s manual for CO-505 dissolved oxygen meter v1.50
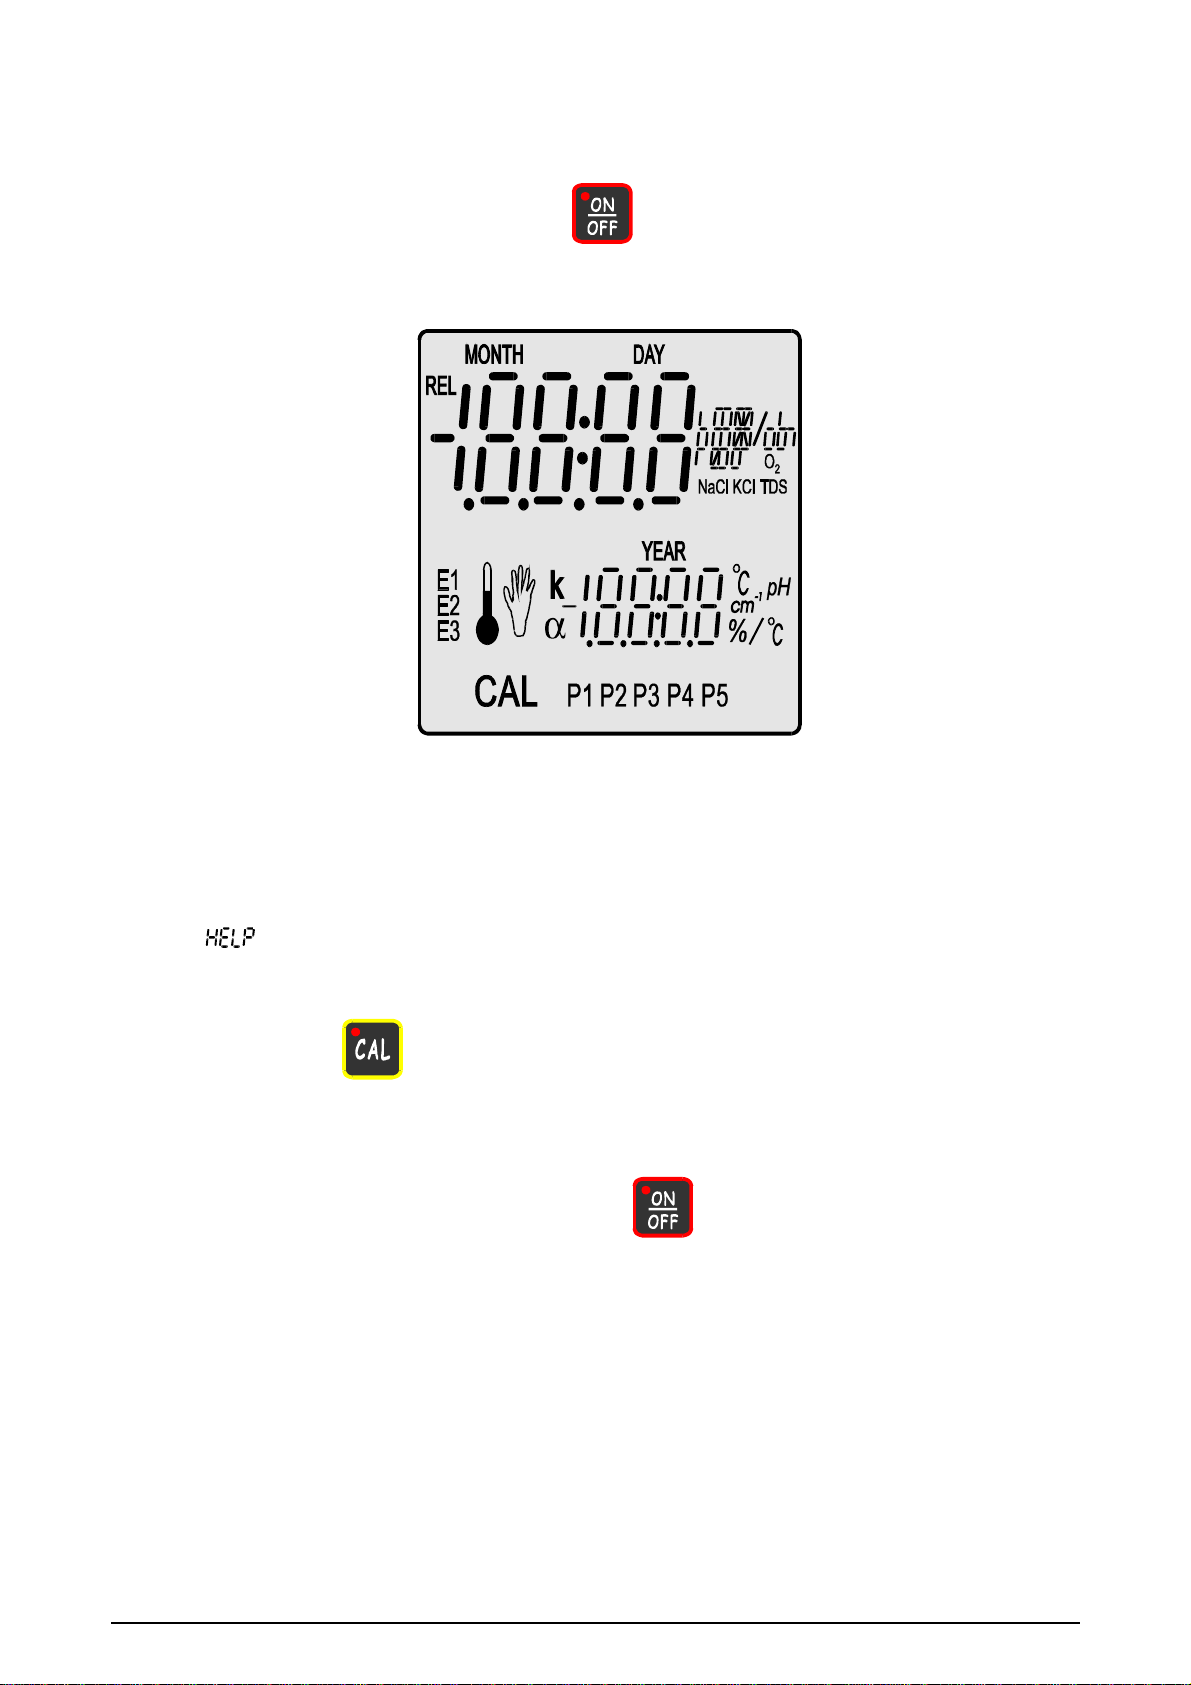
5. SWITCHING THE METER ON AND OFF
After switching it on by pressing the button, the meter tests the memory
and the display on which all symbols are being displayed (Pic. 3).
Pic. 3.
If the test ends successfully, after about 1.5 s the meter switches
automatically to the measuring mode, in which it was switched off. Displaying
of the sign informs that the meter has lost the factory settings and
requires service repair. If after 1,5 s all symbols are continuously displayed, it
informs that the sensors’ calibration parameters have been lost.
After pressing the button the meter adopts standard characteristics:
-shift = 0% O
2
, characteristic slope = 100% O
2
for the oxygen sensor
and enters the measuring mode. It will be necessary to calibrate the oxygen
sensor.
The meter is switched off by pressing the button.

- 9 -
6. PREPARATION TO WORK
Before starting work:
-join the power adapter plug to the Power input;
-join the dissolved oxygen sensor to the O
2
connector;
-in case of using the temperature probe it should be connected with the
Chinch temperature input - temp;
-in case of working with a PC join the cable with the USB port;
-switch the meter on by pressing the button.
6.1. Choosing the kind of temperature compensation
The meter switches to the automatic temperature compensation mode
automatically after connecting the temperature probe, after disconnecting it
the meter enters the manual temperature compensation mode. In the ATC
mode, next to the displayed temperature the symbol appears. Manual
temperature compensation is indicated by the symbol next to the value
entered by the user, its value may be changed with use of the ,
keys.

- 10 -
User‘s manual for CO-505 dissolved oxygen meter v1.50
6.2. Changing resolution of the measurements
The measurement results may be displayed with a chosen resolution. In
order to change it:
-in the measuring mode press the
button, a (resolution) sign will
be displayed. (Pic.4);
-using keys , choose:
- low resolution of the measurement;
- high resolution of the measurement.
Pic 4
For the oxygen measurement:
- resolution of the measurement 1% or 0,1mg/l;
- resolution of the measurement 0.1% or 0.01 mg/l.
Return to the measuring mode by pressing the chosen function button.

- 11 -
6.3. Changing the sensor number
If there is more than one sensor’s characteristic stored in the meter’s
memory, it is possible to replace the sensor without the need of calibration.
This option is quite useful in case of working with more than one sensor. It is
necessary to connect the sensor calibrated earlier, marked with the number
which responds to the number stored in the memory and choose this
number.
In order to do so, in the measuring mode:
-press the
button till the moment of displaying , or symbol in
the upper row of the display, than using the , buttons choose
the sensor number. Under this number the calibration results will be stored
(pic.5). Below the sensor number one of the following signs will be
displayed:
- under this number there is no characteristic stored and
the producer’s values are provided. In the measuring mode the
sensor number will be flashing.
- under this number there are values of the last calibration
stored.
Additionally, the points in which the sensor is calibrated are shown under the
sensor number.
Pic. 5.
-return to the measuring mode by pressing the chosen function button.

- 12 -
User‘s manual for CO-505 dissolved oxygen meter v1.50
6.4. Readout of the last calibration date
The meter remembers the calibration dates of all sensors. Before starting
work it is possible to check the last calibration date.
In order to do so, in the measuring mode:
-press the
button till the moment of displaying in the upper row of the
display the sensor number ( , or symbol);
-using the , buttons choose the sensor number of which
calibration date is to be checked and press the button. The last
calibration date will be displayed in the following format: month – day -
year (below), Pic. 6. On the left the sensor number is displayed.
-Flashing date informs about expiration of the sensor’s calibration
validity. Introducing the calibration time has been described in the
section 6.5.
Pic. 6.
The meter memorises the date during calibration. If the date in the meter‘s
clock is changed after calibration, the date of calibration validity expiration will
be faulty signalised. It is important to set the current date before calibration.
Return to the readout of the sensor number by pressing the button, or
to the measuring mode by pressing any of the function buttons.

- 13 -
6.5. Entering the calibration validity time
The meter remembers the time of calibration validity for three sensors. After
this time has been exceeded, the meter signals with flashing sensor number
( , or symbol) that it is necessary to calibrate this sensor.
In order to set the time validity of calibration, in the measuring mode of the
chosen function:
-press the button till the moment of displaying a (time out) symbol
in the upper row. The number of days till the next calibration will be
displayed below (Pic. 7);
-with the , buttons enter the requested number of days till the
next calibration. After choosing time of one day and pressing the
button instead of digital values the symbol appears and the function of
reminding about the next calibration is blocked.
Pic. 7.
Return to the measuring mode by pressing the button.

- 14 -
User‘s manual for CO-505 dissolved oxygen meter v1.50
Table of contents
Other ELMETRON Measuring Instrument manuals


Popular Measuring Instrument manuals by other brands


ABB
ABB Nitrate 8236 instruction manual

Piusi
Piusi K900 Bulletin

Büttner Elektronik
Büttner Elektronik Dometic MT iQ Basic Pro Installation and operating manual

Keysight
Keysight N4372E user guide

NCTE
NCTE Read Out Unit quick start guide

Endress+Hauser
Endress+Hauser Prosonic M FMU40 Brief operating instructions