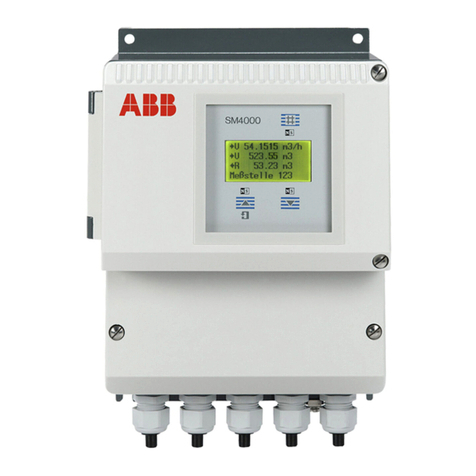
ABB Nitrate 8236 User manual

ISE Nitrate Monitor
8236
Instruction Manual
IM/8236_8

Health and Safety
To ensure that our products are safe and without risk to health, the following points must be noted:
1. The relevant sections of these instructions must be read carefully before proceeding.
2. Warning labels on containers and packages must be observed.
3. Installation, operation, maintenance and servicing must only be carried out by suitably trained personnel and in accordance with the
information given.
4. Normal safety precautions must be taken to avoid the possibility of an accident occurring when operating in conditions of high pressure
and/or temperature.
5. Chemicalsmustbestoredawayfromheat,protectedfromtemperatureextremesandpowderskeptdry.Normalsafehandlingprocedures
must be used.
6. When disposing of chemicals ensure that no two chemicals are mixed.
Safety advice concerning the use of the equipment described in this manual or any relevant hazard data sheets (where applicable) may be
obtained from the Company address on the back cover, together with servicing and spares information.
ABB
The Company
We are an established world force in the design and manufacture of instrumentation for
industrial process control, flow measurement, gas and liquid analysis and environmental
applications.
As a part of ABB, a world leader in process automation technology, we offer customers
application expertise, service and support worldwide.
We are committed to teamwork, high quality manufacturing, advanced technology and
unrivalled service and support.
The quality, accuracy and performance of the Company’s products result from over 100 years
experience, combined with a continuous program of innovative design and development to
incorporate the latest technology.
The UKAS Calibration Laboratory No. 0255 is just one of the ten flow calibration plants
operated by the Company and is indicative of our dedication to quality and accuracy.
EN ISO 9001:2000
Cert. No. Q 05907
R
E
G
I
S
T
E
R
E
D
EN 29001 (ISO 9001)
Lenno, Italy – Cert. No. 9/90A
0255
Stonehouse, U.K.
Warning – Refer to the manual for instructions
Caution – Risk of electric shock
Protective earth (ground) terminal
Earth (ground) terminal
Direct current supply only
Alternating current supply only
Both direct and alternating current supply
The equipment is protected
through double insulation
Electrical Safety
This equipment complies with the requirements of CEI/IEC 61010-1:1993 "Safety requirements for electrical equipment for
measurement, control, and laboratory use". If the instrument is used in a manner NOT specified by the Company, the protection
provided by the instrument may be impaired.
Symbols
One or more of the following symbols may appear on the equipment labelling:
Information in this manual is intended only to assist our customers in the efficient operation of our equipment. Use of this manual
for any other purpose is specifically prohibited and its contents are not to be reproduced in full or part without prior approval of the
Technical Publications Department.

1
CONTENTS
Section Page Section Page
1 INTRODUCTION ..............................................................2
1.1 Description...............................................................2
1.2 Training ....................................................................2
1.3 Location and Function of Main Components ...........2
2 INSTALLATION................................................................3
2.1 Accessories .............................................................3
2.2 Location ...................................................................3
2.3 Mounting ..................................................................3
2.4 Sampling Requirement ............................................3
2.5 Sample Connections................................................3
2.6 Connections, General ..............................................4
2.7 External Electrical Connections ...............................5
2.8 Relay Contact Protection and Interference
Suppression ..........................................................6
3SETTING UP ....................................................................7
4LIQUID HANDLING SECTION ........................................8
4.1 Principle of Operation ..............................................8
4.2 General Operation ...................................................9
5ELECTRONICS SECTION...............................................9
5.1 Electronic Layout .....................................................9
5.2 User Junction Box....................................................9
5.3 Microprocessor Unit.................................................9
5.4 Front Panel Controls..............................................10
5.5 Displays .................................................................10
5.6 L.E.D. Indication ....................................................10
6 PROGRAMMING ........................................................... 11
6.1 Normal Operation ..................................................12
6.2 Programming Pages ..............................................12
6.2.1 Operating Page 1 ....................................13
6.2.2 Operating Page 2 ....................................14
6.2.3 Security Code Page ................................15
6.2.4 Set Up Input Page ...................................16
6.2.5 Current Output Page ...............................17
6.2.6 Set Up Alarms Page ................................20
6.2.7 Set Up Clock Page ..................................22
6.2.8 Calibration User Code Page....................24
6.2.9 Set Up Temperature Control Page ..........25
6.2.10 Electrical Calibration..............................25
6.2.11 Electrical Calibration Page.....................26
7 CALIBRATION ...............................................................29
7.1 Calibration Sequence ............................................29
8 MAINTENANCE .............................................................30
8.1 Chemistry...............................................................30
8.1.1 Reagent Solution .....................................30
8.1.2 Standard Solutions ..................................30
8.1.3 Reference Salt Bridge Solution ...............30
8.2 Scheduled Servicing ..............................................30
8.2.1 Regular Visual Checks ............................30
8.2.2 Four Weekly ............................................30
8.2.3 Four Monthly ...........................................31
8.2.4 Twelve Monthly........................................31
8.2.5 Cleaning Sample Pipework .....................31
8.2.6 Consumables Spares Kit .........................32
8.2.7 Fitting the Electrode ................................32
8.2.8 Peristaltic Pump ......................................33
8.2.9 Replacement of Plumbing Tubing ...........33
8.3 Shutdown Procedure .............................................34
8.3.1 Short Term ...............................................34
8.3.2 Long Term................................................34
8.4 Unscheduled Servicing ..........................................34
8.4.1 Malfunction of the Monitor .......................34
8.4.2 Monitor Diagnostic Information................35
8.5 Refurbishing the Electrode ....................................35
8.6 Microprocessor Unit Error Messages ....................36
9 SPECIFICATION ............................................................37
10 SPARES LIST ..............................................................38
APPENDIX A – REPLACING SOFTWARE EPROM...........40
A.1 Access the Transmitter Unit ..................................40
A.2 Access the PCB ....................................................40
A.3 Removing the PCB................................................41
A.4 Changing the EPROM...........................................41
A.5 Completing the Procedure.....................................41
NOTES.................................................................................42


2
1.1 Description
The Model 8236 Nitrate Monitor is a microprocessor based
analyser using an ABB nitrate ion-selective probe. This
equipment is used for environmental water monitoring.
1.2 Training
Due to the specialised nature of the above instrument, it is
recommended that, where the end users personnel have had no
previous experience of maintaining this equipment, training be
provided by this Company.
Such training is available via the local Company in the UK, or
OverseasAgent elsewhere and may be carried out either on the
users premises or at the factory.
1.3 Location and Function of Main Components –
Fig. 1.1
Monitoring of any sample by ion-selective electrodes usually
requires certain conditioning to be performed on the sample to
allow accurate, trouble-free measurement. Such conditioning
involves regulating flow, controlling temperature and adjusting
chemical composition prior to presentation of the sample to the
point of measurement. This monitor carries out these
adjustments for each parameter in simple and easily understood
steps. The sample is presented from the user's pipework to a
constant head unit and any excess is allowed to overflow. This
allows sample, under controlled pressure conditions, to be
presented to a multi-channel peristaltic pump which proportions
sample and reagent solutions through the monitor to the mixing
point. The resulting combined solution is then temperature
controlled to remove the effects of sample and ambient
temperaturevariations.Theconditionedsolutionisthendelivered
to the flowcell, under constantly flowing conditions, where the ion
measurement takes place. This measurement is carried out
using an ion-selective sensing electrode.
The sensor generates a millivolt output which is proportional to
the ion concentration. This output is processed by the
microprocessor-based electronics section to calculate the actual
sample concentration.
To maintain optimum measurement accuracy it is necessary to
introduce standard solutions of known concentration for
calibration purposes. The monitor utilises solenoid valves to
introduce these standard solutions automatically, at
predeterminedintervals,underthecontrol of the microprocessor.
The electronics section consists of the main Microprocessor Unit
situated at the top left and a User Junction Box at the top right
behind the hinged case.
Fig. 1.1 Location of Instrument Components
1INTRODUCTION
Nitrate 8236
Calibration
Solution
Containers
Constant Head Unit
(behind case)
with Sample Inlet and
Drain Connections
Peristaltic
Pump
Case Lock
Heated
Sensor
Flow Cell
ISE,
Reference Electrode and
Temperature Sensor
Cable Entry Glands
Case Lock
Microprocessor
Unit
Hinged Case
Solenoid Valves
(behind case)
User Junction Box
(behind case)
Hinged Door
Push-to-Release
Latch

3
2.1 Accessories
1 x reagent bottle 1 x nitrate refurbishing kit
4 x calibration bottles 1 x double junction
1 x nitrate inner electrode reference electrode
1 x spares kit
2.2 Location
Themonitorshouldbeinstalledinaclean,dry,wellventilatedand
vibration-free location giving easy access, and where short
sample lines can be used. Rooms containing corrosive gases or
vapours (e.g., chlorination equipment or chlorine gas cylinders)
should be avoided. It is also advisable to have adjacent drains
neargroundlevel,sothatthewasteoutletfromthemonitorcanbe
as short as possible, together with maximum fall. Power supplies
shouldalsobe adjacent.Ambienttemperature:within therange5
to 40°C.
2.3 Mounting – Fig. 2.1
The monitor has a moulded plastic case, mounted onto a flat
metal panel. To provide access, the case is hinged on the left
hand side and has two lockable catches on the right hand to hold
the case in position in normal operation.
One keyhole slot is provided at the top of the flat panel to provide
easy mounting on a wall or framework. Two further fixing holes
areprovided atthe bottomoftheflatpanel.Allholes aredesigned
to take 8 mm bolts or studs.
Mains and signal cables are connected through cable glands in
theUser JunctionBoxon therighthandsidewith theexceptionof
the optional serial interface which connects directly into the
Microprocessor Unit. Sample and drain pipework are brought in
through the bottom of the case.
2.4 Sampling Requirement
In addition to being as close as possible to the monitor, the
sampling point must provide a thoroughly mixed representative
sample. The sample must also conform to the following
conditions:
a) Sample flow rates must be between 5 ml min–1 and
1250 ml min–1.
b) Sample temperature should be within 20 °C of the ambient
temperature and within the range 0 to 40°C.
c) Particles must be less than 10 mg l–1 and the size must not
exceed 60 µm. Above these levels it is essential that the filter
supplied is fitted in both the sample and emergency inlets.
2.5 Sample Connections – Fig. 2.2 (overpage)
The inlet and outlet pipe connections are both located at the
bottom of the case.A6 mm (1/4") hose adaptor is provided for the
sampleinletanda9 mm(3/8")hoseconnectionfor the drains. It is
recommended that the pipes used should be of inert material,
e.g., silicone rubber or p.v.c. The inlet pipe must incorporate a
shut-off valve at its upstream end, while the drain outlet pipes
should be short, venting to atmosphere as soon as possible.
2INSTALLATION
Fig. 2.1 Overall Dimensions and Mounting Details
Junction
Box
60 Top of Case
30
Sample Inlet
& Drain
Tubes
110mm minimum clearance
required for accessto locks
Fixing Centres
Moulded Case
Shown in
Open Position
780
Fixing
Centres
278
482
220
Cable
Entry
Point
188
890
Open
Position
95Max.
angle of
opening 542
235
550
Closed
Position
8mm Keyhole
Slot
8mm Fixing
Holes Top View
Edge of
Case All dimensions in mm

4
…2 INSTALLATION
2.6 Connections, General
Warnings.
•Adisconnecting device such as a switch or circuit breaker conforming to local safety standards must be fitted to the final
installation.Itmustbefittedincloseproximitytotheinstrumentwithineasyreachoftheoperatorandmustbemarkedclearly
as the disconnection device for the instrument.
•Althoughcertaininstrumentsarefittedwithinternalfuseprotection,asuitablyratedexternalprotectiondevice,e.g.a3Afuse
or miniature circuit breaker (m.c.b.), must also be fitted by the installer.
•Remove all power from supply, relay and any powered control circuits and high common mode voltages before accessing
or making any connections.
•The power supply earth (ground) must be connected to ensure safety to personnel, reduction of the effects of RFI
interference and correct operation of the power supply interference filter.
•The power supply earth (ground) must be connected to the earth (ground) stud on the junction box case – see Fig. 2.3.
•Use cable appropriate for the load currents. The terminals accept cables up to 14AWG (2.5mm2).
•The instrument conforms to Mains Power Input Insulation Category III.All other inputs and outputs conform to Category II.
•All connections to secondary circuits must have basic insulation.
•After installation, there must be no access to live parts, e.g. terminals.
•Terminals for external circuits are for use only with equipment with no accessible live parts.
•The relay contacts are voltage-free and must be appropriately connected in series with the power supply and the alarm/
control device which they are to actuate. Ensure that the contact rating is not exceeded. Refer also to Section 2.8 for relay
contact protection details when the relays are to be used for switching loads.
•Do not exceed the maximum load specification for the selected analog output range.
The analog output is isolated, therefore the –ve terminal must be connected to earth (ground) if connecting to the isolated
input of another device.
•If the instrument is used in a manner not specified by the Company, the protection provided by the equipment may be
impaired.
•All equipment connected to the instrument's terminals must comply with local safety standards (IEC 60950, EN61010-1).
Notes.
•Anearthing(grounding)–studterminalisfittedtothejunctionboxcaseforbus-barearth(ground)connection–seeFig.2.3.
•Always route signal output and mains-carrying/relay cables separately, ideally in earthed (grounded) metal conduit. Use
twisted pair output leads or screened cable with the screen connected to the case earth (ground) stud.
Ensure that the cables enter the analyzer through the glands nearest the appropriate screw terminals and are short and
direct. Do not tuck excess cable into the terminal compartment.
•Ensure that the IP65 rating is not compromised when using cable glands, conduit fittings and blanking plugs/bungs (M20
holes). The M20 glands accept cable of between 5 and 9mm (0.2 and 0.35 in.) diameter.

5
2.7 External Electrical Connections – Fig. 2.3
The external electrical connections are to be found in the User
Junction Box with the exception of the optional serial interface
which is connected directly into the Microprocessor Unit. The
cablesarepassedthroughthecableglandsontherighthandside
of the junction box which are adjacent to the internal electrical
terminals.
Caution. Slacken the terminal screws fully before making
connections.
2INSTALLATION…
Fig. 2.2 Suggested Layout
The connections are as follows:
a) Mains input 115 V or 240 V. The mains voltage is selected by
means of the voltage selector – see Fig. 2.3.
b) Currentoutputs1and 2– twoindependent currentoutputs for
external recording or control. One output is supplied as
standard, the second is supplied as an optional extra – see
Fig. 2.4 for details of current output range.
Information. Because the current output is isolated, the
negative terminal must be connected to earth (ground) if
connecting to the isolated input of another device.
c) Relay 1 and 2 – two concentration alarms.
d) Relay 3–calibrationmodeindication.Thisindicateswhenthe
instrument is off line during a calibration.
e) Relay 4 – instrument 'OUT OF SERVICE' indication. This
indicates that the monitor readings are suspect and it is in
need of attention.
f) Relay 5 – 'OUT OF SAMPLE' – indication of loss of sample.
g) Optionalserialinterface–connected intothe Microprocessor
Unit. See supplementary instruction manual for details.
Sample Inlet Pipe
(6 mm i.d.) Drain Tundish
Contaminated Drain pipe
(9 mm i.d.)
Tube wall fixing clips
N.B. Sample, drain and overflow pipework
in flexible silicone rubber or PVC
150 mm
(approx)
Monitor Case
Case Hinge Line Push-on hose connectors
Constant-head unit
250 mm (approximate) length
tubing
to allow the case
to open through 90
Overflow
Drain
Note. It is essential that all
sample pipework to the
monitor is kept as short as
possible to reduce the
effects on the sample due to
the presense of algæ which
can build up. This problem is
particularly acute in the
pipework between the filter
and the monitor because of
the small sample flow. Small
bore tubing is essential, e.g.
6 mm i.d.

6
L
N
N/C
C
N/O
N/C
C
N/O
N/C
C
N/O
N/C
C
N/O
N/C
C
N/O
+
-
+
-
RELAY
1
RELAY
2
CAL
OUT
OF
SERVICE
OUT
OF
SAMPLE
O/P 1
O/P 2
MAINS
INPUT
STD1 STD2
HEATER
230V
MainsVoltage Selector
110V to120V 220V to 240V
User
Cable
Entry
Glands
External
User
Connection
Terminals
Interconnection Cable from/to
Microprocessor Unit and Instrument
Components (wet section)
Internal
Interconnection
Cable Terminals
Solenoid Valves
and Heater
Indicators
Relay
Board
Mains
Transformer
Mains Fuse –
1A, 250V AC (T)
Cable Gland
MAINS
MAINS
F1 250V 1A (T)
PUMP
Mains 'ON'
Indicator
Mains
ON / OFF
Switch
Pump
ON / OFF
Switch
OFF
ON
OFF
ON
230V Position
220V min. to 240V max. AC
50/60Hz
115V Position
110V min. to 120V max. AC
50/60Hz
F2 5A 250V AC (F)
F3 0.5A 250V AC (T)
as shown in Fig. 2.5A. If the instrument malfunctions the value of
the RC network is too low for suppression and an alternative
value must be used. If the correct RC suppressor unit cannot be
obtained, contact the manufacturer of the switched device for
details of the RC unit required.
For d.c. applications fit a diode as shown in Fig. 2.5B. For
general applications use an alternative IN5406 type (600 V peak
inverse voltage at 3 A – part no. B7363).
Note. For reliable switching the minimum voltage must be
greater than 12 V and the minimum current greater than
100 mA.
…2 INSTALLATION
2.8 Relay Contact Protection and Interference
Suppression – Fig. 2.5
If the relays are used to switch loads on or off the relay contacts
can become eroded due to arcing. Arcing also produces radio
frequency interference (r.f.i.) which can cause instrument
malfunctions and incorrect readings. To minimize the effects of
r.f.i., arc suppression components are required; these are
resistor/capacitornetworksfor a.c.applications,ordiodes ford.c.
applications. These components can be connected either across
the load or directly across the relay contacts.
For a.c. applications the value of the resistor/capacitor network
depends on the load current and inductance that is switched.
Initially fit a 100 R/0.022 µF RC suppressor unit (part no. B9303)
Fig. 2.3 Location of User Junction Box Components
Fig. 2.4 Selecting The Current Output Range
Note.ThemainsandpumpON/OFF
switches are situated on the right
hand side of the junction box.
Caution. The AC power supply
ground cable must be connected to
the earth (ground) stud .
Caution. The protective
earth must be connected
to terminal 16.

7
2INSTALLATION
Fig. 2.5 Relay Contact Protection
NC C NO
External
DC Supply +–
Relay Contacts
Load
Diode
NC C NO
External
AC Supply LN
Relay Contacts
C
R
Load
A – AC Applications
B – DC Applications
Fig. 4.1 Nitrate Electrode
3SETTING UP
Note. Beforeproceedinganyfurther,ensurethatallswitches
are set to OFF on the right hand side of the electronics unit –
see Fig. 2.3.
a) Ensure that all external electrical and plumbing connections
have been made correctly.
b) Fillreagentandstandardsolutionbottlesandconnectthemto
the monitor. (See Section 8.1 for details of these solutions.)
c) Fit the probe according to the instructions in Section 8.2.6.
d) Connect the electrical supply and switch on.
Note.Thetemperaturecontrolled blockrequiresupto halfan
hour to reach the normal control temperature. During this
time, ‘Temp. Control Error’ is indicated on the display. Any
calibrations are prevented by the microprocessor during this
time.
e) Verify that there is an adequate supply of sample to the
monitor constant head unit.
f) Fit the pump platen on the peristaltic pumps (see Section
8.2.7) and switch the pumps on with the switch on the side of
the monitor. Ensure that the peristaltic pumps rotate, and
check that sample and reagents are being drawn into the
monitor by observing the progress of any small bubbles
present in the inlet tubes.
g) Runthemonitorfor at leastonehourtoallow the temperature
to stabilize, solutions to be pumped into the system and to
purge the air from the pipework. Check for any leaks around
the pipe connections and rectify as necessary.
h) Ifthe monitor exhibits good stability, i.e. ±2% of reading, carry
out a calibration – see Programming Page.
i) Check the condition of the sample filter and replace it if
necessary.Ensurethatnewfiltersarefittedcorrectlybytaking
note of the flow directions indicated on the filter bodies.
Output
Module 1
Link for the Current
Output required
Output Module 2
(if fitted)
Temperature Input
Module
Input
Module
Protection
Plate
Captive
Screws
0 to 1mA 0 to 10mA 0 to 20mA 4 to 20mA
18181818

8
4LIQUID HANDLING SECTION
4.1 Principle of Operation – Figs. 4.1
ThemonitorusesaNitrateIon–SelectiveElectrodeinconjunction
withadoublejunctionReferenceElectrode.TheNitrateElectrode
is a liquid membrane type sensor employing an ion–exchange
liquid in contact with the sample via a porous membrane. A
reservoir of liquid behind the membrane ensures a constant feed
ofexchanger.An inner central electrode containingagelledfilling
solutionmakesliquidcontactwiththebackofthemembrane.The
inner electrode is connected to main electronic unit via a
screened cable. It is useful to remember that the output from the
sensor is logarithmic with respect to the nitrate ion concentration.
The electro–chemical cell is completed by the reference
electrode, which generates a stable reference potential and is
also connected to the main electronic unit. It comprises a
reference element in a salt bridge container which is in contact
with an outer electrolyte via a porous ceramic junction. The outer
electrolytethencontactsthesampleviaanotherceramicjunction.
Thisdoublejunctionarrangementprotectstheinnerelementfrom
contamination.
Range of measurement can be set to any two consecutive
decades of concentration between 0.2 to 1000 mg l–1 as N or 1 to
5000 mg l–1 as NO3–.
Undertypicalcircumstances, with appropriate standardsolutions
and calibration frequencies, accuracies better than ±5% of
reading or 0.1 mg l–1 as N or 0.5 mg l–1 as NO3–whichever is the
greater, can be achieved.
Fig. 5.1 Electrical Connections Layout
4LIQUID HANDLING SECTION…
Sample
Inlet
Two Channel
Peristaltic Pump
To Electronics Section
Reference
Electrode
Electrode
Flowcell
Drain via
Constant
Head Unit
Heater Sample
Heater Coil
Nitrate
Electrode
Constant Head Unit
Sample / Calibrate
Solenoid Valves
Reagent Solution
Container
Standard
Solution 1
(Low)
Temperature
Sensor
Standard
Solution 2
(High)
SV1 SV2
Overflow
Drain
Contaminated
Drain
Out of Sample
Float Switch
From
Flowcell
Ion
Exchange
Solution
Filling
Aperture
Ion
Exchange
Solution
Bung
Gelled
Reference
Solution
Ag/AgCl
Reference
Electrode
Membrane
Washer
Body
Body Seal
Washer
End Cap
Membrane
Fig. 4.2 Flow Schematic

9
4.2 General Operation – Fig. 4.2
The sequence of events is:
a) Thesampleenterstheconstantheadunitfrombelowandany
excess is allowed to overflow to drain.
The constant head unit is fitted with a float switch to signal an
‘Out of Sample’ condition. This switch is used by the monitor
to initiate the ‘Out of Sample’ alarm.
b) From the constant head unit the sample is drawn through the
normally open ports of the solenoid valves SV1 and SV2 by
one channel of the peristaltic pump.
c) The reagent is drawn through another channel of the
peristaltic pump, and is then mixed with the sample. The tube
diameters are arranged so as to obtain the correct ratio of
sample and reagent.
d) The electrodes are housed in a temperature controlled
flowcell which includes a heat exchanger to remove the
effects of sample and ambient temperature variations. The
electrodepairgeneratesanelectricalpotentialwhenexposed
to the reacted sample which changes in proportion to
changes in concentration of the ion being measured. The
probe is connected to the electronic section where, after
digital conversion, the signal is processed by the
microprocessor.
e) After measurement the sample flows to waste via the
contaminated drain connection.
f) During calibration the monitor introduces two calibration
solutions sequentially in place of the sample by means of the
solenoid valves SV1 and SV2.
Fig. 5.2 Location of Controls, Displays and L.E.D.s
Flow Cell
Heater Block
Heater
Control
Microprocessor Unit User Junction
Box Mains Supply – see Fig. 2.3
Concentration Alarm Relays
Calibration Mode Relay
Out of Service Relay
Current Outputs
Out of Sample Relay
External
User
Connections
External
Serial
Interface
Connections
Reference
Electrode
Ion-Selective
Electrode Sample/Calibrate
Soleniod Valves
Interconnection
Cables
Out of Sample
Float Switch Pump and
Stirrer Motors
Liquid Handling
Section
Protective Earth
…4 LIQUID HANDLING SECTION 5ELECTRONICS SECTION
5.1 Electronic Layout – Fig. 5.1
The electronic section comprises two separate sections:
•The User Junction Box at the top right hand side.
•The Microprocessor Unit at the top left hand side.
5.2 User Junction Box
TheUserJunctionBoxcontainstherelaysfortheheater,solenoid
valvesandalarms,andalltheuserexternalconnectionterminals,
with the exception of the serial interface (if fitted).
Once installed there should be no need to remove the junction
box cover on a regular basis. However, to assist in any fault
finding procedure, there are l.e.d's on the p.c.b. to indicate if the
relays and heater are being energised.
Switches for the mains and pump/heater are situated on the right
hand side of the junction box, together with a mains indication
lamp and mains fuse – see Fig. 2.3.
Two additional fuses (F2 and F3) are located within the junction
box. These are connected in the 24VAC circuits.
5.3 Microprocessor Unit
TheMicroprocessorUnitcontainstheanalogueinputprocessing,
microprocessor, alarm and current output generation, and (if
fitted) the serial interface output.
The programme controls, digital and dot-matrix displays, alarm
indication and status l.e.d's are all mounted on the front panel of
the microprocessor unit.

10
5.4 Front Panel Controls – Fig. 5.2
The programme controls comprise eight tactile membrane
switches. These switches are situated behind a hinged door
below the display, access is via a screwdriver-operated catch. In
normaloperationthe switchesareused to viewthemeasured ion
concentration value, initiate a manual calibration, or to activate
the 'alarm hold' facility.
When programming, the switches are used to sequence through
aprogrammingprocedureasdetailed.Theprocedureissetoutin
programmingpagesfor Input, CurrentOutput,Alarms, RealTime
Clock and Monitor Calibration. Each programme page contains
the programme functions, the values or parameters of which are
programmable.
Switch functions are as follows:
Used for viewing the fluoride concentration, electrode
mVoutput,flowcellcontroltemperature,sensorslope,
date,time,the timetothe nextcalibrationand the time
from the last calibration.
Used to enable or disable the automatic calibrations,
enter the standard solution values and manually
initiate a calibration sequence. Operating ‘Cal’
during a calibration aborts the sequence and returns
to normal operation.
Used to inhibit any change in the alarm relay/l.e.d.
statusandthestartofanyautocalibration.Thefeature
is used during maintenance (‘Hold’ l.e.d. illuminated).
Note. If the ‘Hold’ facility is inadvertently left
switched-in, it is automatically cancelled after a
period of approximately 3 hours has elapsed.
Usedforstoringtheprogrammedfunctionparameters
and values in the instrument’s nonvolatile memory.
Note. The instrument responds instantly to any
programme change but the new value is lost in
theeventofapowerinterruptionifithasnotbeen
‘Entered’.
Parameter Advance – used for selecting a particular
parameter from a programme page.
Used for increasing or decreasing a parameter value
or stepping up or down through a selection of
parameters applicable to a particular function.
Note.Continued pressure on the ‘Raise’ or
‘Lower’switchescausestherateofchangeofthe
displayed value to increase. To make small
adjustments, operate the switches momentarily.
Page Advance – used, via the security code, for
selection of individual programme pages.
5-digit Display
(Concentration)
Alarms Hold Cal Fail
12
Hold
Cal EnterMode
20-character
Dot-Matrix Display Alarm and Status
L.E.D.s
Connections
Cover
Fig. 6.1 Overall Programme Chart
Mode
Cal
Hold
Enter
5.5 Displays – Fig. 5.2
Two blue vacuum fluorescent displays are provided:
a) The upper is a 5-digit 7-segment type display which indicates
the measured variable.
b) The lower is a 20-character dot matrix type which provides
user information during setting up and in normal operation.
5.6 L.E.D. Indication – Fig. 5.2
There are five l.e.d's (indicators situated between the two
displays) which provide information on the current status of the
monitor. From left to right the indicators are as follows:
Used to indicate a concentration alarm state (either
high or low). This indicator is used in association with
an external alarm relay output.
Used to indicate when the ‘Hold’ button has been
operated.
Indicateswhen acalibrationsequence istakingplace.
Indicates when the monitor was unable to carry out a
successful calibration.
A1or A2
Hold
Cal
Fail
…5 ELECTRONICS SECTION

11
6PROGRAMMING
Table 6.1 Relay Action and Alarm Indication
Note 1.
‘Cal Date’ is the date when the first calibration is due and is updated every time an automatic
calibration is carried out, i.e ‘Cal Date’ = autocal date + ‘Cal Interval’.
Note 2.
‘Cal Time’ is the time of the day when the autocalibration is required.
Note 3.
Operating during a calibration aborts the sequence and returns the system to normal operation.
‘Next AutCal’ is the date of the last automatic calibration + the calibration interval ‘Cal interval’. If
the instrument has been switched off, the next ‘AutCal’ is the present date + the ‘Cal interval’. If the
‘AutCal’ is switched off, ‘OFF’ is displayed on the 20-character display.
Note 4.
‘Last Cal’ is the date of the last automatic or manual calibration.
Nitrate <unit>
Millivolts
Control Temp
Slope
Date
Time
Next AutCal
Last Cal
SECURITY CODE 0 SET UP INPUT
Control Temp.
SET UP TEMP. CONTROL
Cycle Time
Prop. Band
Integral Time
CAL USER CODE 0
CURRENT OUTPUT
OP1 Cal Hold
Op1 Law.
OP1 FSD
OP1 Zero
OP2 Cal Hold
OP2 Law
OP2 FSD
OP2 Zero
Test Output Zeros
Test Output FSD
Alter Sec. Code
% Output
SET UPALARMS
A1 Enabled
A1 Action
A1 Failsafe
A1 Hysteresis
A1 Delay
A1 Setpoint
A2 Enabled
A2 Action
A2 Failsafe
A2 Hysteresis
A2 Delay
A2 Setpoint
SET UP CLOCK
Set Clock?
Set Year
Set Month
Set Day of Month
Set Hours
Set Minutes
Cal Date
Cal Time
Cal Interval
CALIBRATION
mV Zero
mV FSD
Temp. Zero
Temp. FSD
Adjust Output 1 Zero
Adjust Output 1 FSD
Adjust Output 2 Zero
Adjust Output 2 FSD
Cal Time 1
Cal Time 2
Cal Time 3
Cal User Code
or
Note 4
Note 5
Lin
Lin
No
Incorrect
Code
Note 1
Note 2
Enable Auto Cals
MANUAL CAL SEQUENCE
Ion Std 1
Ion Std 2
Initiate Cal.
Calibrating Std 1
Calibrating Std 2
CALIBRATION PASSED
CAL. FAILED (SLOPE)
CAL. FAILED (SLOW)
Electrode mV
Electrode mV
No
or
or
xx.xC
DD:MM:YY
HH:MM:SS
xxx.x%
– –
•
–C(Yes/No)
(Log/Lin)
•
–
•
– –
(Yes/No)
(Log/Lin)
–
•
– –
0
– – –
•
–
(Yes/No)
(Yes/No)
(High/Low)
– %
– – m
(Yes/No)
(Yes/No)
– –
•
– –
(High/Low)
– %
– – m
(Yes/No)
– –
– –
– –
– –
– –
– –
– –
– Days
(Y/N)
(Yes/No)
– –
– – –
– – – –
– –
•
–
– –
•
–C
– – –C
– –m
– –m
– –m
0
DD:MM:YY
DD:MM:YY
No
No
Operating Page 1
Operating Page 2
Mode
Cal
– – – –
•
– – – –
– – – –
•
– –
•
–
•
–
•
– –
– – – –
•
– – –
•
– – –
•
Incorrect Code
Note 5.
Cal
xx.xmV
Calibration Std 1
Calibrating Std 2
Cal
Cal
*
*
See Note 3
Ion Units (Units)
Display as N?
– – – –C
•
Display FSD – –C
•
Display Zero –

12
…6 PROGRAMMING
6.1 Normal Operation
In normal operation (Operating Page 1) the lower, dot matrix,
display gives indication of the units of measurement, millivolt
value, sensor slope and time. Selection is made using the
switch. Operation of the
Cal
switch gives access to a second
Operating Page (Operating Page 2) in which the standard
solution values can be set and a manual calibration can be
initiated.Eitherpagecanbeselectedatanytimebyusingthe
Mode
or
Cal
switches.
6.2 Programming Pages
Operation of the switch enables a series of 'programming'
pages to be displayed. Unauthorised entries to this page are
inhibitedbya5-digitsecuritycodewhichisdisplayedimmediately
after the page header.
Intheprogrammingpages,displayedvaluesindicated‘xxxxx’are
for viewing only and cannot be altered by the operator. Displayed
values indicated ‘– – –’ can be altered using the and
switches.When thedesired readingis displayed,operate the
Enter
switch.Thel.e.d'sflashmomentarily,toindicatethatthevaluehas
been stored in the nonvolatile memory. Although the instrument
appearsto operatesatisfactorily,if the
Enter
switch isnotoperated,
in the event of power interruption, the programmed values are
lost. If previously programmed values are to be viewed only, it is
unnecessary to operate the
Enter
switch.

13
6PROGRAMMING…
6.2.1 Operating Page 1
The values displayed in Operating Page 1 are for viewing only and cannot be altered in this page.
Nitrate <Unit>
Millivolts
Control Temp
Slope
Date
Time
Next AutCal
Last Cal
SECURITY CODE -----
or
xx
•
x
C
xxx
•
x
%
or
Mode
or
Mode
or
Mode
or
Mode
or
Mode
or
Mode
or
Mode
or
Mode
xx
•
xmV
DD:MM:YY
HH:MM:SS
DD:MM:YY
DD:MM:YY
Measurement Units
The measurement units are displayed, e.g. Nitrate ppm.
Advance to next parameter.
Sensor Output
The sensor output is displayed in millivolts.
Advance to next parameter.
Control Temperature
The heater block control temperature is displayed in degrees Celsius.
Advance to next parameter.
Slope Check Value
The slope value should be between 70 and 110%. If the value is outside these
limits check the electrode.
Advance to next parameter.
Date
The date is displayed.
Advance to next parameter.
Time
The time is displayed.
Advance to next parameter.
Next Calibration Date
Thedatewhenthenextautomaticcalibrationisto be carried out is displayed. If the
automatic calibration is disabled, ‘OFF’ is displayed in place of the date.
Advance to next parameter.
Last Calibration Date
The date of the last automatic or manual calibration is displayed.
Return to top of Operating Page.
or
Advance to Security Page (Section 6.2.3).

14
…6 PROGRAMMING
6.2.2 Operating Page 2
To gain access to the Calibration Page (Operating Page 2), operate the
Cal
switch.
Enable Automatic Calibrations
Select ‘Yes’ to enable or ‘No’ to disable the automatic calibrations.
Store.
Advance to next parameter.
Page header.
Advance to next parameter.
Ion Standard 1
Set the value of the ‘Low’ standard solution (Std 1).
Store.
Advance to next parameter.
Ion Standard 2
Set the value of the ‘High’standard solution (Std 2). The concentrations of the two
standard solutions must differ from each other by a factor of at least four.
Store.
Advance to next parameter.
Initiate Calibration (manual)
Select ‘Yes’ to carry out a manual calibration or ‘No’to return to the top of the page.
Enter must be pressed to initiate a manual calibration.
Calibrating Standard 1
The upper display shows the nitrate concentration value. The display remains until
a stable output is obtained from the probe.
Toggle between the two displays.
Electrode Millivolts
Note. Pressing
Cal
during a calibration aborts the sequence and returns to
normal operation.
When a stable probe output is detected the display automatically advances to the
next parameter.
Continued on next page.
No
Enable Auto Cals Yes
No
MANUAL CAL SEQUENCE
Ion Std 1
or
Ion Std 2
or
Initiate Cal Yes
No
Yes
Calibrating Std 1
Electrode mV
–
•
– –
Enter
Cal
Cal
Enter
Cal
Enter
Cal
Enter
– –
•
– –
– –
•
–
or
or
Cal

15
6PROGRAMMING…
…6.2.2 Operating Page 2
Continued from previous page.
6.2.3 Security Code Page
A security code is required to gain access to all subsequent programming pages. The code is preset at the factory to ‘0’ but can be
changed if required in the Current Output Page – see Section 6.2.5.
Security Code
Set the correct security code.
Advance to the first of the programming pages – Set Up Input Page.
Return to Operating Page 1.
Incorrect code.
or
SET UP INPUT
Security Code -----
Nitrate <Units>
CALIBRATION PASSED
or
CAL FAILED (SLOPE)
or
CAL FAILED (SLOW)
or
Mode
Calibrating Std 2
Electrode mV – –
•
–
Cal
Nitrate <units>
Calibrating Standard 2
The upper display shows the nitrate concentration value. The display remains until a
stable output is obtained from the probe.
Toggle between the two displays.
Electrode Millivolts
The probe output can also be displayed during calibration
Note. Pressing
Cal
during a calibration aborts the sequence and returns to
normal operation.
Whenastableprobe output is detected thedisplayautomaticallyadvancesto the next
parameter.
Calibration Passed
A satisfactory calibration has been carried out.
or
Calibration Failed (slope)
The monitor was unable to obtain an adequate slope value during calibration. The
slope value required is 70 to 110%.
or
Calibration Failed (slow)
The monitor was unable to obtain a stable output from the probe during calibration.
Return to top of Operating Page 2.
or
Return to Operating Page 1.

16
…6 PROGRAMMING
6.2.4 Set Up Input Page
Page header.
Advance to next parameter.
Control Temperature
Set the required block control temperature within the range 5 to 45 °C in 0.1 °C
increments.
Store.
Advance to next parameter.
Display Type (Nitrogen or Nitrate)
Select display as Nitrogen (N) or Nitrate (NO3–).
Enter
SET UP INPUT
Control Temp
or
Ion Units mg/kg
mg/l
ppm
C
Enter
CURRENT OUTPUT
or
––
•
–
Display Zero ––
•
–
Enter
Display FSD ––
•
–
Enter
Display as N?
Nitrate?
Enter
or
or
Store.
Advance to next parameter.
Ion Units
Select the required display units for ion concentration.
Store.
Advance to next parameter.
Display Zero
Set the required value for display within the ranges: nitrate…1 to 50, or nitrate (as
nitrogen…0.2 to 10.0.
Store.
Advance to next parameter.
Display Full Scale
The full scale value is automatically set at two decades above Display Zero.
Example– If the setting is 1.0 the full scale is automatically set to 100.0.
Store.
Return to top of Set Up Input Page.
or
Advance to Current Output Page.

17
6PROGRAMMING…
6.2.5 Current Output Page
The current output is assigned to the nitrate concentration but is only operative if the relevant output modules are fitted – see Fig. 2.4.
Log
Lin
CURRENT OUTPUT
OP1 FSD
OP1 Cal Hold
OP1 Law
OP1 Zero
Yes
No
or
Lin
Log
––– • –
–•– –
or
or
Enter
Enter
Enter
or
Enter
Page header.
Advance to next parameter.
Output 1 Calibration Hold
Current Output 1 can be held during calibration, if required. Select ‘YES’ or ‘NO’.
Store.
Advance to next parameter.
Output 1 Law
Current Output 1 can be either logarithmic or linear. Select ‘Log’ or ‘Lin’.
Store.
Advance to next parameter.
Output 1 Full Scale
Current Output 1 full scale range: 10 to 5000 mg l–1 as NO3–or 2 to 1000 mg l–1 as N,
i.e. minimum span is 1 decade.
Set the required concentration value for Current Output 1 full scale.
Store.
Advance to next parameter.
Output 1 Zero
Set the required concentration value for Current Output 1 zero.
Note. If the output 1 Law is linear (Lin), this parameter is omitted and the zero
current output is automatically set to ‘0’.
Store.
Advance to next parameter.
Continued on next page.

18
…6 PROGRAMMING
Enter
Log
Lin
OP2 FSD
OP2 Cal Hold
OP2 Law
OP2 Zero
Yes
No
or
Lin
Log
–•– –
or
or
Enter
Enter
or
Enter
– – – •–
…6.2.5 Current Output Page
Continued from previous page.
Output 2 Calibration Hold
Current Output 2 can be held during calibration, if required. Select ‘YES’ or ‘NO’.
Store.
Advance to next parameter.
Output 2 Law
Current Output 2 can be either logarithmic or linear. Select ‘Log’ or ‘Lin’.
Store.
Advance to next parameter.
Output 2 Full Scale
Current Output 1 full scale range: 10 to 5000 mg l–1 as NO3–or 2 to 1000 mg l–1 as N,
i.e. minimum span is 1 decade.
Set the required concentration value for Current Output 2 full scale.
Store.
Advance to next parameter.
Output 2 Zero
Set the required concentration value for Current Output 2 zero.
Note. If the Output 2 Law is linear (Lin), this parameter is omitted and the zero
current output is automatically set to ‘0’.
Store.
Advance to next parameter.
Continued on next page.
Table of contents
Other ABB Measuring Instrument manuals

ABB
ABB ZEE600 User manual

ABB
ABB VortexMaster FSV430 Installation instructions

ABB
ABB EL3000 Series User manual

ABB
ABB LWT300 series User manual

ABB
ABB aquamaster s User manual

ABB
ABB ICOS GLA151 Series User manual

ABB
ABB AX410 User manual

ABB
ABB PFEA 111 User manual

ABB
ABB Endura AZ20 series User manual

ABB
ABB 8002 User manual