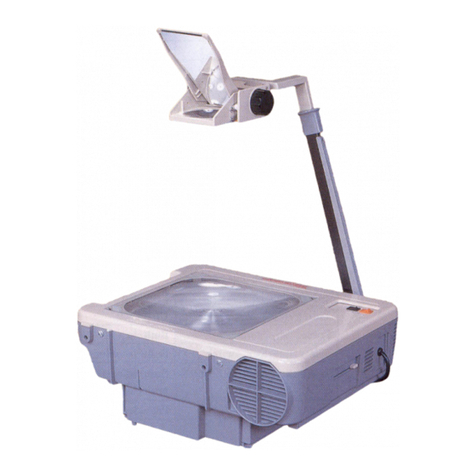
Elmo k-100sm User manual

INSTRUCTION
MANUAL
BEDIENUNGSANLEITUNG
MODE
0'
EMPLOI
MANUAL
DE
INSTRUCCIONES
LIBRETTO
01
ISTRUZIONI
BRUKSANVISNING
GEBRUIKSAANWIJZING

1
IMPORTANT
SAFEGUARDS
When
using
your
photographic
eq
uipment,
basic
safety
precautions
should
al
ways
be
followed,
inc
ludin
g
the
following:
1.
Read
and
understand
a
ll
in
str
u
ctions
.
2.
Cl
ose
supervision
is
necessary
when
any app
li
ance
is
used
by
or
near
ch
ildr
en. Do
not
l
eave
app
li
ance
unattended
while
in
use.
3.
Care
must
be
taken
as
burns
can
occ
ur
from
touch-
ing
hot
parts.
4.
Do
not
operate
appl
iance
with
a
damaged
cord
or
if
the
appliance
h
as
been
dropped
or
damaged
-u
nt
il
it
has
been
examined
by a qua
lifi
ed
serviceman
.
5.
Do
not
let
cord
hang
over
edge
of
tab
le
or
counter
or
touch
hot
surfaces
.
6.
If
an
extens
ion
cord
is
necessary,
a
cord
with
a
suitab
le
current
rating
shou
ld
be
used
.
Cords
rated
for
less
amperage
than
the
appliance
may
overheat
.
Care
should
be
ta
k
en
to
arrange
the
cord
so
that
it
will
not
be
tripped
over
or pu
ll
ed
.
7.
Al
ways
unplug
appl
iance
from
e
le
ctr
i
ca
l o
utl
et
when
not
in
use.
Never
yank
cord
to
pull
plug
from
outlet
.
Grasp
plug
and
pull
to
disconnect.
8.
Let
appl
i
ance
cool
complete
ly
before
putting
away
.
Loop
cord
l
oose
ly
around
appl
iance
when
storing.
9. To
prot.ect
against
electrical
shock
hazards,
do
not
Imm
erse
th
is
appliance
in
water
or
other
1
iquids.
10.
To
avoid
electric
shock
hazard,
do
not
disassem-
ble
this
appliance,
but
take
it
to
a
qualified
serviceman
when
some
service
or
repair
work
is
required.
Incorrect
reassembly
can
ca
u
se
el
ectr
ic
shock
hazard
when
the
appl
iance
is
used
subse
-
quently.
SAVE
THESE
INSTRUCTIONS

WICHTIGE
SICHERHEITSHINWEISE
Bevor
Sie
den
Mehrformatprojektor
ELMO
K100SM
bedienen,
so
llt
en
Sie
die
fo
lg
enden
Sicherheitshinweise
beachten
:
1.
Inf
ormieren
Sie
sich
anha
nd
dieser
Bedi
enungsanleitung
eingehend
li
ber
die
Bedienung
des
Pro
j
ektors
.
2. We
nn
Kind
er
in
der
Nahe sind,
sollten
Sie
den
Projektor
nicht
unb
eau
fsich
ti
gt
l
ass
en.
3.
Fassen
Sie
die
Meta
llt
eile in
der
Nahe
der
Pr
oj
ekt
ionslampe
nicht an, S ie konnten s ich
verb
re
nn
en.
4. Achten
Sie
darauf,
de,B
das
Netzkabel
nicht
durch
sc
h
arfe
Kanten
oder
hei
,Be
Flachen
beschadi
gt
wird. Flihren S ie
das
Kabel
so
zum
Stromnetz,
da,B
man nicht
dariiber
sto
l
pert
un
d
den
Projektor
yom
Ti
sc
h
re
i
,Bt
.
5. N
ur
Verlangerungskabel
mit
Erdl
e
iter
benlitzen und
se
ine
Lange
ri
chtig
bemessen
.
6.
We
nn
der
Pro
j
ekt
or
nicht
benutzt
wird,
das
Netzkab
el
aus
der
S
te
ck
dose
nehmen.
7.
Sollt
e
der
Pro
jek
tor
durc
h S
to,B
oder
Fa
ll
beschadigt
werden,
so
benut
zen
Sie
das
Gerat
erst
wieder
nachdem
es
von e
in
em
Fac
h·
mann ge
prlift
und
instandgesetzt
wurde
.
8. L
assen
Sie
den
Pr
ojek
to
r
erst
abklihlen,
beY~r
Sie ihn zusammen·
pac
ken und
wegstellen
.
9. Um
si
ch
vor
einem
elektr
ischen
Schlag
zu schlitzen, diirfen
Sie
das
Gerat
nie
mi
t
Wasser
o
der
anderen
Fllissigkeiten
in
Beriihr
·
ung
bringen.
10. L
assen
Sie
eve
ntuell
anfa
llende
Reparaturen
nur
von einem
Fach
·
mann
ausflihren.
Dur
ch eine ni
cht
ric
h
tig
ausgefiihrte
Repar
atur
setzen
Sie
si
ch
der
Gefahr
ei
nes
e-lek
tr
ischen
Sch
l
ages
aus.
11. Ve
rw
ah
ren
Sie die
Bed
i
enungsan
leitung
gut
,
damit
Sie zur Hand
ist, wenn sie
gebraucht
wi
rd
.
12. Lliftung
so
ffnungen
freiha
l ten.
CONSEllS
IMPORTANTS
Lorsque
vous
utilisez
votre
apparei
l de
pro
j
ect
ion, il f
aut
toujo
ur
s
veiller
a
respecter
l
es
points
suiv
ants
:
1.
Lire
et
ass
imil
er
Ie
mode
d'e
mp
loi
dans
Ie
detail.
2.
Surve
ill
er tr
es
attent
iv
eme
nt
to
ut
es
les ma
nipulation
s lor
sq
ue Ie
mater iel
est
employe
par
des
enfants
ou
en
le
ur
presence
.
Demeurer
a
proximite
durant
toute la
pro
j
ect
ion.
3.
Certaines
part
i
es
de l
'appare
il
(capot
de la
lampe)
cha
uffent
fortement
en
cours
de
projection
et
peuvent
occasionner
des
brGlures
.
4.
Ne
pas
essayer
de
faire
f
onct
io
nner
l'app
are
il
s'il
a r
ec
u
un
choc
im
portant
(c
hu
te
) ou s'i1 a
ete
endo
mm
age.
De
meme, ne
pas
se
serv
ir
d'un
cordon
de
li
aison
au
secteur
qu i a
ete
endommage.
Se
renseigner
d'abo
rd
aupres
d'un
technicien
qua
l
if
ie.
5.
Ne
pas
lais
ser
'
pendre
Ie
cordo
n
secteur
sur
I'arete
d'une
tab
le
ou d
'un
meuble.
Eviter
so
igneu
se
m
ent
qu'il
e
ntre
en
contact
avec
une
surface
chaude
. ?
6. Si l'
usage
d'un
pro
lon
gateur
s'ave
re n
ecessa
i
re,
vei
ll
er
a
ce
qu'il
soit
d'une
sect
ion
suff
i
sante
po
ur
supporte
r Ie
passage
de
I'int
ens
ite
r
ecla
mee
par
Ie
pro
j
ecte
u
r,
sans
chauffer.
Po
r
ter
un
e
particu
li
ere
attention
a
sa
dispos
i
tion
sur
Ie
sol
de maniere
a
ce
qu'il
ne
puisse
etre
arrache
ou pi
et
in
e.
7.
Ve iller a
debrancher
Ia fiche du
secteur
I
orsq
ue
I'appar
eil
n'est
pas
employe.
Ne
jamais
exerce
r de
tract
ion
sur
Ie fil,
mais
touj
ours
s
ur
la
fi
che
el
le-meme po
ur
Ie
debrancher
.
8.
La
i
sser
refr
oid
ir
ent
ierem
e
nt
Ie
pr
o
jec
te
ur
avant
de
Ie
ra
n
ger
.
Enrouler
Ie
cordo
n
secteur
sa
ns Ie
serrer.
9. L
es
fiches
du
cordon
sect
e
ur
doi
vent
toujours
etre
parfaite
ment
seches
pour
ev
i
ler
tout r i
sque
de choc el
ectr
ique ou de cou
rt
-
c
ir
cu it.
10
.
Pour
l
es
me
me
s
raisons,
ev
i
ter
de
demonter
I
es
fiche
s du
cab
le
ainsi
d'ailleurs
que
le
s
parties
du
projecteur
qui ne
so
nt
pas
normalement
access
ibl
es
.
Le
m
ater
iel
defectueux
do
it
et
re
confie
a
un
tec
hni
cien
qua
lifi
e.
RESPECTER
TOUT
PARTICUllEREMENT
CES
INSTRUCTIONS
2

3
MEDIDAS
IMPORTANTES
A TENER
EN
CUENTA
Al ut
ilizar
su
equipo f
otograf
ic
o,
de
ben
adoptarse
unas
precauciones
basicas
de
seguridad
que incluyen 10 s igu i
ente
:
1.
L
ea
y
ent
i
enda
bien
todas
la
s ins
tr
u
cc
i
ones
.
2.
Se
impone una
cuidadosa
revis
ion de los
aparatos,
cuando
ha
ya
n
podido
ser
tocados
0 uti
li
zados
por
los
n
i
n~s
.
No
pierda
de
vi
sta
ninguna
parte
de su equipo mi
entras
esta
tr
aba
jando con
e1.
3. Debe
tener
cuidado
de no
quemarse
al
tocar
ci
ertas
pi
ezas
que
se
suelen
ca
lentar
.
4.
No
utili
ce
el
proyector
con un
cordon
averiado
, 0
si
el
aparato
ha s
ufrid
o una
ca
ida, 0
si
ha
side
en
algu
na fo
rma
danado,
h
asta
que 10 examine un
tecnico
cualif
i
cado
.
5. 0
deje
que
el
cordo
n
se
apoye en
el
borde
de
la
mesa
0 m
ost
ra
·
d
or
0 toque l
as
superfic
ies
ca
lien
tes
.
6.
Si
hace
falta
un
cordon
de
extens
io
n,
la
capacidad
conductora
d
el
mismo ha de
estar
de
acuerdo
con
la
corr
i
ente
que
este
utilizand
o. L
os
cables
calculados
para
un
amperaje
inferior
al
del
aparato,
sue
len
recalentarse
.
Cuide
de i
nstalar
el
cordon
de
ta
l
manera
que no pueda
trop
ezar
~ e
0 t
ir
arse
de e
1.
7.
No
desenchufe
nunca el
aparato
mientras
esta
funcionando, ni
de un
tiron
al
cordon
para
saca
rl
o del enchufe; a
garr
elo de
la
cl
av
ija y
tire
de
ella
para
de/senchufa
r.
8. De je que el
aparato
se
enfrie
tota
lmente
antes
de gu
ardarlo
.
Enlace
£lojo
el
co
rd
on
alrededor
del
aparato
,
al
recoger
lo.
9. Como
protecc
ion co
ntra
l
os
riesgos
de una
descarga
e
l
~ct
ri
ca
,
pr
oc
ure
evitar
en el ap
ara
to
el
con
tacto
del a
gua
u
otros
liqui
dos
.
10. P
ara
ev
it
ar
tam
bien
dichos
rie
sgos, no
desarme
u
ste
d el
ap
a
r~to;
mej
or
que 10 hage un
tecnico
cualif
i
cado
, cuando
por
averia
u
otras
ca
u
sas
sea
n
ecesar
io.
GUARDE ESTAS
INSTRUCCIONES
PRECAUZIONI
IMPORTANTI
Quando si u
sa
un
pro
i
ettore
cinem
atograf
ico debbono
se
mpr
e
esse
re
segu
ite Ie
opport
une
precauz
ioni di s i
curezza,
ivi incluse Ie
seg
uenti:
1.
Leggere
attentamente
tutte
Ie i
struz
ioni.
2.
E'
necessario
mantenere
una
stretta
sorveg
lianza, quando
l'
ap-
parecchio
viene usato
da
0
vicino
a bambini.
Non
lasciate
adit
o
a
lac
un
e ci
rca
ec
i
struz
ioni
depp'uso
de-I
pro
i
ettore
.
3.
Si deve f
are
la
massima
attenz
ione nee
toccare
parti
bollent
i che
possa
no
provocare
u
stion
i.
4.
Non
effettuare
proiezioni
con il filo della
presa
sfilacc
i
ato
e
non
usar
e il
pro
i
etto
re quando f
os
se
cad
uto 0
danneggiato,
finche
non
sia
state
oppo
rtun
amente
ver
ifi
cato
nee
un
esperto
di fiducia
della
casa
.
5.
Non
lasciate
che il filo
della
corrente
rimanga
sospeso
o
ltr
e 10
spigolo
de
l
tavolo
0 a con
tatto
di
superfici
bollenti.
6.
Se
si
deve
usar
e un filo di
pro
lunga,
bis
ogna
prima
ver
ifi
care
che sia di
amperag
gi
o adegu
ato
alla
tens
ione
della
ret
e. Infa
tti
i
fili
di min
or
amperaggio
di quello che
sarebbe
necessar
io
applicare,
subiscono una
tens
ione
eccessiva
.
Usate
la
mass
ima
dil
i
genza
per
sistemare
i
fili
della
cor
rente
elettrica
, fi
ssa
ndo
li
eventua
lm
ente
con
nastr
o
ades
ivo
cosicche
non divengano
causa
dl
incia
mp
o e qu indi di
strapp
i.
7. Rico
rdarsi
sempre
di
staccare
la
spina
quando non
si
u
sa
corre
nte. Non
dare
mai
strattoni
al filo della
corre
nte
per
togl
iere
la
sp
ina
dalla
pre
sa
. Affe
rr
are
in
vece
la
sp
ina e tog-
lierla
dalla
pre
sa
.
8. L
asc
i
ate
raffreddare
co
mpletament
e il
pr
o
iett
o
re
p
rim
a di
ac
-
c
ingervi
a r ipo
rl
o. S
taccate
il
filo
de
lla
corrente
e
arroto
la
te
lo
attorno
al
pr
oietto
re
quando 10
state
ri
ponendo.
9. A
protez
ione di
risch
i
ose
scosse
ele
ttrich
e bi
sogna
evitare
che
Ie
att
r
ezzature
vengano a
contatto
di
acqua
0
di
a
lt
ri
liquidi.
10.
No
n sm
ontate
ma i
da
so
li
il
vostro
proiettore
. Quando
fo
sse
necessario
eff
ettua
re qualche l
avoro
di
riparaz
ione, affid
ate
lo
al
serv
izio di
riparazion
i de
lla
Casa
rappresentante
. Uno
scor
-
re
tt
o
rim
o
ntaggi
o
PUQ
esse
re
ca
u
sa
di
ris
chi
os
e
scosse
ele
ttri
che
quando
l'
apparecc
hio veni
sse
in
seguito
usato.
OSSERVATE QUESTE
ISTRUZIONI

VIKTIGA
SKYDDSATGARDER
AlI
tid
nar
det
ga
ll
er
foto
gra
fi
sk
utrustning
ska
ll man
for
st
st
uder
a
b
ruksanv
isningen.
1.
La
s och
lar
dig
for
s
ta
b
ruks
anvi
sning
en.
2.
Extra
fors
i
ktig
h
et
bor
iaktag
as
om
appa
rat
en anvand
es
av
barn
ell
er
i
dess
narhet.
Uimna
a
ld
r ig
barn
ensamma
med en
projektor
som
gar
.
3.
Fors
iktigh
et
b
or
i
aktagas
nar
apparate
n
kors
oav
brut
et
en l
angre
tid da den
givetvis
bl
ir nagot var m.
4.
Kor
inte p
ro
jek
torn
med
skadad
kabel e
ll
er
om app
araten
fall
it
i gol
vet
e
ll
er
pa
annat
satt
s
kadats
utan
att
f
orst
l
ata
ko
ntrollera
den
av
var
serv
i
ce
man.
5.
L
at
inte
natkabe
ln hanga
over
vas
sa
kanter
elIer
komma i k
ontakt
med
heta
ytor.
6. Om f
or
langning
skabel
ar nodvandig,
anvand
godkand
sadan
och
t
ill
rack
li
gt
kra
ftig.
En
alltfor
tu
nn
kan bi!
va
rm
.
Var
a
kt
sa
m
om
den
. Sl
it
inte i kabeln.
7. Tag alI
tid
ut n
atkabe
ln
eft
er
avs
lu
tad
pro
je
kti
o
n.
Dra
i
nte
i
kabeln utan
tag
i
st
ic
kpr
oppen
ordent
ligt,
nar
natkabeln
ska
ll
av
l
agsnas
fran
vaggen.
8.
Lat
apparaten
kalIna
helt
innan den
transporteras
.
Linda
ihop
kabeln lagom l
ost
i
vaskan.
9.
Projektorn
far
inte komma i n
ar
h
ete
n
av
vatte
n elI
er
andra
vatskor.
10.
Skruva
i
nt
e
isa
r
pr
ojek
torn
s jalv om
det
sku
ll
e
bli
nodvandi
gt
m
ed
nagon
ser
vi
ce
. Vid
eget
ingrepp
upphor
gara
ntin
att
gall
a.
Lamna den alltid till utbildad ser.:vi
cepersona
l.
SPAR
DENNA
BRUKSANV
I
SNING
VElllG
PROJECTEREN
Voor
en tij
dens
het
gebru
ik van de
pr
oj
ecto
r moeten
altijd
bep
aa
lde
voorzorgsma
atr
ege
len
worden
genomen, en weI de volgende:
1.
Lees
de
gebruiksaanwi
jzing in h
et
geheel
goed do
or.
2.
Direk
te
co
n
tro
le op de
apparat
uur
is noodzakelijk
wanneer
deze
door of
in
de
buurt
van
kinderen
wordt
gebru
ikt. B
lijf
bij
een
pro
j
ector
wanneer
deze
in
werk
ing is.
3. Aa
nr
aking
va
n
war
me delen kan
bra
ndwonden
veroorza
ken.
4.
Gebr
uik de
pr
oj
ec
t
or,
als h
ij
is
geva
ll
e
n,
beschad
igd of
voorzien
is
van
ee
n ondeugdelijk n
ets
noer,
niet
eerd
er
dan
nadat
hij
door
ee
n
terzakekundige
of in e
rnstig
e
geva
lIen
door
de
te
chni
sc
he
dienst
van Elmo is
ge
cont
ro
leerd
en
eventueel
ger
eparee
rd.
5.
La
at
het
snoer
niet
over
een
sc
h
erpe
kant
van de
tafe
l h
angen
of in
aanrak
ing komen
met
wa
rm
e delen.
6.
Ee
n
event
u
ee
l
te
gebru
iken ve
rl
engs
n
oer
moet
geschikt
zijn
voor
de
gebruikte
spa
nn
ing. Ve
rleng
snoere
n,
die aIl
een
voor
een
la
gere
spa
nn
ing
geschikt
zij
n,
kunnen
oververh
it raken. T
eve
ns
moeten v
er
leng
snoer
en zodanig wo
rden
aangebracht
dat
men
er
niet over kan
stru
ikelen.
7.
Wa
nn
eer
het
apparaat
ni
et
gebru
ikt
wordt,
m
oet
de Iichtn
et
-
aans
lui
ting
altijd
worden
verwi
j
derd
. T
rek
nooit
aan
het
snoer
als
de
stekker
uit
het
stopcontact
moet
worden
gehaald!
8.
Laat
het
ap
par
aat
vo
ll
ed
ig a
fk
oelen al
vorens
het
op
te
berg
en
.
9.
Om elek
tr
isch
e
scho
kken
te
voo
rk
ome
n,
m
oet
elk ko
ntakt
van de
pro
j
ect
or
met
een
of
andere
vloeis
tof
word
en
verm
ede
n.
10.
Om
ongelukken
te
vo
or
komen m
oet
niet
ze
lf
aan
de
pr
oj
ecto
r
worden
"geknutseld";
b
re
ng h
et
in
geva
l
va
n
ee
n
stor
in
g of
def
ect
naar
de
techn
i
sche
di
enst
van Elmo.
4

5
CONTENTS
INHAL
TSVERZEICHNIS
TABLE DES MATIERES
INDICE
CONTENUTO
INNEHALL
INHOUD
Major
Specifications
.......................................................................... 7
,
Major
Parts
Descripti
ons
....................
..
.............................
..
............. 9
Prepa
rat
i
ons
Before
Pro
j
ect
ion
........................................................
11
Pr
oj
ecti
on ...........................................................................................
15
Variety
of
Pro
j
ection
Feat
ure
s
..
................
................
...................... 19
When a
Projection
Ends
.....
..
.............................
..
..................
..
.........
21
Combined
Operation
with
Cassette
Tape
Rec
order
.........................23
Maint
enance
Hints
....
...........................
...............................................
25
How to Repl
ace
the
Pro
j
ectio
n La
mp
...............................................27
Voltage
A
lt
erat
ion................................
............................
..................
29
Tr
ouble
Shooting
Hin
ts
........
..
..............
.. ..
.........................................
31
Accessory
......
..
.....
..
..........................................................
..
................ 33
Wi
chtige
Sicherhe
i
tsh
in
weise
........................................................... 1
Technische
Daten
....... ....................................
..
..................................
7
Bed
i
enungse
lem
ente
...............................................................
·.·.···.···.·lO
Vorbere
itungen
zur
Pro
j
ektion
.
..
.........................................·......··....
·ll
Ein
ste
llung
des
Fi
lmf
or
m
ats
..
....................
..
..........·....·........·..
..
....·....
13
Die
Projekti
on ·
..
·
.. ·· ..
·
.. .. ..··
............................
:·
..
......
..
.. ·
..
....··....·
..
..·....
16
Versch
iedene
Pr
oje
ktionsm
oglichkeiten.....
..
.... ..
.....
..
............·............
19
Nach
beendeter
Projektion
....:
...................................................
·......·21
Bed
ienung
kombiniert
mit
Kassettenrekorder
·
..................................
23
Pel
ege
des
Pr
ojekto
rs
....
··
..
··....·
..
·......·· ........·····················....····......·25
Austausch
der
Projektionslampe
..............................
..
.......................27
Spannungsumschaltung
..................................................................... ...29
Beheben
von
Storungen
........................................
..
.
..
..................
.......
31
Caracter
i
stiques
pr
inci
pales
du modele K- 100
SM
......................... 7
omencl
ature
.. ...........................................................
..
..............
..
....... 9
Pr
eparat
ifs
avant
la
pr
oj
ect
ion
........................
..
.........................
......
ll
Pr
oject
ion
...............
..
.....................................
.....
..
..............................15
D
iff
erentes
p
oss
ibili
tes
de
pr
oj
ect
ion
....................
..
........................19
En
fin de
projection
...................
..
................
..
.......
..................
........
..
21
Fo
nct
io
nn
ement
en
sy
nchron
i
sation
avec
un
m
agnetop
hone
acasse
tte
23
Entretien
.
..
.............
.
....................
.
....................
...................................25
Remplacement
de
la la
mp
e
.............................................................
·..·27
Changem
ent
de
vo
lt
age
......
...........................
·................·................·.. ·29
Difficultes
.....................................
..
.....................·
..
···
··
·· ·...·.··.············31
Accesso
ire
s ..............................................................................···....···33

Modelo K- 100SM.
Principales
Especificaciones
...........
..
...
..
............ 8 K- 1
00SM
Tekni
ska
Data
...........
.............
..
...........
..
..
........................... 8
Descripcion
de
l
as
partes
principales
................................
..
............ 9
Projektorns
delar
............................................................................... 9
Preparativos
para
la
proyeccion
................................................... .
..
. 12
Forberedelser
for
projektion
................
..
..........................................12
Proyeccion
...............
..
......................................................................... 16 P
ro
j
ekt
ion....
..
...........
..
..................
..
.................. ...
..
.............................16
Diversas
caracter
i
st
i
cas
de
la
proyecc
ion ....................... ............... 20
Diverse
finesser
.....
..
......
.......................
...............
........
.....................20
Al
acabar
la
proyecc
i
on
...............
..
....
..
...................................·.··.··
··.22
Nar
filmen
ar
visad
.....................................................
..
..........
..
.....
..
.22
Sincronizacion
con magnetofono de
cassette
............................."....... 24
Synkron
i
se
r ing m
ed
k
assett
band
spe
lare
.....................................
..
..... 24
Mantenimiento
..............
.......................
......................
...............
........... 26
Pr
oj
ektorns
skotse
1.
..................................................
..
.......................26
Como
re
empl
azar
la l
ampara
de
proyecc
ion ...... ............................... 28
Byte
av
lampa .....
.......
.
....
...
..............
........
.........................
...............28
Cambio de
volta
je ........
..
..
..............................
.
..
................................. 30 'A:ndr i
ng
av
vol
tstyrkan
...................................................................... 30
Posibles
inconvenientes
en
la
proyeccion
........................................ 32
Om
det
bl
ir
nagot
feI .....................................................................
..
.32
Acceso
r i
os
......................
....
..
..
.......................
..
................................... 34
Til
l
behor
...................................................................
...............
...........34
JI.
Modello K 100
SM
-
Caratter
i
st
ich
e di
massima
............................. 8
Te
chni
sc
he g
egeve
ns
va
n de
Elmo
K- 100
SM
..
....
...................
......... 8
Descrizione
delle
part
i
essenz
iali.
...................
................................ 9
Beschrijving
van
de
onde
rd
elen
.............
........................................... 9
Pred
isp
os
izioni
prima
de
ll
a
proiezione
.......................................
..
...12
Voorbere
idingen
voor
de
projectie
..................................................··12
Proiezione
..
..........
..
...............................................................
..
...........16
Pro
j
ectere
n............
...............
...............
..
............
............
.....................16
Proiezioni
specia
li
..
.......... ..... ..............................
................
..............20
Pr
oj
ect
iemo
ge
I
ijkh
eden
.......
...............
....................... ..........................20
Quando
la
proiezione
e fini
ta
.............
~
...................
..
......
..
.................22
Einde
van
de
proj
ec
tie
...................
.............
..
.......
..
...........................22
Sincronizzazione
sonora
con magnetofono ................................
..
..'....24
Synchr
on
isatie
met
ee
n
cassette·recorder
..
........
...................
.........··24
Suggerimenti
per
la
manu
tenz
ione ····················································26 Aanwij zingen
voor
ond
er
houd .....
..
...
..
.
...........................
.............
..
.....26
Come
rimpi
azzare
la
lampada
di
proiezione
.
.........................
..........28
Vervanging
van
de
pro
j
ectie
lamp
.................
.....................................28
Cambiamento
del
voltaggio
.........
..
............................................··.······30
Aanpass
ing
aan
de
spann
ing ..........
............................
..................······30
Sugger
im
enti
per
e
limi
nare
disturb
i
nella
pro
i
ezione
.....................32
Tips
voor
het
lokaliseren
van
stor
ingen ..........................................32
Accessor
i..................................
..
.......................
..
...............................34
Accessoires
.....................................................................................···34
6

7
MAJOR
SPECIFI
CATIONS
TECHNISCHE
DATEN
CARACTERISTIOUES PRINCIPALES DU
MODELE
K
-1
00
SM
PRINCIPALES ESPECIFICACIONES
CARATTERISTICHE PRINCIPALI
ELMO mod. K-
100
SM
TEKNISKA
DATA
TECHN
ISCHE GEGEVENS VAN
DE
ELMO K-
100
SM
Film
:
Pr
oj
ect
ion
Lamp
:
Pro
je
cti
on L
ens
:
Pro
je
ct
ion
Speed:
Fi
lm Loading :
Motor
:
St
ill
Pr
oject
ion :
Super
8 I
Single
8 I
Regular
8 (
Double
8)
12V
lOOW
Elmo
Halo
gen
Lamp
with
Cold
Mirror
F1.3
f=
15 -
25
mm
Elmo
Zoom L
ens
14
-24 fps
Fully
automatic
system
DC Magnet
Motor
Possible
Slow M
otion
Pro
j
ection
:
Possib
le
Reverse
Projection
:
Synchronous
start
wi
th
Tape
Recorder
Quick
Rewi
nd
:
Ree
l
Capacity
:
Dimensions :
Weight :
Possible
Possible
Possible
120m (400
ft)
290 X 235 X 185
mm
(
1l~~X9!
X
73
92 in)
6.5kg (2.9
lb
s)
Film
:
Projektions
lampe
:
Projektions
ob
jek
t iv :
Projektions
-
geschwindigkei
t :
Filmeinfadelung
:
Motor:
fur
Super
8 ,
Single
8 und Doppel 8
Film
12
V /
lOO
W
Halogen
mit
Kaltlichtspiegel
Vario
1 :
1,
3/
15
-25
mm
von
14
-
24
S I S
kontinuierl
ich
verstellba
r
vollautomat
i
sch
bis in
die
Aufwicke
l
spule
DC -Magnet-
Motor
Stillstands
projektion:
maglich
aus
Vor
-und
Ruckwartsprojektion
Slow
Motion
Projektion
: von 4 - 8
SIS
Ruckwa~ts
projektion
:
magli
ch
Suchse
fur
Simultanstart
: vorhandefl, zum
Starten
von Tonba
ndgeraten
und
Kas
settenreko
rdern
Schnellruck
spulung
:
Spulenkapazitat
:
Abmessungen :
Gewicht
:
Film
:
Lampe
de
projection:
Objectif
:
Cadences
de
pro
j
ect
ion :
Chargement
:
Moteur
:
Arret
sur
image:
Ralenti
:
Marc
he
arriere
:
L
ia
ison
avec
un magne-
tophone a
cassette
:
Reembobinage
rapide
:
Capacite
des
bobines:
Dimensions
:
Poids
:
magI ich, ohne
Sp
ul
entausch
12
0 m
290 X 235 X 185
mm
mit
angeklappten
Spulenarmen
6.5 kg
Super
8,
Single
8 ou 8
Standard
Elmo
12V/
100W
aux
halogenes
et
miroir
di
chro
ique
Zoom
Elmo
1.3/ 15 -25
mm
14-24
im
/sec
.
Ent
i
erement
auto
m
at
ique
A
courant
cont
i
nu
I
ncorpore
Inc
orpo
re
In
corporee
Incorporee
Incorpore
12
0 m
290 X 235 X 185
mm
6,5kg.

Pelicu
l
a:
Super
8/Sing
le
8/8
Normal
(Doble 8)
La
mp
ara
de
pr
oyecci6
n:
Hal6gena, Elmo, con
espejo
frio.
12 V. 100 W.
Ob
j
et
ivo de
proyecci6n
: E
lm
o Zoom F. 1
,3
f=15
-
25
mm
.
Velocidad de
proyecc
i6n :
14
-24 i. p. s.
Carga
de la pel
kula
:
Motor :
Proyecc
i
6n
con
paro
sobre
imagen :
Proyecci6n
len
ta
:
Proyecci6n
hacia
atras
:
Sin
cron
izaci6n con
magn
et6fo
no :
Rebob
in
ado
rap
ido :
Capacidad de
carga
de
pel fcula :
Dimension
es
:
Peso:
Fi
lm:
La
mp
ada di
proiez
io
ne:
Ob
i
ett
ivo d i
proiez
ione :
Veloc
it
a di
proiezione
:
Car
i
ca
m
ento
film
:
Motore :
Pr
o
iezi
one di singolo
fotogramma :
Proiezione
ral
l
entata
:
Sis
tema
total
mente automatico.
DC
Magneto.
Posible
.
P
os
ible.
Posible.
Posible.
Posible.
12
0
metros.
290 X 235 X 1
85
6,5
kg.
mm.
Super
8/S
ingle
8/Dop
pi o 8
12
V
WOW
Lampa
da
alo
g
ena
ELMO
con
specchio
di
croico.
F 1,3 f 15 -
25
mm
.
ELMO
Zoom
14
-
24
fps.
Sistema
completamente
automatico
Motore
magnetico
DC
Poss
ibil
e.
Pos
s
ibile.
Pro
i
ezio
ne in
retromarcia:
P
oss
ibil
e.
Sincro
ni
zzazione
sonora
con
casset
ta
magneti
ca
:
Ri to
rn
o veloce :
Ca
paci
ta
bobina :
Dimensioni :
Pe
so :
Possib
il
e.
Possibile
.
12
0 mt.
290 X
235
X 185
Kg. 6.5.
Film
:
Projektionslampa:
Objektiv
:
H
astighet
:
Super
8/S
in
gle
8/Dubbel 8
12
volt
100 W halogenlampa m
ed
kalljus
spegel
Elmo
Zoom F 1.3/15 -
25
mm
14 -
24
bi l
der/sek
.
Filmladdning
:
Helautomatisk
Motor : Av Iik
stro
m
styp
Enbildsvisning
:
Ja
Slow
Motion·projektion
:
Ja
Bakliingesprojektion
:
Ja
Synkronisering
med
kassettbandspelare:
Snabbaterspolning
:
Filmkapacitet
:
Matt :
V
ikt:
Film
:
Projectielamp
:
Projectielens
:
Pro
j
ectiesnelheid
:
Filminleg:
Ja
Ja
120 m
290 X 235 X 185
mm
6.5
kg
Single
8/Super
8/Dubbel 8.
Elmo
12
V 1
00
W halogeenlamp met koudl icht-
spi
egel.
El
mo zoomlens F 1.3
f=15
-
25
mm
14
-
24
bId
/sec
.
vo
l
auto
m
at
i
sch
Motor : geli j
kstroommotor
Stilstaandbeeldprojectie
: ]a
Slow
-
motionpro
j
ectie
:
]a
Achteru
it
projectie
:
Synchroni
sa
tie
met
cas
-
sette
·
recorder
Snel
terugspoelen
:
Spoelcapaci
tei
t :
Af
metingen:
Cewicht :
ja
]a
120
meter
290 X 235 X 1
85
mm
6,5
kg.
8

9
MAJOR
PARTS
DESCRIPTIONS
BEDIENUNGSELEMENTE
NOMENCLATURE
DESCRIPCION
DE LAS PARTES PRINCIPALES
DESCRIZIONE DELLE PARTI PRINCIPAL!
PROJEKTORNS
VIKTIGASTE
DELAR
BESCHRIJVING
VAN DE
ONDERDELEN
..:---
- -
(D
~---
cv
::..,l-.,-..."t::----
@
~:------
@
(.--
------
@
-------
(6)
-------
(J)
-------
®
-------
(9)
- -
----
- @
-------
@
-------
@
-------
@
~-----
--
~
~----------
-----------
@
--
@
T--
---
@
----
@

CD
Feed
Reel
(2)
Automatic
Take-
up
Reel
®
Take
-
up
Reel Arm
@
Feed
Reel
Arm
®
Fi
lm
Th
read
i
ng
Slot
®
Speed
Con
tro
l Kn
ob
RS
F
ilm
Typ
e
Selecting
(f)
Lever
® Z
oo
ming
Ring
®
Focusing
Kn
ob
@
Operation
Switch
@
Framing
L
ever
@
Fi
lm
Tri
mmi
ng
Slot
@
Pr
oject
ion
Lever
<Gl
Tilting
1 ut
@
Power
Cord
@ Hand
strap
@ F
ront
Cover
@ Synchro jack
@
Power
Cord
Receptacle
@
Rear
Cover
CD
Filmspule
(2)
Auffangspule
® Spul
enar
m
@
Spulenarm
®
Fi
lmeinfuhrung
®
Geschwindigkei
tskontrollknopf
(f) Fo
rmatumschaltung
®
Varioring
®
Fokussierknopf
® Z
entra
l
sc
hal
ter
@ Bil
dstr
i
chverste
llung
@
Fi
lman
sc
hneider
@ Hebel
fur
Slow
Motion und
Sti
ll
sta
ndspr
oje
kti
on
<Gl
Hoh
e
nverste
ll
schra
ube
@ Netzkabel
@ T
ragegr
iff
@
vordere
Abdeckung
@ Buchse
fUr
Simultanstart
@ Bu
chse
fur
Netzkabel
@
hint
e
re
Abdecku
ng
CD
Bobine
debitrice
(2)
Bobine
receptrice
a
chargement
automatique
®
Bras
de
la
bobine
receptrice
@
Bra
s de la bobine
debitrice
®
Fente
de
chargement
®Bouton de
reg
lage de vi
tesse
(f)
Levier
selecteur
de
format
® Couronne de
reglage
du zoom
® Bouton de
mise
au
point
@
Commutateur
rotatif
de fo
nctio
ns
@
Le
v
ier
de
cadrage
@
Cal
i
bre
d 'am
orce
@
Selecteur
de def
il
em
ent
<Gl
Reglage en
hauteur
@
Cable
d 'al
imentat
ion
@ Poignee de
transp
o
rt
@ Capot
central
@
Jack
de synchroni
sat
i
on
@
Pr
ise
d'a
lim
entat
i
on
secteu
r
@ Vis de fixation du cou
vercle
arr
i
ere
CD
Bobina de
alimentacion
(2)
Bobina
receptora
automati
ca
®
Brazo
de
la
b
ob
ina
recept
o
ra
@
Brazo
de
la
bobina de a
lim
entac
ion
®
Ranura
de in
serc
i
on
de la
pe
licu
la
®Boton de
contro
l de
la
veloc idad
(f)
Palanca
de
se
l
ecc
ion del tipo de
pel
icula
®
An
i
11
0 de
transfoque
(zoom)
®Boton de enfoque
@ Conmutador de
operac
ion
@
Palanca
de en
cuadre
@
Ranura
del
cortado
r de
pelicula
@
Palanca
selectora
de modal idad de
pr
oy
eccion
<Gl
Reg
ll
lador
de al
tura
@ Cordon de ener
gia
@Asa
de
transporte
@ Tapa f
rontal
@Terminal
para
sincronizacion
@
Receptacul
o del cordon de
energia
® T
orn
i
llos
de
la
tapa
p
oste
ri
or
CD
Bobina alim
entatr
ice
(2)
Awol
gitore
automat
ico della bobina
®
Bra
c
ci
o
della
bobina
avvolgitrice
@
Braccio
dell
a bobina al ime
nta
tr
ice
®
Scanalatura
/
guida
del
film
® Manop
ola
di
contro
llo
della
vel
oc
ita
(f) L
evetta
di
se
lezione del
tipo
di
f
ilm
® Ane
ll
o
dell
o zoom di
regola
zi one
® Manopola
della
messa
a fuoco
@ In
terr
ut
tore
di comando
dell
e
op
erazioni
@ L
evetta
di i
nterl
in
ea
@ Tag
li
er
ina fi lm
@
Leva
di
proiezione
<Gl
Dado di
sollevamento
e
incl
inazione
@ Cavo di al ime
ntazione
@ Manigl
ia
di
traspor
to
@F ron
tespizio
del
coperchio
@
Attacco
per
si
ncronizzazione
sonora
@
Pre
sa
per
cavo di a
lim
entaz
ione
@ Guida
per
avvi
tare
iI
coperc
hio
CD
Matarhj
ul
(2)
Autom
atiskt
upptagn
ingshju
l
® Upptagning
sar
m
@
Arm
for
matarhjlllet
® F
ilmladdningsuttag
®
Instal
lning av
pr
o
jektionshastighet
(f)
Instal
lning
av
filmfor
m
at
® Zoomins
ta
lln
i
ng
®
Fokuseringsratt
@
Centra
lo
mk
oppl
are
@
Justering
av bi
Idstrecket
@
Utt
ag
for
filmtr
imning
@
Pro
j
ektionsarm
<Gl
Lutningsaxel
@ Natkabel
@
Barhandtag
@ F r
ontstycke
@
Synkr
o
nuttag
@A
nslutning
for
natkabel
@
Skruvar
for
bakstycket
CD
Filmspoel
(2)
Automatische
op
wikkelspoe
l
® Ac
hterste
spoelarm
@
Voors
te
spoelarm
®
Filminvoersleuf
®
Snelhe
i
dsrege
lk
nop
(f) Hende I
vo
or fi I
mformaatkeuze
®
Zoomring
®
Scherpstel
ring
@Bedieningsknop
@ Kaderknop
@
Filmsni
jm
es
je
@
Projectieke
uzeknop
<Gl
Moer
voor
hoogtever
ste
II ing
@
Netsnoer
@ Handgreep
@
Beschermkap
@ Synchroni
sat
ie-
aa
nsluiting
@ Aans
luiting
voor
netsn
oer
@
Achterdekse
I
10

11
1.
Plug
in
the
power
cor
d.
2.
Raise
both
take
-up and
feed
reel
ar
ms.
3. Mount the
feed
reel
and
take
-
up
r
ee
l
on
each
reel
spindle
.
4. In
sert
i
ng
the
end of fiIm l
ead
er
in
to
the
fi
lm
tr
imming s l
ot,
tr
im
the I
eader
end by
pr
ess
i
ng
down
the
trimm
ing l
ever
.
*
If
no
leader
is
prov
i
d~d
with
the
fi
I
m,
at
t
ach
a pr
oper
Iength of
lea
der
to
it.
1.
Netz
kabel
am
Pro
jek
tor
anse
hl ie(3en.
2.
Die
vorderen
und hin
teren
Spulenarme
a
usklappen
.
3.
Filmvorratsspule
auf
die
vordere
un
d
Au
ff
angspu
le
auf
die
hin
tere
Spul
ena
ufnahme
stee
ken.
4. Den wei(3en
Filmvorspann
in den
Filmansehneider
steeken
und
die
Taste
fiir den F
ilm
ansc
hn
ei
der
n
ae
h
un
ten
driicken
.
Achtung
!
Die
Funkrion
der
automatischen
Fi
l
me
in·
fadelung
is
t
nur
dann lOO%ig
gelVahrleiste
,
\Venn
der
Film
mit
e inem genugend
langen
F i
lmvorspann
versehen
is t. Wenn del'
Fil
m-
vO
I
'span
n zu
kur
z
oder
de
rselb
e
beschad
i
gt
ist,
bi tre den F
ilm
mit
einem
neue
n
\lorspann
versehen.
1.
Brancher
Ie
cordon
secteur
.
2.
Ouvr
ir l
es
bras
porte
-bo
bine
.
3.
Placer
les
bob
ines
reeept
ri
ee
et
debi t
rice
s
ur
l
eurs
ax
es
respec
-
t i fs.
4.
Ca
librer
l'am
oree
en
I'in
t rodui-
sant
dans
la
fente
prevue
a
eet
effet
ii.
I
'a
vant
du
pr
oj
eeteur,
presser
Ie l
ev
ier por
tant
Ie
eou
teau
mobi le.
TRES
IMPORTANT
:
S'ass
ur
er
que
la
co
up
e a
bien
eu Iiell
entre
deux
perforat
ions
sinon Ie chargement automatique
ne
pou
rrai
t
avail' Iie
ll
convenablemen
t.
*
Si
Ie
fi
lm n'
est
pas
dote
d'or
igin
e
d'
une
am
orce
blanche,
en
fixer une
bonne
lo
ng
ueu
r
( 1 metr
e)av
ant d'entr
epre
n
dre
Ie
charge
ment.

1.
Enc
hufe
el
co
rdon
de
en
ergia
.
2.
Disponga
de
ambas
bobinas,
la
de
toma
y
la
de
al
imen
tacion
.
3.
Monte
cada
una
en
su
eje
.
4.
In
sertan
do la
cola
de
principio
de
la pel
icula
en
la
mu
esca
del
corta
·
dol',
recorte
dicho
ext
femo
me·
d i
ante
presi6n
de
la
pa
lan
ca
del
referido
cortador
.
* S i
la
pe
li
cula no
lleva
cola
de
principio,
peguele
un
a
de
longitud
ad
ec
u
ada
.
1.
I
nserite
la
spi
na
del
cavo
del
la
corrente
nella
presa
di
corrente
di
al
imentazione
della
rete.
2.
Alzate
entrambi
i
bracci
avvolgi
·
tori
e
predisponetel
i
per
l'inseri
·
me
nto
de
II
e bobine.
3.
Mettete
la
bobina
alimentatrice
(bobina
piena
) e
la
bobina
ri
ce
·
vitrice
sui
rispettivi
bracci,
in
·
sere
nd
ole
su
i
perni
e fi
ssate
le
m
ediante
gli
appositi
blocch
i.
4.
Inserite
la
codina
iniziale
del
fi
lm
nell
a
apposi
ta
f
essura
de
ll
a
scanalatura
pr~mendo
iI
tasto
dell'inserimen
to
automa
ico
.
*
Control
la
te
che
il
capo
de
l
film
sla
provvisto
di una
coda
con·
veniente
e
che
la
stessa
non
sia
ne cor
ta
ne Iunga.
1.
Stoppa
in
natkabeln.
2.
Lyft
upp
armarna
for
matning
oc
h
upptagning
.
3.
ontera
matarhjul
och
upptagnings
·
hj ul.
4.
Stoppa
in f
il
men
uttaget
f
or
tr
i mni
ng
och
tryck
ned.
* Om
filmen
saknar
startsladd
skal
l
en
sadan
skarvas
pil..
1.
Sluit
het
netsnoer
aan
.
2.
Breng
de
bei
de
spoelarmen
in
de
juiste
positie
.
3.
Bevest
ig
de
opw
ikkel
spoel
en
de
f
ilm
spoel
op
de
bei
de
spoe
l
assen.
4. S nij het einde van
de
aanloopstrook
af
m.b.v.
het
filmsnijmesje
.
* Als
er
geen
aanloopstrook
aanwez
ig
is,
moet
deze
eerst
aan
de
film
gemonteerd
worden
.
12

13
5. Make
sure
the
projection
l
eve
r
is
locat
ed
at
the
position
marked
....
.
Film Type Selecting Lever
Se
le
ct
the
I
eve
r in
accordance
wi
th
the
typ
e of fi Im
to
be
run
.
Push
down the
lever
to S posi t ion
when
pr
oj
ect
ing
eit
h
er
Super
8 or
Sing
l e 8.
For
Regu
l
ar
8
(D
ouble 8 )
ope
ration
,
push up t he 1eve r to R pos
it
ion.
Cauti
on
:
1.
Th
e fi l m
type
selecting
lever
mu
st
be
set
up
positiv
ely at
each
se
l
ect
ed
positi
on, R
or
S .
2.
Be
s
ur
e
to
avo
id mo
ving
th
is
leve
r wh
il
e
the
pr
oj
ec
ti
on
is
un
de
r
way.
Ot
h
erw
i
se
, t he fi lm may be
damag
ed
.
5.
Vergewissern
S ie
sich,
d
a/3
der
Hebe
l fi.ir S low M
ot
ion und
St
ill
·
st
andsp
os
it
ion
si
ch
in
Ste
ll
ung
....
befinde
t.
Formatumschaltung
W·
it
hl en S ie d
as
ri
c
htige
F
ilm
for
m
at.
Fi.ir
Su
per
8 und S ingle 8
Fi
l m
mu/3
s i
ch
der
H
ebe
l fi.ir
die
Formatum
·
ste
llung
in
Position
" S ",
fur
Doppel
8
Film
in
Pos
iti
on " R" befin
den
.
(R
=
Re
gul
ar
8)
Achtung !
1.
Der H
ebel
fur die F
or
ma
tu
m-
ste
llung
mu
/3
s ich eindeut ig au f
P
os
iti
on " S "
ode
r " R" be
find
en
.
2.
Bef
i
ndet
s ich
der
H
ebe
l fi.ir d ie
Formatumstel
lung
in
einer
Zwi
-
sc
henp
os
it io
n,
so
fun
kt
ioni
ert
d ie
autom
at
i
sc
he E inf
adelung
nicht und
der
Film
kann be
sc
h,idigt
we r
de
n.
5. S '
ass
urer
que Ie l
ev
i
er
sEdecte
ur
du mode
de
defilement
est
bien
su
r
la
posit
ion m
arq
u
ee
(
....
).
Selecteur de format
Placer
Ie
levier
sur
la
pos
iti
on
co
r
respon
dam
au type
de
film
pro
jete.
Abaisse
r Ie l
ev
i
er
s ur la p
os
it ion
" S " (
Super)
pour
pro
je
te
r
un
film
Super
8 ou
Singl
e 8.
Le
fiIm 8
Standard
( Doub le 8)
neces·
s
it
e
de
rem
o
nter
Ie
lev
ier
en p
os
i·
t ion " R" ( Regul
ar)
.
Attention :
1.
II
fa
ut bien pou
sse
r Ie
lev
ie r' a
fond de m
an
i
ere
a
ce
qu 'i 1 s
'en·
clenche
sur
la p
os
it ion
cho
is ie.
2.
Vei
I
le
r
tout
p
articul
i
ere
ment ane
pas
dep
l
acer
ce
levie
r en
co
ul's de
proj
ect
ion,
so
us pe ine
d'
endo
mma·
gel'
Ie
fi lm.

5.
Pr
oc
ure
que
el
con
mut
ado
r
se
l
ec
·
to
r
de
m
oda
l
id
ad
de
proyecci6n
es
te
pues
to
en
una posici6n ma
rcad
a
(
...
~
)
.
Palanca de Selecci6n del
Tipo
de Pelicula
Accion
e la
pa
l
anca
se
l
ectora
de
acuerd
o con el
tipo
de
pel
icula
que
se
dispone a
pr
oyect
ar
.
Mu
eva
la
palan
ca
h
asta
la pos
ici
6n
(S)
cuando
vaya
a
proyectar
en
Super
-
S 0 S igle-
S.
Para
8
Normal
( Dobl e
S),
l
leve
Ia
pa
l
anca
a
la
posi
cion
(R)
.
Precauci6n :
1.
La
paIa
nca
de
se
I
ecc
ion
de
1 t i po
de
pe
li
cul a
debe
aju
sta
r
se
, s in
du
das,
a
cada
posicion
seleccionada
,
R 0 S.
2.
Evi
te
mover
esta
pal
anca
d
ur
an
te
la
pr
oyeccion
. De
otro
modo, la
pelicula
puede
estropea
r
se
.
5. P
er
eseg
uir
e la
proiez
ione
occorre
si
ste
mar e l'i
nterruttore
di
se
le ·
zione
nella
posizionesegnata(
...
~
)
.
Levetta
di
selezione del tipo
di
film
Sel
ez
i
onar
e Ia posizione
de
lla
levetta
secondo
il
tipo
di
film
, come e in-
dic
ato
dal
programmatore
.
Sping
ere
in
ba
sso
la
l
evetta
con
(S
)
n
ella
pos
izi
one ind
ica
ta
p
er
la
pr
o·
i
ezi
one
Super
S /
Single
S.
Per
i l doppi o
S,
s i
stemare
la
le
vetta
nel
la
pos
izi
one
(R
).
Avvertimento
1.
La
se
lezi
one
de
l t
ip
o di fi l m
de
ve
essere
fatta
co
n
la
l
evetta
nell
e
p
os
izi
oni
appos
i
tamente
indi
cate
R 0 S.
2.
Evi
tare
assol
utamente
di
mu
overe
questa
l
evetta
mentr
e la
pr
oie-
zione e in
co
r
so
. In
caso
contra
-
rio
il
film
s i
danneggerebbe
.
5.
Fo
r
vissa
er
om
ate
proje
kti
o
nsar-
men
star
i
lag
e (
...
~
)
.
Omstalining av
fi
l
mformatet
S
ta
ll
armen
i en
lighe
t med den
film
-
typ
som
ska
II vi
sas
.
Tr
yck ned
arme
n
till
"
S"
v
id
vis
ning
av
Super
S och
Sing
le S
film
.
F
or
standard
S
mm
(Du
bbel 8) fi Im
tr
yckes
armen
upp
til
l " R".
Observandum
1.
Ar
men
for
in
sta
ll
ning
av
f
il
mfor
-
m
atet
, m
aste
stallas
in
helt
i
re
sp
. l
age
,
Rel
ler S .
2.
Ar
mens
lage
far
in
te
andras
un
der
vi
sning,
da
detta
kan sk
ada
filmen.
5.
Cont
rol
eer
of
de
knop
voor
pro
j
ec
-
tiekeuze
in
de
stand
...
~
staa
t.
Hendel voor filmformaatkeuze
Zet
de
hen
de
l in de
sta
nd
voor
het
type
film
wat
gepr
oj
ecteerd
m
oet
worden
.
Voor
Single
-S
en
Super
-S
film
s :
stand"
S"
.
Voor
Dubbe
l-
S
fil
ms ;
stand
"R"
.
Waarschuwing
1.
Zorg
da
t
de
hende
I
voor
fiImfor -
maatkeuze
go
ed
in
de
sta
nd
"R"
of "
S"
is
gep
l
aatst.
2.
Onder
geen
beding
m
ag
deze
hendel
t i
jd
ens
het
pro
j
ecteren
worden
verschoven
.
De
f i1m kan
daardoor
er
n
st
ig
worden
beschadigd
.
14

15
1.
Turn
the
operat
ion s
wit
ch
to
the
pos it i
on
ma
rked
j!)
and the m
otor
starts.
Now, you
are
ready
for
thread
ing
the
film
.
(The
projec
'
tion lamp
does
not
li
ght
yet
at
th
is
s
tag
e.)
2. In
ser
t the
end
of
th
e fi
lm
in
to
the
t
hr
ead
ing
slot
as
indi
cat
ed by
arrow
.
Th
e
film
is
automat
i
ca
ll
y
th
readed
through
the
fiIm
pa
th
and
wound up
onto
the
take
·up
reel.
3.
Turning
the
operat
ion
switch
to
the
posi t ion
marked
(J
·wi
ll
allow
the
pr
oj
ector
la
mp
to
Ii
ght
ready
for
sta
r
ting
the
pro
j
ect
io
n.
When
the
operat
i
on
switch
is
tur
ned
to
j!)
posi
tion
after t
urning
to
<J
~
p
ositio
n,
th
e
film
cann't
be
threaded
.
to
all
position
and
then
turn
it
to
j!)
position
before
threading
~he
film.
1.
We
nn
der
Ze
ntralschal
te
r in
Ste
l·
lung
j!)
gebracht
wird,
l
auft
der
Motor
des
Pro
j
ektors
. N
ur
in
die
·
ser
Schal
terste
llung
funkti
oni
ert
die au
tomat
i
sche
Fi
Imeinfadelung.
(
Die
Pr
oj
ekt
io
nsl
ampe
brennt
in
di
eser
Scha
l
terste
l
lung
ni
cht,
)
2. F i
lm
-
Vorspann
mit
dem
Film
-
sc
hneide
r
anschneiden
und
sowe
it
in
den
Filme
infa
delsch
li
tz
sch
ie·
ben
bis
er
vom
Trans
portmechanis
·
mus
erf
apt
wi
rd
.
Del' F iIm wi
rd
nun
automat
i
sch
bis
in
die
Aufnahmespule
t r
ans
-
p
ort
ier
t.
3.
Drehen
Sie
den
Zentralschalter
in
Pos
it ion () ,
da
mi t
auch
die
Pro
·
j
ekt
ionsla
mp
e
brennt
und
die
Pro'
j
ekt
ion beginnt.
1.
To
urn
er
Ie co
mmu
tate
ur
rotati
f
sur
la
position
j!)
.
Le
moteur
se
met
en
route;
Ie
projecte
ur
est
prih
pou r Ie
cha
rg
ement,
(]
a la mpe
demeure
eteinte
sur
cette
position) .
2.
Insere
r
l'amo
rce
cal ib
ree
d
ans
Ia
fe
n
te
de
c
hargemen
t
(a
i
nsi
que Ie
mo
nt
re
la
fleche
).
Le
film
est
entrai
ne de
maniere
automatiq
ue
tout
au
lon
g de son
tra
j
et
ju
sq
u
'a
la bobine
receptrice
.
3. II
suff
it
alors
de
tourner
Ie bouton
de
commande
sur
la
position
a
ce
pour
allumer
la
l
ampe
et
commen'
ce
r
la
project
ion.

1.
G
ir
e el
conmutador
de
operacion
a
la
pos
i
cion
marcada
~
,
y el
mot
or
em
pezara
a funcion
ar
. Aho
ra
ya po
dr
a enh
eb
rar l a pe
li
cula.
( La lam
para
de
pr
oyecc
i
on
no
se
habra en
cend
ido
todavia
).
2.
Inserte
el
pr
inc ipio de
la
pe l i
cula
en la ran
ura
de enhebrado,
Co
mo
se indi
ca
por
la
flec
ha.
La
pel
ic
ul a
queda
enhebrada
auto
-
m
at
i
camente
a t r
aves
del
paso
de
la mi
sma,
penetrando
en
la
bobina
de
toma
.
3. Al
gir
ar
el
conmuta
dor
de
opera
-
cion h
asta
Ia
posic
ion
marcada
Go,
la
la
m
para
del pr
oyecto
r
se
en
ce
n'
d
era
y
estara
1i
sta
para
Ia
pro
-
yecc
i
on
.
1.
Girare
l'interrutt
o
redi
avviamento
ne l
la
posizione
segnata
con
~
e
i1
motore
e
pronto
pe r i1 vi a.
Ora
voi
potete
far
p
art
ir
e il
film
(La
l
ampada
di
pro
i
ez
ione in que-
sto stadio non
deve
essere
accesa
).
2.
Introdurre
la
linguetta
del
film
n
ella
ap
posita
fess
ura,
come
e
indi
cato
nella di
rez
ione
del
la
freccia.
II fi lm
automaticamente
viene
avvolto
fino
alIa
bobina
ricevitrice
.
3.
Girate
l'i
nterruttore
ne
ll
a posi-
zio
ne
in
di
cata
con Go. In
tal
modo
si
accendera
la
lampada
del
proiettore
che e
cosi
pron
to
per
Ia
proi
ez
ione.
1.
Vrid
centra
lomkopplaren
till
lage
~
fo r
att
starta
mo
to
rn
.
(Pro
-
j
ektio
n
slam
p
an
ta
nd
s
inte
vid d
etta
ti
1
1fa
lIe.)
2.
Sto
ppa in f
il
men i f
ilml
addni
ngs
-
utt
age
t e
nl,
p
il
marker
ingen.
F
il
men ladd
as
automat
iskt gen
om
projektorn
, och upp pa
uppta
g
nings
-
hj
ulet.
3.
Nar
stro
mbr
ytaren
vr
i
des
t iII
lage
Go
tands
l
ampan
och
visnin
-
gen
borjar
.
1.
Draa
i de bedi
eningsknop
in
de
stand
~
. De
motor
tr
eed
t nu
in
werk
ing. De p
ro
j
ecto
r is nu
g
ereed
om de
film
te
tr
anspor-
teren
(De
pro
j
ect
ielamp brandt
in dit
stadium
ni
et.
)
2.
St
eek
het
e
in
de
van de
aa
nl oop-
str
oo
k
in
de
filminv
oers
leuf
(a
an-
geg
even
door
ee
n pi jI).
De fi Im
wordt
nu au
tomat
i
sc
h door
het
f i1
mkanaa
l
getranspo
rt
eerd
tot
op
de
opwikkel
spoel.
3.
Dr
aa
i de be
di
eningskn
op
in de stand
Go. De
lamp
gaat
nu
brande
n en
er
kan
gepro
j
ecteerd
worden.
16

17
Image
Alignment
A.
Determine
the
vertica
l image height us ing the ti
lting
nut.
B.
Set
up
the image
dimensions
by
t
urni
ng the zooming
ring.
C.
For
achiev
ing
sharp
image,
estab
li
sh a
correct
pr
oj
ector
-
to
-
screen
di
stance
by
use
of the
focusing
knob.
D.
To
e
limina
te
a
fr
a
me
line,
adj
ust
by moving the
framing
l
ever
ei
th
er
up
or
down.
E.
If
the pi
cture
tends
to
flicker,
ad
ju
st
by
turning
the
speed
co
ntr
ol
kn
ob
until
a
steady
image is
obta
in
ed
.
Ausrichten Des Projektionsbilds
A.
Dur
ch
Drehen
der
Hoh
enverste
ll
schrau
be
his
st
sic
h das
Pro
-
j
ektionsbild
auf
der
Leinwand
ausrichten
.
B. Die Bildgro,8e lii,8t
sich
durch
Drehen
am
Var
io
rin
g
des
Objektivs
verste
]Jen.
C. Zum
Scharfstellen
d
es
Fi
l
mbildes
auf
der
Lein
wa
nd
mu,8
d
er
Fokuss
ierknopf
gedreht
werden
.
D.
Zeigt
sich
oben
oder
unten am F
ilmbild
ein
sc
hw
arze
r
Strich,
d
er
sog
. "Bild
str
ich
",
so lii,8t si
ch
die
se
r
durch
Verschieben
der
Bild
st
rich
verst
ellung n
ac
h oben
oder
unten
bese
i
tigen.
E. Wenn
das
Fi
lmbi
ld
flimmert
oder
di
e Bewegungen im
Film
unnat-
iirlich
wi
rken
,
dann
mu,8
di
e
Pr
oj
ektionsgesc
hwindigke
it
dur
ch
Drehen
des Ve
rs
te
llkn
opfes
veriindert
werden
.
Anschlag
rec
h
ts
24
B
/S
,
auf
I
ndexstrich
18
B/S
.
Cad
rage
A.
RegIer
l'inclinaison
du
pro
j
ecteur
a 1
'a
ide du bouton de
reg
lage en
hau
te
ur
situe a I'
ava
nt.
B. RegI
er
les
dim
ens
i
ons
de
l
'im
age a I'aide du zoom.
C.
RegIer
ensuite
la
nettete
s
ur
I'
ecra
n de
pr
oj
ect
ion.
D.
Pour
eliminer
la
barr
e
no
i
re
separant
deux
i
mages
et
ca
d
rer
convenablement
la
pro
j
ect
io
n,
ag
ir
s
ur
Ie
levier
de
ca
drage
en Ie
po
u
ssant
vers
Ie
haut
ou
vers
Ie
bas
.
E. S i l 'image
sc
intille, c '
est
que la
vitesse
de
pr
oj
ec
ti
on
est
tr
op
len
te
; l 'a ju
ster
a l
'a
ide du bouton de
reglag
e de
vitesse
jusq
u'
a
I'ob
tention
d'une bonne
sta
bilite.

Nivelaci6n de
la
imagen
A.
Determin
e
la
altura
de
la
imagen en
vertical,
mediante
la
tuerca
de inc
li
naciOn.
B. A
ju
ste
las
dimensiones
de
la
imagen
girando
el
anillo
del
zoom.
C.
Para
lograr
una imagen
bri
llant
e,
establezca
una
correcta
distancia
pro
yector
-
pantalla,
por
medio
del
bot6n de enfoque.
D.
Para
e
limi
nar
la lin
ea
de
separac
i6n
entre
fotograma
y
fotograma,
mueva la
palan
ca
de
enc
uadr
e
arriba
y abajo.
E. S i la
pelicula
tiende a
fluctuar
0
parpadear,
ajustela
girando
el
bot6n de
control
de
la
veloc
idad,
hasta
conseguir
la
estabilidad
de
la image
n.
Allineamento dell'immagine.
A.
Si
regola
l'i
nc
li
nazione
del
proiettore
.
B. Si
se
l
eziona
la
di
mensione
della
immagine
proiettata,
ruotando
1'anello '
dello
zoo
m.
C.
Si
sta
bili
sce
la
luminosita
dell'immagine
e
la
corretta
distanza
proiettore
/
schermo
,
per
mezzo
de
lla
messa
a fuoco
micrometrica
.
D.Dopo
aver
inquadrato,
s i
sistemail
quadro
della
proiezione
spostando
l
evetta
verso
il
basso
0
verso
l'atto
.
E.
Se
il
quadro
da
una immagine
tremolante,
s i
provveda,
g
ir
ando la
manopola
di
contro
ll
o de
ll
a
ve
loci
ta
, fino ad
ottenere
una immagine
ben
ferma
.
Bildinstallning
A.
Sta
ll
\D
bild
en i
vertika
l
planet
m
ed
hja
lp
av
l
utningsaxeln
.
B.
Sta
ll
\D
onskad
bildstorlek
med
zoomr
ingen.
C.
For
att
fa en
skarp
bild,
fokuseras
med
in
sta
llning
sratten
.
D
.For
att
avlagsna
eventuell
bildkant,
flyttas
armen
for
juster
ing
av
bildstrecket,
uppat
eller
nedat
.
E.
Om
bil
drutan
tenderar
att
hoppa, ju
stera
genom
att
vrida
hastigh
-
etsreglaget
t
ills
stadig
bild
erha
llit
s.
Beeldinstelling
A.
Stel
de
juiste
hoogte
van
het
geprojecteerde
beeld
In
door
aan
de
moer
voor
de
hoogteverste
lling
te
draai
en
.
B.
Bepaa
l de
beeldgrootte
d.
m.
v. de zoo
mring
C.
Draai
,
voor
het
verkrijgen
van
een
scherp
beeld,
aan
de
scherpste
lknop.
D.Om
een
onjuist
in
gesteld
beeldkader
te
corrigeren,
moet de
kader
-
knop
naar
boven of
naar
beneden
worden
bewogen.
E.
lndien
het
bee
ld als gevolg
van
een
te
lage
pro
j
ectiesnelheid
een
hinderlijke
fl
ikkering
te
zien
geeft,
moet
dit
door
draaien
aan de
snelheidsregelknop
worden
opgeheven,
zodat
een
rust
ig
pro
j
ectiebee
ld
wordt
verkregen
.
18

19
Reverse Projection
If
the
operat
ion
sw
i
tc
h
is
turn
ed
countercl
oc
kwise
to
the
position
(]
::-,
you
can
make a
reverse
pro
j
ecti
o
n.
If
a
fram
e
lin
e
ap
pear
s, adju
st
by
the
f
ram
ing
l
ever.
Still Projection
Shift
ing
the
projection
lever
to
the
lef
t up
to
the
posit
ion 0
will
enab
le
you to
perf
o
rm
a
single
frame
st
ill
pr
oj
ec
ti
on of the
desired
fram
e.
If
a
fr
ame I
in
e
comes
out,
return
pr
oj
ect
ion lever
to
....
~
posi
tion
once
and then move
it
0 p
osi
ti
on
aga
in.
Slow
Motion
Projection
When
the
pro
j
ect
i
on
l
ever
is
thrown
to
ext
r
eme
right
posit
ion , a slow
moti
on
projecti
on i s
available
at
a
speed
rat
e one
th
ird
of the
ord
in
ary
pr
oj
ec
ting
speed
(a
pp
rox
. 5
to
8 fps.)
In
this
connect
io
n,
if
the ope
rati
on
swi
tc
h is
set
to
the
r
everse
projec
'
t ion
posi
t ion, you
can
en j
oy
a
reverse
slow mo
ti
on
pr
oj
ect
io
n.
RUckwarts-Projektion
Wird
der
Zentralschalter
gegen
den
Uhrze
ig
ersinn
in
P
os
.
(]
::-
gebra
c
ht,
so
wird
der
F
ilm
ruckwarts
proji
·
ziert.
Meistens
wi
rd
sich
ein
Bild
·
s
tri
ch
zeigen,
der
d
ur
ch
die
Bild
·
strichverstel
lung
bese
i
tigt
werden
kann.
StiIistands-Projektion
Stillstands
·
Projekt
ion
bedeutet
,
dass
das
sic
h
gerade
im
Bi
I
dfensters
des
Projektors
befindliche
Filmbild
al s
Einzelb
i
ld
proj
izier
t
wird
. Die
Umscha
ltung
erfolgt
durch
Verschie
·
bung
des
Wahlh
ebe
ls
in
die
P
os
. 0 .
Zum
Schutz
des
Fil
ms
wi
rd
e
in
Fi
Iter
vor
den
Film
geschwenkt,
wodurch
sich
die
Helligk
eit
des
Pro-
j
ekt
i
onsbi
Id
es
reduziert.
Dennoch
sollte
die
Stillstands-Pro
j
ekti
on
nicht
liinger
als
30
Se
k.
betragen
.
Sod
ann
is
t
der
Wahlhebel
wieder
in
di
e
Neut
ral
ste
llung
....
~
zu
bring
e
n.
Slow
Motion-Projektion
Dur
ch U
mst
e
llung
des
Wahlhebels
in
die
Po
s.
1/ 3
reduziert
sich
die
Pro-
j
ekt
i
onsgeschw
indigkei
t
auf
ein
Dritt
e
l,
d. h.
auf
Zeitlupe.
Die
Zeitlup
e
n-
Geschwindigkeit
kann
durch
Nach
-
stellen
am
Gesc
hwindigkeit
sreg
l
er
vo
n 4-8 B
/S
va
ri
ier
t
werden.
Auch
bei
Riickwarts
-
Projekti
on kann auf
Zeit
lupe
umgestellt
werden
.
Marche
arriere
Pour
la
projection
en
marche
arr
ier-e,
tourne
r Ie commu
tateur
rotatif
vers
la
gauche
jusq
u'a
la
position
(]
O'
.
II
se
ra
eventuell
ement
necessai
re
de
r
ea
ju
ster
Ie
cad
rage
a
I'a
id
e du l
ev
ier
appropri
e.
Arret
sur image
Le
lev
i
er
place
it
la
base
du
pro
jec-
te
ur
perme
t, en pos
iti
on
0 ,
l'
arre
t
sur
image
.
II peUl
arriver
que
I'arret
s'
effectue
entre
de
ux
images
:
pour
faire
dis-
parai
re
la
ligne
noire,
repasser
un
in
sta
nt
sur
la
posi
tion
....
~
avant
de
venir
en posit i
on
o.
Ralenti
Placer
Ie
levier
it
droite
,
sur
la posi-
tion
1
/3
.
La
projecti
on
s'effectue
al
ors
au
ral
ent i a une
cadence
ega
le
au
1/3
de ce
ll
e
se
l
ec
ti
on
nee
po
ur
la
pro
j
ect
ion
normale
(so
it
de 5 a 8
im
/sec
.
environ
). II
est
ega
lement
possi
-
b
e
de
projeter
au r
ale
nti
en m
arche
arrier-e
.
Other Elmo Projector manuals