ELNA XQUISIT 2 User manual

INSTRUCTION MANUAL
09.04 – English Elna International Corp. SA
Printed in JAPAN
www.elna.com

SAVE THESE INSTRUCTIONS
FOR USA ONLY-
This appliance has a polarized plug (one blade wider than the other). To reduce the risk of electric shock, this
plug is intended to fit in a polarized outlet only one way. If the plug does not fit fully in the outlet, reverse the
plug. If it still does not fit, contact a qualified electrician to install the proper outlet. Do not modify the plug in any
way.
Use only foot control YC-700 (UL, CSA) with your Xquisit II.
IMPORTANT SAFETY INSTRUCTIONS
When using an electrical appliance, basic safety precautions should always be
observed, including the following:
Your Elna Xquisit II computerized sewing/embroidery machine is designed and
constructed for HOUSEHOLD use only. Read all instructions before using this
machine.
DANGER- To reduce the risk of electrical shock:
1. An appliance should never be left unattended when plugged in. Always unplug this appliance from the
electric outlet immediately after using and before cleaning.
2. Always unplug before relamping. Replace bulb with same type rated 3 Watts.
WARNING- To reduce the risk of burns, fire, electric shock or injury to
persons:
1. Do not allow to be used as a toy. Close attention is necessary when this machine is used by or near
children.
2. Use this appliance only for its intended use as described in this manual. Use only attachments
recommended by the manufacturer as described in this manual.
3. Never operate this appliance if it has a damaged cord or plug, if it is not working properly, if it has been
dropped or damaged, or dropped into water. Return the appliance to the nearest authorized dealer or service
center for examination, repair, electrical or mechanical adjustment.
4. Never operate the machine with any air openings blocked. Keep ventilation openings of the sewing machine
and foot controller free from accumulation of lint, dust and fibers.
5. Keep fingers away from all moving parts. Special care is required around the sewing machine needle.
6. Always use the proper needle plate. The wrong plate can cause the needle to break.
7. Do not use bent needles.
8. Do not pull or push fabric while stitching. It may deflect the needle causing it to break.
9. Switch the sewing machine off (“0”) when making any adjustments in the needle area, such as threading
needle, changing needle, threading bobbin, or changing presser foot and the like.
10. Always unplug sewing machine from the electrical outlet when removing covers, lubricating or when
making any other servicing adjustments mentioned in the instruction manual.
11. Never drop or insert any object into any opening.
12. Do not use outdoors.
13. Do not operate where aerosol (spray) products are being used or where oxygen is being administered.
14. To disconnect, turn all controls to the off (“0”) position, then remove plug from outlet.

2
SECTION I
Machine Parts and Functions
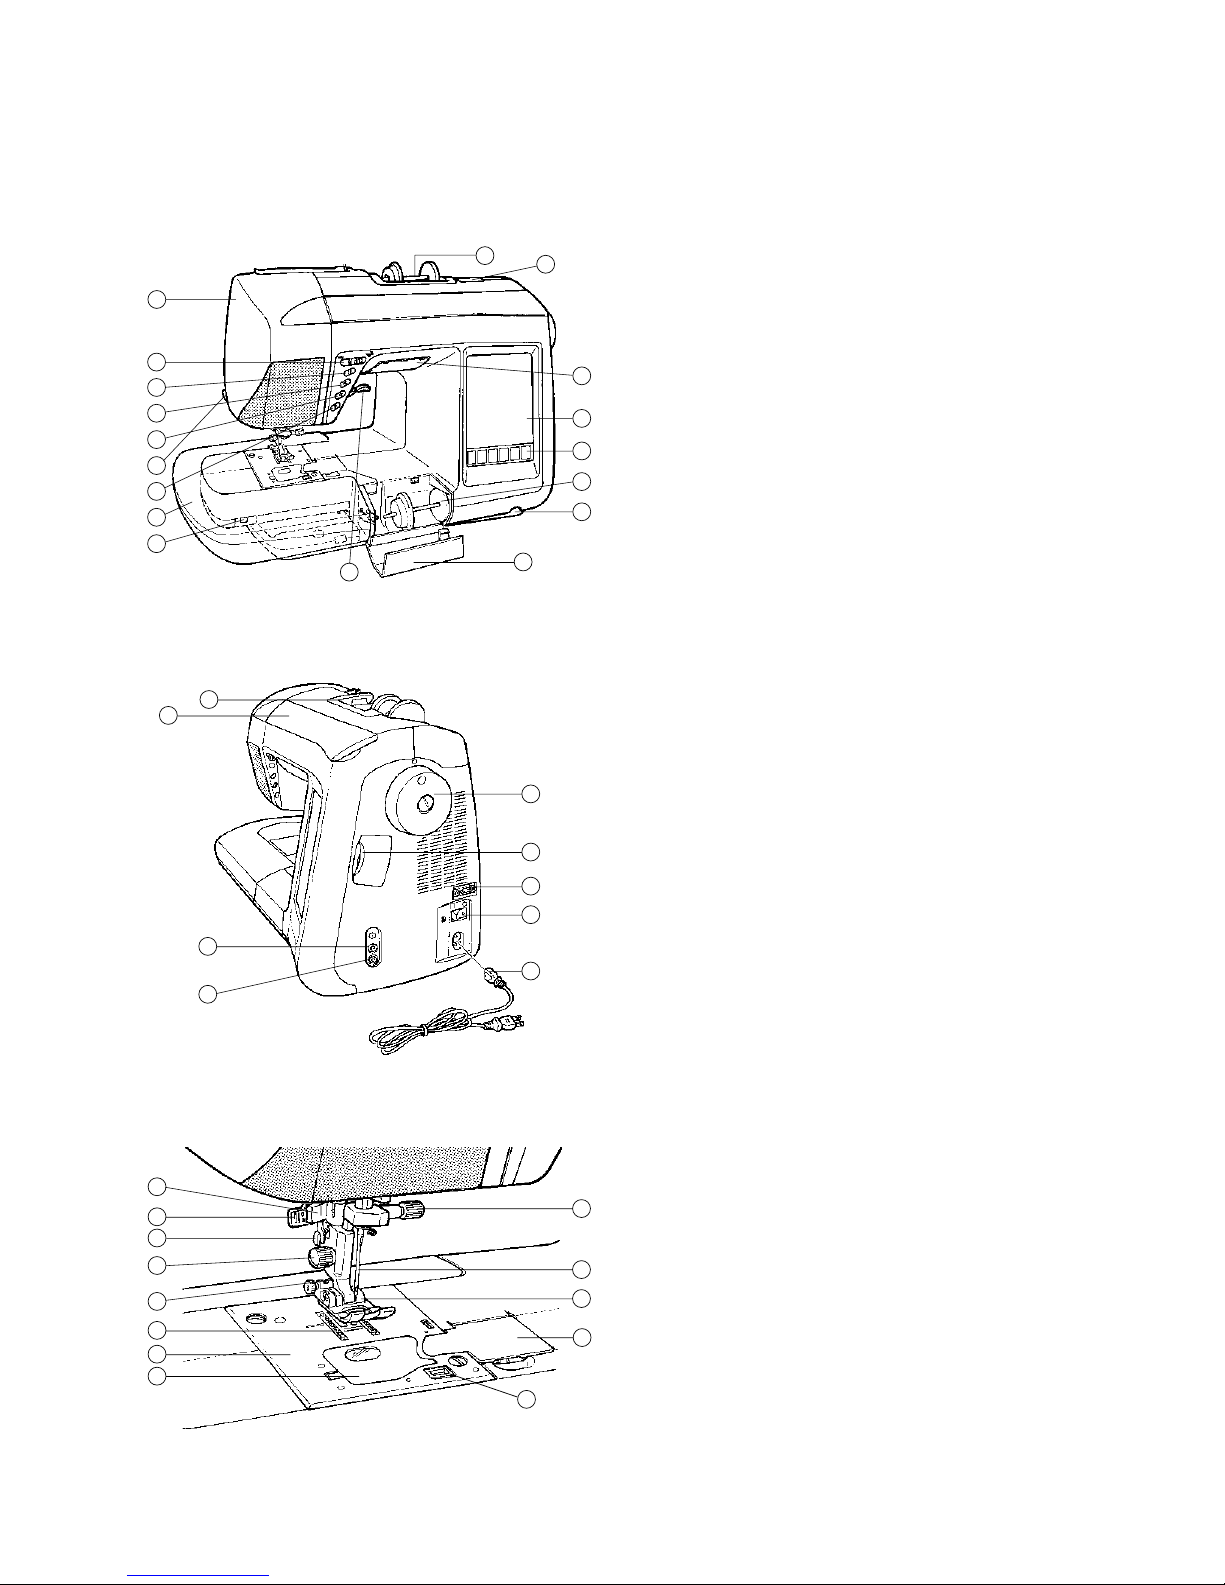
Machine Parts.....................................................................4
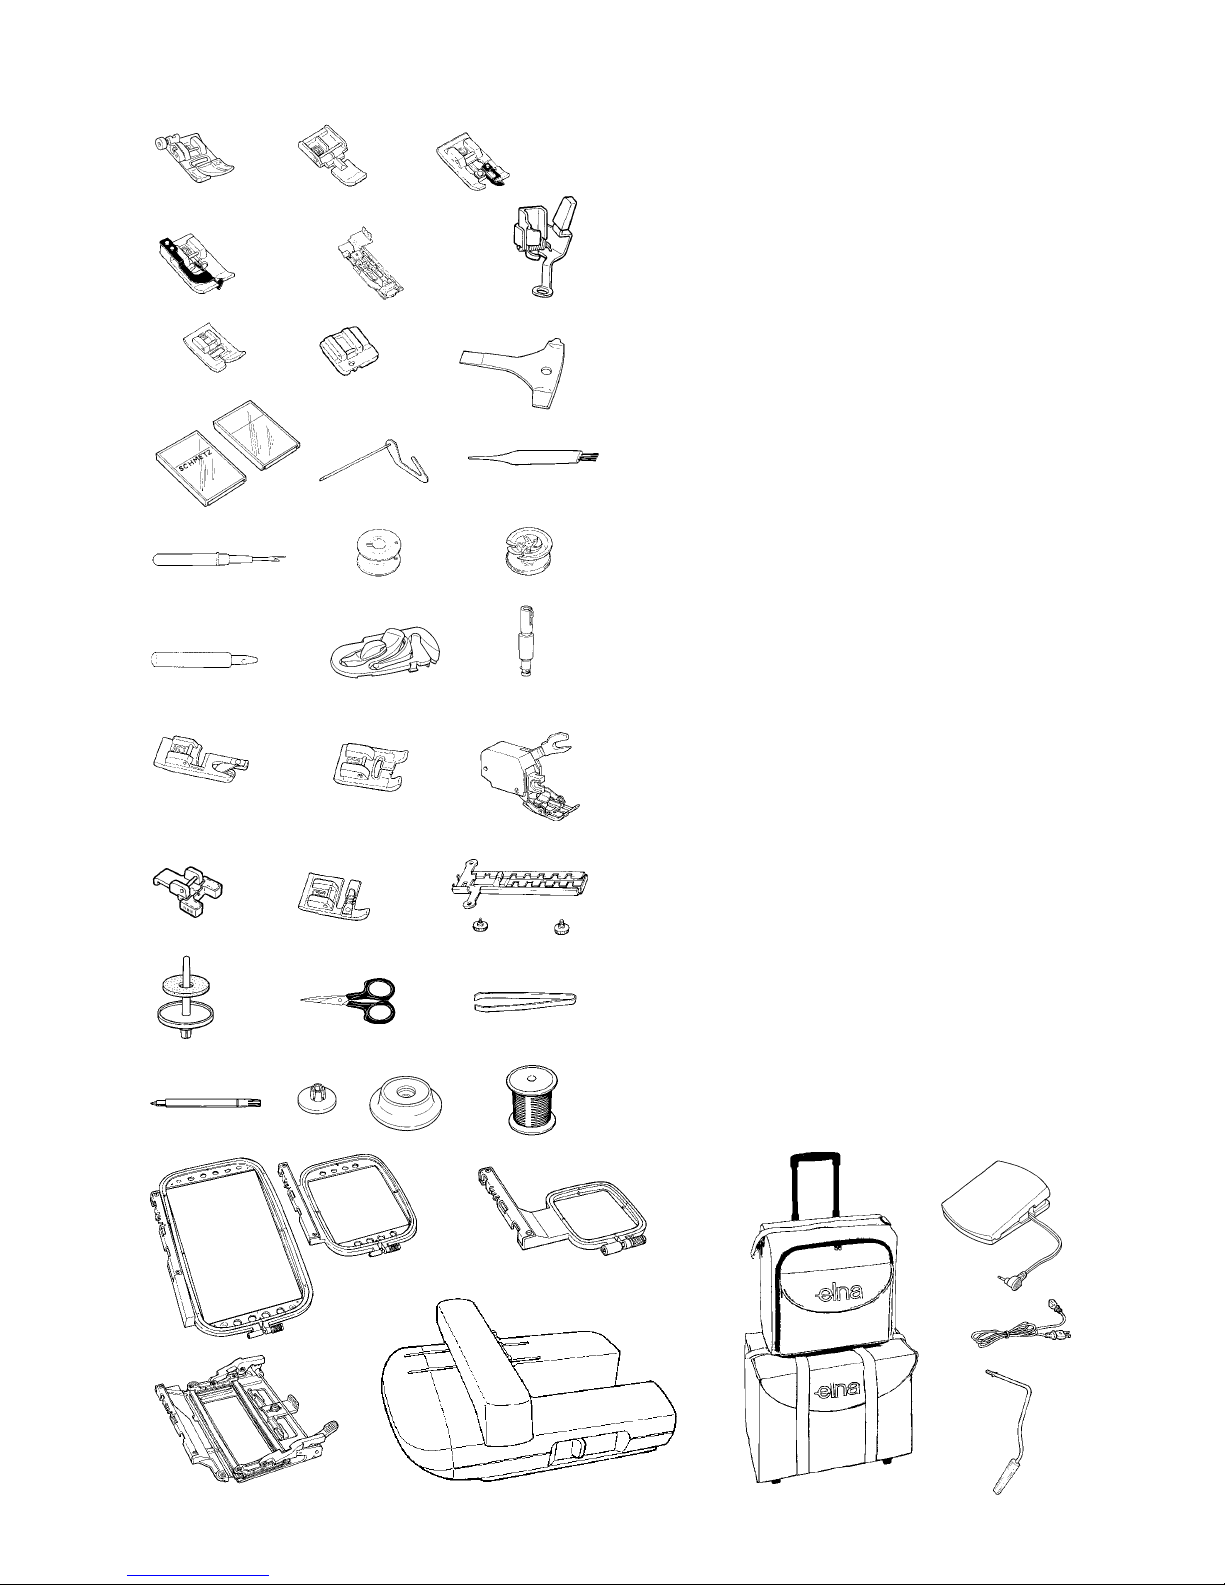
Standard Accessories .........................................................5
Auxiliary Bed/Accessory Box and Free Arm .......................6
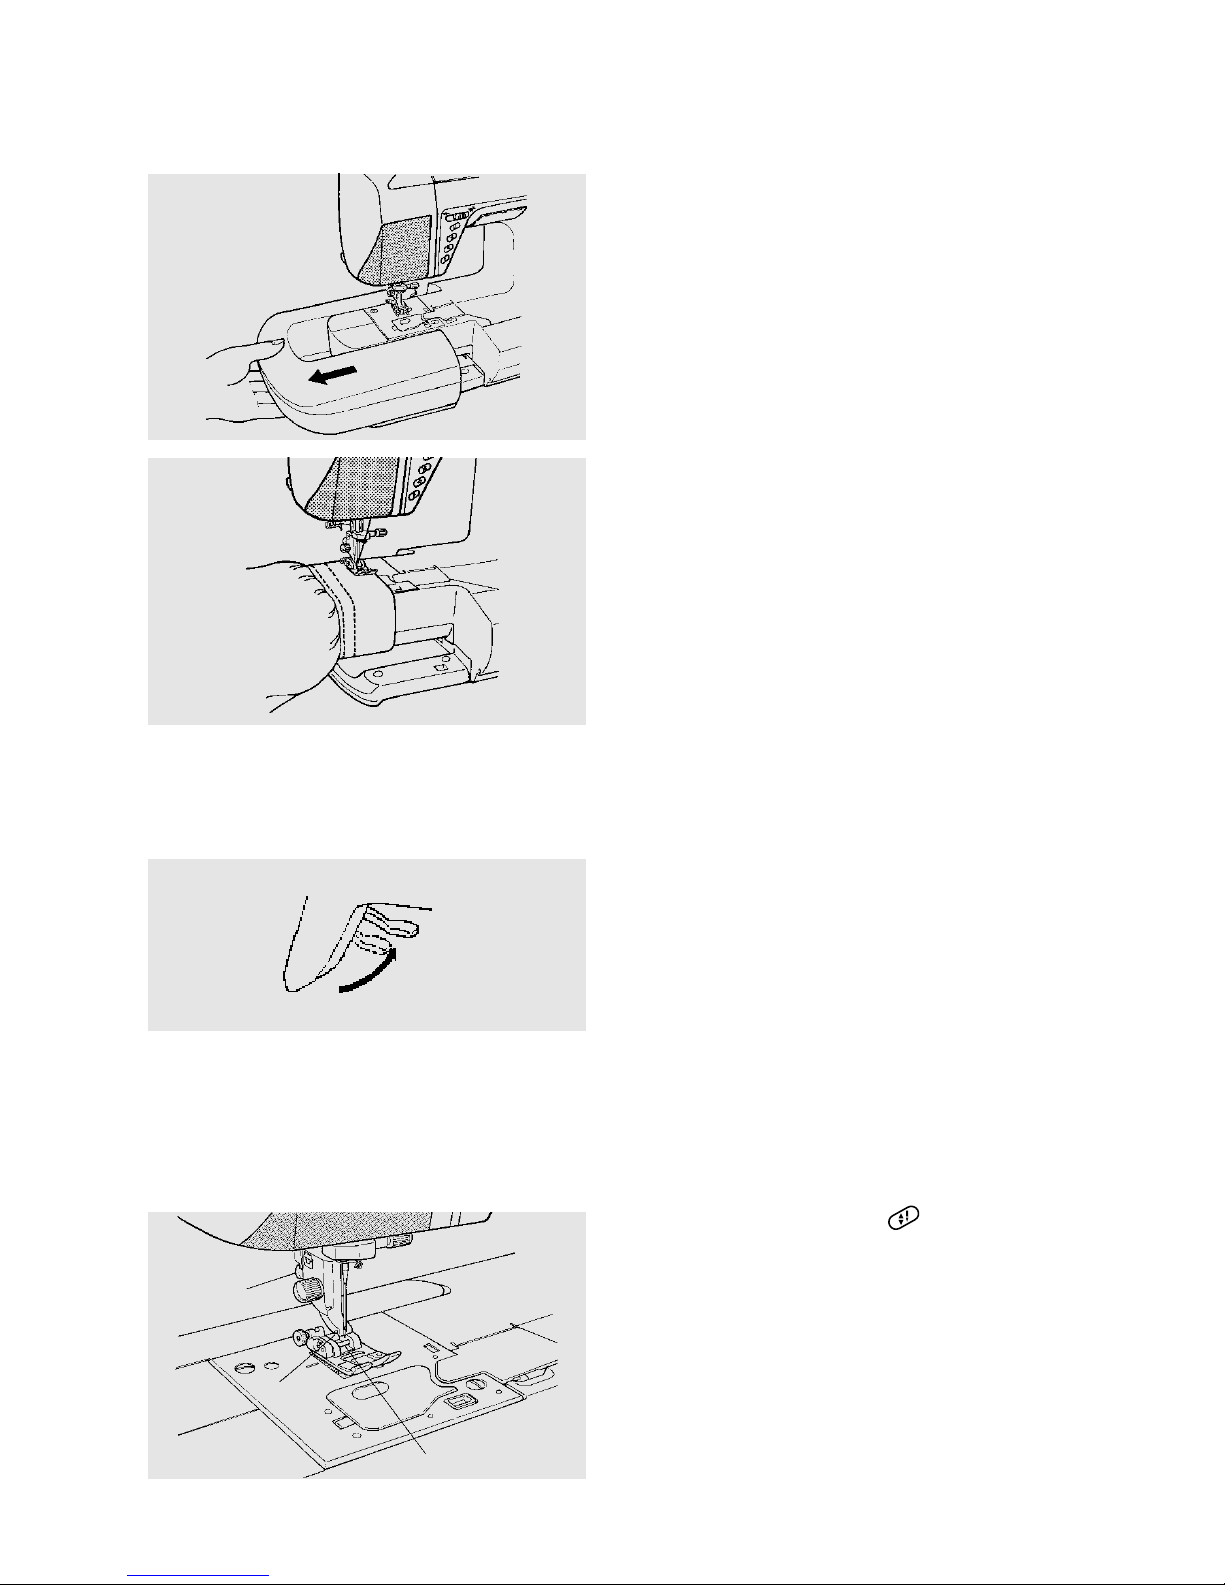
Additional Presser Foot Clearance......................................6
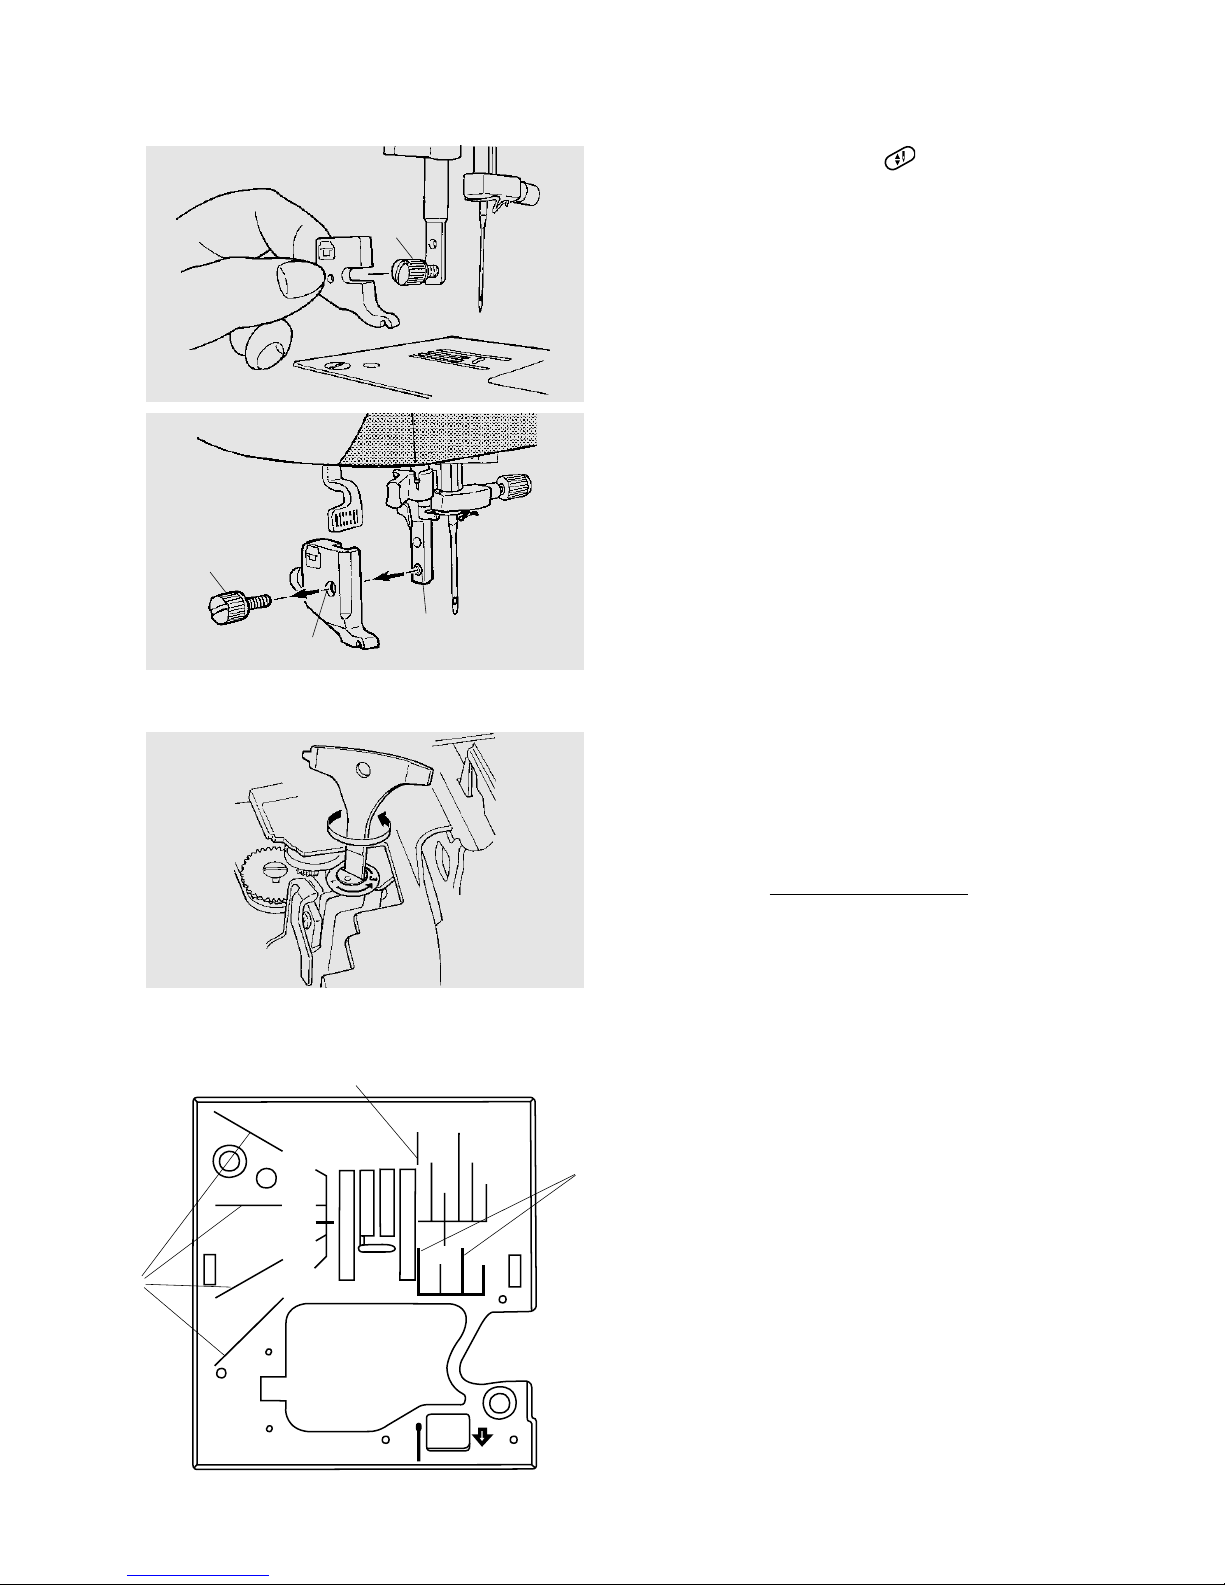
Attach and Remove Presser Feet.......................................6
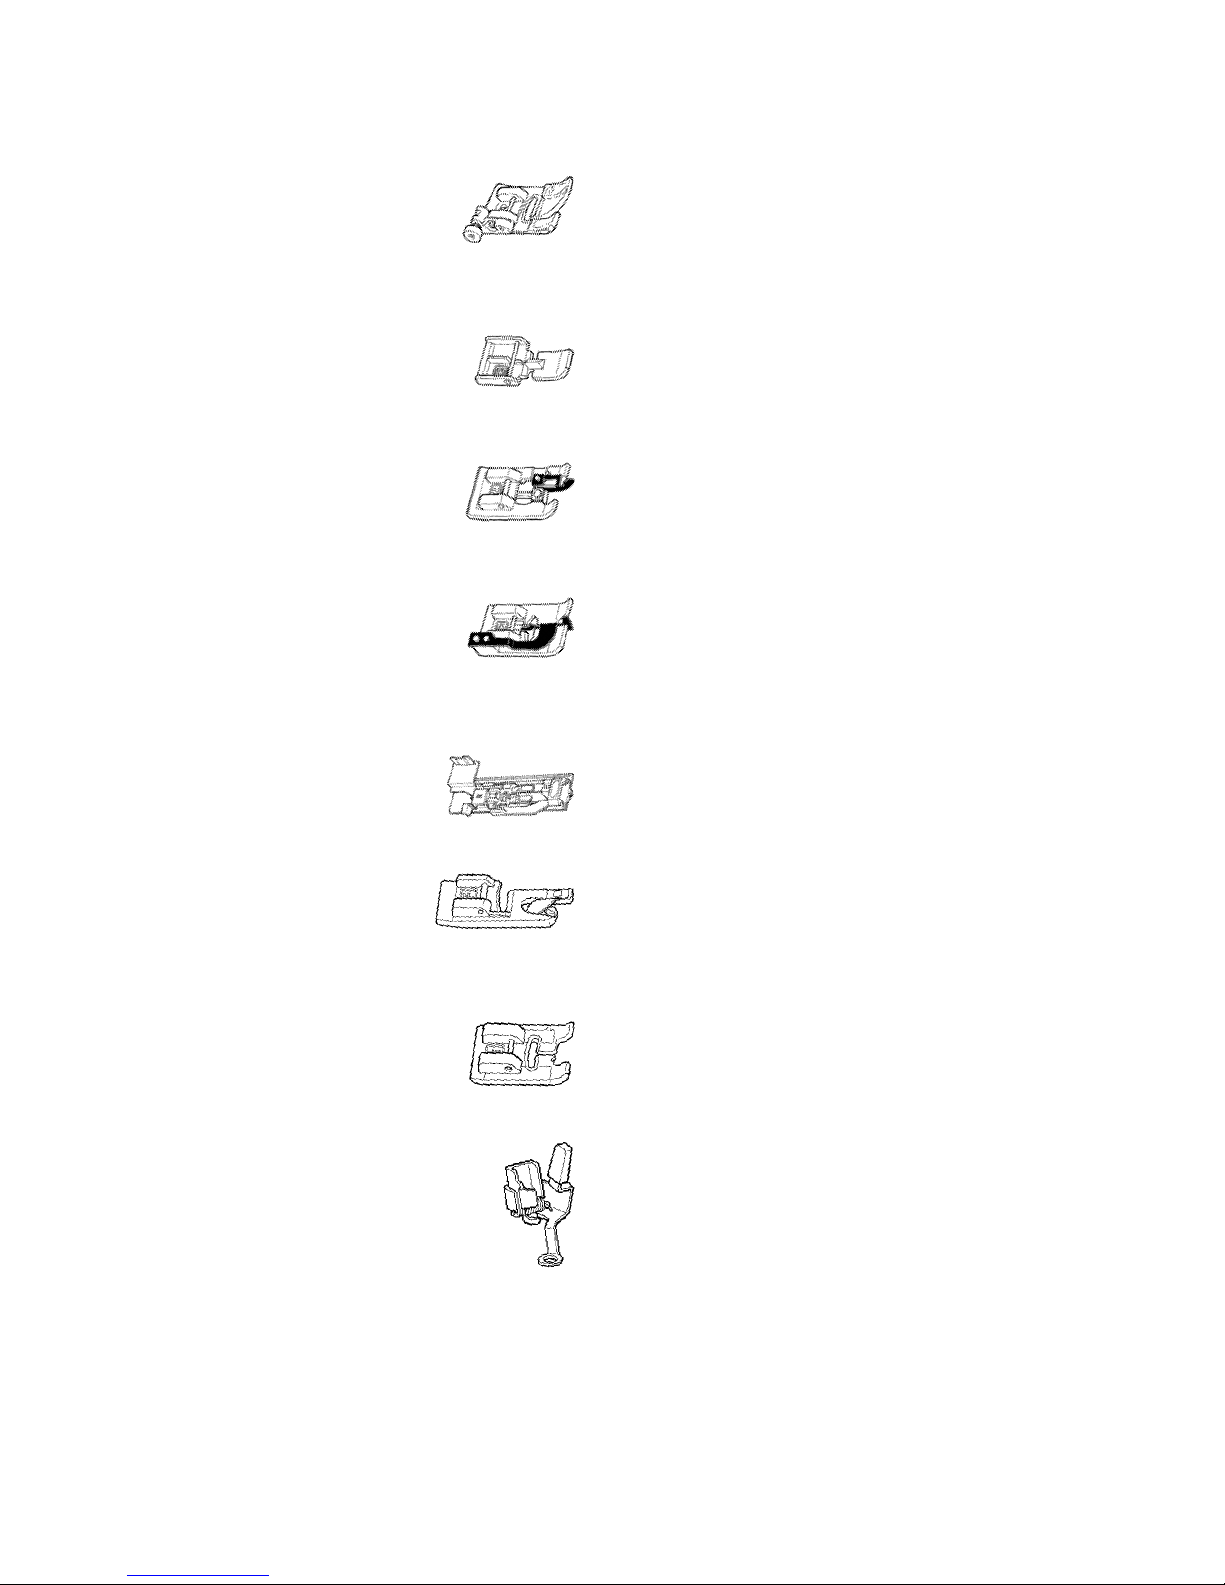
Presser Foot Definitions ..................................................7-8
Presser Foot Storage..........................................................8
Attach and Remove Foot Holder ........................................9
Adjusting Foot Pressure......................................................9
Seam Allowance Lines........................................................9
Knee Lifter.........................................................................10
How to Lower Feed Dog ..................................................10
Controlling Sewing Speed.................................................10
Machine Operation Keys...................................................11
SECTION II
Getting Ready to Sew
Selecting Correct Needle and Thread...............................12
Needle Definitions .......................................................12-13
Changing Needles.............................................................13
For Your Safety .................................................................14
Connecting Machine to Power Supply .............................15
Welcome Screen ..............................................................15
LCD Screen Brightness Control........................................16
Index ............................................................................16-17
First Screen.......................................................................18
Operation Keys .................................................................18
LCD Keys ..........................................................................19
Removing Bobbin from Bobbin Case................................20
Winding Bobbin from Top Spool..................................20-22
Inserting the Bobbin..........................................................22
Automatic Top Threading..................................................23
Manual Top Threading .................................................24-25
Automatic Needle Threader – Manual
Operation.....................................................................26
Drawing Up the Bobbin Thread ........................................27
Test Sewing......................................................................28
How to Access Utility, Heirloom and
Quilting Groups and Folders...................................28-29
How to Select a Stitch......................................................30
Starting to Sew............................................................30-31
Thread Tension .................................................................32
Stitch Width and Length...................................................33
Stitch Width/Needle Position Key.....................................33
Stitch Length Key..............................................................34
Scissors Key and Lock/Reverse Key............................35-36
SECTION III
On-Screen Manual
Sewing Instruction Screens..............................................37
Machine Usage Screens..............................................38-39
Version and Update Data..................................................39
Personalized Machine Settings....................................40-41
SECTION IV
Sewing Techniques
Utility
Straight Stitch..............................................................42
Changing Sewing Direction.........................................42
Sewing on Heavy Fabrics............................................43
Gathering/Shirring........................................................44
Flat Fell Seam..............................................................45
Zippers, Lapped......................................................46-47
Zippers, Centered...................................................48-49
Zippers, Exposed.........................................................50
Invisible Zipper ............................................................51
Rolled Hem..................................................................52
Twin Needle Hem .......................................................53
Basting Stitch..............................................................54
Triple Seam .................................................................54
Saddle Stitch ...............................................................54
Zigzag Stitch................................................................55
Zigzag, Center – Overcast...........................................55
Multi-Cord Foot
Gathering Over a Cord...........................................55
Zigzag, Center – Satin Stitch Applique........................56
Zigzag Left...................................................................57
Zigzag Right.................................................................57
3-Step Zigzag Stitch.....................................................57
Serpentine Stitch.........................................................58
Applying Elastic...........................................................58
Blind Hem Stitch .........................................................59
Stretch Seam...............................................................60
Lingerie Stitch .............................................................60
Super Overlock Stitch..................................................60
Overlock Stitch............................................................61
Super Stretch Stitch....................................................61
Double Overlock Stitch ...............................................61
Tricot Stitch.................................................................62
Shell Tuck....................................................................62
Rickrack.......................................................................63
Eyelets.........................................................................63
Arrowtack....................................................................63
Bartack ........................................................................64
Darning Stitches..........................................................65
Directional Sewing, Straight Stitch..............................65
Directional Sewing, Zigzag Stitch................................65
Buttonholes............................................................66-68
Buttonholes, 4-Step ...............................................69-70
Bound Buttonholes .....................................................71
Corded Buttonholes ....................................................72
Sewing on Buttons......................................................73
Heirloom
Pintucks.......................................................................74
Whip and Roll Hem .....................................................75
Hemstitches................................................................75
Drawn Work and Fringing ...........................................76
Bridging (Fagoting) ......................................................77
Quilting
Patchwork ...................................................................78
Quilt Guide ..................................................................78
Walking Foot ...............................................................79
Quilt Stitch...................................................................79
Buttonhole Appliqué....................................................80
Stippling Stitches.........................................................81
TABLE OF CONTENTS

3
SECTION V
Decorative Sewing
Access Stitches Using the Key............................82-87
LCD Keys .....................................................................88-89
Test Sewing......................................................................90
How to Program Decorative Patterns...............................91
Single Pattern....................................................................91
Scallop Edges....................................................................92
Twin Needle Decorative Patterns.....................................92
Combining Patterns ..........................................................93
Scissors and Lock/Reverse Keys......................................93
Reset Key..........................................................................93
Elongation Key ..................................................................94
Two Color..........................................................................94
Size Key.............................................................................95
Mirror Image and Face to Face.........................................95
Cascade Key .....................................................................95
Circular Sewing.................................................................96
Alphabets and Editing.......................................................97
Alphabets and Saving Memory.........................................98
Overwriting Memory.........................................................99
Recalling Memory...........................................................100
Deleting Memory............................................................100
Inserting a Second Color.................................................101
SECTION VI
Getting Ready to Embroider...............................102
Attaching Embroidery Foot J ..........................................103
Inserting Embroidery Needle..........................................103
Installing Embroidery Unit...............................................103
Removing Embroidery Unit.............................................103
Welcome Screen ............................................................104
First Screen.....................................................................104
How to Access Alphabets and Designs ..................104-107
Embroidery Cards (Optional)...........................................108
Operation Keys ...............................................................108
LCD Keys.................................................................108-109
Automatic Bobbin Winding......................................110-113
Threading the Machine...................................................113
Preparing the Fabric........................................................113
Embroidery Frames.........................................................114
Securing Fabric in Frame/Hoop.......................................114
Attaching Frame/Hoop....................................................115
Removing Frame/Hoop...................................................115
Embroidering Small Areas...............................................115
SECTION VII
Embroidering
Embroidering a Single Design..................................116-121
Embroidering More Than One Letter ......................122-123
Embroidering Multiple Lines of Letters and
Adding/Editing a Design.....................................124-129
Temp Embroidery Memory.............................................130
Permanent Memory.................................................131-133
Multiple Hoop Embroidery - Characters...................134-140
Multiple Hoop Embroidery with Designs.................141-146
Continuous Embroidery Frame................................146-147
Repositioning Frame After
Embroidery Begins.............................................148-149
SECTION VIII
On-Screen Manual
Machine Usage Screens.................................................150
Personalized Machine Settings................................150-152
Download from Xpressive Software (optional)...............153
SECTION IX
Maintenance
Cleaning the Bobbin Area ...............................................154
Cleaning the Hook Area and Feed Dog...........................154
Cleaning Auto Bobbin Thread Winder.............................155
Changing the Light Bulbs................................................156
Troubleshooting.............................................157-158
Specification Table....................................................158
Index................................................................159-160
Thread Color Conversion Chart..........................161
NOTE: Information found in this instruction
manual is current at the time of printing. Elna
reserves the right to change and update
specifications and information as needed.

4
SECTION I
Machine Parts and Functions
Machine Parts
1. Presser foot lifter
2. Drop feed lever
3. Auxiliary bed/accessory box
4. Start/stop key
5. Thread cutter
6. Reverse/backtack key
7. Thread cutter key
8. Up/down Needle key
9. Sewing speed lever
10. Face plate cover
11. Spool pin holder
12. Bobbin winding shaft cover
13. Light
14. LCD screen
15. Operation keys
16. Bottom spool pin for bobbin winding
17. Knee lifter insert
18. Bottom spool pin cover
19. Handle
20. Top accessory storage
21. Handwheel (always turn towards you)
22. Embroidery card insert slot
23. Serial port
24. Power/light switch
25. LCD brightness control
26. Foot control socket
27. Electrical cord and power plug
28. Bobbin case cover button
29. Bobbin case cover
30. Needle plate
31. Feed dog
32. Presser foot holder
33. Presser foot holder screw
34. Presser foot release button
35. Buttonhole lever
36. Automatic needle threader
37. Needle clamp screw
38. Needle
39. Presser foot
40. Automatic bobbin winder cover
20 19
18
17
16
15
14
13
12
11
10
9
8
7
6
5
4
3
2
1
21
22
23
24
27
25
26
36
28
40
39
38
37
35
34
33
32
31
30
29
This manual suits for next models
1
Table of contents
Other ELNA Sewing Machine manuals