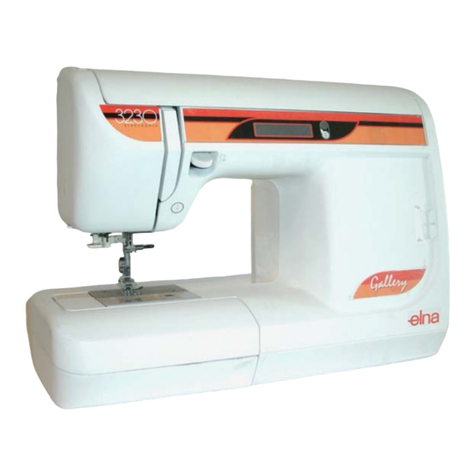
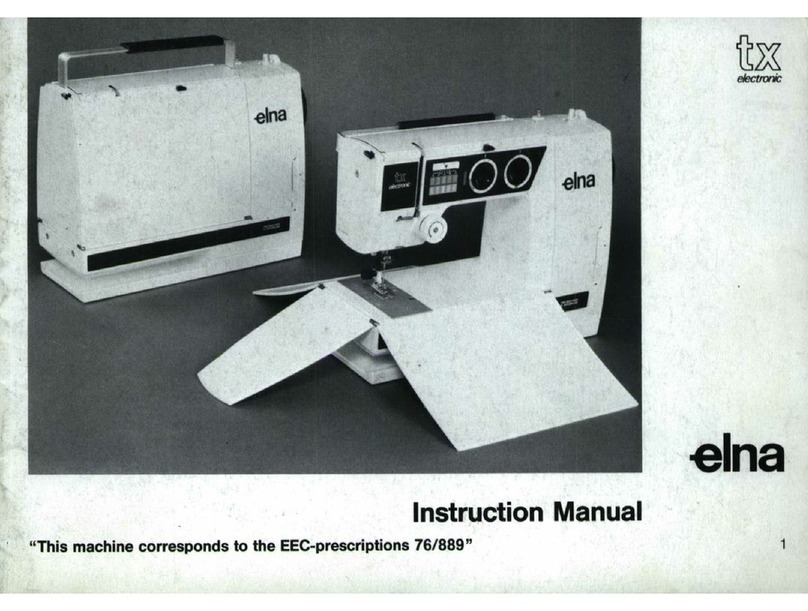
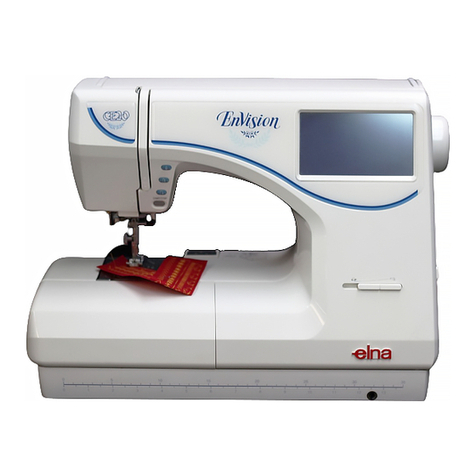
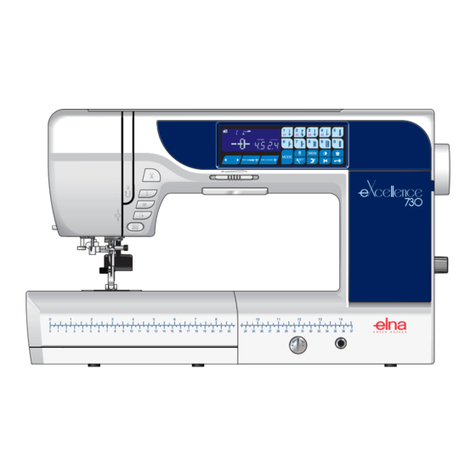
ELNA EnVision 8006 User manual

th
Elna
SOO6
Envision
_
INSTRUCTION
MANUAL
SWISS
DESIGN

INSTRUCTION
BOOK
MODEL
8006

IMPORTANT
SAFETY
INSTRUCTIONS
Your Elna
model
8006
sewing
machine
is
designed
and
constructed
for
HOUSEHOLD
use
only.
Read
all
instructions
before
using
this
sewing
machine.
DANGER
—
To
reduce
the
risk
of
electrical
shock:
1.
Your
sewing
machine
should
never
be
left
unattended
when
plugged
in.
Always
unplug
the
machine
from
the
electrical
outlet
immediately
after
using
and
before
cleaning.
2.
Always
unplug
before
replacing
light
bulb.
Replace
bulb
with
same
type
rated
13.2
Volts
D.C.
3
watts.
3.
Do
not
reach
for
the
machine
if
it
has
fallen
into
water.
Unplug
immediately.
4.
Do
not
place
or
store
machine
where
it
can
fall
or
be
pulled
into
a
tub
or
sink.
Do
not
place
it
in
or
drop
it
into
water
or
other
liquid.
WARNING
—
To
reduce
the
risk
of
burns,
fire,
electrical
shock
or
injury:
1.
Do
not
allow
the
machine
to
be
used
as
a
toy.
Supervision
is
necessary
when
this
machine
is
used
by
or
near
children.
2.
Use
this
machine
only
for
its
intended
use
as
described
in
this
manual.
Use
only
attachments
recommended
by
the
manufacturer
as
described
in
this
manual.
3.
Never
operate
this
machine
if it
has
a
damaged
cord
or
plug,
is
not
working
properly,
has
been
dropped
or
damaged,
or
dropped
into
water.
Return
the
machine
to
the
nearest
authorized
dealer
or
service
center
for
examination,
repair,
electrical
or
mechanical
adjustment.
4.
This
machine
is
equipped
with
a
special
connection
cord
which,
if
damaged,
must
be
replaced
by
an
identical
cord.
This
can
be
obtained
from
your
dealer.
5.
10.
11.
12,
13.
14,
15.
16.
Never
operate
the
machine
with
any
air
opening
blocked.
Keep
ventilation
openings
of
the
sewing
machine
and
foot
control
free
from
accumulation
of
lint,
dust
and
fibers.
.
Never
drop
or
insert
any
object
into
any
opening.
.
Do
not
use
outdoors.
.
Do
not
operate
where
aerosol
(spray)
products
are
being
used
or
where
oxygen
is
being
administered.
.
To
disconnect,
turn
machine
off,
then
remove
plug
from
outlet.
Do
not
unplug
by
pulling
on
cord.
To
unplug,
grasp
the
plug,
not
the
cord.
Keep
fingers
away
from
all
moving
parts.
Special
care
should
be
used
around
the
sewing
machine
needle.
Always
use
the
proper
needle
plate.
The
wrong
plate
can
cause
the
needle
to
break.
Do
not
use
bent
needles.
Do
not
pull
or
push
fabric
while
stitching.
It
may
deflect
the
needle
causing
it
to
break.
Switch
the
machine
off
when
making
any
adjustment
in
the
needle
area,
such
as
threading
needle,
changing
needle,
threading
bobbin,
changing
presser
foot,
etc.
Always
unplug
the
sewing
machine
from
the
electrical
outlet
when
removing
covers,
lubricating
or
when
making
any
other
servicing
adjustments
mentioned
in
the
instruction
manual.
SAVE
THESE
INSTRUCTIONS
IMPORTANT
Be
sure
to
keep
machine
away
from
static
electricity,
heat
sources,
humidity
and
direct
sunlight.
When
using
your
sewing
machine
the
first
few
times,
place
waste
fabric
under
the
presser
foot
and
run
the
machine
without
thread
for
a
few
minutes.
Wipe
away
excess
oil.

Table
of
Contents
SECTION
|
Machine
Parts
and
Functions
Patt
Neimesiny.,
(Site
lcci
intl
Hs
tet
iaey
senveelte,
saeracarteneraase
cutee
es
2
Standard
Accessories
........
3
Extension
Table/Free
Arm..
ww
Fine
Adjustment
Dial..........
4
How
to
Drop
the
Feed
Dog.............
5
Additional
Presser
Foot
Clearance...
5
Attaching
and
Removing
Presser
Feet...
ee
ceeceeeee
5
Attaching
and
Removing
the
Shank
...........::::ccceecsceecseesees
5
Foot
Pressure
Dial
wo.
ae)
Sewing
on
Heavy
Fabrics...
«6
Controlling
Sewing
Speed...
eee
cece
cee
eeseesteeneeeeees
6
Computer
Display
Screen
Brightness
Control
........
ee
6
Changing
Needles............
cece
eeeeeeeereeeeees
ha
Seam
Allowance
Lines
ee
Thread
Tension
Dial
...........
cee
8
*
Choosing
the
Correct
Tension
....
8
*
Tension
is
Too
Tight
«0.0.0:
8
¢
Tension
is
Too
Loose
..
8
Function
Keys
vce
9
¢
Up/Down
Needle
Key..
“ud
¢
Auto-lock
Key
.............-
9
@
REVEISC
Ke
yoecstercisccvtsenes
onditeregehs
ctneess
pene
deadiieadiomeemenede
9
€
Start/Stop
Key.
vedi
ttn
ee
tet
eee
necesito
eee
9
Program
Panel
Keys
10
*
Memory
Key......
v0
¢
Clear
Key
20...
watO
©
Menu
Key
wees
oe
1)
*
Letter
Size
Key...
ld
¢
Upper/Lowercase
Key
...........0...
10
*
Sewing
and
Frame
Position
Key
....
ial
O
e
Previous
Page
Key...
cee
10
*
Next
Page
Key.........
el)
*
SROTUIM:
KAY
oS
eea
ho
iotte
eek
ae
tect
eee
a
ath
ee
10
SCrEEN
MESSAGES
........ceeeseceeeseeeeesecseeeeeenececeeeereeesaeeseteaeeees
11
SECTION
Il
Getting
Ready
to
Sew
Needle
and
Thread
Selection
oo...
ee
ceeeeereeeeeneeennees
12
Connecting
Machine
to
Power
Supply
..
sel
Language
Selection...
es
sald
Winding
the
Bobbin......
wel
4
Inserting
the
Bobbin
.......
ra
ks)
Threading
the
Machine.
.........
16
Automatic
Needle
Threader
.....
16
Drawing
up
the
Bobbin
Thread...
eee
eeneeeeeeteenees
17
SECTION
Ill
Traditional
Sewing
(Utility,
Buttonhole
and
Decorative
Sewing)
How
to
Select
Traditional
Sewing
Mode
uo...
eee
18
How
to
Select
a
Stitch...
ee
ccc
ccceeee
cece
eeetteeeneeetetetneesens
18
Straight
Stitch
wo...
219
*
Starting
to
Sew...
wel
*
Changing
Sewing
Direction
..
wroh®
¢
Finishing
Off
a
Seam
..........
ee)
*
Adjusting
Stitch
Length
.....
20
¢
Variable
Needle
Positions
oo...
cee
eeeeeereeeereeenees
20
ZIPPER
INSSTHON
sain
ceeded
adaeewcee
evant
eeek
hebddetead
chat
atsseegene
21
¢
Fabric
Preparation
...
2
*
Lapped
Application
..
21-22
“EWIPNG
SCS
QM.
jenssesives
eae
arscsnicetaceseessilesdotsdsandtitercauedivasesdes
23
e
Threading
the
Machine
oo...
cece
eeeeeeeeeeteereeeteeetees
23
Sculpture
Stitch
(Quilt
Stitch)
oo
ects
eteteeeree
24
Triple
Straight
Stretch
Stitch
oe
cecseesseeetsreeereeees
24
Triple
Straight
Stretch
Hemstitch
2.00...
cccccceceeeseeesesseeee
24
Zigzag
Stitch
oe
eee
25
¢
Adjusting
Width
and
Length...
25
Whip
and
Roll
Hem...
eeeereeerenees
26
Satin
Stitch
Applique
.......ccececcccecsecenes
26
How
to
Sew
on
a
Button..
el
Overcast
Stitches
........
..28
*
Zigzag
Stitch.......
28
°
Multiple
Zigzag...
28
¢
Super
Overlock
Stitch
....
e:
BING
SM
STICH
522s.
dics
teede
ed
ctseedsMaast
hvvahidhen
ee
oaes
29
Stretch:
Stitch:
4A.
css
eaten
vetacindeeaadn
dy
Makara
29
Super
Stretch
Stitch
we
30
Parisian
Hemstitch
or
Pinstitch
..
7
Buttonhole:
Applique:
ss.cwiciisdaydscurntedcsndecsei
ies
posteN
ose
eeeds
SHSIMSUICH
5.
cess
weecieesee
ince
execs
tna
ou
this
cint¥a
ven
fog
esdeavaliadagbanta
agian
Sensor
Buttonholes
.........
¢
Classic
Buttonhole
...
¢
Stretch
Buttonhole.....
*
Keyhole
Buttonhole...
ccecccccccccecceseesscceeseneeneeee
¢
How
to
Alter
Buttonhole
Stitch
Width
and
Length
........
34
*
Reinforced
Buttonhole
ooo...
ccc
cee
ttceeseceseeeeneeees
34
*
Corded:
Buttonhole
vce.
csvacten
dati
cried
Saedaceoievn
35
Patchwork
.......c:ceecseeereeens
186
Daisy
Stitch
for
SMOCKING
.........
cc
eceeceeseeteeteessteeesesseeesessees
36
Daisy
HeEmsSthth
2.
ccvscesca.cfee
testes
iacaahidedgvieed
etavartnendieon
ts
37
Decorative
Satin
Stitches
0.2...
cccecccccccesseeeecseeenssenees
37
*
Scallop
Edges
...........
¢
Heirloom
Insertion
SECTION
IV
Hoop
Embroidery
Getting
Ready
to
Monogram
and
Embroider
.................0.
39
*
Selecting
Needle
and
Thread...
cceesessesseseseee
39
*
Stabilizing:
Fabrics...
2s.
j.eccq.stesk
gnaw
satincogertedcaetaveaveres
39
©
Template...
39
©
Machine
Threading...........cceccccceceessscsesssseseeceeeeseeeaaes
40
¢
Securing
Fabric
in
Embroidery
Hoop
..
..
40-41
Built-in
MONOQrAMS
oo.
ee
ce
eeeeeeeeeeetteetttessseeeeeeneeeees
42-44
*
Programming
Letters
and
Numbers
(DISCK
StVle)
«ci
cymauutr
sched
d
nerregta
ek
eivnared
45
*
Programming
Uppercase
and
Lowercase
Letters
(SCFIDUSTYVIO)
S65
sectcet
cca
tetas
ap
Mocion
eMerntmmeataseiadathe
46
*
Programming
Diacritical
Letters
(block
styleAOWercaSe)
......ceccessseteesesseteeseeeneesseeneess
47
Thread
Breaks
While
Embroidering
.............0ccccccccceeeeeee
48
¢
Beginning
Key
.........
cece
.
¢
Frame
Backward
Key
*
Frame
Forward
Key
uc.
Large
Pattern
Embroidery
with
Optional
EnVision
Cards:
eccscctvite.:
nts
ute
ae be
te
ows
49
*
Insert
EnVision
Card
49
¢
Eject
EnVision
Card
................
49
EnvVision
Card
Sewing
—
100
Series..............
..50
How
to
Skip
on
100
Series
EnVision
Cards
..
od
EnVision
Card
Sewing
—
#1,
#2, #3,
etO.
neces
52
SECTION
V
Care
Of
Your
Machine
Cleaning
the
Bobbin
Area
oo...
ccccetcsetesteeetereeessaeens
Cleaning
the
Hook
Area
and
Feed
Dog...
:
Replacing
the
Bobbin
Case
..........
ee
TROUDIESNOOLING
yee
csceapinenssvieevssGitisenudyeestnondactoers
cust
Ouweed?
SECTION
|
Machine
Parts
and
Functions
Part
Names
1.
17.
18.
19.
20.
21.
22.
23.
24.
25.
26.
27.
28.
Foot
pressure
dial
.
Top
cover
.
Thread
tension
dial
.
Spool
holder
(Large)
.
Bobbin
winder
spindle
.
Program
panel
keys
.
Computer
display
screen
.
Up/down
needle
key
.
Auto-lock
key
.
Reverse
key
.
Start/stop
key
.
Extension
table
(Accessory
storage
box)
.
Bobbin
cover
plate
release
button
.
Bobbin
cover
plate
.
Needle
threader
.
Thread
cutter
Carrying
handle
Thread
take-up
lever
Presser
foot
lever
Buttonhole
lever
Feed
dog
lever
Carriage
Power
switch
Machine
sockets
Card
eject
button
Envision
Card
EnVision
Card
slot
Flywheel

Standard
Accessories
Overlock
foot
Satin
stitch
foot
Blind
hem
foot
Zipper
foot
Embroidery
foot
Automatic
buttonhole
foot
Metal
foot
.
Screwdriver
.
Bobbins
.
Additional
spool
pin
P>pUMogO
TO
SO
MONDRAR
HOD
3
=a
at
.
Spool
pin
felt
.
Lint
brush
.
Seam
ripper
=
i)
ev
amare’
bh
WwW
.
Set
of
needles
.
Small
spool
holder
a
4
ao
uo
.
Large
spool
holder
=
~
.
Spool
stand
eure
oc
.
Extension
table
(Accessory
storage
box)
oi
©o
.
Foot
compartment
iy)
Oo
.
Power
supply
cord
nN
ae
.
Foot
control
ie)
Nh
.
Carrying
case
ye)
a
.
Embroidery
hoop
No.
1

TOO
SHORT
CORRECT
TOO
LONG
&
Extension
Table
(Accessory
Storage
Box)
and
Free
Arm
Lift
the
extension
table
up
from
the
machine
to
expose
the
free
arm.
Advantages
of
free
arm
sewing:
¢
For
stitching
sleeves,
waistbands,
pants
legs
or
any
circular
garment
area
¢
For
darning
socks
or
mending
knees,
elbows
or
worn
areas
in
children’s
clothing
Attach
the
extension
table
for
a
large
sewing
surface.
Position
the
tabs
on
the
base
grooves
and
push
down
gently.
Using
the
Fine
Adjustment
Dial
Choice
of
fabrics
and
threads
may
affect
the
stitch
formation.
The
fine
adjustment
dial
may
be
used
to
either
lengthen
or
shorten
the
stitch.
@
Fine
adjustment
dial
@
Standard
mark
@)
Setting
mark
To
fine
tune
the
stitch,
use
a
screwdriver
to
move
the
setting
mark.
if
stitches
are
too
short,
correct
by
turning
the
dial
in
the
direction
of
“+”.
If
stitches
are
too
long,
correct
by
turning
the
cial
in
the
direction
of
“—”.

How
to
Drop
the
Feed
Dog
The
feed
dog
drops
out
of
position
for
hoop
embroidery
sewing
and
special
sewing
techniques:
free
motion
embroidery,
button
sewing,
etc.
The
feed
dog
must
always
be
up
for
traditional
sewing.
Locate
the
feed
dog
lever
on
the
back
of
the
free
arm.
Slide
the
lever
either
to
the
right
(down)
or
to
the
left
(up).
@
Raised
position
@)
Lowered
position
Additional
Presser
Foot
Clearance
You
can
raise
the
presser
foot
about
6.5
mm
(1/4”)
higher
than
the
normal
up
position
for
easy
removal
of
the
presser
foot,
to
place
heavy
fabrics
under
the
presser
foot,
or
when
moving
the
hoop
under
presser
foot.
Pull
up
the
presser
foot
lever
beyond
the
normal
up
position.
@)
Presser
foot
lever
Attaching
and
Removing
Presser
Feet
Press
the red
button
on
back
of
the
shank.
The
presser
foot
will
drop
off.
Place
the
selected
presser
foot
so
the
pin
on
the
foot
lies
just
under
the
groove
of
the
shank.
Lower
the
presser
bar
to
attach
the
foot.
@
Red
button
®
Groove
©
Pin
Attaching
and
Removing
the
Shank
The
shank
is
removed
by
turning
the
thumbscrew
counter-clockwise
with
the
screwdriver.
@
Thumbscrew
When
attaching,
match
the
hole
in
the
shank
with
the
hole
in
the
presser
bar.
Put
thumbscrew
into
hole.
Tighten
thumbscrew
by
turning
it
clockwise.
Shank
@©
Presser
bar

Foot
Pressure
Dial
The
foot
pressure
dial
should
be
set
at
“3”
for
traditional
sewing.
Reduce
the
pressure
to
“2”
for
applique,
cutwork,
drawn
work,
basting
and
embroidery.
Velours
and
knits
with
a
lot
of
stretch
may
require
a
“1”
setting.
@
Setting
mark
Sewing
on
Heavy
Fabrics
The
black
button
on
presser
foot
A
locks
the
foot
in
a
horizontal
position
when
pushed
in
before
lowering
the
presser
foot.
This
ensures
even
feeding
at
the
beginning
of
seams
and
helps
when
sewing
many
layers
of
fabric
such
as
welt
seams
used
to
hem
jeans.
When
the
point
of
an
increased
thickness
is
reached,
lower
the
needle
and
raise
the
presser
foot.
Press
in
the
black
button.
Lower
the
foot
and
continue
sewing.
This
button
releases
automatically
after
a
few
stitches
have
been
sewn.
Controlling
Sewing
Speed
Sewing
speed
varies
with
the
foot
control.
The
harder
you
press
on
the
foot
control,
the
faster
the
machine
runs.
Computer
Display
Screen
Brightness
Control
Display
screen
lightens
or
darkens
for
visibility
by
turning
the
dial
located
under
the
top
cover
in
front
of
the
foot
compartment.

So
T
a
SS
eee
XY
YF
Changing
Needles
Raise
the
needle
by
pressing
the
up/down
needle
key.
Lower
the
presser
foot.
Tur
off
the
power
switch.
Loosen
the
needle
clamp
screw
by
turning
it
counterclockwise.
@
Needle
clamp
screw
Remove
the
needle
from
the
clamp.
Insert
the
new
needie
into
needle
clamp
with
flat
side
to
the
back.
When
inserting
the
needle
into
the
clamp,
push
it
up
as
far
as
it
will
go
and
tighten
the
clamp
screw
firmly.
@
Needle
insertion
view
hole
@®
Needle
clamp
To
determine
if
the
needle
is
defective,
place
the
flat
side
of
the
needle
onto
something
flat
(a
needle
plate,
glass,
etc.).
The
gap
between
the
needle
and
the
flat
surface
should
be
consistent.
Never
use
a
bent
or
blunt
needle.
It
may
cause
skipped
stitches
or
thread
breakage.
Defective
needles
can
ruin
the
fabric.
Always
purchase
good
quality
needles.
Change
needle
often.
Seam
Allowance
Lines
The
lines
on
the
needle
plate
and
bobbin
cover
plate
help
you
measure
seam
width.
¢
The
number
indicates
the
distance
between
the
center
needle
position
and
the
seam
allowance
line.
Millimeters
Inches
Lines
on
needle
plate
@
Center needle
position
@
Edge
of
fabric
©
Needle
plate
guide
lines

(
Thread
Tension
Dial
*
Choosing
the
Correct
Tension
Straight
Stitch
The
ideal
straight
stitch
will
have
threads
locked
between
the
two
layers
of
fabric,
as
shown
left
(magnified
to
show
detail).
If
you
look
at
the
top
and
bottom
of
the
stitch,
you
will
notice
that
there
are
no
gaps;
each
stitch
is
smooth
and
even.
When
adjusting
needle
thread
tension,
the
higher
the
number,
the
tighter
the
needle
thread.
Results
depend
on:
*
stiffness
and
thickness
of
fabric
*
number
of
fabric
layers
type
of
stitch
@
Needle
thread
(Top
thread)
@
Bobbin
thread
(Bottom
thread)
@
Higher
numbers
(Tighten)
@
Lower
numbers
(Loosen)
Tension
is
too
tight
The
bobbin
thread
shows
through
on
the
top
side
of
the
fabric
and
it
will
feel
bumpy.
Turn
the
dial
to
the
left
to
loosen
the
needle
thread
tension.
Solution:
Lower
numbers
(Loosen)
Tension
is
too
loose
il
The
needle
thread
shows
through
on
the
underside
of
the
fabric
and
it
will
feel
bumpy.
Turn
the
dial
to
the
right
to
tighten
the
needle
thread
tension.
Solution:
Higher
numbers
(Tighten)

FUNCTION
KEYS
@)
Up/Down
Needle
Key
When
you
press
this
key:
if
the
needle
is
up,
the
needle
will
immediately
go
to
its
lowest
position.
If
the
needle
is
down,
the
needle
will
immediately
go
to
its
highest
position.
@
Auto-Lock
Key
Press
this
key
while
sewing
a
straight
stitch,
zigzag
stitch
or
multiple
zigzag
stitch
(Stitches
1,
4
and
5)
and
the
machine
will
sew
a
few
stitches
in
place
and
stop
automatically.
Press
this
key
while
sewing
utility
or
decorative
stitches
and
the
machine
will
complete
the
stitch,
lockstitch
and
stop.
@
Reverse
Key
If
you
are
sewing
a
straight
stitch,
zigzag
stitch
or
multiple
zigzag
stitch
(Stitches
1,
4
and
5),
press
and
hold
the
reverse
key.
The
machine
will
sew
in
reverse
until
you
release
the
key.
If
you
are
sewing
utility
or
decorative
stitches,
when
you
press
this
key
the
machine
will
immediately
stop
and
sew
a
locking
stitch.
@
Start/Stop
Key
The
start/stop
key
operates
the
machine
only
when
sewing
large
pattern
embroidery.

PROGRAM
PANEL
KEYS
®
10
Memory
Key:
The
memory
key
may
be
used
to
combine
letters
and
numbers
from
the
built-in
monograms.
Press
the
key
after
selecting
a
stitch
(letter
or
number)
and
the
stitch
will
be
memorized.
When
the
key
is
pressed
after
selecting
another
stitch,
that
stitch
will
be
memorized
after
the
previously
memorized
stitch.
Clear
Key:
ayy,
Press
the
clear
key
and
the
last
memorized
stitch
will
be
cleared
(like
a
backspace).
Menu
Key:
Press
the
menu
key
to
return
the
computer
display
screen
to
the
menu
screen.
The
menu
screen
is
used
to
select
a
sewing
mode
(traditional,
built-in
monogram
or
large
pattern
embroidery).
The
menu
screen
also
con-
tains
the
language
selection
programming.
(Menu
screen
appears
automatically
when
machine
is
turned
on.)
(s)ME]
Letter
Size
Key:
Press
the
letter
size
key
to
change
the
letter
and
number
size.
L
-
30
mm
(38/32”)
M
-
18
mm
(22/32”)
S
-
10
mm
(13/32”)
Upper/Lowercase
Key:
AA,|
Press
the
upper/lowercase
key
to
alternate
between
uppercase
and
lowercase
letters.
Sewing
and
Frame
Position
Key:
a=)
When
sewing
letters/numbers,
there
may
be
a
need
to
sew
a
second
row.
Press
the
sewing
and
frame
position
key
to
align
the
wording.
It
is
also
used
to
restart
large
embroidery
at
the
correct
position
after
thread
breaks.
Previous
Page
Key:
ie
After
selecting
a
specific
sewing
mode
(traditional,
built-in
monogram
or
large
pattern
embroidery),
the
screens
will
alternate
to
show
the
various
stitch
options.
Press
the
previous
page
key
to
move
from
screen
B
to
A.
Next
Page
Key:
es
After
selecting
a
specific
sewing
mode
(traditional,
built-in
monogram
or
large
pattern
embroidery),
the
screens
will
alternate
to
show
the
various
stitch
options.
Press
the
next
page
key
to
move
from
screen
A
to
B.
Return
Key:
Press
the
return
key
and
the
screen
will
revert
to
the
last
display
screen.

Screen
Messages
@
The
computer
display
screen
shows
“Bobbin
winding”.
After
the
bobbin
is
wound,
return
the
bobbin
winder
to
its
original
position
by
moving
the
spindle
to
the
left.
@
Raise
the
needle
bar
by
pressing
the
up/down
needle
key.
(This
message
will
appear
when
the
machine
is
turned
on
with
the
needle
not
in
its
up
position.)
@
Turn
machine
off
and
insert
the
EnVision
Card
again.
&
TURN
OFF
AND
INSERT
CARD
@
Stop
operating
the
machine
until
this
message
disappears
(about
15
seconds).
STOP
FOR
SAFETY
PURPOSES
©
Contact
your
Authorized
Elna
Dealer.
SYSTEM
ERROR
CAUTION
¢
Do
not
touch
the
surface
of
the
computer
display
screen
or
program
panel
keys
with
hard
or
sharp
objects
such
as
pencils
or
screwdrivers.
It
is
not
necessary
to
press
hard
on
the
stitch/ftunction
keys;
a
light
touch
is
all
that
is
needed.
¢
Use
a
dry,
soft
cloth
to
wipe
off
the
screen.
11

SECTION
Il
Getting
Ready
to
Sew
Needle
and
Thread
Selection
In
general,
fine
threads
and
needles
are
used
for
sewing
lightweight
fabrics
and
heavier threads
and
larger
needles
are
used
for
sewing
heavyweight
fabrics.
There
are
many
specialty
needles
available
from
your
sewing
machine
dealer.
A
denim
needle
with
a
sharp
tip
is
used
to
effectively
pierce
dense
fabrics
such
as
denim
and
canvas.
For
topstitching,
a
special
topstitching
needle
with
a
larger
eye
accommodates
heavier
weight
thread.
Leather
needles
punch
small
holes
in
leather
and
suede
allowing
the
thread
to
follow
through
the
hole.
Always
test
thread
and
needle
size
on
a
scrap
piece
of
fabric.
WEIGHT
FABRIC
Check
your
needles
frequently
for
rough
or
blunt
tips.
Snags
and
runs
in
knits,
fine
silks
and
silk-like
fabrics
are
permanent
and
are
often
caused
by
damaged
needles.
Always
purchase
a
good
quality
thread.
It
should
be
strong,
smooth
and
consistent
in
thickness.
Use
the
same
thread
for
needle
and
bobbin.
When
sewing
stretch,
very
fine
or
synthetic
fabrics,
use
a
stretch
needle.
The
stretch
needle
prevents
skipped
stitches.
TYPE
OF
NEEDLE
|
NEEDLE
SIZE
Very
light
Chiffon,
Georgette,
Fine
Lace,
Organdy,
Tulle
Universal
Ball
Point
9
(65)
9
(65)
Single
Knits,
Jersey,
Swimwear,
Tricot
Leather,
Suede
Batiste,
Voile,
Lawn,
Pure
Silk,
Crepe
de
Chine,
Sheer
Crepe,
Chambray,
Handkerchief
Linen,
Gingham,
Challis,
Percale,
Wool
Crepe,
Peau
de
Soie,
Taffeta,
Satin,
Silk
Surah,
Satin-backed
Crepe,
Qiana
Stretch
Needle
Universal
Stretch
Needle
Ball
Point
Wedge
Point
Leather
Needle
Terry,
Burlap,
Quilted
Fabrics
Flannel,
Velour,
Velvet,
Muslin,
Velveteen,
Poplin,
Corduroy,
Broadcloth,
Linen,
Chintz,
Gabardine,
Felt,
Universal
Medium
Stretch
Terry,
Sweater
Knits
Double
Knits
(synthetic
and
natural),
Stretch
Velour,
Leather,
Vinyl,
Suede
Ball
Point
14
(90)
Wedge
Point
Leather
Needle
14
(90)
Denim,
Sailcloth,
Ticking
Denim
Needle
16
(100)
Double
Faced
Wool,
Heavy
Coating,
Fake
Fur,
Drapery
Fabrics
Leather,
Suede
Universal
16
(100)
Wedge
Point
Leather
Needle
16
(100)
Very
Heavy
Canvas,
Duck,
Upholstery
Fabrics
Universal
18
(110)
Topstitching
for
Special
Finish
12
Topstitching
Needle

Connecting
Machine
to
Power
Supply
Before
connecting
the
power
cord,
make
sure
the
voltage
and
frequency
shown
on
the
machine
are
identical
to
your
electrical
power.
To
connect
the
foot
control,
turn
off
the
power
switch.
Insert
the
foot
control
plug
and
machine
plug
into
the
machine
and
the
power
supply
plug
into
the
wall.
@
Foot
control
plug
@
Power
switch
@
Machine
plug
®
Power
supply
cord
@
Power
supply
plug
©
Foot
control
For
Your
Safety
1.
While
the
machine
is
in
operation,
always
keep
your
eye
on
the
sewing
area
and
do
not
touch
any
moving
parts
such
as
the
thread
take-up
lever,
flywheel
or
needle.
2.
Always
turn
off
the
power
switch
and
unplug
from
the
power
supply:
¢
when
leaving
the
machine
unattended
¢
when
attaching
or
removing
parts
*
when
cleaning
the
machine.
3.
Do
not
place
anything
on
the
foot
control.
Operating
Instructions:
The
“O”
symbol
on
the
power
switch
indicates
the
OFF
position.
For
certain
countries,
your
machine
may
come
equipped
with
a
polarized
plug
(one
prong
wider
than
the
other).
This
plug
is
intended
to
fit
into
a
polarized
outlet.
if
the
plug
does
not
fit
fully
into
the
outlet,
reverse
the
plug.
If
it
still
does
not
fit,
contact
a
qualified
electrician
to
install
the
proper
outlet.
Do
not
modify
the
plug
in
any
way.
NOTE:
«
After
turning
off
the
machine,
wait
5
seconds
before
turning
it
on.
¢
Aslight
humming
noise
may
be
heard
from
the
internal
motor
while
the
machine
\
is
turned
on.
This
is
normal.
[xa
MEHUs
(NO)
(LE
Decl
=
|
Language
Selection
cl
=
There
are
eight
languages
built
into
the
programming.
Turn
on
the
machine
and
the
computer
display
screen
shows
the
main
menu.
To
change
the
FRANCAIS
NEDERLANDS)
ITALIANO
)
language:
Bas
PORTUGUES)(
_)
@
Press
key
on
the
MENU
screen.
(Eight
languages
will
appear
on
the
screen.)
wong)
[oma]
mew
Select
desired
language.
A
i
@©
Press
Row
key.
The
display
screen
will
Hal
si)
automatically
revert
to
MENU
screen.
13

—
itr
Winding
the
Bobbin
Lift
up
the
spool
pin.
Place
the
spool
of
thread
on
the
spool
pin
with
the
thread
coming
off
the
spool
as
shown.
Attach
the
large
spool
holder
and
press
it
firmly
against
the
spool
of
thread.
(The
small
spool
holder
is
used
with
narrow
or
small
spools
of
thread.)
Slide
the
thread
under
the
thread
guide
hook,
around
the
upper
thread
guide
and
the
bobbin
winder
thread
guide.
Pass
the
thread
through
the
hole
in
the
bobbin
from
the
inside
to
the
outside.
Place
the
bobbin
on
the
bobbin winder
spindle
and
push
it
to
the
right.
@)
Spool
pin
@
Bobbin winder
@
Spool
of
thread
spindle
®
Large
spool
holder
Additional
spool
pin
@
Thread
guide
hook
ie
:
©
Upper
thread
guide
@
Additional
spool
pin
©
Bobbin
winder
thread
guide
The
additional
spool
pin
may
be
used
to
wind
an
extra
bobbin
without
unthreading
the
machine.
Procedure
—
insert
the
spool
stand
and
the
additional
spool
pin
in
the
hole.
Place
the
felt
and
spool
on
the
pin
with
the
thread
coming
off
the
spool
as
shown.
Spool
stand
(4)
Spool
pin
felt
NOTE:
Spool
holder
needs
to
be
changed
according
to
the
type
of
thread
spool.
A.
Large
spool
B.
Small
spool
C.
Should
the
thread
tangle
around
the
spool
pin,
use
the
spool
stand.
The
computer
display
screen
will
show
a
bobbin
winding.
Holding
the
free
end
of
the
thread,
press
the
foot
control.
Stop
the
machine
when
it
has
made
a
few
turns
and
cut
the
thread
close
to
the
hole
in
the
bobbin.
Press
the
foot
control
again.
When
the
bobbin
is
fully
wound,
it
will
stop
automatically.
Return
the
bobbin
winder
to
its
original
position
by
moving
the
spindle
to
the
left
and
cut
the
thread
as
shown.
The
machine
will
not
sew
until
the
spindle
is
moved
to
the
left.

15
Inserting
the
Bobbin
Gently
slide
the
bobbin
cover
plate
release
button
to
the
right
and
remove
the
cover
plate.
Lift
out
the
bobbin.
@
Bobbin
cover
plate
release
button
@
Bobbin
cover
plate
Place
the
bobbin
in
the
bobbin
case
with
the
thread
running
counterclockwise.
Guide
the
thread
into
notch
A
on
the
front
side
of
the
bobbin
case.
Hold
the
bobbin
with
your
right
hand
and
pull
the
thread
to
the
left,
through
the
tension
spring
blades.
Continue
pulling
the
thread
lightly
until
the
thread
slips
into
notch
B.
Pull
out
about
15
cm
(6”)
of
thread.
Replace
the
bobbin
cover
plate.
Check
the
threading
by
referring
to
the
chart
shown
on
the
bobbin
cover
plate.

Threading
the
machine
@)
Raise
the
presser
foot.
Press
the
Up/Down
needle
key
until
the
needle
is
in
an
up
position.
Slide
the
thread
under
the
thread
guide
hook.
Pull
the
thread
around
the
upper
thread
guide.
Guide
the
thread
down
and
around
the
checkspring
holder.
©
©O6
®
Firmly
pull
the
thread
from
right
to
left,
over
the
take-up
lever
and
down
into
the
take-up
lever
eye.
@
Proceed
down
through
the
lower
thread
guide.
Slide
the
thread
to
the
left
behind
the
needle
bar
thread
guide.
@
Thread
the
needie
from
front
to
back
or
use
the
automatic
needle
threader.
Automatic
Needle
Threader
Raise
the
needle
to
its
highest
position.
Lower
the
needle
threader
lever
as
far
as
it
will
go.
Turn
the
lever
in
the
direction
of
the
arrow
in
the
illustration,
then
insert
Hook
0)
into
the
needle
eye.
Bring
the
thread
around
Guide
(11)
and
under
Hook
0).
Turn
the
lever
in
the
direction
of
the
arrow
in
the
illustration,
drawing
the
thread
loop
through
the
needle.
Release
the
lever
and
let
the
needle
threader
return
to
its
original
position.
Manually
bring
the
thread
through
the
needle
eye
by
pulling
the
thread
loop
to
the
back.
¢
The
needle
threader
can
be
used
with
#11
to
#16
size
needles.
Thread
weight
may
vary
from
30
to
100.

Drawing
Up
the
Bobbin
Thread
Raise
the
presser
foot.
Hold
the
needle
thread
lightly
with
your
left
hand.
Press
the
up/down
needle
key
twice
to
pick
up
the
bobbin
thread.
Draw
up
the
needle
thread
together
with
a
loop
of
bobbin
thread.
@
Up/down
needle
key
Slide
10
cm
(4”)
of
both
threads
to
the
back
under
the
presser
foot.
17
Other manuals for EnVision 8006
2
Table of contents
Other ELNA Sewing Machine manuals

ELNA
ELNA EN VISION CE 20 - LEAFLET User manual

ELNA
ELNA 5100 - User manual

ELNA
ELNA 6001 User manual

ELNA
ELNA 3210 User manual

ELNA
ELNA eXcellence 730 User manual

ELNA
ELNA 6003 - LEAFLET User manual

ELNA
ELNA eXcellence 790PRO User manual

ELNA
ELNA 7300 - User manual

ELNA
ELNA 945 User manual

ELNA
ELNA eXcellence 720PRO User manual
Popular Sewing Machine manuals by other brands

Brother
Brother KXC4589-051 Quick reference guide

Pfaff
Pfaff expression 2.0 features and benefits

Brother
Brother BAS-311G Brochure & specs

Grace
Grace Continuum II ASSEMBLY & USE

Singer
Singer 114-51 Instructions for using

Atlanta Attachment Company
Atlanta Attachment Company 1393E Technical Manual & Parts Lists