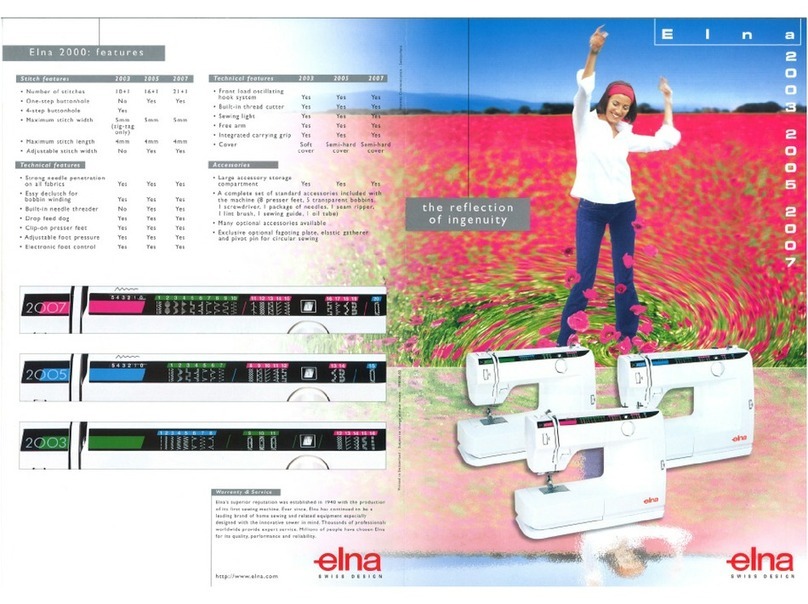
ELNA 745 - User manual

745/845
SERVICE MANUAL
2
2.5
5
1
3.5
NA
6.0 B
12
1
T|P
T|P

TABLE OF CONTENTS MODEL 745/845
A.General directions and recommendations
B. Recommendations
C. Mechanical sewing disorders
D. Adjustment of the automatic tension unit
E. Position of program selection - display drum indicator and display window
F. Position of display drum indicator and upper looper shifting cam
G. Adjustment of the Chain looper tension dial
H. Gauge for the after - sales service
1. Removing Machine Base and Back Cover
2. Removing Front Cover and Mounting Covers
3. Angular position of balance weights and position of eccentrics
4. Height and alignment of cloth presser bar
5. Height and orientation of needle bar in relation to the needle plate holes
6. Height - clearance - angular position of lower looper
7. Clearance of needle guards
8. Timing of lower looper
9. Angular position of upper looper
10. Clearance and timing of upper looper to lower looper
11. Chain looper : angular position - clearance - orbital timing - clearance of chain
needles guards
12. Chain looper thread take up rotary cam
13. Height of feed dog
14. Moving cutter and vertical feed timing
15. Horizontal feed timing against chainstitch needle
16. Differential feed
17. Position of fixed cutter and cutting width dial setting
18. Position of loopers threads take up lever
19. Safety device - Side Cover and Front Flap
20. Safety device - Presser foot and Needle Clamp Safety Lever
21. Top Cover device(for Model 845)
ANNEX
ޓTools for setting SL/DF Dials
ޓSetting positions of SL/DF Dials
ޓClearance between Feed Dog and Needle Plate
ޓTrouble shooting - Cover Hems
ޓCover Hem stitch formations

GENERAL DIRECTIONS AND RECOMMENDATIONS A
Safety
For safety reasons, the sewing machine must be disconnected from the mains:
- Whenever the machine is left unattended
- Whenever preparing the machine for sewing
- Whenever servicing
- Whenever replacing mechanical or electrical parts or accessories
Needles
Usually needles of the system 130/705 H may be used. However, in certain cases stitch
quality may be improved by using type ELX 705 needles.
Choose needle size No.80 for sheer materials and No.90 for normal or thick materials.
Threads
Choose a good quality polyester thread or blended thread.
Lubrication
Besides the 2 oiling points marked in red, the machine is equipped with self-lubrication
bearings and parts. Lubricate the machine as follows: when using it for the first time - if it
has not been used for some time - when it has been intensively during 7 to 8 hours.

RECOMMENDATIONS B
1. Never connect the machine to a different voltage than that marked on the specification plate.
2. For safety reasons, never perform any repairs on the power supply circuit without first
removing the mains lead from the machine.
3.
4.
Never plug in or run the machine unless all the connections are correctly set.
When changing the light bulb, it is neccessary to disconnect the mains lead.

MECHANICAL SEWING DISORDERS C1
First of all, please refer to the paragraph entitled "maintenance" in the instruction manual,
especially when machine does not turn freely by turning the flywheel by hand. If necessary,
check and adjust tightness of motor belt.
Given below are the most frequent disorders. In most cases, they can be remedied by checking
the adjustments in the following order. However, before checking the adjustments, make sure
that the threading is correct and that all the thread passages are okay.
1. Skipped overlock stitches
Check and adjust if necessary:
- Needle bent or with a dull point - replace needle
- Needle not set correctly - refer to "changing the needle" in the instruction manual
- Burrs on upper or lower looper - polish
- Burrs on stitch tongue - polish
- Excessive tension on the needle thread
- Height and orientation of needle bar
- Clearance between point of lower loopers and needle
- Clearance between upper and lower loopers
- Timing of upper and lower loopers against needle
- Feed timing
2. Skipped chainstitches - Cover hems
Check and adjust if necessary:
- Needle and chain looper thread tensions not balanced
- Needle bent or with a dull point - replace needle
- Needle not set correctly - refer to "changing the needle" in the instruction manual
- Burr on chain looper - replace or polish
- Dull blade edge on moving cutter - replace
- Chain looper needle clearance
- Chain needle guard clearance
- Angular position of chain looper
- Orbital timing of chain looper
- Chain thread take up lever timing
- Height and orientation of needle bar
- Needle plate spring plate bent
-
Clearance and position between back of chain looper and needle L0
Note: For more information, see pages ANNEX ΦΧ.
MECHANICAL SEWING DISORDERS C2
3. Thread breakage
Before checking the adjustment, make sure of the good quality of the thread and the needle,
the correctness of threading and the smoothness of all the thread passages. Quite often, an
injury to thread passage is the cause of thread breakage. If all these points are in order, check
the following:
- Dull point of needle or bent needle - replace.
- Dull or burred point of looper - replace.
- Scratch or injury on stitch tongue of needle plate - replace.
- Too strong thread tension.
- Unsmooth or injured edge of needle hole on needle plate (thread breakage of chain stitches)
- replace.
4. Irregular stitches
- Inadequate setting of thread tensions - re-adjust.
- Unsmooth thread passage - polish.
- Height of feed dog.
- Position of looper thread take up levers and thread guides.
- Dull blade edge of moving cutter - replace.
- Injury on needle plate face or presser foot sole - replace.
- Incorrect alignment of pulled-up thread antenna with spool pins - reset it at correct position
to align to spool pins.
5. Breakage of needle
Check and adjust if necessary
- Dull point of needle or bent needle - replace.
- Incorrect placement of needle - refer to "changing the needle" in the instruction manual.
- Clearance of needle guard and (chain needle).
- Incorrect alignment of needle holes of presser foot and needle plate.
- Clearance from needle to lower looper.
- Clearance between the upper and lower loopers.
- Feed timing.
- Horizontal feed timing against chain-stitch needle.

ADJUSTMENT OF THE AUTOMATIC TENSION UNIT D
d
B
B
r
s
1. Remove: Mains lead - Front cover.
2. Select sewing program 1 "SAFETY 4 THREAD"
3. Make sure that all the tensiondials are set at "N" position
4. Use a 50 (3ply) cotton thread to check the tension values with the tension gauge.
Blue tension : 50 to 60 gr.
Red tension : 35 to 45 gr.
Yellow tension : 10 to 15 gr.
Green tension : 20 to 25 gr.
5. If not, adjust the tension(s) with the fine tuning dial "d". The tension can be adjusted by
using small minus screw driver.
6. If one of the tension dial "r" is not aligned with the other dials when tensions are set at
"N" position, then proceed as follow:
Slide and hold the dial to the left side, make sure that the pinion on the dial "r" is
disconnected to the drive gear "s".
Rotate dial "r" towards the back (maximum position), and set drive gear "s" in its initial
position. See figure B . Then slide pinion dial "r" back into drive gear "s" and recheck
the position.
+
-
s
r

E
1. Remove: Mains lead - Front cover.
2. Select sewing program 1 "SAFETY 4 THREAD"
3. Check and make sure that the lever "h" is facing the notch of tension cam "g" for blue
needle thread.
4. If not, loosen screw "a" and turn DT cam pulley "j" forward or backward until the lever
"h" is facing the notch of tension cam "g". Then, tighten screw "a".
5. If the position of the display drum indicator "d" is not aligned with the display window
"e", then loosen screw "c" and adjust the position of drum.
6. Fasten screw "c" and recheck the position of the display drum "d".
Note: In order to check the alignment of the display drum indicator "d" and the display
window "e", it is necessary to set the front cover onto the machine.
POSITION OF PROGRAM SELECTION-DISPLAY DRUM INDICATOR
AND DISPLAY WINDOW
g
a
c
h
de
SELECT
h
g
b
d
2 mm
j

POSITION OF THE DISPLAY DRUM INDICATOR
& UPPER LOOPER SHIFTING CAM F
1. Remove: Mains lead - Front cover
2. Make sure if tension cams and levers are set in proper positions when selecting sewing
program 1 "SAFETY 4 THREAD". (See and Check Page E).
3. Select sewing program 10 "COVER HEM/CHAINSTITCH".
4. Bring the needle bar to its lowest position by turning a handwheel toward you.
5. Loosen screw "a" and turn the upper looper shifting cam "b" until the hook of the looper
follower "c" falls into the V-shaped hollow of the cam "b" (See View A ). Check if a
cam "b" and looper follower "c" are positioned as shown in View B .
6. Fasten screw "a" and recheck if the upper looper shifting connector "d" is pulled
up by a spring.
view A b
c
view B
b
c
a
a
b
c
d
A
SELECT
2 mm
1.0~1.5mm
B

THE ADJUSTMENT OF THE CHAIN LOOPER
TENSION DIAL G
1. Remove: Mains lead - Front cover
2. Open Front Flap.
3. Peel a label "a" from the surface of screw "b" with a needle or a tool with sharp point
and remove a tension dial "c" (brown) by loosening a screw "b".
4. Use a 50 (3 ply) cotton thread to check the tension value with the tension
gauge.
Brown tension : 15 to 20 gr.
5. If not, adjust the tension value with the tension adjustment plate screw "d".
Turn the screw "d" by one notch clockwise to increase or in reverse to
decrease tension value.
6. Make sure if a notch of the screw "d" faces against an indicator "p". (See Fig. 1)
7. Set back a tension dial "c" with the mark "N" above into a shaft "e". (See Fig. 2)
8. Fasten a screw "b" and put back a label "a" with glue.
Fig.1 Fig.2
a
b
c
d
d
p
e

GAUGE FOR THE AFTER-SALES SERVICE H
5.6
65
2.7
1.3
4 55 11.6
1.5
4.7
2.8
12
46
47.3
3.4
Dimension Use
4.7mm Height of cloth presser bar
12.0mm Height of needle bar
2.8mm Angular position of lower looper to needle
65.0mm Height of lower looper
5.6mm Angular position of upper looper to needle
1.5mm Chain looper angular position
46.0mm Position of upper looper thread take up lever
1.3mm Height of feed dogs
2.7mm Position of feed dog
Gauge Nb. 11951

1a
REMOVING MACHINE BASE COVER
1. Remove: Mains lead
2. Remove Machine base Unit "1" by loosening screws "a".
a
1
+
a
+
a+

1b
REMOVING BACK COVER
3. Remove Antenna Pole from Spool pin base.
4. Remove screw caps and screws "b" and "c" from Back Cover.
5. Remove Back Cover Unit "3" and Spool Stand "2".
6. Remove Side Cover.
Note: To remove screw caps, use a wire pin No.11007.
b
3
2
c(14mm)
(10mm)
+
+
No.11007

2a
REMOVING FRONT COVER
1. Remove: Mains lead
2. Remove screws "b", "c", "d" and Inside Cover Unit "7".
3. Remove Program Selection Dial and a screw cap from Front Cover.
4. Remove snap-on Noise Cover Unit "6". (Spread its sides.)
5. Remove screws "a" and Take-up Noise Cover Bracket "8" with Allen Screw Driver
(2.5mm).
6. Position Needle Thread Take-up Lever in the middle of the slot by turning
handwheel toward you.
7. Remove a screw "e".
8. Pull Front Cover towards you and remove it.
a
2.5mm
d
c
b
7
9
6
8
e
for 845

2b
REMOVING FRONT COVER
When mounting covers, please follow in reverse order (pages 2b-2a-1).
Note: When mounting Snap-on Noise Cover "6" in front cover, make sure if a check spring
takes its place in a slot as shown in view X .
6
X
view X
6

3a
ANGULAR POSITION OF BALANCE WEIGHTS AND POSITION OF
ECCENTRICS
6
7
7
8
8
32
6132
a
5
41
4
4
Fig.3 Fig.4
Fig.5
Fig.6
Fig.7
A
Fig.1
h
n
7
Fig.2
8
2mm

3b
ANGULAR POSITION OF BALANCE WEIGHTS AND POSITION OF
ECCENTRICS
1. Remove: Mains lead - Back - Front cover - Machine base.
2. In case of dismantling the lower shaft or if one of the eccentrics is damaged or badly
fixed, the positions shown in page 3a, allow resetting the eccentrics approximately. These
should be adjusted correctly with each relative adjustment. Each angular position of
eccentrics as shown is based primarily on the angular positions of screw "a" of main shaft
collar. It is useful to turn handwheel by (90 ) to check the correct position of the
eccentrics. See procedure shown below.
3. Check and set screw "a" of collar "2" at the same level of the screw of needle bar timing
eccentric "1".(Fig.5) Turn the handwheel toward you and check if the screw on collar
"2" is set at the same level of eccentrc "3".(Fig.4)
4. Turn handwheel towards you and bring needle bar to its highest postion. Check if the
balance weight "A" is positioned as shown in Fig. 1.
@Note: If position of eccentrc "3" is correctly set, it is possible to see the screw of eccentric
"3" from the opening on the thread take up rotary cam when needle bar is set in its
highest position.
5. Turn handwheel towards you and chec if the eccetric "7" and the balance weight "8" are
positioned as shown in Fig. 2
6. Turn handwheel (180 ) counterclockwise and check position of balance weight "8" and
eccentric screws "6-7".(Fig.3)
7. Turn handwheel (90 ) clockwise and check position of screw on collar "2" and eccentric
screw "3".(Fig.4)
8. Turn handwheel (90 ) counterclockwise and check position of screw "a" of collar "2"
with eccentric "1-5-6".(Fig.5)
9. Turn handwheel (90 ) counterclockwise and check position of eccentric screws "1-4".
(Fig.6)
10. Turn handwheel (90 ) counterclockwise and check position of eccentric screws"4".(Fig.7)
Position and function of the eccentrics:
1) Needle bar timing
2) Main shaft collar
3) Horizontal feed eccentric
4) Upper looper timing
5) Lower looper and chain looper timing
6) Orbital motion of chain looper
7) Moving cutter and vertical feed timing
8) Balance weight

=
=
a
HEIGHT AND ALIGNMENT OF CLOTH PRESSER BAR 4a
5
b
c
4.7mm

HEIGHT AND ALIGNMENT OF CLOTH PRESSER BAR 4b
1. Remove: Mains lead.
2. Lower lever "a" and open lamp cover.
3. Loosen screws "b" to remove bracket with lamp holder.
4. Make sure that the shank holder of presser foot is in its highest position.
5. Turn handwheel towards you and bring feed dog below needle plate.
6. Loosen screw "c".
7. With lever "a" in its lowered position, push cloth presser bar down from the top so that
the presser foot touches gauge.(No.11951)
8. Align the needle opening(s) of the presser foot with those of the needle plate, and fasten
screw "c".
9. Refit bracket with lamp holder.

12 mm
0.2
R1
Fig.1
Fig.2
Fig.3
=
==
=
5a
HEIGHT AND ORIENTATION OF NEEDLE BAR IN RELATION
TO THE NEEDLE PLATE HOLES
HEIGHT AND ORIENTATION OF NEEDLE BAR IN RELATION
TO THE NEEDLE PLATE HOLES
5
b
a
Other manuals for 745 -
2
This manual suits for next models
2
Table of contents
Other ELNA Sewing Machine manuals