ELR Engeineering NGG16 Garratt User manual

Coal fired steam locomotive
NGG16 Garratt
Owners Manual

Contents
Controls
Locomotive running tools
Running in
Preparing to run your locomotive
Running your locomotive
Once you have finished your running session
Maintenance / troubleshooting
Precautionary instructions
The NGG16 Garratt locomotive operates just like its full-sized counterpart by using coal
to produce steam under pressure. Therefore, parts of the locomotive will become very
hot. Provided the locomotive is operated with adequate care and attention, no problems
should arise. The model is intended for outdoor use and should only be used in well-
ventilated areas.
The model is unsuitable for children unless they are carefully supervised at all times: The
locomotive is not a toy.
Whilst the locomotive is in steam, an exhaust will be emitted through the chimney that
includes hot steam, ash and sparks. Therefore, any operator or bystander must not lean
over the locomotive while it is running.

Controls
1. Water gauge glass
2. Water gauge glass blow-down valve
3. Pressure gauge
4. Lubricator
5. Blower valve
6. Water bypass control
1
2
3
4
5
6

Locomotive running tools
The following tools are supplied with your new locomotive:
Battery blower
Firing shovel and pricker
Flu brush
Water top-up bottle
Bottle of steam oil
Bag of coal
Preparing your locomotive
Your locomotive must be fully prepared before every running session in accordance with
the operational guidelines below.
Use light motion oil to lubricate the valve gear. Make sure to include all moving parts.
The water axle pump ram, located just above the front axle, together with its joint to the
eccentric arm are both easy to miss, yet require routine lubrication. Also, there are parts
of the eccentric located on the rear axle that will benefit from frequent lubrication.
Remove the front tank to access the axle pump. It is recommended that this is done first,
before the tank is filled with water.
Fill the boiler with water using the top-up bottle or if the boiler is completely empty
remove a safety valve and fill the boiler. Distilled water is preferred if available. Place
the end of the flexible pipe from the bottle into the water top-up valve, which is located
under the dome. Fill until the water reading is slightly over the top of the gauge glass.
Next, fill up the front tank with water. To do this, remove the tank cap located in the
middle of the tank.
N.B. If distilled water is not available: clean soft tap water, filtered rainwater or filtered water from a
dehumidifier may also be used.
Next, unscrew the top of the lubricator and also unscrew the drain of the lubricator.
Allow any water to drain then, as oil starts to appear, retighten the lubricator drain screw
(finger tighten only). Top up the lubricator with steam oil until full and then screw the top
on again (finger tight).
Shortly before you’re ready to light the locomotive, fill the firebox level to the door with
unlit paraffin soaked charcoal.
Your locomotive is now ready to be steamed.

Operating your locomotive
Raising steam
When you are ready to light your locomotive, place the battery blower into the chimney
and turn it on. Then prepare a shovel of lit paraffin-soaked charcoal and shovel this into
the firebox to light the fire.
Soon after, shovel three or four more loads onto the fire and shut the firebox door. After a
couple of minutes or so put another three or four loads into the firebox, as to create a nice
even spread and again shut the door. It is important to keep the firebox door shut as much
as possible as the most heat is lost here because the electric blower is pulling cold air
across the fire.
Keep an eye on your fire and if it looks to be fading, add some more charcoal.
With practice, you will gain a working knowledge of how your locomotive’s fire behaves during the
warming up period.
You will soon have steam pressure and once the pressure gauge reaches 40psi (pounds
per square inch) or above, you can then open the locomotive’s own steam blower and
remove the battery blower from the chimney at the same time.
The locomotive will now be able to draw its fire harder and therefore generate more heat
from the charcoal. You will be able to see the fire increase in intensity and hear the
increased draw from the locomotive’s steam blower: if you can’t, open the blower a little
more to increase the air flow through the fire.
At this stage, you can add some steam coal: a little at first and again, shut the firebox
door between each shovelful. This allows the coal to start to burn (too much at once
could choke the fire and put it out). You should be aiming for an even spread of coal
across the firebox, giving an even glow.
It is recommended that you practice opening and closing the firebox with the fire pricker whilst the engine
is cold. This will make your shovelling technique more efficient when the locomotive is in steam.
When the locomotive has reached the full working pressure of 70psi, you will be able to
move it under its own steam.
Running the locomotive
Turn on the radio transmitter and then the locomotive.
Move the reverser into the desired gear by moving the right hand stick left or right and
then open the regulator by moving the left hand stick up. Some priming is to be expected
(identified by water escaping from the chimney). This is normal and will soon clear.
Following priming, the locomotive is ready to start running.
When operating the locomotive, it is important to keep a draft to draw the fire.
Without one the fire will go out.
When the loco is stationary the blower valve should be open: doing this will create the
draft of steam required to draw the fire.
Teach yourself to automatically open the blower whenever the locomotive is stationary.
Shortly before you open the regulator to move the locomotive, you may shut the blower
valve. Once the locomotive is moving, the exhaust from the cylinders creates the
necessary draft to draw the fire.
By this stage, you will need to add more coal to your fire, with the aim of producing a
nice, deep orange glow. Remember to shut the door in between shovelfuls in an attempt
to keep in as much heat as possible.
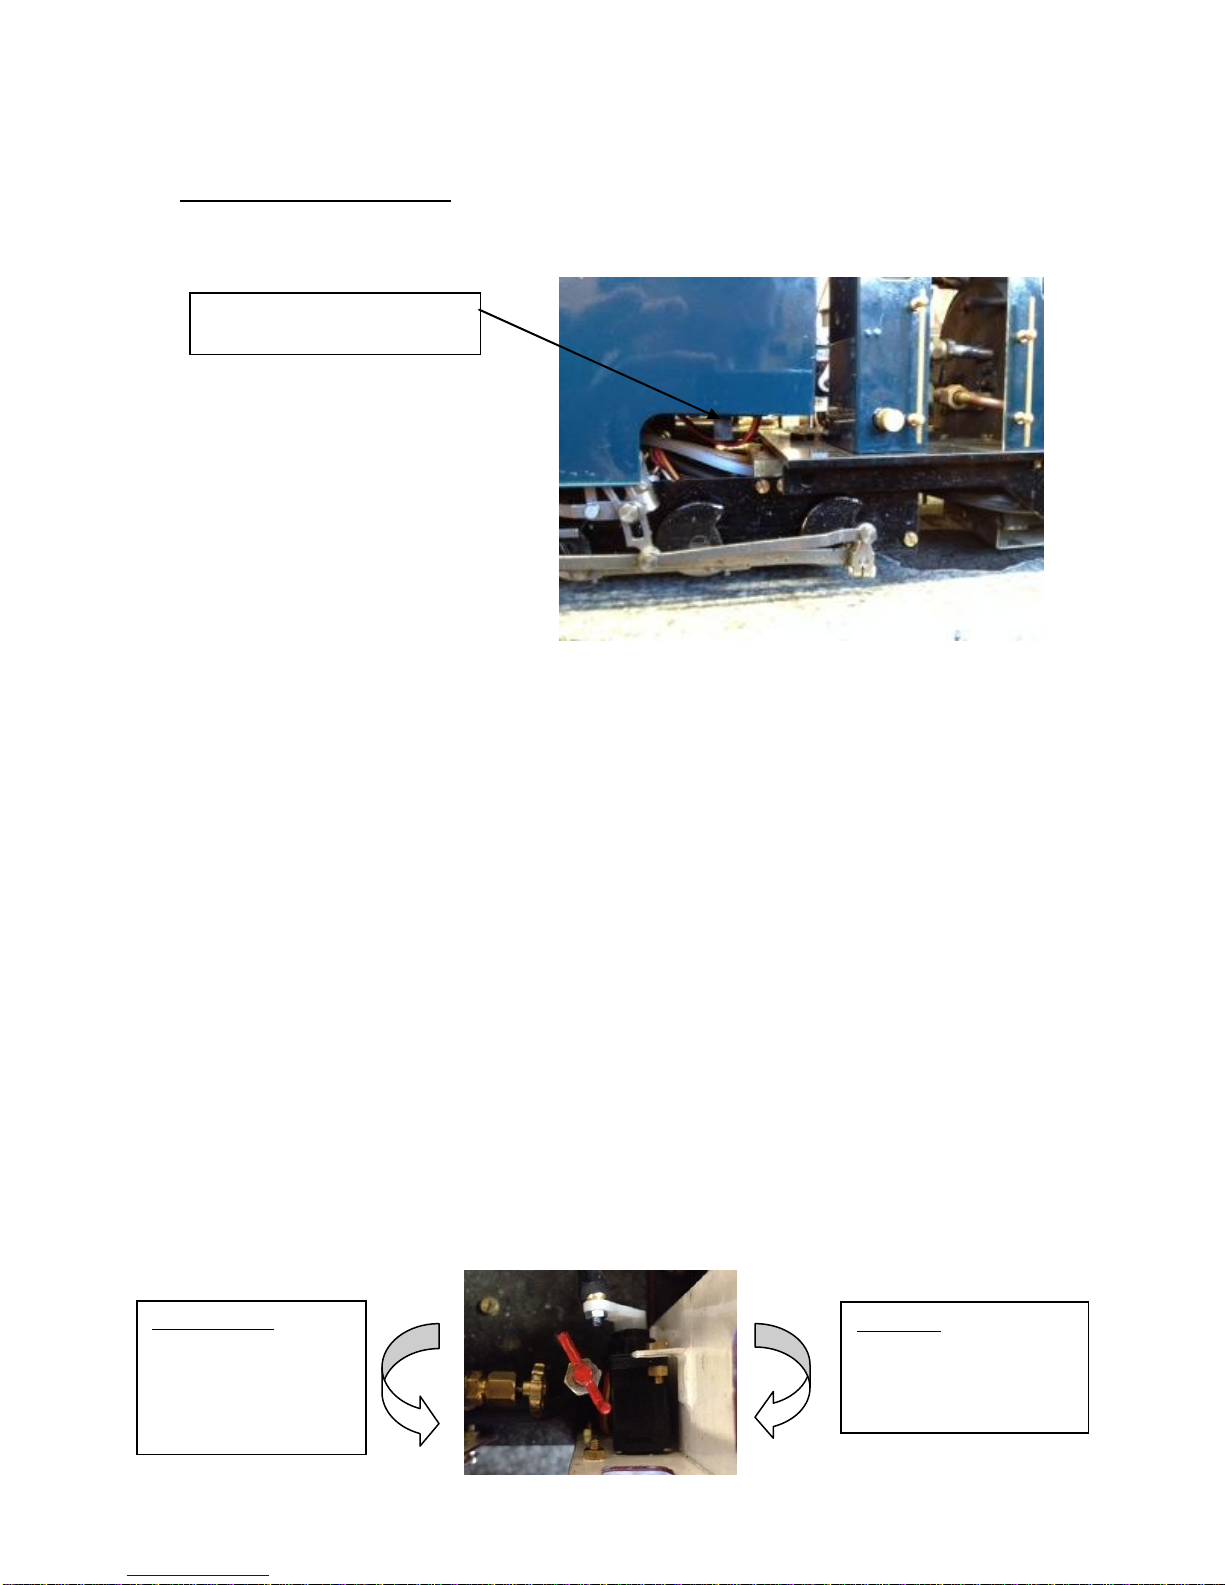
The water axle pump should be turned on using the bypass valve in the cab.
The switch is located under the
rear tank on the right hand side.
Anti-clockwise
Axle pump is turned
OFF and is not pumping
Water into the boiler.
Clockwise
Axle pump is turned ON
and is pumping water into
the boiler.

The bypass valve controls the axle pump, which pumps water from the tank into the
boiler while the loco is running and therefore maintains a steady level of water in the
gauge glass. Setting the water bypass valve so it pumps water at the optimum rate is
something that is learnt over time as you become familiar with your locomotive. If the
gauge glass fills completely, you will be able to hear the loco prime, as the boiler is full
of water. At this point you should turn off the axle pump by opening the bypass valve.
This stops water being pumped into the boiler for the moment. Only begin to close it
again when the gauge glass indicates that the water level has dropped to a more sensible
level. Keeping plenty of water in boiler is very important and this is why the top-up bottle
is included. If the water level drops too low, i.e. it falls to the very bottom of the gauge
glass, attach the top-up bottle to the water top-up valve in the cab and add water to the
boiler using the bottle.
Operators should aspire to run their locomotive efficiently, eventually achieving between
10 –15 minutes running time between firings, while remembering to keep the tank
topped up with water.
N.B If you intend running your locomotive for extended periods, the lubricator will require oil after about
an hour (please note, it will be hot! ). You will also need to keep the water pump ram and its cam (between
the locomotive frames) well oiled.
Once you have finished your running session
Once you have finished running your locomotive, it needs to be ‘disposed of’ responsibly
–just like the real thing!
Firstly, ensure that the blower valve and regulator are closed and allow the locomotive to
cool slightly. Next, drop the remnants of your fire. The NGG16’s ash pan makes this
easy. Behind the ash pan (located under the firebox) is a movable hook and bar. Just push
the hook to one side out away from the bar (which is attached to the ash pan), the whole
ash pan and grate will fall out with guidance and allow complete and easy removal of the
remaining fire and ash. Beware: this may still be hot so please take extreme caution when
removing the ash pan. Once the fire has been removed and the grate has cooled, locate
the ashpan back into the firebox with the two locating pins and push the hook back
around the bar.
It is vital that the boilers flue tubes and smokebox are cleared at the end of every run.
Access to the smokebox door on the NGG16 is gained by lifting the front tank off its
locating pins.

It is strongly recommended that a cloth is draped over the exposed front chassis at this
point so that ash cannot get into the valve gear and axle pump.
On front of the smoke-box, completely unscrew the centre dart and remove the smoke-
box door. You will probably be able to see an accumulation of ash built up inside the
smoke-box (the amount depends upon the length of your run). Next, brush out as much of
the ash as possible using a small paintbrush. A gentle blow down the chimney will
remove the remainder.
Removing the smoke-box ash will reveal the boiler tubes. Using the flu brush provided,
clean out the seven tubes that are accessable. These can get blocked with bits of coal and
ash, limiting the boiler’s steaming capability. Don’t worry if it is difficult to push the
brush through, keep trying: dipping the end of the brush in paraffin is helpful.
Reattach the smoke-box door using the screw dart you removed earlier. Tighten until
finger tight.
You can now clean your locomotive, removing unwanted ash and dirt. We have found
that a soft paintbrush can be very effective for removing fresh ash that has covered some
of the bodywork.
Maintenance / troubleshooting
To keep your locomotive running well, you must keep all moving parts well oiled. It is
worth being aware that well-oiled valve gear can very easily attract ash onto itself. This
ash is abrasive and its presence can increase wear on the valve gear. To keep this wear at
a minimum, we suggest using an old toothbrush to remove ash out of the valve gear.
As is the case for many new locomotives, the seals at certain joints may take time to ‘bed
in’. This can soon be overcome by a gentle tightening of the seal.
If the axle pump is failing to pump enough water into the boiler, there are usually two
reasons for this. The most likely of which is that small particles of dirt have blocked the
pump. This dirt can be removed by opening the bypass valve in order to allow the water
system to unblock itself after a moment of running. The second reason for a lack of water
is that water may be leaking out of the gland and avoiding the pump. Check the gland
over the ram is finger tight. If you are still having trouble, you can disconnect the rubber
tube underneath the loco. This pipe runs between the centre driving wheels and supplies
water to the pump. Put the end of your water top-up bottle onto the pipe and pump water
around the system, this pushes out any dirt. Once done reconnect the rubber tube and test
the locomotive.
Remember; practice makes perfect!
We hope that you find great enjoyment in your NGG16 Garratt.
Table of contents
Other ELR Engeineering Toy manuals


