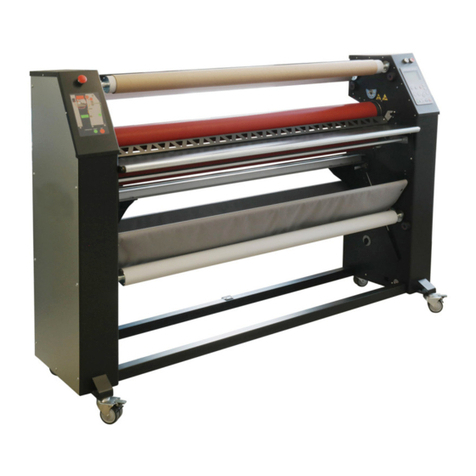
EMBLEM EASYLAM 140 C User manual

Operating instructions
Laminator
Version 1.0
140 C

- 2 -
Please read this operating instructions before installation and keep this
for later use
technical information
model..............................................................................................................EASYLAM 140C
length .............................................................................................................177 cm
width ..............................................................................................................48 cm
height .............................................................................................................135 cm
height working area .......................................................................................97 cm
max. media width ...........................................................................................143 cm
usable roll length ............................................................................................1420 mm
max. opening of rolls......................................................................................40 mm
power supply .................................................................................................110 - 230 V
internal power supply .....................................................................................12 V
.....................................................................................................................50/60 Hz max. 4,5A
INSTALLATION
The laminator is delivered in wooden box.
size .................................................................................................................2000 x 900 x 600 mm
weight in total kg ...........................................................................................115 kg
To open the box we recommend to use a cordless screwdriver. Further you need a open-end wrench, size 17

Further advises for installation:
Power supply:
The connection sockets have to be close to the machine.
• single-phase current 110 V - 230 V
• frequency: 50 – 60 Hz
• strength of electric current: 4,5 A
Location
The location to place the machine must provide enough space to work. Don’t forget that space is also
needed to insert and remove the material. Please consider the dimensions of the pictures and sheets
used.
Place
Prepare a flat location suited to the size of the machine and also consider its accessories.
Lighting
Good lighting (300 – 600 lux) is indispensable to operating and maintaining the machine safely.
Room properties:
The laminator has to be placed in a closed room and has to be protected against weather effect.
• Permissible room temperature: 18°C to 35°C.
• Humidity range permitted: 30% to 80%
Electricity connection
Check that the electrical supply corresponds with the machine performance.
With connecting to the electricity supply, the laminator must be earthed.
To connect the laminator with electric supply system:
• Interrupt the current supply.
• Connect the connection cable to a suitable plug or directly to the main (capsule rail, junctionbox, etc.).
• Turn on the electricity with main switch (10).
Test before use
Before the actual initial operation, carry out a few test runs of the different functions of the device.
- 3 -

9) Roll-down axle R1
10) Main switch
7) Textile basket
8) Adjustment of the brake for R1
1) keyboard/operating panel
15) Pressure rollers
16) Supply plate with guide roller
5) Roll-down axle R4
6) Lever to set up the height of the
supply plate
3) Adjustment of the brake for R4
2) Adjustment of the strength of the
roll-up coupling R3
4) Roll-up axle R3
17) Side casing
12) Roll-up axle R2
18) Wheel with brake
11) connection for the footpedal
14) Adjustment of the strength pf the roll-up
coupling for R2
13) Cable inlet
- 4 -
19) Foot switch “FILM“
foot switch on backside

The keyboard:
The laminator is controlled (apart from footpedal) by the following keyboard:
- 5 -
● adjustable brakes and
clutches
Safety devices
The machine includes the following safety devices:
Left safety cover
right safety cover
safety system (slip clutch)
Make sure that your hands do not get between the rolls while the machine is opera-
ting. EMBLEM EASYLAM 140C is eqipped with a safety mechanism which uses a
slip clutch to stop the rotation of the rollers. In this way serious injuries or pinching of
the fingers are avoided. During running the machine the user has to make sure that
no parts of the body or other unknown objects get between the rolls.The manufac-
turing company will not accept any liability - especially in case of any mechanical or
electrical alteration of the mechanism by the user.
The side covers are designed to protect the electric equipment of the machine and
may be removed by qualified personal only or by service technicians authorised by the manufactor.
● FILM,FOAM-keysfor
preset modes of roller
pressure.
● SPEED1-2,5m/min.
SPEED 2 - 3,5 m/min.
● START/STOP–Startandstoprunning
the rolls.
● REVERSE–themachinestopsand
goes back (after 2 seconds).
● OPENkeyforautomatic
open of the rollers
● MANUALOPENkey
● MANUALCLOSEkey

Operation of the machine
When you start working stay directly in front of the machine. The laminator has to be turned on with the
main switch (right down, inside the machine). The main switch is lighted in green.
With the keys SPEED I or SPEED II you decide the speed of lamination. You can also use the footpedal
to adjust the speed of the laminator.
General operation advice
AxlesR1-R4areequippedwithadjustablebrakesandclutches.Allmediumshavetheirownspecifi-
cations, which differ by temperature, humidity, used glue, type of film and more. The best condition is,
when the lamination film is tensioned at the upper roll and can be applied without wrinkles. To find the
best adjustment you start with low brake condition. If necessary you can increase the break power.
We recommend not to use too much brake to get not too much tension. The lamination film would
warptoomuchandthelaminatedproductwouldgettoomuchtension.Usingthetakeupforlineryou
need low tension. Please notice to adjust the clutches properly.
Operation of the machine
The machine may be used only by trained and qualified personel.
Tosetthepressurecorrectlyyoucaneitherusethepre-setfunctions„FILM“or„FOAM“.Youcanuse
alsothemanualfunctionwitharrow-keysupordown.„FOAM“isforfoamboardsorothernotrigidmedia.
„FILM“ is for paper, film and self adhesive vinyl. To get the correct right pressure, we recommend to make
tests sample.
When the roller pressure is exceeded to a damaging extent, the machine stops automatically.
To avoid tension and pushing, the material to be worked with should be placed in the middle, i.e. at an
equal distance from both sides; the same applies to small formats (e.g. for a roller width of 1,450 mm and
a material of 450 mm).
When laminating thin foils or paper, it is important to choose the width of the laminate according to the
dimensions of the picture. It should not protrude too far over the print to be laminated as otherwise it
could stick to the lower roller. It is perfect if the paper to be laminated or the base is bigger than the lami-
nate to be applied.
If this is not possible, the size difference between the laminate and the paper has to be kept as small as
possible (no more than 2–3 cm per page) to avoid creases.
Material supply
Themediaaxles(R1-R4)couldbeequippedwithlaminationfilm,linerordoublesidedadhesionfilm.To
place the axes, please notice the pictures and do the following:
Removing the scroller
• Lift up the scroller at the left side.
• pull it from its right fastener
Insert the scroller into the core of the roll of media you want to use which is easy thanks to autogrip mate-
rial insertion. As soon as the machine starts operating, the autogrip function will lock with the media inside
its core and it will rotate with the scroller.
Inserting the scroller
Thescrollerhastwodifferentends.Oneendislabeledbluewitharedcircle.Thispartisfortherightcon-
nection.
- 6 -

- 7 -
Operating priciples:
Adhesives without protective liner (application tape, double-sided adhesive film):
•OpenthelaminationrollerbypressingthebuttonMANUALÇ/Èand put on the laminate flatly. Ensure that the
film is completely flat on the roller and there are no folds or waves. Secure the film by fastening (tape) it slightly
onto the back workspace.
•UsethebuttonMANUALÇ/Èto put the upper roller about 1 cm off the lower roller. Meanwhile the foil might
come loose during this time and no longer stick to the roller perfectly. Pull the foil straight again so that it is
slightly under tension.
• After you have put the base to be used under the laminating roller, use Çand Èto adjust the rollers comple-
telytoposition0oruse„FILM“or„FOAM“toshuttherollers.Iftheprintmediumisnotstiff,putonthelaminate
that it extends to the work surface via the rubber roller and the slit so it sticks when the machine starts up.
LINER-ROLL-UP DEVICE
PRINT MEDIUM
RUBBER ROLLER
LAMINATE
Laminating single prints
Insert the scroller into the right
connection. Move the scroller that
way, so the pin fits into the holding
fixture.
insert this end of the scroller into
the left connection
label on the side
with pin.
right end of scroller
with pin
• Autogrip material insertion
to equip self-adhesive

ToequipyourlaminatorwithlaminationlminasimpleandeconomicalwaywerecommendourEASYLAM-CUTTER
(Art.-Nr.:24959).
Its knife has a special blade to minimize the danger of getting hurt or of damaging the rolls considerably.
Advantages:
- yousavetimeandmaterialwhileinsertingthelaminationlmincludingliner
- no exposed knife point
Thefollowingdescriptionoftheprocedureallowsaneconomicalconsumptionofthelaminationlmwhileequippingthelamina-
torwithfoil.Thecuttersimpliesthepreparationofthemachineandhelpstolearnitfaster.
You can get this tool at your local dealer or at www.dataplot.de.
EASYLAM-CUTTER
- 8 -

Place the lamination film between
the rollers
Hold the film tight and clamp the
rollers
Make sure the lamination film is
rolled tight
Feed foreward approx. 5cm of
lamination film
Position the blund part of the knife
between film and liner
Cut the liner carefully
Usethesharpendinfrontofthe
knife too
Fix the liner to the core Start Laminating
- 9 -
Procedure - EASYLAM CUTTER

- 10 -
Laminate with backing paper:
•OpenthelaminationrollerbypressingthebuttonOPENkeyandputinthelaminateasshowninthepicture.
Pushanemptyrollercoreontotheroll-upaxleR3sothattheprotectiveliner/backingpapercanberolledup.
•Afteryouhaveattachedthelaminatetotheroll-downaxleR4,separatethebackingpaperandusetapetofas-
tenittothecardboardcoreontheroll-upaxleR3.Ensurethattheprotectivelinerhasbeenfasteneduniformly
without cross creases. Pull the laminate between the rollers and stick it onto the upper roller with tape. When
doing this ensure that the foil is spread out evenly across the whole width. If there are creases or folds, repeat
the steps until the material is perfectly positioned.
•Byadjustingthecouplingoftheroll-upaxlesthepulloftheR3axlecanbestopped.Onlyasmallamountof
power is required to roll up the liner. Therefore, do not select a very high value.
• The required breaking power is normally low unless the protective liner has much more power than the vinyl. In
this case the tensile force has to be increased accordingly.
•UsethebuttonMANUALÈ/Çto put the upper roller about 1 cm apart the lower roller. The laminate might
come loosen during this time and no longer stick to the roller properly. Correct the film again.
•Puttheprinttobelaminatedbetweenthelaminatingrollersasshowninthepicture.UseÇand Èto adjust the
rollerscompletelytoposition0oruse„FILM“or„FOAM“toshuttherollersorusefootswitchatbackside.
•Releasethefilmthatyouhavefixedwithtapetotheupperrollerandstartrunningthemachine.
Laminating with backing paper:
LINER-AUFROLLVORRICHTUNG
DRUCKMEDIUM GUMMIWALZEN
LAMINAT
FERTIGES PRODUKT

Mounting on rigid boards with EASYLAM
There are different technics professional users execute. First you have to face two requirements:
a) Mounting a print on a self adhesive board
b) Mounting a self adhesive print on board
General:
Openthegapbetweentheaxlesatthathighoftheboard.
Adjust the high of the supply plate to the high of the board.
Move the board between the axles and close the gap by “FILM”-key.
Removetheboardoutsidebyusing“REVERSE”–key.
Nowthegapisadjusted.
For requirement a) Mounting a print on a self adhesive board
Pull of 3-4 cm of the liner of the adhesive board and stick the print to the board manually.
Move the board between the axles and place print on top of the upper axle like shown in graphic I.
Start mounting by some push of the board to move between the axles and push “start”- key.
Move away liner manually during mounting process.
- 11 -

- 12 -
For requirement b) Mounting a self adhesive print on board:
Pull of 3-4 cm of the liner of the self adhesive print and stick the print onto the board manually.
Move the board between the axles and place the print on top of the upper axle like shown in graphic II.
Start mounting by some push of the board to move between the axles and push “start”- key.
Move away liner manually during mounting process.
Alternative technique:
Place the print on the board
Move this both into the open axles in the middle of the board and close axles to fix position of board and print.
Print should be some larger then board to adjust easy.

- 13 -
Cut the liner of one half of the self adhesive media and mount this half by using the laminator pushing “start” key.
Turn around and insert the board again.

- 14 -
CE DECLARATION OF CONFORMITY
Us, DATAPLOT GmbH
Gutenbergstraße 15
24558 Henstedt-Ulzburg
Company manufacturerof the brand EMBLEM, declares under our own responsility, that the machine:
Brand: EMBLEM
Model: Easylam Expert 140C
Easylam Expert 160C
Easylam 140C
Easylam 160W
Easylam 160C
is in conformity with:
The requirements of EU Directive 2006/42/EC.s
The requirements of EU Directive 2004/108/EC.
The safety requirements of EU Directive 2006/95/EC.

- 15 -

DataplotGmbH•Gutenbergstraße15•D–24558Henstedt–Ulzburg•Germany
Tel. +49 41 93 995 0 • Fax +49 41 93 995 220
Table of contents
Other EMBLEM Laminator manuals
