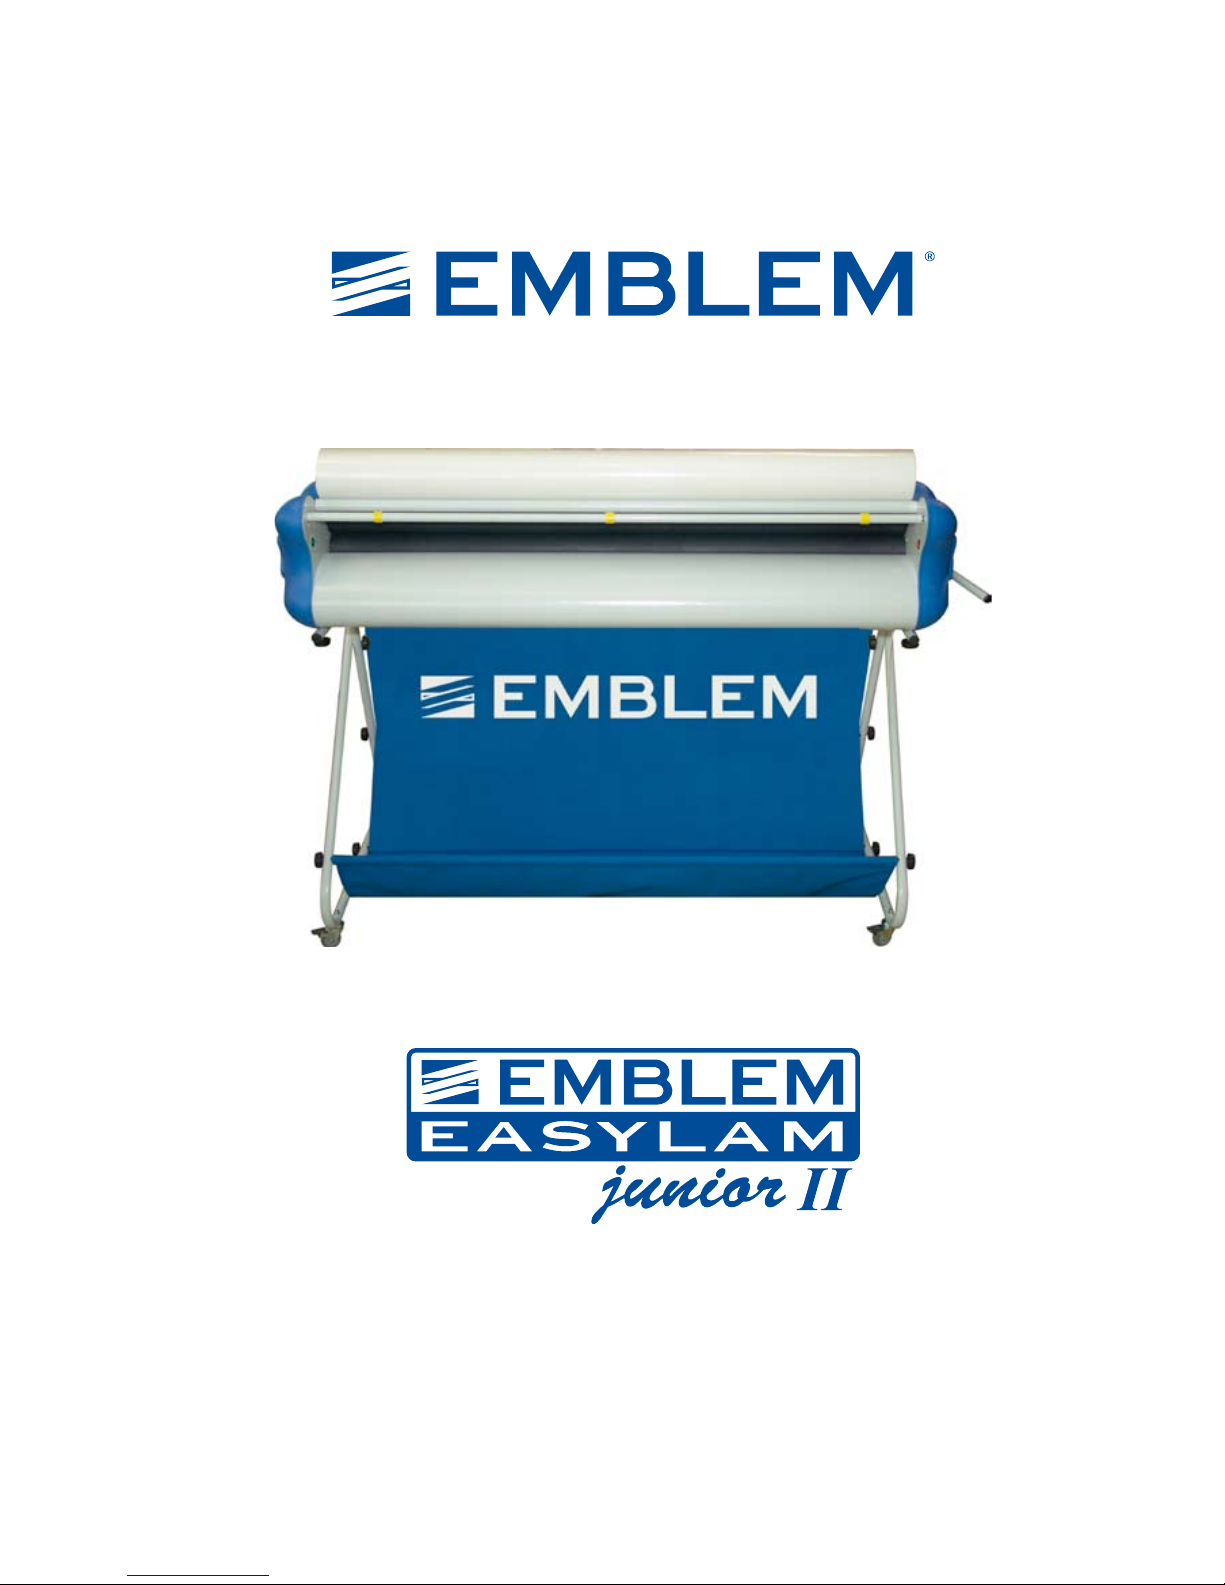
EMBLEM Easylam Junior II Manual
Product Description and
Operating Manual
Art.-Nr. 18309junior2

page - 2 -
IMPORTANT SECURITY NOTICE
The user of the laminator is obliged to observe the security regulations in his country. Fingers, clo-
thing or hair must be kept free from the pressure rolls, to avoid injuries when applying / inserting
material.
The unit must never be connected to an electrical power supply, which is not conform with its elec-
trical data. If the EMBLEM EASYLAM junior II does not work as expected, it has to be switched off
immediately.
Liquids or mechanical / metal parts may never be allowed to penetrate the unit.The power supply
cable must not be squeezed or otherwise damaged. Avoid risk of tripping over cable.
For disconnecting the cable, pull the plug, never apply force to the cable. Defective cables have to
be replaced immediately.
Disconnect the laminator from the power supply, if the unit is not in use for some while.While as-
sembling the laminator take precaution of injuries to hands and/or fingers.Passive operating security
is given through the rubber coated pressure rolls and the internal Voltage of 12 V =.
pressure rolls
front feeding plate
textile basket
stand
transport wheels
with stop
laminating axle
adjusting screw

page - 3 -
1. DESCRIPTION OF THE EMBLEM EASYLAM JUNIOR II LAMINATOR
EASYLAM junior II is a cold-laminator for large-format prints. It allows laminating and sealing, ma-
terial up to maximal width of 1400 mm and a thickness of 30 mm. With its rugged design, a simple
mechanical construction and the 12 V = system supply, the laminator ensures reliability, safety and
long life time with minimal maintenance requirements.
Laminating film is placed on the top rollers, which have an easy to clean surface finish. The lamina-
ting pressure of the rubber coated pressure rolls is controlled by means of a lever. Adjustable springs
allow the height adjusting of the unit, which enables to open the pressure rolls for material up to 30
mm thickness.
EASYLAM junioris II provided with an electric motor, which is controlled by means of foot-operated
regulating pedal, and a separate switch for continuous running.
The torsion moment is transferred through an indented belt onto the inner axis of the rubber coated
pressure roll. When under increased pressure, deflection of laminating rolls is noted the pressure must
be reduced. The material to be laminated (paper, foil, thin plastic) is inserted via the front feeding
plate. Its radius eliminates possible transversal corrugation.
With the possibility to use material without interlayer silicone paper (like Application Paper) next to
regular laminating film, and the simple application, this laminator becomes a very efficient, fast, and
easy to use tool for everyday use. Of course the laminator also is equipped for winding interlayer
paper as used with standardand special films.
The universality and cost efficiency of EASYLAM junior II makes it to the perfect laminator for use under
professional conditions when small numbers of pieces are produced (advertising studios, printing
offices, offices, copy centres, etc.).
2. PREPARATION AND INSPECTION OF THE LAMINATOR BEFORE OPERATI-
ON
EASYLAM junior II can be operated in normal workshop or office environment, under regular tem-
perature and humidity conditions. Dust and dirt represent a considerable risk factor,which may effect
the quality of output. Before starting the job it is recommended :
• to check that metal rollers, pressure rubber rolls and feeding plate are clean. (if necessary clean
with antistatic dust-cloth and / or cleaning alcohol)
•to switch on the laminator and check its function.
•to provide work space around the laminator for material in- and output.

page - 4 -
main switch, switches
on/off of the laminator
switch for permanent
movement of laminator
foot pedal - stepless control
of speed
power cord
foot pedal socket
lever
adjusting screw

page - 5 -
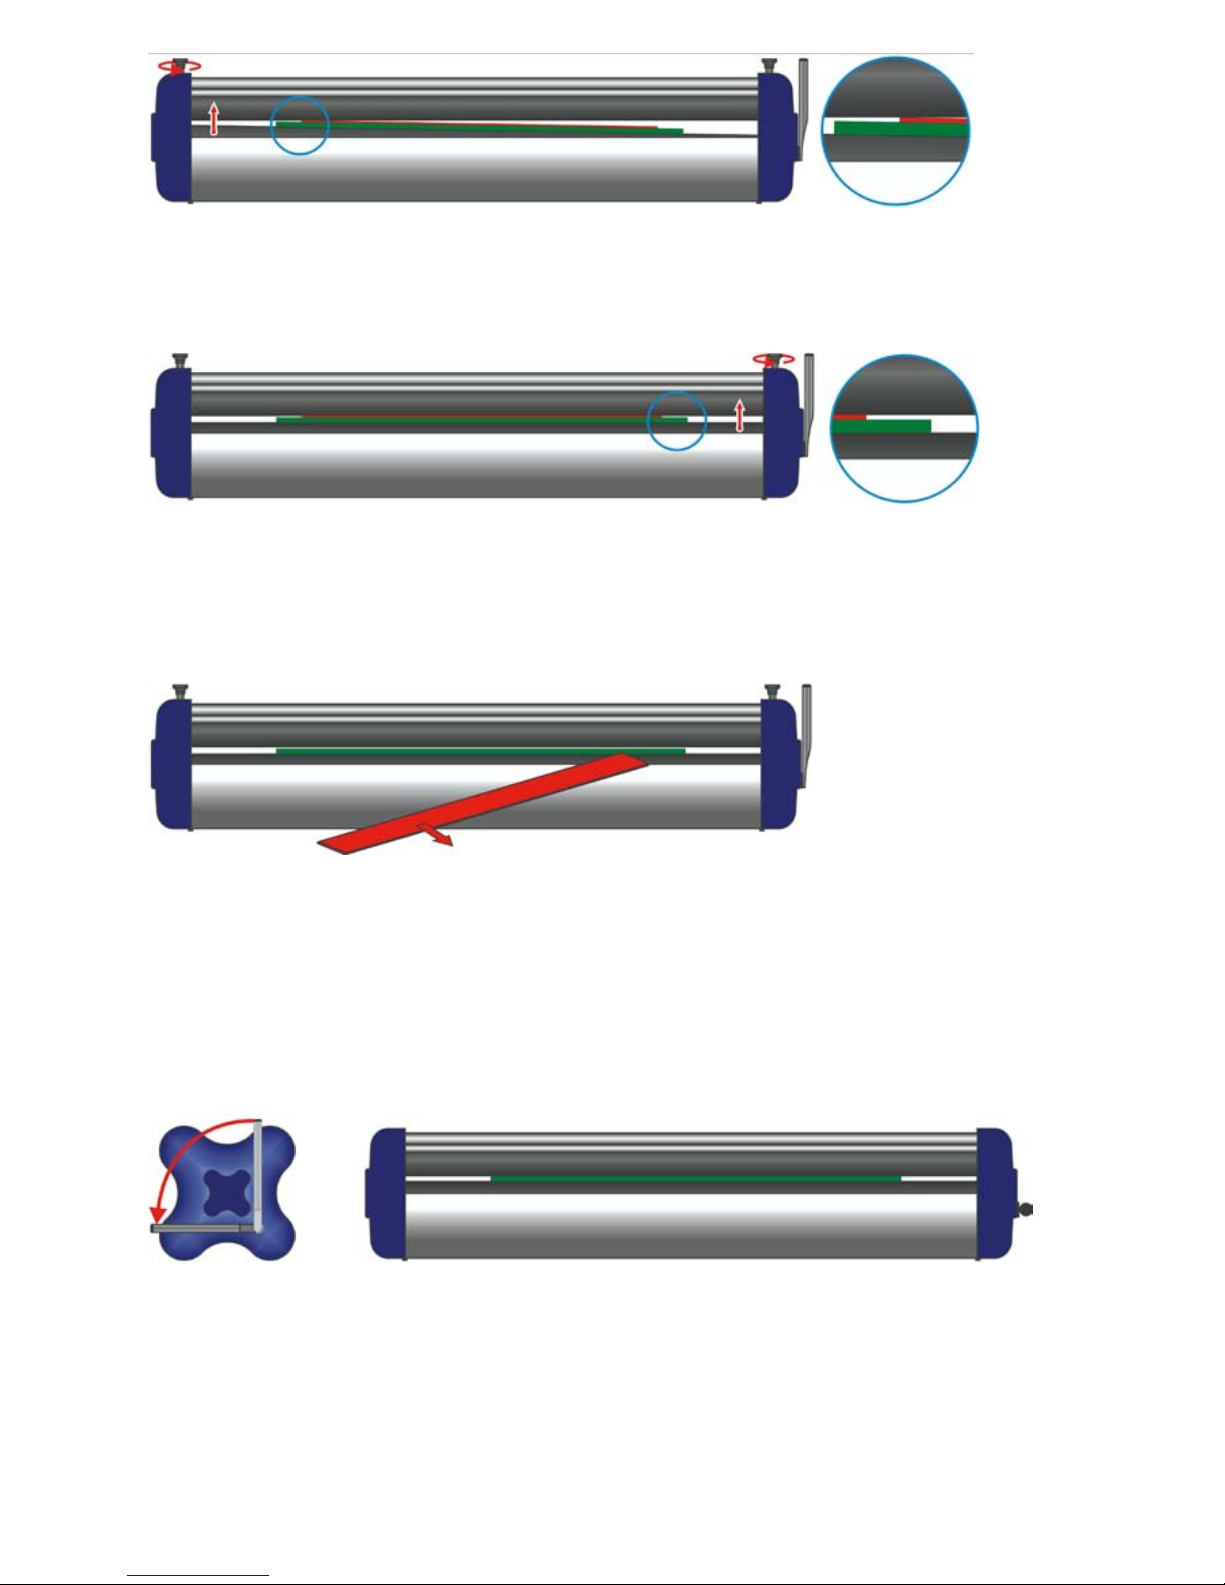
3. INSERTING THE LAMINATING FILM
Put laminating film on the laminating axles of EASYLAM junior II.
Insert brakes.
Lift the backing paper and stick a 10cm "parkingstrip" onto the whole width of the laminate.
Do not cut of the backing paper! Fold back the backing paper.
Notice:
The „parkingstrip“ isolates the layer of the glue from the pressure rolls and prevents
a adhesion of both.

page - 6 -
Bent the corners of silicone paper as shown.
Open pressure rolls, by moving the control lever up Pull laminating film through the pressure rolls (
see below) and reset the lever in fix position.
Notice:
Make sure, that parkingstrip is between the pressure rolls and the "laminating win-
dow" is positioned in front of the pressure rolls..
Grab the silicone paper at the bent corners and pull off for approx. 20 cm, then fix the paper by
means of the 2 plastic fasteners.

page - 7 -
4. LAMINATING
Before inserting the printed matter into the laminator, make sure, that the laminating film is free of
wrinkles and clean. These kind of disturbances can be transferred to the final product and can dama-
ge it irreversibly. It is necessary to feed the printed matter flat and straight by hand over the feeding
plate untilcontact with the laminating film. Now, the EASYLAM junior II can be started with the foot
pedal. If necessary smoothen the material by hand. When entered between the laminating rolls, the
printed matter is sealed with laminating film and leaves the laminator through the rear cover. The
movement of the printed matter should be smooth (without stopping). After the printed matter has
passed through, a further print can be inserted (allow for a small distance between the jobs) or the
work can be terminated.
5. PARKING OF THE FILM, TERMINATION OF LAMINATION
When the work is to be interrupted for a short time, insert a parking stripe (paper, foil etc.with dimen-
sions approx. 10 cm x width of the package) in order to prevent the adhesive from sticking on the
pressure rolls. If the film reel has to be changed, or the work is to be interrupted for a longer time,
wind the film up back into reel and store in accordance with manufacturer's recommendations. When
the work is terminated, cover the EASYLAM junior II with a dust protection. It also is recommend to
disconnect the power source from mains.
pressure rolls
laminate
laminating axle
take-up for
backing paper
front feeding
plate
DIAGRAM FOR LOADING THE LAMINATING FILM

page - 8 -
6. ADJUSTMENT OF PRESSURE
Both adjusting screws unscrew to upper stop position (position 0) in counterclockwise rotation.
A Lamination:
Lamination of materials up to 1,5 mm thickness
B Mounting:
Mounting of materials between 1,5 - 25 mm thickness 1,5
1. Lift lever.
2. Both adjusting screws screw in clockwise rotation. The distance between the pressure rolls must
be 5 - 10 mm more than the thickness of the mounting plate.
3. Put the mounting plate and the adjust plate between the pressure rolls. ( detail 1.)
adjust plate
mounting plate
detail 1.
page - 9 -
4. Use one of the adjusting screws in counterclockwise rotation to lift the lower pressure roll until the
adjust plate has contact to the upper pressure roll. ( detail 2.)
detail 2.
5. Now use the other adjusting screw in counterclockwise rotation to lift the lower pressure roll until
this side of the adjust plate has contact to the upper pressure roll. (detail 3.)
detail 3.
6. After correct adjust of both sides, pull out the plates.
Possible Errors:
Less pressure – The pressure rolls are free, you see a gap above the adjust plate.
Too much pressure – The pressure rolls are fixed. It is not possible to pull out the ad-
just plate.
7. Press down lever. Now you have the right pressure for mounting with this thickness of mounting
plate.
Notice
Please repeat this for mounting plates with other thickness. If not you damage your
print (because of less pressure for mounting) or the laminator springs (too much pres-
sure).

page - 10 -
Take-Up of backing paper
The backing paper is fastened up to take-up by means of 2 plastic clamps. After the work is done,
cut the backing paper and remove it from the take-up.
Notice
Never overpower the springs by forcing the turning the lever in the lower position.
There is a danger of damaging the laminator (springs)!
C Mounting:
Mounting of materials between 25 - 30 mm thickness
1. Lift lever.
2. Both adjusting screws screw to lower stop position in clockwise rotation.
3. Put the mounting plate between the pressure rolls. Turn on the pressure rolls. Press down the lever
carefully until both pressure rolls are rotating. Now you have the right pressure.
7. MAINTENANCE, SERVICE
EMBLEM EASYLAM junior II has been designed as a maintenance-free device for professional use,
which does not require special user's care.
•cleaning - with technical gasoline, alcohol
•pressure roll maintenance: use an agent for regeneration of rubber parts (for instance silicone oil),
approximately once a month
•the use of laminating film from the EMBLEM range is recommended.
•for service, please contact your local dealer.

page - 11 -
8. POWER SUPPLY
The power cord for the laminator is equipped with a standard car-plug. Please connect this to the
EMBLEM power supply unit. If using another power supply, make sure the correct connection / set
up is used.(See scheme)
Laminator Power supply
9. SPECIFICATIONS
width of the pressure rolls ........................................................................................... 1420 mm
diameter of the pressure rolls .......................................................................................... 80 mm
maximal width of the laminating film........................................................................... 1400 mm
maximal thickness of the material to be laminated ........................................................... 30 mm
lamination speed ............................................................................................... ca. 2,5 m / min
power supply ................................................................................ 220V~ 50Hz / 12V= / 2,5 A
operating control ............................................................ foot-operated regulating pedal / switch
for continuous runningdimensions of the machine
dimensions of the machine with stand .................................................... 1750 x 1300 x 750 mm
weight of the machine ................................................................................................ ca. 60 kg
Technical specifications are subject of change
WARRANTY AND LIABILITY
Our general sales conditions are valid. Under no circumstances, technical changes or modification of
the unit are permitted. Any interference of unauthorized persons cause loss of the warranty. We also
refuse warranty for units which are not in original condition. For further information please contact
your local dealer!
DATAPLOT GmbH
Gutenbergstrasse 15
D- 24558 Henstedt-Ulzburg
Tel: +49 (0)4193-995-0
Fax: +49 (0)4193-995-220
www.emblem.de // www.dataplot.de
eMail: [email protected]

page - 12 -
Content
IMPORTANT SECURITY NOTICE 2
1. DESCRIPTION OF THE EMBLEM EASYLAM JUNIOR II LAMINATOR 3
2. PREPARATION AND INSPECTION OF THE LAMINATOR BEFORE OPERATION 3
3. INSERTING THE LAMINATING FILM 5
DIAGRAM FOR LOADING THE LAMINATING FILM 7
4. LAMINATING 7
5. PARKING OF THE FILM, TERMINATION OF LAMINATION 7
6. ADJUSTMENT OF PRESSURE 8
7. MAINTENANCE, SERVICE 10
8. POWER SUPPLY 11
9. SPECIFICATIONS 11
Table of contents
Other EMBLEM Laminator manuals


