Emergency Response USA S.O.S COMPANION User manual

S.O.S
COMPANION
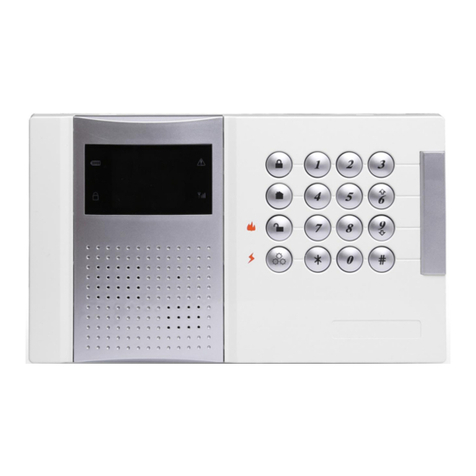
1. SOS Activation Button
2. Battery Status
Red Light shows battery status.
3. Connection Status
Blue Light shows connection status.
4. GPS Signal Status
Blue Light shows location tracking status.
GPS Signal Status Blue Light
O – Normal
Quick
Reference
Turn Unit ON: Press and hold the Power
Button for 3 seconds.
Turn Unit OFF: Press and hold the Power
Button for 3 seconds.
Place an emergency call:
1. Press and Hold the SOS button
for 3 seconds.
2. All 3 indicator lights will illuminate.
3. Your response team will answer and
notify emergency services for you.
For more information about the
Emergency Response USA Mobile
medical Alert System visit
www.emergencyresponseusa.com
About the Unit
2
1
Volume
3
Indicator Light Charts
Quick
Start
Guide
855.237.2500
www.emergencyresponseusa.com
Charging (Solid)
SOS Alert has been
triggered (All on)
Low Battery (Flashing)
Connection Status Blue Light
Fast Flash – Attempting to Connect
Slow Flash – Connected
Attempting to Connect
(Fast Flashing)
Connected
(Slow Flashing)
Normal (O)
All Three ON
SOS Alert has been triggered
Battery Status Red Light
Solid ON – Charging
Flashing – Low Battery
4
Power
On/O

Enjoy Your
Freedom
This Quick Start Guide will help you
set up and activate Emergency
Response USA Mobile Alert System.
Please read this entire guide before
using your system to ensure it is
set up correctly and ready for use.
What’s in
the box
Step 2
1. Hold the S.O.S. button for 3 seconds.
2. Your response team will answer
shortly to customize the unit and
complete set up.
3. When the call ends, the unit will be
set up and ready for use.
Unit Charging
Base
Power
Cord Lanyard
Charge Unit Call to Set up
855.237.2500
www.emergencyresponseusa.com
IMPORTANT:
The unit is not ready for use until you have:
• Charged it in the Charger for 8 hours
• Done Initial GPS activation
• Completed a call with the response team
CAUTION: Neither the unit, nor the
charger, is water proof and should not
be worn while bathing or swimming.
Step 1
1. Insert the Power Cord into the
Charging Base and Plug the large end
of the Power Cord into a standard
wall outlet.
2. Lay the unit at onto the charging
base. Initial Use: Let charge for 8 hours
3. Aer the unit is charged, take it
outside to a location with clear
visibility to the sky for 15 minutes to
allow for GPS Location to be acquired.
This step must only be done once.
1 FREE MONTH
OF SERVICE
When you recommend a friend
who subscribes to our service
Table of contents
