EmergoPlus PowerXtreme SOLAR set XS100 User manual
User manual
SOLAR set XS100
SOLAR set XS130
SOLAR set XS200
SOLAR set XS260
EmergoPlus BV
Informaticastraat 20
NL 4538 BT Terneuzen
Tel. +31 85 2018 158
www.emergoplus.com

User manual Solar set XS
E18-XSSolarset-EN-00 www.emergoplus.com Page 2of 15
Dear customer,
Thank you for purchasing our high-quality Solar set XS by
EmergoPlus! This product was developed using the latest
technologies and quality systems. We assure you that we will do
our utmost to guarantee hassle-free operation, to make you
satisfied with your purchase. Our ultimate goal is a satisfied
customer.
If you have any questions, please contact our dealers or our sales
department.
We hope you will enjoy your Solar set XS!
Best regards,
EmergoPlus BV

User manual Solar set XS
E18-XSSolarset-EN-00 www.emergoplus.com Page 3of 15
Table of contents
1. Product description......................................................................4
2. Safety instructions .......................................................................5
2.1 Explanation of safety instructions ...................................5
2.2 General instructions............................................................5
3. Unpacking and mounting/installing .........................................7
3.1 Components in packaging.................................................7
3.2 Installation of Solar cables ................................................8
3.3 Mounting Solar panel .........................................................9
3.4 Mounting MPPT Solar charger ...................................... 10
3.5 Gluing prescription........................................................... 10
4. Maintenance................................................................................13
5. Decommissioning.......................................................................13
6. BT-2 Bluetooth Connector (optional)......................................13
7. Display (optional)........................................................................13
8. Warranty conditions...................................................................14
9. Liability..........................................................................................14
10. EC Declaration of Conformity..............................................15

User manual Solar set XS
E18-XSSolarset-EN-00 www.emergoplus.com Page 4of 15
1. Product description
The solar set contains all parts required to install a functioning
solar system onto your vehicle. In addition to 1 or 2 solar panels,
the set includes an MPPT charger and the necessary installation
materials. The MPPT charger is an intelligent charger that gets
the most out of the solar panel. For the functioning of the MPPT
charger, refer to the extensive description in its manual.
User manual Solar set XS
E18-XSSolarset-EN-00 www.emergoplus.com Page 5of 15
2. Safety instructions
2.1 Explanation of safety instructions
The safety instructions will help you avoid risks while carrying out
activities. The safety instructions are sub-divided into the
following categories:
2.2 General instructions
1. Before installing and wiring the charger, you must ensure that
the connection with the Solar panel and the fuse is being
detached.
2. Check after the installation whether all connections are solid
and reliable and if all connections are firmly attached. Loose
connections generate warmth which may lead to hazardous
situations.
WARNING!
Means that the relevant activity is hazardous and
you must prepare well before proceeding.
CAUTION!
Means that the relevant implementation could
cause damage.
NOTE!
Means advice or instruction for the operator.

User manual Solar set XS
E18-XSSolarset-EN-00 www.emergoplus.com Page 6of 15
2.3 Installation precautions
3. Loose connections or corroded wire leads to excessive heat
development. This can cause the insulation layer of the wire
and surrounding materials to melt, and even cause a fire. So,
make sure that all connections are properly tightened or
tightened.
4. When connecting the system, the output voltage may exceed
the upper limit for human safety. Therefore, use insulated
tools at all times and keep hands dry.
User manual Solar set XS
E18-XSSolarset-EN-00 www.emergoplus.com Page 7of 15
3. Unpacking and mounting/installing
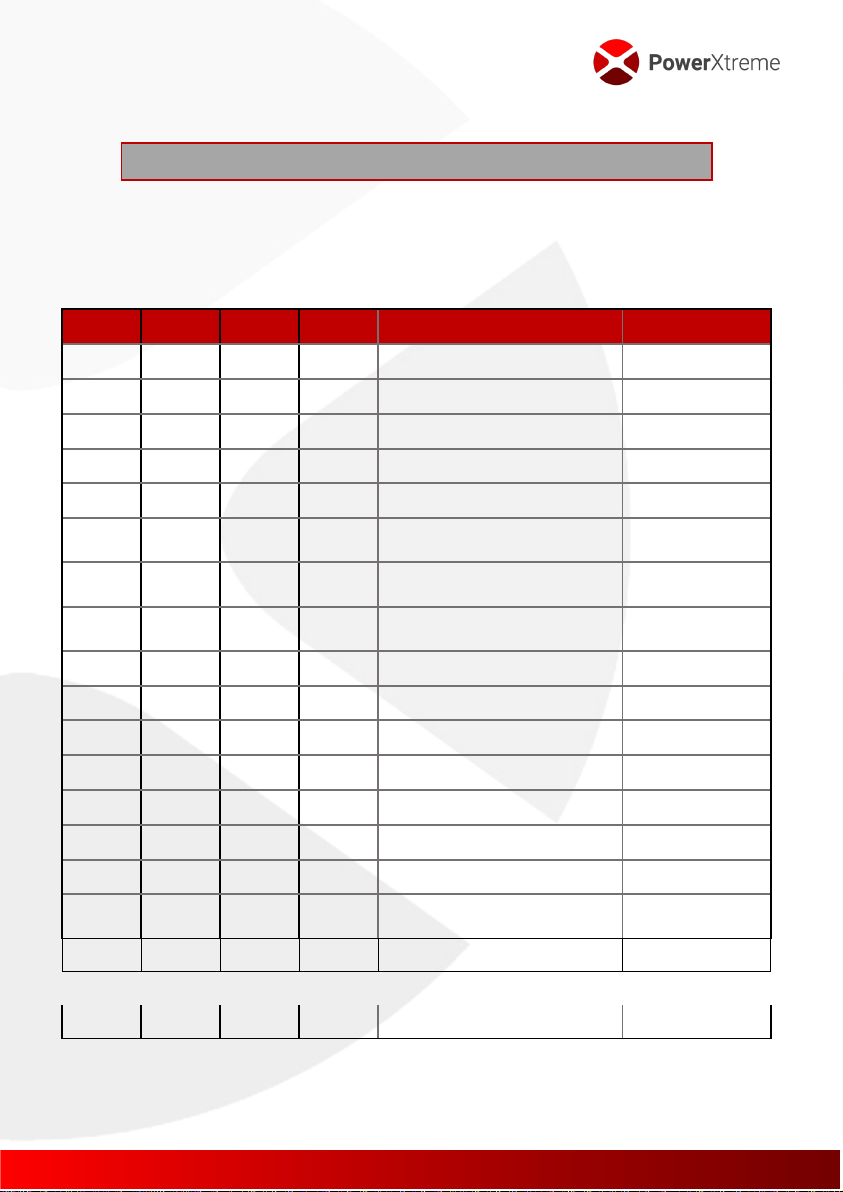
3.1 Components in packaging
In the packaging of the Solar set you will find the following parts:
XS100
XS130
XS200
XS260
Description
Dimensions
1
2
Solar panel XS100W
1000x670x30
1
2
Solar panel XS130W
1250x670x30
1
1
2
2
Mounting spoiler set (2 pieces)
680x90x65
1
1
1
1
MPPT charger XS20s
150x105.6x61.5
1
1
1
1
Cable entry
1
1
1
1
Solar cable 4mm² red, 1 x MC4-
M
5 m
1
1
1
1
Solar cable 4mm² black, 1 x
MC4-F
5 m
1
1
Solar cable 4mm² black, MC4-M,
MC4-F
2 m
1
1
Cable tray 30x15
2 m
1
1
1
1
Battery cable 4mm² red
4 m
1
1
1
1
Battery cable 4mm² black
4 m
1
1
1
1
Sikaflex 552
310ml
1
1
1
1
Scotchbrite Very fine
75 x50
1
1
2
2
Spacer tape Sika 12x2mm
60 cm
1
1
1
1
Activator bottle
30ml
10
10
20
20
Stainless steel self-drilling screw
4.2 x 19 A2
1
1
1
1
Manual EN (Download)
Optional:
1
1
1
1
Bluetooth module BT-2
67,3x36x15,5 mm
Of

User manual Solar set XS
E18-XSSolarset-EN-00 www.emergoplus.com Page 8of 15
▪Take all the components carefully out of the packaging
and check whether all parts are present in accordance
with the parts list.
3.2 Installation of Solar cables
▪Determine the position of the solar panel or panels on the
roof of the vehicle.
▪Determine where you want to lead the solar cables
through the roof into the vehicle.
▪Make a 12-14 mm hole in the roof, using a hole saw.
▪Lead the solar cables through the cable glands of the
included roof throughput. Glue the roof throughput
across the hole, curved side in driving direction. For
gluing instructions refer to paragraph 3.5.
▪When applying 2 Solar panels you must daisy chain the
panels. You do this by connecting the + of the one panel
to the –of the other panel. See diagram below:
1
1
1
1
Display
104.5x55.5x11.8
mm
CAUTION!
Keep children away from the plastic packaging
material. Risk of suffocation!

User manual Solar set XS
E18-XSSolarset-EN-00 www.emergoplus.com Page 9of 15
If the mutual distance is too large, you can use the included solar
cable to make the connection. The solar cable can be installed
into the included cable duct. Perform installation conform the
gluing instruction in paragraph 3.5.
3.3 Mounting Solar panel
▪Determine the exact position of the spoiler profiles on the
roof by laying them down on the roof, together with the
panel. Mark the position of the spoiler profiles by use of a
marker or tape.
▪Glue both spoiler profiles to the spot marked on the roof
in accordance with the gluing prescription.
▪After curing of the glue, you can mount the solar panel.
▪Mount the solar cables using the MC4 plugs to the solar
panel. Make the cables as short as possible and tighten
both cable glands on the cable throughput.
▪Leg the solar panel op the spoiler profiles and fixate this
by positioning of the 10 self-drilling screws.
CAUTION!
Beware that you do not place the screws too high in
the spoiler profile. The screw could damage the
bottom of solar panel!
User manual Solar set XS
E18-XSSolarset-EN-00 www.emergoplus.com Page 10 of 15
3.4 Mounting MPPT Solar charger
See manual of the Solar charger.
3.5 Gluing prescription
▪Clean both adhesive surfaces with Activator.
▪Allow the Activator to vaporise. This will take 10-15
minutes, depending on temperature and humidity.
▪Roughen the surfaces to be glued with Scotchbrite Very
Fine.
▪Clean both adhesive surfaces with activator.
▪Allow the activator to vaporise. This will take 10-15
minutes, depending on temperature and humidity.
NOTE!
For a good and solid adhesive bond it is very
important that you act in accordance with
instructions below! Surfaces must be dry,
grease-free, oil-free and dust-free.
CAUTION!
As soon as the Solar panel is exposed to light,
it will start generating voltage! This voltage is
not touch-safe. Bear this in mind when
connecting the cabling! As an additional safety
you could cover the solar panel or protect it
against exposure to light, before you perform
any installation, maintenance or cleaning
activities.

User manual Solar set XS
E18-XSSolarset-EN-00 www.emergoplus.com Page 11 of 15
▪For an esthetical nice result, you can apply tape to
locations that you don’t want glued.
▪Apply the distance tape to one of the surfaces to be
glued. Remove the adhesive back of the tape.
The tape will ensure fixation during the curing of the
sealant. In addition, the tape ensures the required
adhesive thickness, which is 2-3 mm between the
adhesive surfaces.
▪Cut the nozzle of the sealant tube conform
accompanying image. First cut it horizontally, then cut
out a red triangle.
▪Apply a triangle adhesive bead onto the surface to be
glued. Keep the sealant tube at 90° relative to the surface.
▪Position the part and press the glue up to the desired glue
thickness of 2-3 mm.
▪Excessive glue can be removed or smoothed by use of an
angled cut-off piece of PVC pipe. Before use, immerse the
pipe into water with detergent. Run the piece of pipe
across the adhesive bead to achieve a smooth result. You
can also lightly moisten the adhesive bead with a plant

User manual Solar set XS
E18-XSSolarset-EN-00 www.emergoplus.com Page 12 of 15
sprayer with water and detergent and then use a
squeegee to smoothen the adhesive bead.
▪The glue will cure by means of moisture absorption from
the ambient air. Depending on the humidity, the curing
will take 1 to 2 days per mm of glue thickness.
▪The glue can be re-coated with most of the common
automotive paint systems (also water-based). Resin-
based wet paint finish or acidic curing are not suitable.
Re-coating can also be done in wet-on-wet up to 3 hours
after the application. Adhesion op fully hardened glue can
be improved by pre-treatment with Activator.
User manual Solar set XS
E18-XSSolarset-EN-00 www.emergoplus.com Page 13 of 15
4. Maintenance
To ensure optimal charger performance, we recommend
checking the following parts once a year:
▪Clean the solar panel with a soft brush with water and soap
solution.
▪Check whether the cabling is still in order: contacts are tight,
there is corrosion, there is wear on the cable insulation. Repair
or replace cabling if necessary.
5. Decommissioning
Electric appliances should not be disposed of with normal
household waste. Hand in the solar panels to a registered waste
processor.
6. BT-2 Bluetooth Connector (optional)
See manual of the MPPT Solar charge controller.
7. Display (optional)
See manual of the MPPT Solar charge controller.

User manual Solar set XS
E18-XSSolarset-EN-00 www.emergoplus.com Page 14 of 15
8. Warranty conditions
EmergoPlus guarantees that the Solar set is built according to the
legally applicable standards and regulations. During production
and before delivery all Solar sets have been extensively tested and
checked. Failure to act in accordance with the instructions and
provisions of this manual may result in damage and / or the unit
will not meet our specifications. This may mean that the warranty
will become void.
9. Liability
EmergoPlus cannot be held liable for:
▪Damage resulting from the use of the Solar set.
▪Possible errors in the supplied manual and their
consequences.
▪Use that is incompatible with the purpose of the product.
User manual Solar set XS
E18-XSSolarset-EN-00 www.emergoplus.com Page 15 of 15
10. EC Declaration of Conformity
EC DECLARATION OF CONFORMITY OF ELECTRICAL EQUIPMENT
Declaration according to Directive 2014/35 / EC, as amended
This language version of the statement is verified by the manufacturer.
We:
Name : EmergoPlus BV
Address : Informaticastraat 20
Country : 4538 BT Terneuzen Nederland
Declare for the product described below:
Trade name : Solar panel XS100, XS130, XS200, XS260
Model : XSS100, XSS130, XS200, XS260
Function : Generation of electrical energy from solar energy.
that all relevant provisions of the Machinery Directive are met;
that the product also complies with the provisions of the following European
directives:
-2014-35-EG : Low Voltage Directive
and that the following harmonized Standards have been used:
-EN61730-1: 2007 / A2: 2013 Safety qualification of photovoltaic (PV)
modules - Part 1: Construction requirements.
-EN61730-2: 2007A1: 2012 Safety qualification of photovoltaic (PV) modules
- Part 2: Requirements for testing.
The product complies with the EC type-examination carried out by:
Report number : 7001261605301-00
Name : TÜV SÜD Product Service GmbH
Notified Body Number : 0123
Address : Ridlerstraße 65
Country : D-80339 München
and that the following natural or legal person established within the Community is
authorized to compile the technical file:
Name : EmergoPlus BV
Name and position : Dick van Wijck, CEO
Address : Informaticastraat 20, 4538 BT Terneuzen
Country : Nederland
Done at Kapelle 2 July 2018.
Dick van Wijck
This manual suits for next models
3
Table of contents
Popular Solar Panel manuals by other brands


STIEBEL ELTRON
STIEBEL ELTRON SOL 25 PLUS Operating and installation instructions

Exiom Solution
Exiom Solution EX P-48 Series installation guide

Viessmann
Viessmann VITOSOL 200-F installation instructions

FulTyme RV
FulTyme RV 3098 instruction manual

SFC Energy
SFC Energy XTREMESOLAR XTR-S290P Series installation manual

Jackery
Jackery SolarSaga 80 user manual

Grape Solar
Grape Solar GS-100-KIT installation guide

ChinaLight Solar
ChinaLight Solar CLS-230P installation manual

vikram solar
vikram solar SOMERA VSMD.72 Series installation manual

Schweizer
Schweizer Solrif Short installation manual

Aleo
Aleo X63 installation manual

PHOTOWATT
PHOTOWATT PW2500 U Series user guide