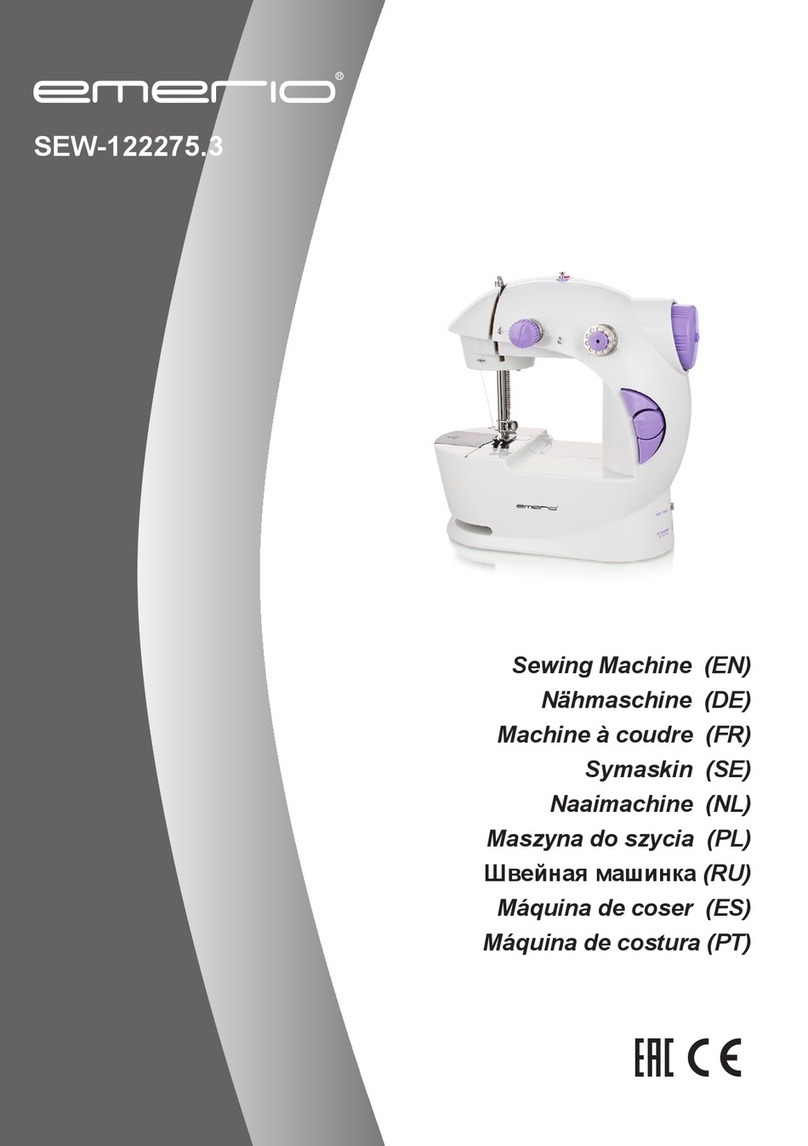
emerio SEW-122275.2 User manual

SEW-122275.2
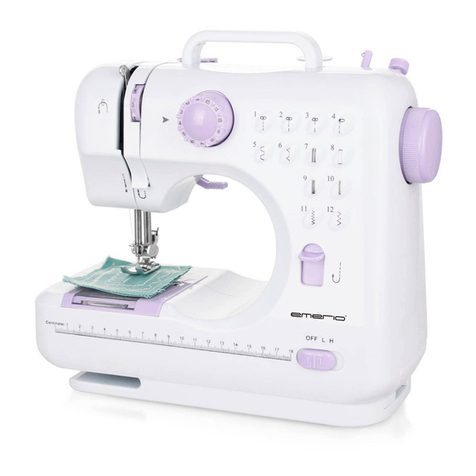
Sewing Machine (EN)
Nähmaschine (DE)
Machine à coudre (FR)
Naaimachine (NL)
Maszyna do szycia (PL)

- 1 -
Content –Inhalt –Teneur –Inhoud –Treść
Instruction manual –English ......................................................................................- 2 -
Bedienungsanleitung –German ...............................................................................- 11 -
Mode d’emploi – French ..........................................................................................- 22 -
Gebruiksaanwijzing –Dutch.....................................................................................- 33 -
Instrukcja obsługi – Polish........................................................................................- 44 -

- 2 -
Instruction manual –English
SAFETY INSTRUCTIONS
Before use make sure to read all of the below instructions in
order to avoid injury or damage, and to get the best results
from the appliance. Make sure to keep this manual in a safe
place. If you give or transfer this appliance to someone else
make sure to also include this manual.
In case of damage caused by user failing to follow the
instructions in this manual the warranty will be void. The
manufacturer/importer accepts no liability for damages
caused by failure to follow the manual, a negligent use or use
not in accordance with the requirements of this manual.
1. This appliance can be used by children aged from 8 years
and above and persons with reduced physical, sensory or
mental capabilities or lack of experience and knowledge if
they have been given supervision or instruction concerning
use of the appliance in a safe way and understand the
hazards involved.
2. Children shall not play with the appliance.
3. Cleaning and user maintenance shall not be made by
children without supervision.
4. The appliance is only to be used with the power supply
unit provided with the appliance.
5. Always switch off the appliance, disconnect from the power
supply and remove foot pedal when:
changing the needle;
threading the needle;
changing bottom bobbin;
changing any parts;
inserting or removing batteries;
cleaning the machine;
after each use.
6. Never run the machine when there’s thread in the needle,
but no fabric on the machine. This could damage the
machine.

- 3 -
7. Never attempt to open the housing of the appliance, or to
repair the appliance yourself. This could cause electric
shock.
8. Unplug the appliance before carrying out maintenance.
9. This appliance is not designed for commercial use.
10. Do not use the appliance outdoors.
11. Do not use the appliance for other than intended use.
12. Never use the appliance if damaged in anyway.
13. Do not pull on fabric while sewing. Pulling could break the
needle and result in damage to the appliance.
14. Remove batteries when the appliance is not in use for long
periods. This saves battery life and protects the appliance.
New and used batteries are not to be mixed.
15. Keep away from children. This appliance is not a toy and
not meant to be used by or near children.
16. Do not submerge the unit or any other parts in water. Do
not operate the appliance with wet hands, without shoes,
or while standing in the water or on a wet surface when
using the adapter.
17. Never use the appliance with a damaged power cord or
plug.
18. Keep the power cord away from heated surface.
19. To remove the plug from the plug socket, pull the plug. Do
not pull the power cord.
20. Use only the power adapter recommended by the
manufacturer. Any other adapter may cause injury or
damage to the appliance.
21. Switch off or unplug the appliance when leaving it
unattended.
22. Make sure there is fabric under the needle when the
appliance is working and the needle is moving. Otherwise
the appliance will get stuck and the thread will be jammed.
23. If the appliance get stuck or jammed due to wrong
operation, turn off the power on/off switch immediately.

- 4 -
SEW-122275.2 EN
PARTS DESCRIPTION
1. Power on/off switch
2. Speed switch
3. Light on/off switch
4. Bobbin spindle
5. Bobbin winder bar (can be
pressed out)
6. Hand wheel
7. Side bobbin
8. Thread spool (not included)
9. Thread spindle
10. Thread guide ring
11. Tension adjusting screw
12. Thread guide ring
13. Take-up lever
14. Thread cutter
15. Thread guide ring
16. Light
17. Needle clamp
18. Needle clamp screw
19. Needle
20. Bobbin compartment cap
21. Bottom bobbin (inside)
22. Sleeves sewing slot
23. Presser foot
24. Battery compartment
(underneath)
25. DC Jack for adapter
26. Foot pedal jack
27. Thread gap (gap between the
presser foot and the sewing
deck)
28. Presser foot lever
Accessories
1. Needle
2. Needle threader
3. Four metal bobbins
4. Foot pedal
5. Adapter

- 5 -
After removing the appliance from the packaging box:
1. Make sure the power on/off switch is in off position before inserting batteries.
2. Put 4 AA batteries into the battery compartment.
3. Press the power on/off switch to turn on the appliance. The unit will start sewing immediately. Be sure the
appliance is properly threaded and the fabric is positioned for sewing before you turn on the unit.
4. Warning! When using the adapter, remove all batteries from the appliance.
THREADING THE APPLIANCE
This appliance works with two threads. One is the top thread. The thread is from the side bobbin or the thread
spool. The other one is the bottom thread. The thread is from the bottom bobbin.
Top thread:
After removing the appliance from the packaging box, you’ll find the appliance is threaded already (see the
direction of 1-8 shown in the picture). You can directly use the side bobbin to start sewing. Alternatively, you
can use the thread spool you purchase separately to start sewing:
Step 1: Raise the thread spindle by grasp the exposed top and pull upward until the thread spindle is fully
extended out.
Step 2: Place a thread spool on the thread spindle.
Step 3: Pull out the thread from the thread spool and put it through the thread guide rings, tension adjusting
screw, take-up lever, needle clamp and the needle, based on the direction of 2-8 shown in the picture.
Caution! When the thread goes over the needle it must be put through the hole from the left to right. Otherwise,
the appliance will not work properly.
Note: When the thread goes over the tension adjusting screw, it must be positioned between the two washers
behind the screw. This provides the tension to the thread.
Make sure the appliance is threaded correctly. (Step by step, do not forget any step or thread to wrong places.)
Leave about 10cm of the thread hanging out.
Bottom thread (Bottom bobbin placement):
1. Remove the cap of the bobbin compartment.
2. Place the bobbin you selected into the bobbin compartment, with the thread going counterclockwise. Leave
about 5cm of the thread hanging out. (Fig.1)
3. Hold the end of the top thread with one hand, and then turn the hand wheel with the other hand several
circles. The top thread will pick up the bottom thread and pull it up through the hole under the needle.
4. Replace the cap of the bobbin compartment. Separate the two threads and then pull them together to the
back of the appliance under through the thread gap, leaving about 10cm hanging there. (Fig.2)
Caution! Always turn the hand wheel 2 to 3 circles by hand to test it goes smoothly or not before start the
appliance. Direction to turn the hand wheel should be the same as the arrows’ direction on the hand wheel.
- 6 -
Fig.1 Fig.2
Important! Check and make sure the top and bottom threads go correctly. Test one piece of old fabric before
beginning to sew. Improper threading will damage the lockstitch.
The appliance may have been pre-threaded from the factory. Look at this threading carefully before removing
it to replace the thread or bobbin with different thread.
OPERATING THE APPLIANCE (without the foot pedal)
Caution! Always turn the hand wheel 2 to 3 circles by hand to test it goes smoothly or not before start the
appliance. Direction to turn the hand wheel should be the same as the arrows’ direction on the hand wheel.
1. Lift the needle above the presser foot by turning the hand wheel slightly.
2. Raise the presser foot by lifting up the presser foot lever.
3. Place the fabric to be sewn under the presser foot.
4. Lower the presser foot by releasing the presser foot lever downward.
5. Rotate the hand wheel 2 to 3 circles.
6. Press the speed switch to choose your desired speed. The button is pressed-in when selecting the low speed;
the button is released-out when selecting the high speed. Use low speed for intricate work which requires a
lot of stopping, starting and turning. Use high speed for long uninterrupted seams.
7. Now press the power on/off switch to on position with the button pressed in. Gently guide the fabric to keep
the stitching straight by pressing lightly down with your fingertips on both sides as it feeds through the
presser foot.
8. When the seam is finished, press the power on/off switch to off position with the button released out.
9. Raise the needle above the fabric by turning the hand wheel slightly.
10. Raise the presser foot by lifting the presser foot lever.
11. Turn the hand wheel back and forth, the thread will be released easily. Pull the fabric toward you leaving
about 10cm of the threads between the fabric and the appliance. If the fabric is difficult to pull out, release
the top thread a little bit by loosening the thread from the right side of the take-up lever manually. (Fig.3&4)
12. Cut the threads close to the fabric. Put the threads to the back of the appliance under through the thread
gap, leaving about 10cm hanging there. Begin the next seam in the same manner as above by following these
operating steps again.
Fig.3 Fig.4

- 7 -
To use the foot pedal
1. Make sure the appliance is in off position.
2. Plug the foot pedal into the appliance.
3. Turn on the appliance by pressing the foot pedal. Press gently on the foot pedal to run the unit.
Caution! The foot pedal and the power on/off switch cannot be used at the same time. When the foot pedal is
being used, please press the power on/off switch to off position on the appliance. The foot pedal is used to
control the power on/off. It is not the power source. Therefore, please do not forget to connect the adapter or
insert batteries while using the foot pedal.
Adjusting the tension
1. The normal stitching shall have top and bottom threading evenly, neither over tight nor loose.
You shall not adjust the tension, as the tension for maximum performance has been set and adjusted from
the factory. However, if you find that the stitches are too loose or too tight when sewing different fabrics,
you can adjust the tension. (A= Top thread; B= Cloth; C= Bottom thread.)
2. If the bottom thread looks like a straight line, which indicates the top thread is too loose. Please turn the
tension adjusting screw neither too tight nor too loose clockwise to increase the pressure until the stitching
returns to normal.
3. However, when the top thread looks like a straight line indicating an over-tight top thread, slowly turn the
tension adjusting screw counterclockwise to reduce the pressure until the stitching returns to normal.
Caution! When the thread goes over the tension adjusting screw it must be positioned between the two washers
behind the screw. Otherwise, the appliance will not work properly.
Changing the needle
If the needle breaks, or you need a different needle to sew a different kind of fabric, please replace the needle.
1. Remove the batteries / adapter to make sure the appliance is totally powered off.
2. Turn the hand wheel to raise the needle to its highest position.
3. Loosen the needle clamp screw by a short slotted screwdriver.
4. Remove the needle by pulling it down away from the needle clamp.
5. Place a new needle with the flat side facing against the needle clamp. Push it gently as up as it will go.
6. Tighten the needle clamp screw while holding the needle in place.
Caution! When the thread goes over the needle it must be put through the hole from the left to right. Otherwise,
the appliance will not work properly.
Caution! When install the needle please turn the flat side of the needle to the right (direction of the hand wheel)
and the cambered side to the left. Otherwise, the appliance will not work.
Left
Direction of the
hand wheel
Flat side
Cambered side

-8 -
Winding the bobbin
The bobbin winder bar is used to wind your own bobbins from the thread spools you purchase separately.
Normally, the bar is hidden in the hand wheel. When you need to wind a bobbin:
1. Press and hold on the bar.
2. Turn the bar counterclockwise; the bar will pop out.
3. Attach the empty bobbin onto the bar firmly and wind the thread on it clockwise for 4 to 5 circles.
4. Press the on/off switch to turn on the appliance. The thread will be winded automatically. Hold the thread
lightly and guide it gently through your finger. See reference picture as above. Do not wind the thread over
the rim of the bobbin.
5. Press the on/off switch to turn off the appliance when finished. Cut the thread and take off the bobbin.
6. Press the bobbin winder bar into the hand wheel and turn it clockwise to hide it back.
Caution! Before winding the bobbin, please take out the bottom bobbin and remove the top thread completely.
Replacement of the side bobbin
1. Pull the bobbin spindle out from the bobbin holder.
2. Take off the bobbin and replace with a new one.
3. Push the spindle with the new bobbin back to the bobbin holder.
How to use the needle threader
1. Insert the needle threader into the hole of the needle from the right to left.
2. Insert the thread into the needle threader at the left side of the needle and then pull the needle threader
out to the right side.
Sewing sleeves
The appliance is designed to allow you to sew sleeves easier with the sleeves sewing slot. Follow the operating
steps to sew the sleeves.
Working lamp
If additional light is needed, press the light switch to turn the light on. Press the switch again to turn it off.

-9 -
Tips:
1. The appliance will be damaged if it works without fabric in place.
2. Turn off the appliance immediately once finished sewing.
3. During sewing, if the thread is broken or came out from the hole of the needle, turn off the appliance
immediately. Otherwise, the thread may be tangled into the inside of the appliance and cause damages.
APPLICABLE CLOTH FOR SEWING
Sewing Cloth
Presentation
Fabric
specification
Cotton/Linen
Silk/Wool
Polyester
Elastic
Regular
√
×
√
△
Thick
√
×
√
△
Thin
√
×
×
×
Hard
√
√
√
△
Soft
×
×
×
×
Sewing effective:
√:means easy to sew
×:means difficult to sew
△:means not smooth to sew
Note:
1. The definition of the fabric thickness:
Thin (fabric): two layers of the fabric thickness < 0.35mm;
Thick (fabric): two layers of the fabric thickness > 0.8mm;
Regular (fabric): two layers of the fabric thickness ≥ 0.35mm and ≤ 0.8mm.
2. The definition of elastic cloth:
If the cloth, which size is “100mm x 30mm”, is extending to or over 106mm under 0.5KG tension force, then
the cloth is defined elastic, otherwise it is inelastic.
3. Hard fabric: such as Jeans, fine canvas, etc.
4. Soft fabric: such as towel, duster, etc.
TECHNICAL DATA
Adapter input: 100-240V~ 50/60Hz, 0.3A Max
Adapter output: 6V DC, 800mA, 4.8W
Sewing machine: 6V DC, 800mA

- 10 -
GUARANTEE AND CUSTOMER SERVICE
Before delivery our devices are subjected to rigorous quality control. If, despite all care, damage has occurred
during production or transportation, please return the device to your dealer. In addition to statutory legal rights,
the purchaser has an option to claim under the terms of the following guarantee:
For the purchased device we provide 2 years guarantee, commencing from the day of sale. If you have a defective
product, you can directly go back to the point of purchase.
Defects which arise due to improper handling of the device and malfunctions due to interventions and repairs
by third parties or the fitting of non-original parts are not covered by this guarantee. Always keep your receipt,
without the receipt you can’t claim any form of warranty. Damage caused by not following the instruction manual,
will lead to a void of warranty, if this results in consequential damages then we will not be liable. Neither can we
hold responsible for material damage or personal injury caused by improper use if the instruction manual is not
properly executed. Damage to accessories does not mean free replacement of the whole appliance. In such case
please contact our service department. Broken glass or breakage of plastic parts is always subject to a charge.
Defects to consumables or parts subjected to wearing, as well as cleaning, maintenance or the replacement of
said parts are not covered by the warranty and are to be paid.
ENVIRONMENT FRIENDLY DISPOSAL
Recycling –European Directive 2012/19/EU
This marking indicates that this product should not be disposed with other household wastes. To
prevent possible harm to the environment or human health from uncontrolled waste disposal, recycle
it responsibly to promote the sustainable reuse of material resources. To return your used device,
please use the return and collection systems or contact the retailer where the product was purchased. They can
take this product for environmental safe recycling.
BATTERY MUST BE RECYCLED OR DISPOSED OF PROPERLY. DO NOT OPEN. DO NOT DISPOSE
OR IN FIRE OR SHORT CIRCUIT.
Manufactured by: Emerio Deutschland GmbH
Lerchenweg 3, 40789 Monheim am Rhein, Deutschland

- 11 -
Bedienungsanleitung –German
SICHERHEITSHINWEISE
Lesen Sie vor dem Gebrauch unbedingt die nachfolgenden
Bedienungshinweise, um Verletzungen oder Beschädigungen
zu vermeiden und das beste Ergebnis mit dem Gerät zu
erzielen. Bewahren Sie diese Bedienungsanleitung an einem
sicheren Ort auf. Wenn Sie dieses Gerät an eine andere Person
weitergeben, stellen Sie sicher, dass Sie auch diese
Bedienungsanleitung aushändigen.
Im Falle von Beschädigungen, die durch die Missachtung der
Anleitungen in dieser Bedienungsanleitung verursacht
wurden, wird die Garantie ungültig. Der Hersteller/Importeur
haftet nicht für Schäden, die durch Missachtung der
Bedienungsanleitung, fahrlässigen Gebrauch oder Benutzung,
die nicht in Übereinstimmung mit den Anforderungen dieser
Bedienungsanleitung erfolgt, verursacht wurden.
1. Dieses Gerät kann von Kindern ab 8 Jahren und Personen
mit eingeschränkten körperlichen, sensorischen oder
geistigen Fähigkeiten oder mangelnder Erfahrung und
Kenntnis benutzt werden, wenn sie beaufsichtigt werden
oder in die sichere Benutzung des Gerätes unterwiesen
werden und die damit verbundenen Gefahren verstehen.
2. Kinder dürfen nicht mit dem Gerät spielen.
3. Die Reinigung und vom Benutzer auszuführende
Wartungsarbeiten dürfen von Kindern nur unter Aufsicht
durchgeführt werden.
4. Das Gerät darf nur mit dem mitgelieferten Ladegerät
betrieben werden.
5. Schalten Sie das Gerät stets aus, trennen Sie es von der
Stromversorgung und entfernen Sie das Fußpedal, wenn
Sie:
die Nadel auswechseln;
die Nadel einfädeln;
die Unterfadenspule auswechseln;

- 12 -
Bestandteile auswechseln;
Batterien einlegen oder herausnehmen;
die Maschine reinigen;
nach jedem Gebrauch.
6. Lassen Sie die Maschine niemals laufen, wenn ein Faden in
die Nadel eingefädelt ist, aber kein Stoff auf der Maschine
liegt. Dadurch könnte die Nähmaschine beschädigt werden.
7. Versuchen Sie unter keinen Umständen, das Gehäuse des
Gerätes zu öffnen oder das Gerät selbst zu reparieren. Dies
könnte einen Stromschlag verursachen.
8. Ziehen Sie den Netzstecker des Gerätes, bevor Sie
Wartungsarbeiten durchführen.
9. Dieses Gerät ist nicht für den gewerblichen Gebrauch
konzipiert.
10. Benutzen Sie das Gerät nicht im Freien.
11. Verwenden Sie das Gerät nur zu seinem
bestimmungsgemäßen Zweck.
12. Benutzen Sie das Gerät niemals, wenn es in irgendeiner
Weise beschädigt ist.
13. Ziehen Sie den Stoff nicht beim Nähen. Durch das Ziehen
könnte die Nadel brechen und das Gerät beschädigt
werden.
14. Entnehmen Sie die Batterien, wenn das Gerät längere Zeit
nicht benutzt wird. Dies schont die Batterien und schützt
das Gerät. Benutzen Sie keine neuen und alten Batterien
zusammen.
15. Halten Sie das Gerät von Kindern fern. Dieses Gerät ist kein
Spielzeug und sollte nicht von oder in der Nähe von Kindern
benutzt werden.
16. Tauchen Sie das Gerät oder andere Teile niemals in Wasser
oder andere Flüssigkeiten. Wenn Sie den Adapter benutzen,
bedienen Sie das Gerät nicht mit nassen Händen, ohne
Schuhe oder während Sie in Wasser stehen oder auf einer
nassen Oberfläche.
17. Benutzen Sie das Gerät niemals mit einem beschädigten
Kabel oder Stecker.

- 13 -
18. Halten Sie das Kabel von heißen Oberflächen fern.
19. Um den Stecker aus der Steckdose zu entfernen, ziehen Sie
am Stecker. Ziehen Sie nicht am Kabel.
20. Verwenden Sie nur den vom Hersteller empfohlenen
Adapter. Ein anderer Adapter kann Verletzungen
verursachen oder das Gerät beschädigen.
21. Schalten Sie das Gerät aus oder ziehen Sie seinen
Netzstecker aus der Steckdose, wenn Sie es unbeaufsichtigt
lassen.
22. Achten Sie darauf, dass sich unter der Nadel Stoff befindet,
wenn die Maschine läuft und die Nadel sich bewegt.
Andernfalls wird sich die Maschine festfahren und der
Faden steckenbleiben.
23. Wenn die Maschine festgefahren ist oder aufgrund
unsachgemäßer Handhabung blockiert, stellen Sie die
Maschine mit dem Ein/Ausschalter sofort aus.

- 14 -
SEW-122275.2 DE
BESCHREIBUNG
1. Ein/Ausschalter
2. Geschwindigkeitsregler
3. Lichtschalter
4. Spulenspindel
5. Aufspulerstift (kann
herausgedrückt werden)
6. Handrad
7. Seitenspule
8. Garnrolle
9. Garnrollenspindel
10. Fadenführungsring
11. Fadenspannungsschraube
12. Fadenführungsring
13. Fadengeber
14. Fadenschneider
15. Fadenführungsring
16. Lampe
17. Nadelhalter
18. Nadelhalterschraube
19. Nadel
20. Spulenfachabdeckung
21. Unterfadenspule (im Fach)
22. Schlitz zum Nähen von
Ärmeln
23. Nähfuß
24. Batteriefach (Unterseite)
25. DC-Anschluss für den
Adapter
26. Fußpedal-Anschlussbuchse
27. Zwischenraum für den Faden
(Zwischenraum zwischen
dem Nähfuß und der
Nähplatte)
28. Nähfußhebel
Zubehör
1. Nadel
2. Nadeleinfädler
3. Vier Metallspulen
4. Fußpedal
5. Adapter

- 15 -
Nach dem Auspacken des Geräts:
1. Stellen Sie sicher, dass der Ein/Ausschalter auf die Aus-Position gestellt ist, bevor Sie die Batterien einlegen.
2. Legen Sie vier AA-Batterien in das Batteriefach ein.
3. Drücken Sie den Ein/Ausschalter, um das Gerät einzuschalten. Das Gerät beginnt sofort zu nähen.
Vergewissern Sie sich, dass das Gerät korrekt eingefädelt ist und der Stoff in der Nähposition ist, bevor Sie
das Gerät einschalten.
4. Warnung! Wenn Sie den Adapter verwenden, nehmen Sie alle Batterien aus der Maschine.
EINFÄDELN DES GERÄTS
Dieses Gerät arbeitet mit zwei Fäden. Einer ist der Oberfaden. Dies ist der Faden der seitlichen Spule oder der
Garnrolle. Der andere Faden ist der Unterfaden. Dies ist der Faden der Unterfadenspule.
Oberfaden:
Nach dem Auspacken des Geräts werden Sie sehen, dass es bereits eingefädelt ist (siehe Fadenverlauf 1 bis 8
in der Abbildung). Sie können die seitliche Spule sofort verwenden, um mit dem Nähen zu beginnen. Alternativ
können Sie die Garnrolle, die Sie separat gekauft haben, zum Nähen verwenden.
Schritt 1: Heben Sie die Garnrollenspindel an, indem Sie die freiliegende Spitze greifen und die Garnrollenspindel
nach oben ziehen, bis sie komplett herausgezogen ist.
Schritt 2: Stecken Sie die Garnrolle auf die Garnrollenspindel.
Schritt 3: Ziehen Sie den Faden von der Garnrolle und führen Sie ihn durch die Fadenführungsringe, die
Fadenspannungsschraube, den Fadengeber, den Nadelhalter und die Nadel (siehe Verlauf 2 bis 8 in der
Abbildung).
Achtung! Wenn der Faden über der Nadel verläuft, muss er von links nach rechts durch das Nadelöhr gefädelt
werden. Andernfalls wird das Gerät nicht ordnungsgemäß funktionieren.
Hinweis: Wenn der Faden über der Fadenspannungsschraube verläuft, muss er zwischen den zwei
Unterlegscheiben hinter der Schraube positioniert werden. Auf diese Weise wird der Faden gespannt.
Stellen Sie sicher, dass das Gerät korrekt eingefädelt ist. (Schrittweise, keinen Schritt auslassen oder an einer
falschen Stelle einfädeln.) Ziehen Sie etwa 10 cm des Fadens heraus.
Unterfaden (Einsetzen der Unterfadenspule):
1. Entfernen Sie die Abdeckung des Spulenfachs.
2. Setzen Sie die ausgewählte Unterfadenspule in das Spulenfach ein. Der Faden muss gegen den Uhrzeigersinn
verlaufen. Ziehen Sie etwa 5 cm des Fadens heraus. (Abb.1)
3. Halten Sie das Ende des Oberfadens mit einer Hand und drehen Sie dann das Handrad mehrmals mit der
anderen Hand. Der Oberfaden wird den Unterfaden aufnehmen und durch die Ö ffnung unter der Nadel
ziehen.

- 16 -
4. Setzen Sie die Abdeckung des Spulenfachs wieder ein. Trennen Sie die zwei Fäden und ziehen Sie diese dann
zusammen zur Rückseite der Maschine durch den Zwischenraum unter dem Nähfuß; lassen Sie dort etwa 10
cm Faden hängen. (Abb. 2)
Achtung! Drehen Sie vor dem Starten der Maschine immer das Handrad zwei- bis dreimal, um zu prüfen, ob es
sich leichtgängig drehen lässt. Das Handrad sollte in Richtung des Pfeils gedreht werden, der sich auf dem
Handrad befindet.
Abb.1 Abb. 2
Wichtig! Stellen Sie sicher, dass Ober- und Unterfaden korrekt verlaufen. Führen Sie einen Test an einem alten
Stück Stoff durch, bevor Sie mit dem Nähen beginnen. Wenn die Maschine nicht korrekt eingefädelt ist, wird
die Steppnaht fehlerhaft ausgeführt.
Das Gerät wurde möglicherweise schon im Werk eingefädelt. Sehen Sie sich den Fadenverlauf genau an, bevor
Sie den Faden entfernen, um einen neuen Faden oder eine neue Spule mit einem anderen Faden zu verwenden.
BETRIEB DES GERÄTS (ohne Fußpedal)
Achtung! Drehen Sie vor dem Starten der Maschine immer das Handrad zwei- bis dreimal, um zu prüfen, ob es
sich leichtgängig drehen lässt. Das Handrad sollte in Richtung des Pfeils gedreht werden, der sich auf dem
Handrad befindet.
1. Drehen Sie das Handrad etwas, um die Nadel über den Nähfuß zu stellen.
2. Heben Sie den Nähfuß an, indem Sie den Nähfußhebel nach oben stellen.
3. Legen Sie den Stoff, den Sie nähen möchten, unter den Nähfuß.
4. Senken Sie den Nähfuß, indem Sie den Nähfußhebel lösen und nach unten stellen.
5. Drehen Sie das Handrad zwei- bis dreimal.
6. Drücken Sie den Geschwindigkeitsschalter, um die gewünschte Geschwindigkeit einzustellen. Wenn der
Schalter eingerastet ist, wurde die niedrige Geschwindigkeit eingestellt; wenn der Schalter gelöst ist und
hervorsteht, wurde die hohe Geschwindigkeit eingestellt. Wählen Sie für komplizierte Näharbeiten, für die
das Gerät häufig angehalten, gestartet und der Stoff gedreht werden muss, die niedrige Geschwindigkeit.
Wählen Sie für lange, durchgehende Nähte die hohe Geschwindigkeit.
7. Drücken Sie nun den Ein/Ausschalter, bis er in der Ein-Position einrastet. Führen Sie den Stoff vorsichtig, um
eine gerade Naht zu nähen, indem Sie den Stoff mit Ihren Fingerspitzen an beiden Seiten leicht
herunterdrücken, während er unter den Nähfuß gezogen wird.
8. Wenn die Naht fertig ist, drücken Sie den Ein/Ausschalter, bis er sich löst und sich in Aus-Position stellt.
9. Drehen Sie das Handrad etwas, um die Nadel über den Stoff zu heben.
10. Heben Sie den Nähfußhebel an, um den Nähfuß hoch zu stellen.
11. Drehen Sie das Handrad vor und zurück. Dadurch lässt sich der Faden leicht lösen. Ziehen Sie den Stoff in
Ihre Richtung und lassen Sie einen etwa 10 cm langen Faden zwischen dem Stoff und dem Gerät. Wenn sich
der Stoff nur schwer herausziehen lässt, lockern Sie den Oberfaden etwas, indem Sie den Faden mit der Hand
von der rechten Seite des Fadengebers lockern. (Abb. 3 und 4)
12. Schneiden Sie die Fäden nahe am Stoff ab. Ziehen Sie die Fäden durch den Zwischenraum unter dem Nähfuß
zur Rückseite des Geräts, lassen Sie dort einen etwa 10 cm langen Faden hängen. Starten Sie die nächste
Naht auf die gleiche Weise wie oben beschrieben, indem Sie diese Anleitungsschritte wiederholen.

- 17 -
Abb. 3 Abb. 4
Benutzung des Fußpedals
1. Das Gerät muss ausgeschaltet sein.
2. Verbinden des Fußpedals mit dem Gerät.
3. Drücken Sie auf das Fußpedal, um das Gerät zu starten. Drücken Sie behutsam auf das Fußpedal, um das
Gerät zu steuern.
Achtung! Das Fußpedal und der Ein/Ausschalter können nicht gleichzeitig benutzt werden. Wenn das Fußpedal
benutzt wird, stellen Sie bitte den Ein/Ausschalter am Gerät in die Aus-Position. Mithilfe des Fußpedals wird das
Starten und Anhalten gesteuert. Es ist nicht der Antrieb. Sie müssen daher den Adapter anschließen oder
Batterien einlegen, wenn Sie das Fußpedal benutzen.
Einstellen der Fadenspannung
1. Eine normale Naht sollte gleichmäßig aus Ober- und Unterfaden gebildet werden, weder zu straff noch zu
locker. Sie sollten die Spannung nicht einstellen, da sie für eine optimale Leistung bereits im Werk eingestellt
und angepasst wurde. Wenn Sie jedoch beim Nähen unterschiedlicher Stoffe feststellen, dass die Stiche zu
locker oder zu straff sind, können Sie die Spannung anpassen. (A= Oberfaden; B= Stoff; C= Unterfaden.)
2. Wenn der Unterfaden wie eine gerade Linie aussieht, ist der Oberfaden zu locker. Drehen Sie bitte die
Fadenspannungsschraube - weder zu stark noch zu locker - im Uhrzeigersinn, um die Spannung zu erhöhen,
bis die Stiche wieder normal aussehen.
3. Wenn jedoch der Oberfaden wie eine gerade Linie aussieht, ist der Oberfaden zu straff. Drehen Sie die
Fadenspannungsschraube langsam gegen den Uhrzeigersinn, bis die Stiche wieder normal aussehen.
Achtung! Wenn der Faden über der Fadenspannungsschraube verläuft, muss er zwischen die zwei
Unterlegscheiben hinter der Schraube positioniert werden. Andernfalls wird das Gerät nicht ordnungsgemäß
funktionieren.
Auswechseln der Nadel
Wenn die Nadel bricht oder Sie eine andere Nadel benötigen, um eine andere Stoffart zu nähen, wechseln Sie
bitte die Nadel aus.
1. Entfernen Sie die Batterien/den Adapter, um sicherzustellen, dass das Gerät richtig ausgeschaltet ist.
2. Drehen Sie das Handrad, um die Nadel ganz nach oben zu stellen.
3. Lösen Sie die Nadelhalterschraube mithilfe eines kurzen Schlitzschraubendreher.
4. Ziehen Sie die Nadel nach unten aus dem Nadelhalter, um sie zu entfernen.
5. Setzen Sie eine neue Nadel mit der flachen Seite gegen die Nadelhalterung ein. Schieben Sie die Nadel
vorsichtig nach oben, bis sie sich nicht weiter schieben lässt.
6. Halten Sie die Nadel, damit sie nicht verrutscht, und ziehen Sie die Nadelhalterschraube an.

- 18 -
Achtung! Wenn der Faden über der Nadel verläuft, muss er von links nach rechts durch das Nadelöhr gefädelt
werden. Andernfalls wird das Gerät nicht ordnungsgemäß funktionieren.
Achtung! Wenn Sie die Nadel einsetzen, drehen Sie bitte die flache Seite der Nadel nach rechts (Richtung
Handrad) und die gewölbte Seite nach links. Andernfalls funktioniert das Gerät nicht.
Aufspulen
Mithilfe des Aufspulers können Sie Ihre eigenen Spulen von den Garnrollen, die Sie separat kaufen, aufspulen.
Der Stift ist normalerweise im Handrad verborgen. Wenn Sie eine Spule aufspulen möchten:
1. Drücken Sie einen Moment lang auf den Stift.
2. Drehen Sie den Stift gegen den Uhrzeigersinn; der Stift springt daraufhin heraus.
3. Setzen Sie die leere Spule fest auf den Stift und wickeln Sie den Faden im Uhrzeigersinn vier- bis fünfmal um
die Spule.
4. Drücken Sie den Ein/Ausschalter, um das Gerät einzuschalten. Der Faden wird automatisch aufgespult.
Halten Sie den Faden leicht und lassen Sie ihn vorsichtig durch Ihre Finger gleiten. Siehe obenstehendes
Beispielbild. Wickeln Sie den Faden nicht über den Rand der Spule auf.
5. Drücken Sie den Ein/Ausschalter, um das Gerät auszuschalten, wenn die Spule aufgespult ist. Schneiden Sie
den Faden ab und nehmen Sie die Spule von dem Stift.
6. Drücken Sie den Aufspulerstift in das Handrad und drehen Sie ihn im Uhrzeigersinn, um ihn wieder zu
verbergen.
Achtung! Bevor Sie aufspulen, nehmen Sie bitte die Unterfadenspule heraus und entfernen Sie den Oberfaden
vollständig.
Auswechseln der Seitenspule
1. Ziehen Sie die Spulenspindel aus dem Spulenhalter.
2. Nehmen Sie die Spule ab und ersetzen Sie sie durch eine neue.
3. Schieben Sie die Spindel mit der neuen Spule zurück auf den Spulenhalter.
Verwendung des Einfädlers
1. Stecken Sie den Einfädler von rechts durch das Nadelöhr.
2. Führen Sie den Faden durch den Einfädler auf der linken Seite der Nadel und ziehen Sie dann den Einfädler
zur rechten Seite der Nadel heraus.
Links
Richtung
Handrad
Flache Seite
Gewölbte Seite

- 19 -
Ärmel nähen
Das Gerät ist mit einem Ärmelschlitz ausgestattet, der Ihnen das Nähen von Ärmeln erleichtert. Folgen Sie den
Betriebsanleitungen zum Nähen der Ärmel.
Arbeitslampe
Falls Sie mehr Licht benötigen, drücken Sie den Lichtschalter, um die Lampe einzuschalten. Drücken Sie den
Schalter erneut, um die Lampe auszuschalten.
Tipps:
1. Das Gerät wird beschädigt, wenn es ohne Stoff benutzt wird.
2. Schalten Sie das Gerät sofort aus, wenn Sie mit dem Nähen fertig sind.
3. Schalten Sie das Gerät sofort aus, wenn der Faden während des Nähens reißt oder aus dem Nadelöhr
gezogen wurde. Andernfalls kann sich der Faden im Gerät verheddern und Schäden verursachen.
GEEIGNETE STOFFE
Baumwolle/Leinen
Seide/Wolle
Polyester
Elastisch
Regulär
√
×
√
△
Dick
√
×
√
△
Dünn
√
×
×
×
Hart
√
√
√
△
Weich
×
×
×
×
Stoff
Erklärung
Stoffeigensch
aften
Table of contents
Languages:
Other emerio Sewing Machine manuals

emerio
emerio SEW-122275.3 User manual

emerio
emerio SEW-122275 User manual

emerio
emerio SEW-122595.2 User manual

emerio
emerio SEW-121820 User manual

emerio
emerio SEW-121820.1 User manual

emerio
emerio SEW-121816 User manual

emerio
emerio SEW-121820 User manual

emerio
emerio SEW-121821.1 User manual

emerio
emerio SEW-121821 User manual