EMERY MACHINERY CORP. EC-360 User manual

Round Knife Cutter (60mm)
Cordless Electric Shear
OPERATING INSTRUCTIONS
mod. EC-360
Important: Save This Instruction Manual
Charger Operating Instructions Included
Before use
Read this instruction manual
From the library of: Superior Sewing Machine & Supply LLC

SAFETY
INSTRUCTIONS
WARNING! When using
el~ctric
tools, basic safety precautions should always
~e
foll?wed to reduce the rrsk
of
fire, electric shock and personal injury
1nclud1ng the following: '
READ
ALL
THESE INSTRUCTIONS before attempti
ng
to
operate this product
and SAVE THESE INSTRUCTIONS. Keep these operating inst
ru
ctions with this
product.
DOUBLEINSULATED@
The
Do~ble
Insulation @ System replaces the three-wire system e
li
minates
uncertamt~,
.and
all~ws
operation with grounded or ungrounded
p~wer
supp
li
es
While
prov1d1ng
max1mum electrical safety. IMPORTANT! WHEN SERVICING
USE ONLY IDENTICAL REPLACEMENT PARTS! '
1.P<?LARIZED
PLUGS-
This powertool has a
po
l
ari~ed
pl
ug
(one blade is
Wider
t~an
the other) as a feature to reduce the risk
of
electric shock This
plug.wlll fit in
a.
P.olarized outlet only one
way.
If
the plug does not fit,
~ontact
a
qualified electrrc1an to replace the outlet. Never use with an extension cord
unless the plug can be fully inserted. Do not change the plug in any way.
2.KEEP
WORK
AREA
CLEAN -- Cluttered areas and benches invite injuries.
3.
CONSID~R
WORK
AREA
.ENVIRONMENT-- Don't expose powertools to
ram
..Don t use power
t.ools
1n
damp orwet locations Keep work area well l
it.
Don
t use power tools m presence
of
flammable liquids
or
gases.
4.GUARD
AGAINST
ELECTRIC
SHOCK--
Prevent body contact with
grounded surfaces (e.g. pipes, radiators, ranges, refrigerators).
5.
KE~~
CHILDREN AWAY -- Do not let visitors contact tool
or
.extension cord
All
VISitors
should be kept away from work area. ·
6.
~TORE
IDLE
TOOLS
--
When not in use. tools should be stored in a
dry,
h1gh,
or locked-up place, out of the reach
of
children.
7.
DON'~
FORCE
TOOL-
It will do the job better and saferat the rate forwhich
1t was mtended.
8.
USE RIGHT
TOOL-
Don'tforce small tools
or
attachments to do the job
of
a
heav~
duty tool. Don't use tools for purposes not intended; for example, don't
use Circular saw for cutting tree limbs
or
logs.
9.
ORES~
PRO~ERLY-
Do notwear loose clothing orjewel
ry
. They can be
caught m
mov1ng
parts. Rubber gloves and non-skid footwear are
recommended when working outdoors. Wear protective hair covering to
contain long hair.
10. USE SAFETY
GLASSES--
Also use face or dust :nask
if
cutting is dusty.
Al.ways
wear
sa.fety goggles
or
safety glasses with side shields, complying
With
current national standards and a full face shield, when needed.
2
11. DON'T ABUSE CORD
--Never
carry tool by cord
or
yank it to disconnect it
from receptacle. Keep cord away from heat, oil and sharp edges.
12. SECURE
WORK--
Use clamps or a vise to hold work. It's safer than using
your hand and it frees both hands to operate tool.
13.
DON'T
OVERREACH--
Keep proper footing and balance at all times.
14. MAINTAIN TOOLS WITH
CARE--
Keep tools sharp and clean for better
and safer performance. Follow instructions for lubricating and changing
accessories. Inspect tool cords periodically and, ifdamaged, have repair
ed
by Authorized Service Center. Inspect extension cords periodica
ll
y
and
replace if damaged. Keep handles dry, clean and free from oil and grease.
15. DISCONNECT
TOOLS--
When not in use, before servicing, and when
changing accessories such as blades, bits and cutters.
16. REMOVE ADJUSTING KEYS AND
WRENCHES--
Form the habit of
checking to see that keys and adjusting wrenches are removed from to
ol
before tu
rn
ing it on.
17. AVOID UNINTENTIONAL
STARTING--
Don't carry plugged-in tool with
finger on switch. Be sure switch is offwhen plugging in.
18. OUTDOOR USE EXTENSION CORDS
--When
tool is used outdoors. use
only extension cords intended for use outdoors and so marked.
19. STAY
ALERT--
Watch what you are doing. Use common sense. Do not
operate tool when you are tired.
20. CHECK DAMAGED PARTS
--Before
further use
of
the too
l,
a guard or
other part that is damaged should be carefully checked to determine that it
will operate properly and perform its intended function. Check for alignment
of
moving parts. binding
of
moving parts, breakage of parts. mounting, and
any otherconditions that may affect its operation. A guard or other part that
is damaged should be properly repaired or replaced by Authorized Service
Center, unless otherwise indicated elsewhere in this instruction manual.
Have defective switches replaced by Authorized Service Center. Do not use
tool if switch does not turn it on and off.
If
tool has
.::i
lock-on switch be sure
it
releases freely from lock-on position.
IMPORTANT SAFETY INSTRUCTIONS
FOR BATTERY CHARGER
SAVE THESE INSTRUCTIONS
21
. This manual contains important operating instructions for battery charger
MODEL EC-360-04.
22
. Before
us
i
ng
battery charger, read all instructions and cautionary markings
on (1) battery charger, (2) battery and (3) product using battery.
3
From the library of: Superior Sewing Machine & Supply LLC

23.
CA
UTION • To reduce risk
of
injury, charge only rechargeable
batteries. Othertypes
of
batteries may burst, causing personal injury and
damage.
24.
Do not expose charger to rain
or
snow.
25.
To
reduce risk
of
damage to electric pl
ug
and cord, pull by plug rather than
cord when disconnecting charger.
26.
Make
sure charger cord is located so that
it
will not be stepped on, tripped
over
or
otherwise subjected to damage
or
stress.
27
. An extension cord should
not
be used on the battery charger unless
absolutely necessary.
Use
of
improper extension cord could result in a risk
of
fire and electric shock.
If
extension cord must be used, make sure:
a) that pins on plug
of
extension cord are the same number, size and shape
as those
of
plug on charger.
b)
that extension cord is properly wired and in good electrical condilion, and
b)
that wire size is large enough for AC ampere rating
of
charger as
specified below:
RECOMMENDED MINIMUM AWG SI
ZE
FOR
EXTENSION CORDS FOR BATTERY CHARGERS
L
ength
of c
ord
in meter
(f
eet)
7.6m(25') 15m(50')
30m(1
00') 45m(150')
18
ga.
18
ga.
18
ga.
16
ga.
28. Do notoperate charger with damaged cord
or
plug; have them replaced
immediately.
29. Do notoperate charger
if
it
has received a sharp blow, been dropped
or
otherwise damaged in any way; take it to
an
EMERY Authorized Service
Center.
30.
Do not disassemble charger; take
it
to an Authorized Service
Center when service
or
repairis required. Incorrectreassembly may result in
a risk
of
electric shock
of
fire.
31.
To reduce risk
of
electric shock, unplug charger from outlet before
attempting any maintenance
or
clearing. Turning
off
controls will not reduce
this risk.
SAVE THESE INSTRUCTIONS
SPECIAL SAFETY INSTRUCTIONS FOR THE ROTARY
SHEAR
1. Keep gu
ar
ds in place and in working order •
Neverwedge
or
tie finger guard open. Check operation
of
finger guard before
be
for
e each use. Do not use
if
finger guard does not close over rotary shear
sew blade.
CAUTION:
If
the rotary shear is dropped, finger guard may be bent, restricting
full return. 4
2.
Keep blades clean and sharp •
• Sharp blades minimize stalling.
3.
DANGER: keep hands away from cutting area- .
• Keep hands away from blades. Do not reach beneath workwhile blade 1s
rotating. Do not attempt to remove cut material when blade is moving.
CAUTION: Blade coasts after turn off.
4.
Don't force tool.
• Stay alert; exercise control. . .
• During a cut, don't remove shear from work while the blade IS movmg.
5.
Finger Guard ·
•
To
avoid accidents never expose excessive blade.
L~wer
the finger guard so
that the material being cut justclears guard.
6.
Adjustments - . .
• Before cutting, be sure the finger guard lock nut IS
t1ght.
7.
Use only the correct blades in
mounting·
· . .
• Do not use blades with incorrect size holes. Never use defective
or
mcorrect
blade washers
or
bolts.
SAVE THESE INSTRUCTIONS
5
From the library of: Superior Sewing Machine & Supply LLC

Figure 1-3
1. Oil hole (not illustrated)
2. Finger guard lock nut
3. Finger guard
4.
Guide runner
5.
Stationary blade
6.
Holding spring clip
7. Battery pack
8.
On I
Off
switch
9. Spring
10
. Blade lubricating felt
3---.../
4 ------'"-..:..--/"
5------J
SWITCHES
11
. Drive flange
12. Blade
13. Pin hole
14. Screw flange
15.
Upperguard bushing
16. Upper guard
17. Screw
18. Sharpening stone
19. Sharpening stone holder
20. Bracket
..........
~~FY
------
8
.---
----9
10
----
--
11
Figure
1
16 17
Pull back on the switch (8) to start tool. Switch trigger will slip into a recess in
motor housing. This helps hold it on against spring tension. Normal holding
of
the tool with fingers around switch trigger will keep the switch on.
To
turn tool off, release switch. There is no provision to lock the tool on for
continuous running.
6
ACCESSORIES AND ATTACHMENTS
To
avoid accidents, remove battery from the tool while installing blade or other
accessories.
WARNING
-The
use of any accessory or attachment other than recommende
in this operating instruction catalog may present a risk of
personal injury.
CLEANING AND CARE
To
avoid accidents, remove battery before cleaning or performing any
maintenance. Always see that the ventilation openings are kept clean. The too
may be cleaned most effectively with compressed dry a
ir.
Do notattempt to
clean by inserting pointed objects through openings
Recharge battery periodically to keep ready for operation. When not
in
use,
store tool and battery in a dry and frost-free place. Never store in temperature!
above44
·c
or
110·F or below o·c or 32.F.
BATTERY PACK -EC-360-03 (Figure
1,
position 7)
The battery pack
1s
housed 1n the handle
of
the motor housing.
To
remove the
battery pack, release the holding spring clip (Figure 1 -position 6) and pull the
battery pack out. Do not force the battery pack out.
If
the battery pack is hot.
le
it cool before removing from the housing.
No special maintenance is required for the battery pack. Store it in a dry and
frost-free place. Never store in temperatures above 44•c or 110•F or below
o·c or 32"F.
If
the battery pack has a warped or swollen plastic housing, it
mw
be replaced.
The battery pack will charge in about 1 hour. It can be recharged more than 30
times: however, misuse or abuse can shorten its life expectancy.
IMPORTANT: DO NOTTRY TO CHARGE BATTERY PACK IF
IT
IS HOT
FROM DISCHARGE.
CHARGER -EC-360-04
The battery charger must be maintained like any electronic device.
1. The charger and battery have been designed to work together.
2. Always check the power source before returning charger for any repair.
CAUTION: The transformerless battery chargers EC-360-04 are designed to
operate on 115 Volts AC, 60Hz, or
230\1,
50Hz, commonly available
from all public utilities. They will notoperate on some inverters foun
in remote areas out
of
reach of public utilities, which change low-
voltage
DC
to 115V or 230V modified sine-wave AC. Forthose whc
must use "inverted power", contact your representative to obtain a
transformer type charger.
3. Power source must conform to the voltage rating on the name place.
4. Have any damaged plug and cord replaced immediately by a service center.
5. Make sure that the contact plate connection between the charger and the
battery pack is not obstructed by any debris.
7
From the library of: Superior Sewing Machine & Supply LLC
CAUTION:
To
reduce the risk
of
electrical shock, always disconnect the charger
from the powersource before removing any debris that obstructs the
chargercontact plate.
6.
Rapid charging begins as soon as the battery pack is inserted. The light
indicates charging is in process. When lightgoes out, the rapid charging
process is completed, and trickle charge will begin.
7.
A battery pack can remain indefinitely in the battery charger and the full charge
will be maintained automatically by the trickle charging circuit built into the charger.
8.
It is normal forthe charger and battery to become warm during the charging
process.
9. No special maintenance is required forthe charger.
It
may be cleaned most
effectively with compressed dry air. Do not attemptto clean by inserting
pointed objects through openings.
We
recommend
~~at
all service be
performed by an Authorized Service Center.
IMPORTA
NT
•
DO
NOT CHARGE A BATTERY PACK IF THE ROOM TEMPERATURE IS
BELOW
o·c
OR 32•F OR ABOVE 44•c OR 110
·F.
• DO NOT FORCE BATTERY PACK INTO CHARGER.
• IN OROER TO ENSURE A LONG LIFE SPAN FOR THE BATTERY PACK IT
HAS AN ELECTRONIC TEMPERATURE SENSOR, WHICH PREVENTS
RAPID CHARGING IF THE BATTERY PACK TEMPERATURE IS ABOVE
44·c
or
110r.
• IF A BATTERY PACK IS NOTWITHIN THE TEMPERATURE RANGES
INDICATED AND FALLS OUTSIDE THE BOUNDARY CONDITIONS, THE
BATTERY PACK
WILL
NOT
CHARGE. ALSO, IF THE BATTERY PACK
REACHES THE 44•c OR 110•F TEMPERATURE DURING THE
CHARGING PROCESS, THE CHARGER WILL DISCONTINUE CHARGING
EVEN THOUGH THE CHARGING PROCESS IS NOT FINISHED.IN ORDER
TO RESTART THE CHARGING PROCESS, ALLOW THE BATTERY PACK
TO COOL.
• THE BATTERY CHARGER AND BATTERY PACK :-:AVE
NO
USER
SERVICEABLE PARTS INSIDE.
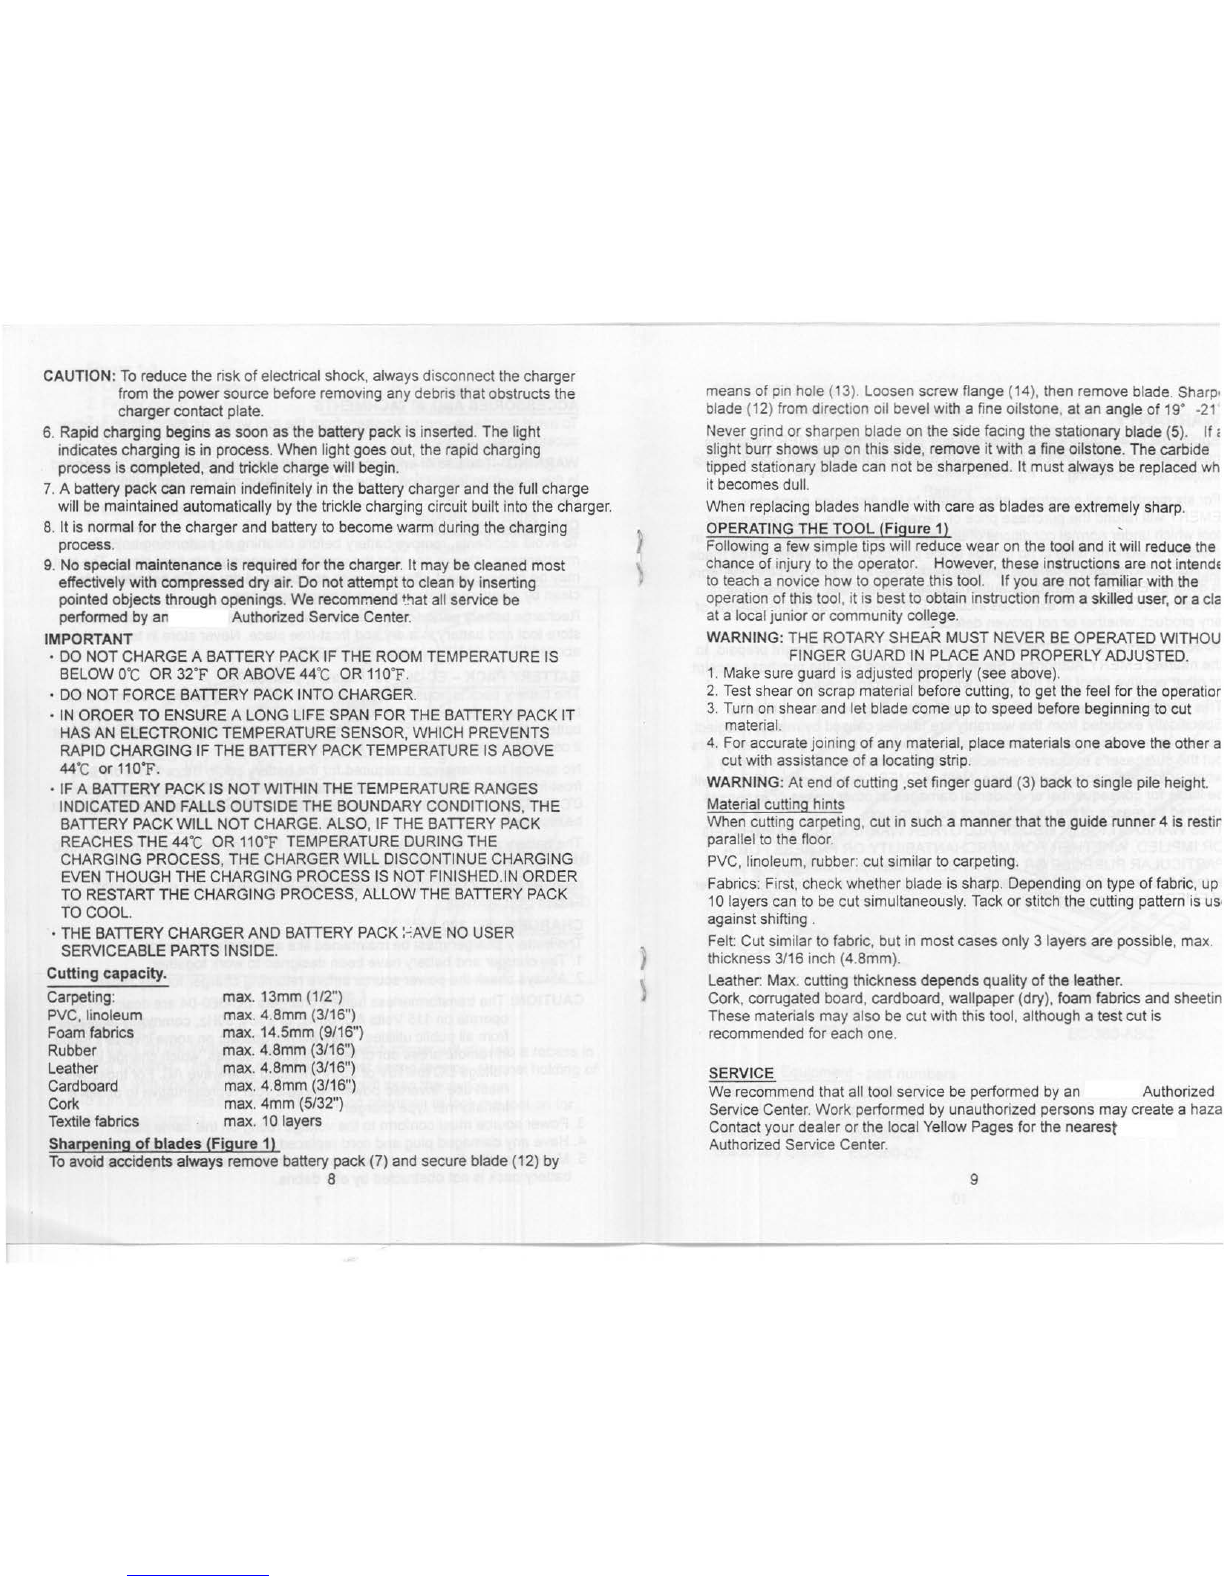
Cutting
capacity.
Carpeting:
PVC, linoleum
Foam fabrics
Rubber
Leather
Cardboard
Cork
Textile fabrics
max. 13mm (1/2")
max. 4.8mm (3/16")
max. 14.5mm (9/16")
max. 4.8mm (3/16")
max. 4.8mm (3/16")
max. 4.8mm (3/16")
max. 4mm (5/32")
max. 1
0 layers
Sharpeni
ng
of
blades
(Figur
e
1)
To
avoid accidents always remove battery pack (7) and secure blade (12) by
8
means
of
pin hole (13
).
Loosen screw flange (14), then remove blade. Sharp•
blade (
12
) from direction oil bevel with a fine oilstone, at an angle of 19•
-21
Never
gr
ind or sharpen blade on the side facing the stationary blade (5). If<
slight burrshows up on this side, remove it with a fine oilstone. The carbide
tipped stationary blade can not be sharpened. It must always be replaced
wh
it becomes dull.
When replacing blades handle with care as blades are extremely sharp.
OPERATI
NG
THE TOOL (F
igure
1)
Following a few simple tips will reduce wearon the tool and itwill reduce the
chance of injury to the operator. However, these instructions are not i
ntendE
to teach a novice how to operate this tool.
If
you are not familiar with the
operation of this tool, it is best to obtain instruction from a
sk
illed user,
or
a
cia
at a local junioror community college.
WARNING: THE ROTARY SHEAR MUST NEVER BE OPERATED WITHOU
FINGER GUARD IN PLACE AND PROPERLY ADJUSTED.
1.
Make sure guard is adjusted properly (see above).
2.
Test shear on scrap material before cutting, to get the feel for the operatior
3.
Turn on shear and let blade come up to speed before beginning to cut
material.
4.
Foraccurate joining of any material, place materials one above the other a
cut with assistance
of
a locating strip.
WARNING: At end
of
cutting ,set finger guard (3) back to single pile height.
Material cutting hints
When cutting carpeting, cut in such a manner that the guide runner 4 is rest
ir
parallel to the floor.
PVC, linoleum, rubber: cut similar to carpeting.
Fabrics: First, check whether blade is sharp. Depending on type
of
fabric, up
1
0 layers can to be cut simultaneously. Tack or stitch the cutting pattern is
us
•
against shifting .
Felt: Cut similar to fabric, but in most cases only 3 layers are possible, max.
thickness 3/16 inch (4.8mm).
Leather: Max. cutting thickness depends quality
of
the leather.
Cork, corrugated board, cardboard, wallpaper (dry), foam fabrics and sheetin
These materials may also be cutwith this tool, although a testcut is
recommended for each one.
SERVICE
We
recommend that all tool service be performed by an Authorized
Service Center. Work performed by unauthorized persons may create a haza
Contact yourdealer or the local Yellow Pages for the nearest
Authorized Service Center.
9
From the library of: Superior Sewing Machine & Supply LLC
WARRANTY
Applicable to all countries. Supersedes any other warranty. warrants
new power tools sold by itto be free from defects
in
material and workmanship
subject to the following:
For six months
in
all countries, after delivery to the first using purchaser,
will refund the purchase price of, repair, or replace, at its option, any
tool which under normal conditions
of
use and service proves to be defective
in
material orworkmanship at no charge to the purchaser. No charge will be made
for labor with respect to defects covered by this warranty, provided that the work
1s done by or any
of
its authorized service facilities. However, this
warranty does not coverexpenses incurred
in
the removal and reinstallation
of
any product, whether or not proven defective.
To
obtain performance of this warranty, return the tool intact, freight prepaid, to
the
nearest Authorized Service Centeralong with the purchase receipt
or other positive proof that the tool is within the warranty period.
This warranty is limited to the first using purchaserana is not transferable.
Specifically excluded from this warranty are failures caused by misuse, neglect,
abuse. improper operation, or unauthorized service or parts. This warranty sets
out the purchaser's exclusive remedies with respect to products covered by
it,
whether for negligence or otherwise. Neither nor any of its affiliates will
be liable for consequential or incidental damages orother losses or expenses
mcurred by reason
of
the use of sale
of
such products.
THIS WARRANTY
IS
IN
LIEU OF ALL OTHER WARRANTIES, EXPRESSED
OR
IMPLIED, WHETHER FOR MERCHANTABILITY OR FITNESS FOR A
PARTICULAR PURPOSE OR OTHRWISE. No attempt
to
alter, amend or
extend this warranty shall be effective unless authorized
in
writing by an Officer
of company.
10
S
PE
CIFICATIO
NS
Model Description Rating
No. in
EC-360 Cordless rotary 9.6 V
DC
shear Nickel-Cadmium
Battery
·No load RPM with a fully charged battery
··weight
with battery
No Load Weight
RPM
1,200" 1.15kgs
....
(2.51bs)
WA
RN
ING
--The
use ofany accessory or attachment other than recommenc
in
th
is operati
ng
instruction
or
catalog may present a risk
of
personal injury.
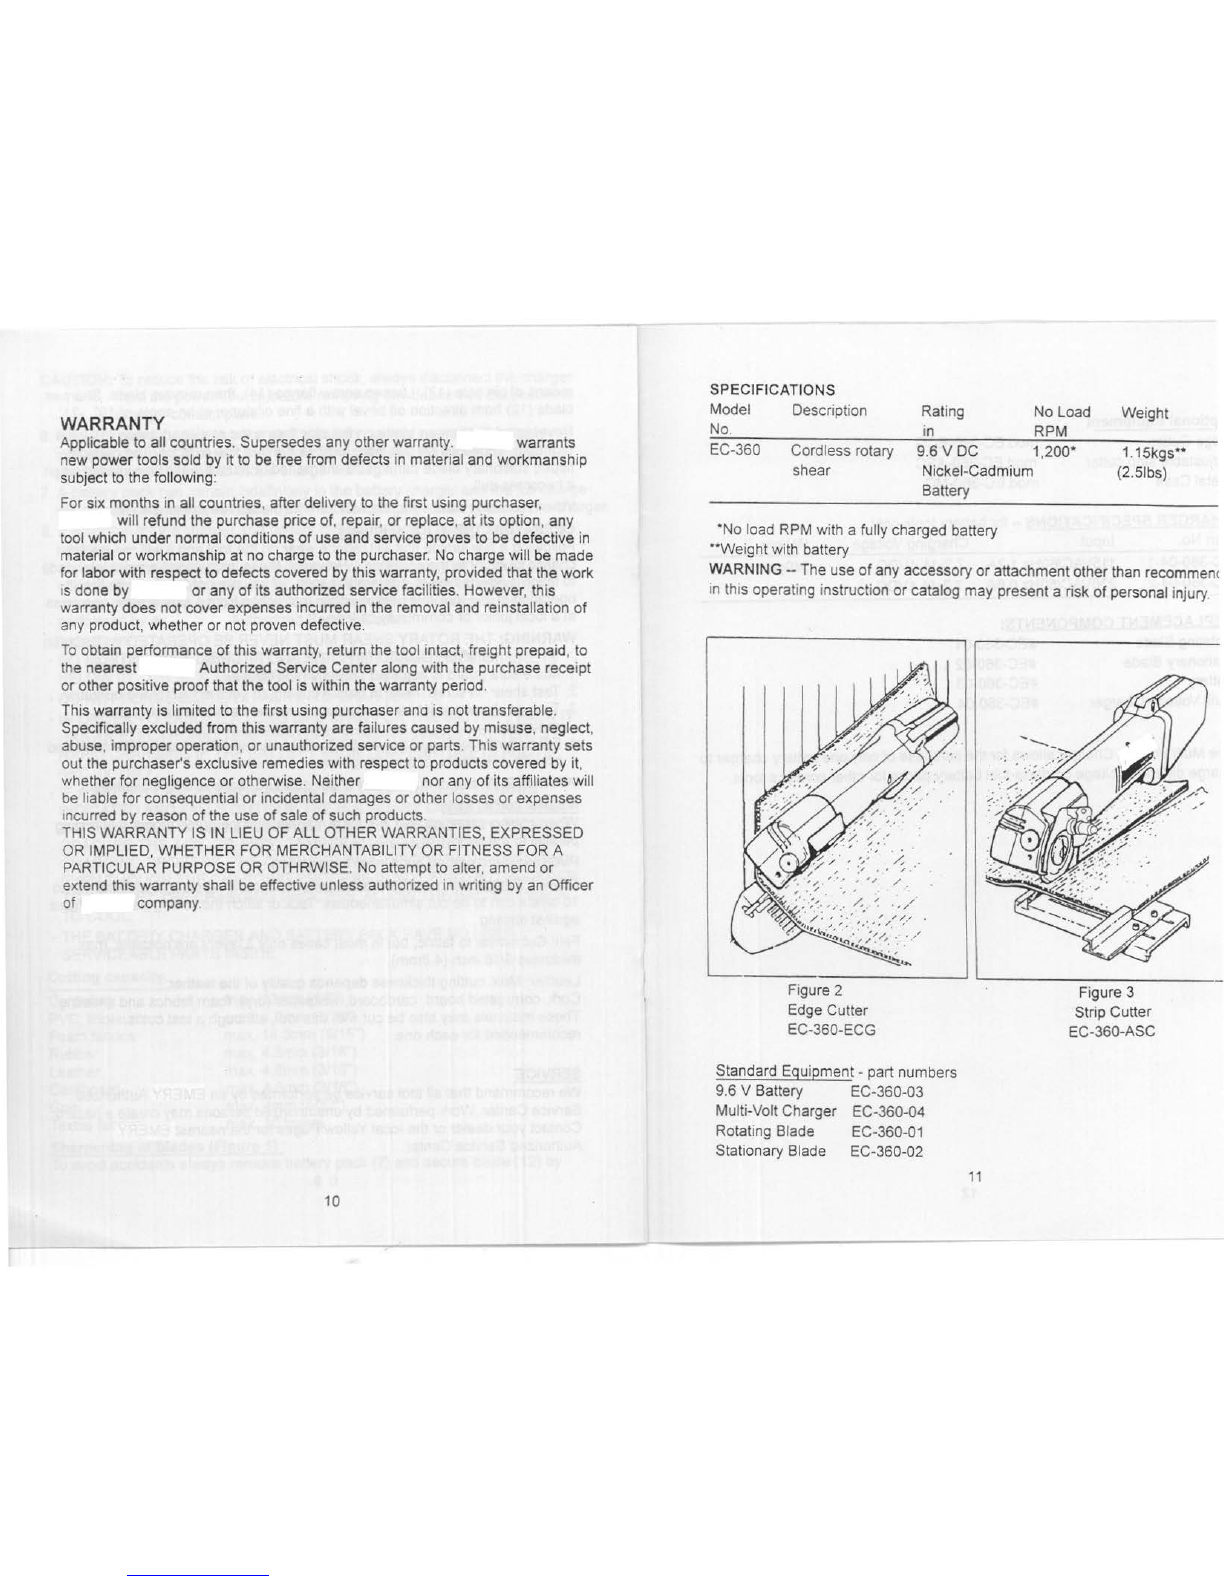
Figure 2
Edge Cutter
EC-360-ECG
Standard Equipment -part numbers
9.6 V Battery EC-360-03
Multi-Volt Charger EC-360-04
Rotating Blade EC-360-01
Stationary Blade EC-360-02
11
Figure 3
Strip Cutter
EC-360-ASC
From the library of: Superior Sewing Machine & Supply LLC
Optional
Equipment
Edge Cutter
Adjustable strip cutter
Metal Case
mod
EC-360-ECG
mod.EC-360-ASC
mod
EC-360-MC
CHARGER SPECIFICATIONS -for battery tools only
Part No. Input Charging Voltage
EC-360-04-1 115VAC/60Hz.1.2A 7.2-14.4VDC
EC-360-04-2 230VAC/50Hz.0.6A 7.2-14.4VDC
REPLACEMENT COMPONENTS:
Rotating Blade #EC-360-01
Stationary Blade #EC-360-02
Battery #EC-360-03
Multi Voltage Charger #EC-360-04
Weight
340grams
The Multi Voltage Chargerallows for the purchase of only one battery charger to
charge differentvoltage cordless tool battery packs for othercordless tools.
12
From the library of: Superior Sewing Machine & Supply LLC

Nickel
Cadmium
Battery
Care
&
Disposal
@
Ni-Cd
This nickel c:::dmium battery must
be
collected,recycled.
or
disposed
of
in an environmentally sound manner.
Do
not
place used batteries in your regular trash. The
incineration,landfilling,or mixing of nickel cadmium bat-
teries with municipal solid waste streams
is
prohibited
by law
in
most areas.
Return depleted batteries
to
an authorized power tool
service center
or
other State Municipal approved battery
collection center. Contact your local waste management
Item
No.EC-360-03
(9.6VDC)
author
ity for
specific
locations and additional informa-
tion
regarding
the
environmentally
sound
collection,
recycling, and disposal
of
nickel cadmium batteries.
~~
Do not expose the tool or battery
to
fire
~
or
high
heat
as
batteries
may
ex-
plode. Care must
be
t
CJken
not
to
short terminals together
with mental objects; jewel
ry,
keys, nai
ls,
screws, etc.
Do
not attempt to disassemble battery. .Fire
or
injury may
result.
Prior
to
disposal
protect
terminals
with
heavy
insulating tape to prevent shorting.
...
-----------------------------------------------------------------------------------------------~
From the library of: Superior Sewing Machine & Supply LLC
Table of contents


