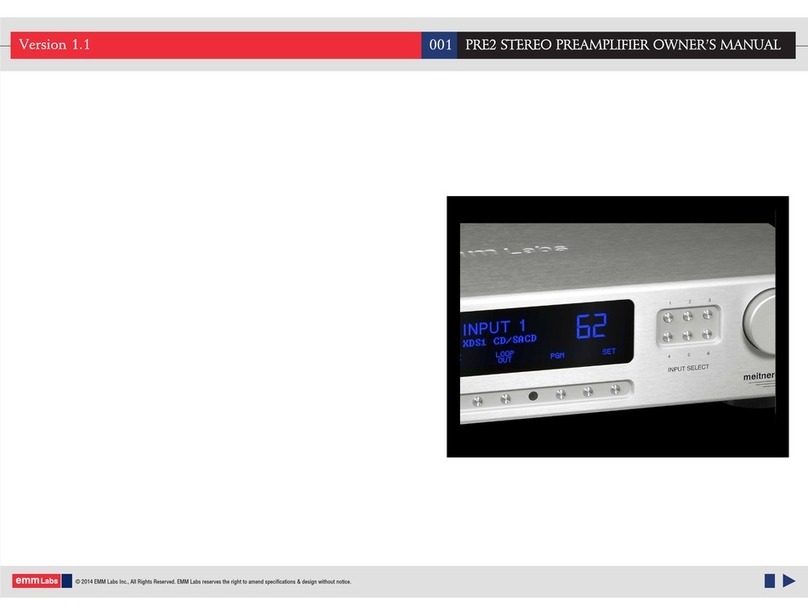
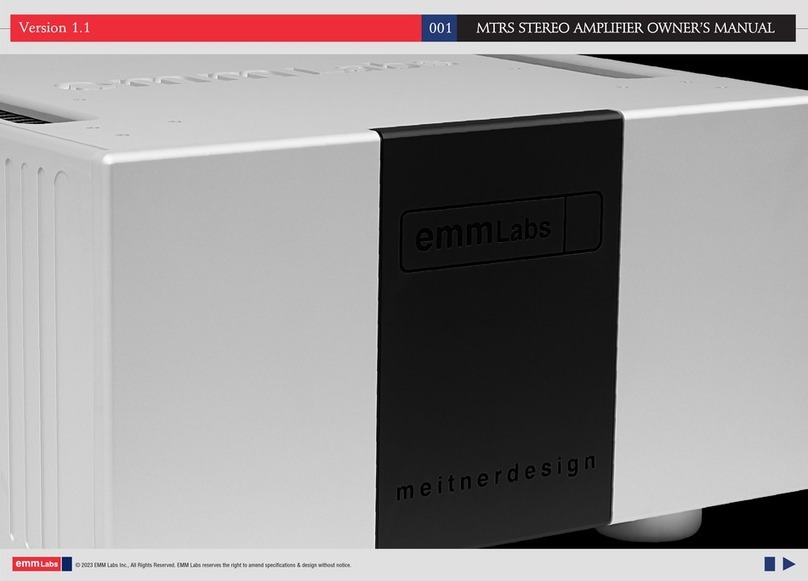
EMM Labs meitnerdesign MTRX User manual

© 2017 EMM Labs Inc., All Rights Reserved. EMM Labs reserves the right to amend specifications & design without notice.
MTRX REFERENCE AMPLIFIER OWNER’S MANUAL
001
Version 1.1

ank you for choosing EMM Labs
Welcome 002
© 2017 EMM Labs Inc., All Rights Reserved. EMM Labs reserves the right to amend specifications & design without notice.
MTRX2 AMPLIFIER OWNER’S MANUAL

Front Panel & Functions
Features & Specifications
MTRX2 AMPLIFIER
003
Table Of Contents
Welcome 002
Table of Contents 003
007
011
Rear Panel & Functions 012
Operation Power Requirements 014
017
019
Safety Instructions 004
Warranty 005
Operation Power Modes, Sequencing and Precautions 015
006
Installation 009
Operation Audio Connections
Operation System Connections
020
Care and Maintenance
© 2017 EMM Labs Inc., All Rights Reserved. EMM Labs reserves the right to amend specifications & design without notice.
MTRX2 AMPLIFIER OWNER’S MANUAL

Safety Instructions
Prior to Installing you new EMM Labs product please read the following safety
instructions:
• Read and follow all instructions.
• Keep these instructions.
• Do not use or install product near any sources of water, rain and/or moisture.
• Clean using only a dry lint free or micro bre cloth.
• Install only in accordance with the manufacturer’s instructions.
• Refer all servicing to approved service personnel.
• Do not install near any heat sources such as radiators, heat registers,
stoves, open ames or other apparatus that produce heat.
• Do not install product outdoors or in direct sunlight.
• Leave at least 30cm or 12 inches around product to ensure proper ventilation.
• Do not cover/block ventilation openings.
• Do not place product near strong electrical or magnetic radiation/emissions.
• Terminals marked with this symbol should be considered hazardous
and live. Proper percautions should be taken when wiring these terminals.
This EMM Labs product must be connected to a mains socket outlet with a protective
earthing connection (grounding pin).
WARNING: TO REDUCE THE RISK OF FIRE OR ELECTRIC SHOCK, DO NOT
EXPOSE THIS APPARATUS TO WATER OR MOISTURE.
EEC: This product has been designed and tested to comply with the
limits set out in EN55013, EN55020 and EN 60065:2009 (electrical safety)
Safety Instructions 004 MTRX2 AMPLIFIER OWNER’S MANUAL
© 2017 EMM Labs Inc., All Rights Reserved. EMM Labs reserves the right to amend specifications & design without notice.

Warranty
Warranty
EMM Labs warrants the MTRX2 product against defects in material
and workmanship under normal use and service for a period of time
specied by the product’s serial number from the date of rst
delivery to the owner. e warranty time period is 5 years. Warranty
is limited to the original owner and is non-transferable.
EMM Labs will pay for return shipping charges back to the owner
when the product is sent to EMM Labs within the rst 90 days aer
purchase (US and Canada end-users only). Otherwise, owner will be
responsible for all shipping charges to and from EMM Labs.
For all warranty claims, a copy of the original invoice must
accompany the product.
Opening the product or modifying it in any way by the owner,
including but not limited to cryogenic treatment, will void any
warranty.
and shipping instructions before shipping any product to EMM Labs.
EMM Labs products are sold worldwide through authorized dealers
with restricted territories. EMM Labs product purchased from
non-authorized dealers or from a dealer selling outside his / her
authorized territory will automatically void product warranty.
005 MTRX2 AMPLIFIER OWNER’S MANUAL
© 2017 EMM Labs Inc., All Rights Reserved. EMM Labs reserves the right to amend specifications & design without notice.

006
MTRX REFERENCE AMPLIFIER
MTRX REFERENCE AMPLIFIER
Hot on the heels of Ed Meitner’s ground breaking reference MTRX
amplier, comes the eagerly anticipated debut of its smaller sibling
monoblocks, the MTRX2.
e MTRX2s are 1KW Class A/B solid-state powerhouses built using
MTRX technology.
e MTRX2 REFERENCE AMPLIFIER features:
• 1000W Class A/B balanced mono-block design
• Ed’s proprietary fully discrete circuit topologies
• Ultra low distortion
• Very high bandwidth
• Zero overall feedback
• Ability to deliver massive transient currents instantaneously
• Ability to drive complex and dicult loads down to 1 Ohm
• Fully balanced audio paths throughout
• Proprietary systems for speaker protection and self-protection
• Exclusive aerospace-grade ceramic circuit boards
e MTRX2 monoblock ampliers just like our reference MTRX
ampliers are designed, manufactured, and built in Canada with no
compromise.
MTRX2 AMPLIFIER OWNER’S MANUAL
© 2017 EMM Labs Inc., All Rights Reserved. EMM Labs reserves the right to amend specifications & design without notice.

007
Features & Specifications
Features & Specications
Frequency Response : DC - 500Khz (Full Rated Power)
Signal to Noise : Greater than 120dB (A Weighted)
THD+N : Less than 0.005% (20-20Khz, Full Rated Power)
IMD : Less than 0.005%
Slew Rate : Greater then 100V/μS
Damping Factor : Greater than 1000
Inputs:
• 1 Balanced (XLR)
• 1 Un-balanced (RCA)
Input impedance:
• 100KΩ Balanced (XLR)
• 100KΩ Un-balanced (RCA)
Output:
• 2 Sets Furutech Binding Posts
System:
• 1 RS-232 Communication Port
• 1 USB Communication Port
MTRX2 AMPLIFIER OWNER’S MANUAL
© 2017 EMM Labs Inc., All Rights Reserved. EMM Labs reserves the right to amend specifications & design without notice.

008
Features & Specifications
Features & Specications
Power & Accessories:
• 30A 250V 3-pin, IP44, IEC60309 type power inlet
• Custom Kimber Kable 30A Power Cable
• Custom EMM Labs Flight Case
Amplier Dimensions (W x D x H):
544 x 584 x 297 mm
21.4 x 23 x 11.7 inches
Amplier Weight:
82kg
180lbs
MTRX2 AMPLIFIER OWNER’S MANUAL
© 2017 EMM Labs Inc., All Rights Reserved. EMM Labs reserves the right to amend specifications & design without notice.

009
Installation
Installation
Unpacking:
Please save the ight cases for future shipping needs. You can use the included custom
cover to cover the ampliers when not in use. Do not cover the ampliers while in
standby or during operation.
e MTRX2 comes packed in its own individual custom made
heavy duty ATA ight case. Included are the premium Kimber
power cables, CD manual plus included documentation.
e ight case also has removable heavy duty wheels with
brakes, making it easy to move the ampliers close to the
appropriate install position.
To unpack the amplier two people are required to unlock
and carefully li the top cover of the ight case over the
amplier. Remove the custom amplier cloth cover before
liing the amplier out of the ight case.
Do not attempt to li or move the MTRX2 without adequate assistance. At least two people
are required to li or move the MTRX2 amplier. A third person is highly recommended
when removing the amplier o the ight case base/platform. While liing the amplier up
o the base/platform, the third person should stop the base/platform from moving. Once
the amplier is lied up o the base/platform the third person can easily slide the
base/platform away and the amplier can then be lowered to the ground.
MTRX Amplier
Custom ATA Flight
Case Conguration
MTRX2 AMPLIFIER OWNER’S MANUAL
© 2017 EMM Labs Inc., All Rights Reserved. EMM Labs reserves the right to amend specifications & design without notice.

010
Installation
Installation
Location & Precautions:
• Install MTRX2 amplier on a solid level surface.
• Install the MTRX2 in a dry and well ventilated location out of direct sunlight.
• Allow at least 60cm or 2 feet of clearance behind the amplier for power cords and cable
clearance.
• Allow at least 30cm or 1 foot of clearance above and around the amplier for proper heat
dissipation.
• Do not cover amplier with custom cover during standby or operation.
• Do not cover or obstruct ventilation holes or heatsinks.
• Do not place the MTRX2 close to low level components. e MTRX2 is a power amplier
capable of producing large output currents and hence large magnetic elds which can
interfere and induce noise in sensitive components.
• Do not install or expose the MTRX2 to sources of heat or open ame, steam, water,
dampness, excessive humidity, smoke or dust.
e MTRX2 amplier must be connected to a mains socket outlet with a protective earthing
connection (grounding pin). Do not install a “ground lier” or “cheater” adaptors.
MTRX2 AMPLIFIER OWNER’S MANUAL
© 2017 EMM Labs Inc., All Rights Reserved. EMM Labs reserves the right to amend specifications & design without notice.

011
Front Panel and Functions
Front Panel & Functions
1. Standby/Power-Save button: Toggles the operation between on and standby mode.
2. Down lit indicators: Power mode and diagnostic led indicators.
MTRX2 AMPLIFIER OWNER’S MANUAL
© 2017 EMM Labs Inc., All Rights Reserved. EMM Labs reserves the right to amend specifications & design without notice.

012
Back Panel and Functions
Back Panel & Functions
1. Product model and serial number indicator:
Warranty void if model/serial number indicator is not attached to unit,
missing or damaged whereby serial number cannot be seen.
MTRX2 AMPLIFIER OWNER’S MANUAL
© 2017 EMM Labs Inc., All Rights Reserved. EMM Labs reserves the right to amend specifications & design without notice.

013
Back Panel and Functions
Back Panel & Functions
2. System Ports:
• USB Communication Port for diagnostics and rmware upgrades
• RS232 Communication Port for diagnostics and rmware upgrades
3. Analog Inputs:
• XLR Balanced Input
• RCA Un-balanced (single ended) Input
4. Dual Positive Speaker Terminals (Red)
5. Dual Negative Speaker Terminals (Black)
6. Main Power Breaker/Switch
7. Main Power Connector:
Only use included power cable with 30A connector to connect to the MTRX’s
power inlet (30A 250V 3-pin, IP44, IEC60309 type).
8. Voltage Indicator:
Indicates working voltage of the MTRX2. Only use with indicated line voltage.
MTRX2 AMPLIFIER OWNER’S MANUAL
© 2017 EMM Labs Inc., All Rights Reserved. EMM Labs reserves the right to amend specifications & design without notice.

014
Operation
Operation
MTRX2 Power Requirements:
e MTRX2 is pre-congured at the factory for 100, 110-120 or 230-240VAC operation at
50 or 60Hz depending on customer requirements. Please make sure to check that the Voltage
Indicator label on the back of the MTRX2, under the power inlet, matches the correct
voltage before installation.
e MTRX2 is capable of incredible performance due to its ability to
deliver huge amounts of power instantaneously to drive the most
complex and dicult loads. Depending on listening habits and
speakers used the limiting factor may be your electrical service.
For optimum performance and to take full advantage of the MTRX2’s
remarkable power handling capabilities we strongly recommend that
each MTRX2 amplier be congured and installed on its own
dedicated AC circuit. For maximum power each MTRX2 should be
congured and installed on its own dedicated 230-240VAC circuit.
Building regulations and electrical codes dier from location to
location and country to country. Please consult a local licensed
electrician with regards to installation of the dedicated AC circuits
for the MTRX2 ampliers.
Voltage Indicator Label
MTRX2 AMPLIFIER OWNER’S MANUAL
© 2017 EMM Labs Inc., All Rights Reserved. EMM Labs reserves the right to amend specifications & design without notice.

015
Operation
Operation
MTRX2 Power Modes and Precautions:
O: AC power is disconnected either using the Main Power Breaker Switch in the
back of the MTRX2 or by disconnecting/removing the main power cable
from the power inlet. Please see diagram on the right.
Standby: Power cable connected and Main Power Breaker Switch turned to the ON
position. Safety, control and operational systems are enabled. MTRX2 indicator
lights will glow RED. In Standby mode the MTRX2 consumes minimal power.
On: Once in Standby mode press the front panel Standby button to fully power the
MTRX2 amplier. e MTRX2 amplier will take between 5-10 seconds to go
through a complete systems and safety check before enabling full power. Once
at full power the MTRX2 indicator lights will glow BLUE.
Ind. O: MTRX2 will be ON but indicators will be o. Press and hold the front panel
button for 2 seconds while in Standby mode. e MTRX2 will fully turn ON,
indicators will glow BLUE for a few seconds before dimming and turning o.
To re-enable indicators, press the front panel button for Standby mode then
back ON again.
Recommended Turn ON an Turn OFF Sequence
Turn ON Sequence:
1. Check that Main Power Breaker Switch is OFF (down position)
2. Connect speakers/speaker cables to MTRX2 amplier
3. Connect power from wall plug to power inlet of the MTRX2 amplier
4. Plug in audio input from source components
Main Power
Breaker Switch
Power
Inlet
Voltage
Indicator Label
MTRX2 AMPLIFIER OWNER’S MANUAL
© 2017 EMM Labs Inc., All Rights Reserved. EMM Labs reserves the right to amend specifications & design without notice.

016
Operation
Operation
Turn ON Sequence (continued from previous page):
5. Turn ON (up position) Main Power Breaker Switch.
6. Check that the MTRX2 indicator lights are RED (Standby Mode)
7. Push the Standby button on the front panel
8. MTRX2 indicator lights will blink BLUE while going through safety startup sequence
then will glow solid BLUE once fully turned ON.
Turn OFF Sequence:
1. Push the Standby button on the front panel to put MTRX2 amplier back into
Standby Mode. Indicator lights will go from BLUE to RED
2. Once in Standby Mode you can remove the audio source cables (XLR/RCA)
3. Turn OFF (down position) the Main Power Breaker Switch to completely turn o the
MTRX2 amplier and to remove speakers cables or disconnect power cables.
MTRX2 Power Modes and Precautions:
MTRX2 amplier should always be placed in Standby Mode before turning the Main Power
Breaker Switch OFF (down position). Turn the Main Power Breaker Switch OFF (down
position) before removing speaker cables, power cables or when moving or relocating the
MTRX2 amplier.
We recommend unplugging the MTRX2 (30A 250V 3-pin, IP44, IEC60309 type) from the
main AC circuit during lightning storms or when unused for extended periods of time to
prevent damage from power surges.
Main Power
Breaker Switch
Power
Inlet
Voltage
Indicator Label
MTRX2 AMPLIFIER OWNER’S MANUAL
© 2017 EMM Labs Inc., All Rights Reserved. EMM Labs reserves the right to amend specifications & design without notice.

017
Operation
Operation
MTRX2 Audio Connections:
Analog Inputs:
Each MTRX2 amplier has one balanced/XLR and one un-balanced/single-ended connector
for audio input shown above.
Balanced/XLR pin assignments:
Pin 1: Signal Ground
Pin 3: Signal - (inverting)
Pin 2: Signal + (non-inverting)
Balanced/XLR Input
Unbalanced/Single-Ended Input
MTRX2 AMPLIFIER OWNER’S MANUAL
© 2017 EMM Labs Inc., All Rights Reserved. EMM Labs reserves the right to amend specifications & design without notice.

018
Operation
Operation
MTRX2 Audio Connections:
Analog Outputs:
Each MTRX2 amplier has two sets of high performance, high current Furutech binding
posts. e positive (+) binding posts are RED and the negative (-) binding posts are
BLACK. e binding posts can also accepts banana plugs. Please ensure when
connecting to a speaker that at least one positive and one negative binding post is used.
• DO NOT bend or exert force on the binding posts. ey will get damaged.
• NEVER connect "red" or "black" binding posts to ground. e negative terminal is NOT
ground in a balanced amplier.
MTRX2 AMPLIFIER OWNER’S MANUAL
© 2017 EMM Labs Inc., All Rights Reserved. EMM Labs reserves the right to amend specifications & design without notice.

019
Operation
Operation
MTRX2 System Connections:
Each MTRX2 amplier has a USB connection and an RS232 connection for system updates
and for diagnostics and real-time monitoring. ese ports allow for remote control,
monitoring and real-time diagnostics of the MTRX2 amplier via the onboard computer and
internal sensors.
MTRX2 Diagnostic and Safety Systems:
e MTRX2 amplier is equipped with a full and detailed set of sophisticated and
comprehensive diagnostic and monitoring systems. On top of providing critical safety, these
systems also perform real-time monitoring of the amplier. is allows the MTRX2 to both
perform at its maximum performance and to immediately protect not only itself but
speakers and source components when it detects issues and faults.
is includes a comprehensive short circuit system protection and fast oset detection.
All of which are implemented outside of the MTRX2’s critical audio paths. us ensuring
that while the MTRX2 is completely protected, its audio paths are never compromised.
MTRX2 AMPLIFIER OWNER’S MANUAL
© 2017 EMM Labs Inc., All Rights Reserved. EMM Labs reserves the right to amend specifications & design without notice.

020
Care and Maintenance
Care and Maintenance (General)
e MTRX2 amplier requires just basic routine maintenance and care to ensure optimal
performance.
• Before performing any maintenance please ensure to turn the MTRX2 amplier OFF
and remove the power cable from the amplier.
• To remove dust from the exterior surface of the MTRX2 you can use a, low pressure
blower, feather duster, popular static duster (e.g. Swier) dry clean lint free or micro bre
cloth.
• To remove nger prints. dirt, grease from the exterior surface you can use a dry clean lint
free or micro bre cloth.
• In some cases it may be necessary to dampen the lint free or micro bre cloth with some
distilled water prior to gently cleaning ngerprints or dirt from the ne bead blasted
surface. DO NOT apply liquid directly to amplier surface always apply or dampen the
cloth.
• DO NOT USE abrasive pads, steel wool, metal polish or other such abrasive means to
clean the amplier surface.
• DO NOT USE any commercial cleaners, benzene, acetone or chemicals to clean the
amplier surface.
MTRX2 AMPLIFIER OWNER’S MANUAL
© 2017 EMM Labs Inc., All Rights Reserved. EMM Labs reserves the right to amend specifications & design without notice.
This manual suits for next models
2
Table of contents
Other EMM Labs Amplifier manuals
