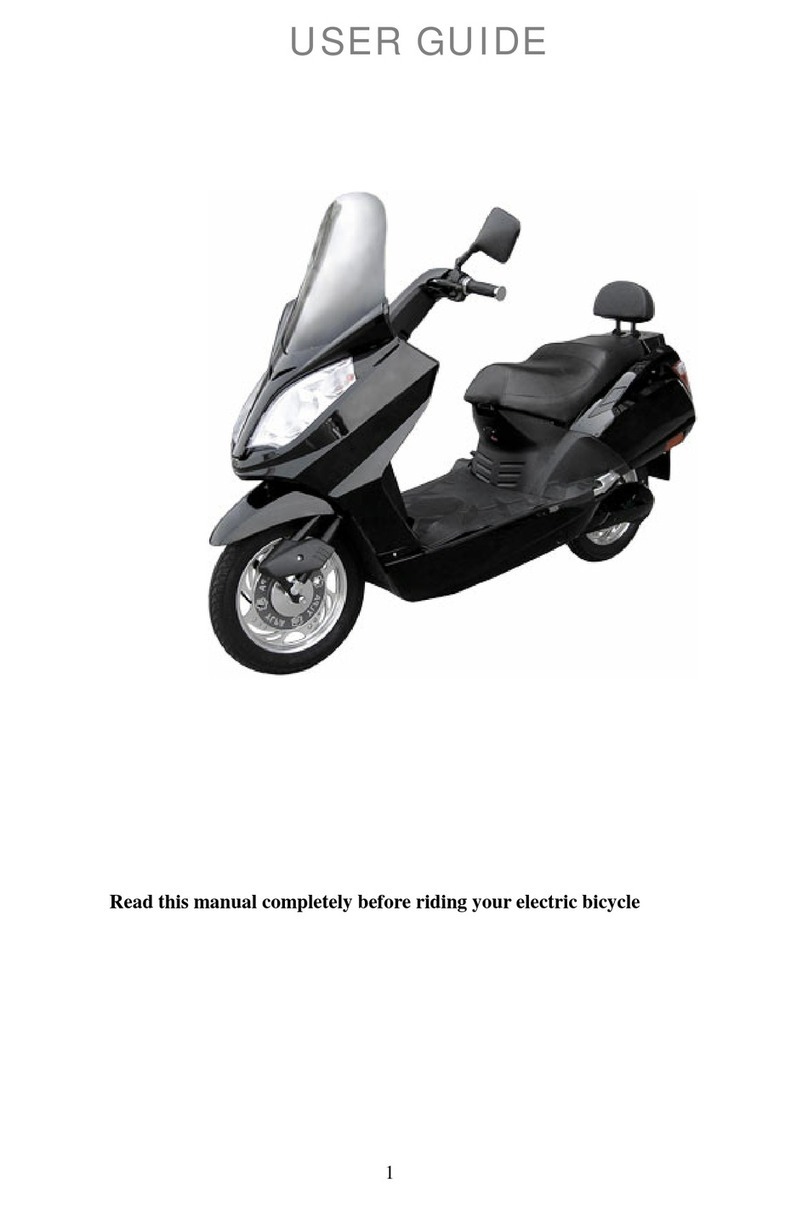
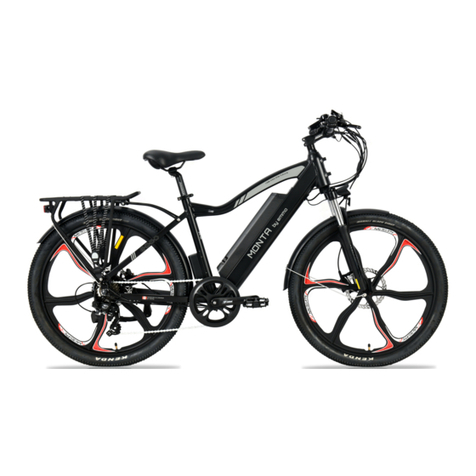
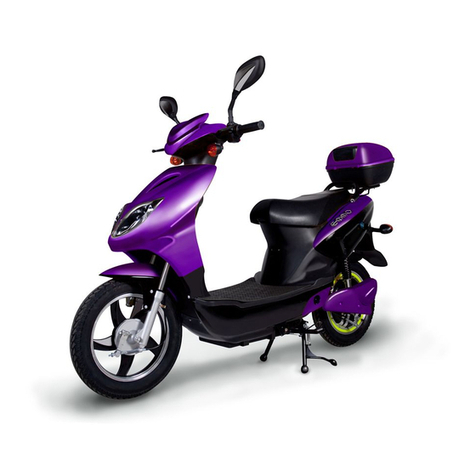
EMMO E-mini B Quick start guide

www.emmo.ca

2
TABLE OF CONTENTS
Carton Contents -----------------------------------------------------------------------------------2
Note-------------------------------------------------------------------------------------------------3
Warning------------------------------------------------------------------------------------------------- 4
Assembly Instructions
Handlebar ------------------------------------------------------------------------------------------ 5
Front Wheel --------------------------------------------------------------------------------------- 6
Seat Post and Pedals------------------------------------------------------------------------------7
Operating Instructions
For E-mini B ----------------------------------------------------------------------------------- 8-9
For E-Wild B/ Monta B------------------------------------------------------------------------- 10
Battery & Charger Care-------------------------------------------------------------------------11
Safety----------------------------------------------------------------------------------------------12
General warning --------------------------------------------------------------------------------- 13
Meter Programming & Use
800 or 810 LED ----------------------------------------------------------------------------------14
S900 LCD-------------------------------------------------------------------------------------- 15-16
Troubleshooting---------------------------------------------------------------------------------17
Tips for basic maintenance of your electric bike -------------------------------------------18
Warranty information---------------------------------------------------------------------------19
The wiring diagram----------------------------------------------------------------------------- 21
RECORDING YOUR EMMO BIKE INFO -----------------------------------------------
21
CARTON CONTENTS
(x1) Kit Box
(x2) Pedals
(x1) Owner’s Manual
(x1) Tool Kit
(x1) Battery Charger
(x1) Reflector
(x1) EMMO Bike
(x1) Seat
(x1) Lithium Ion Battery
(x2) Keys

3
Thank you for choosing the EMMO electric bike. We believe this
technology, with the benefits of electric propulsion, provides you with
the perfect vehicle to increase your personal mobility.
Our brushless, electric hub motor allows you to run errands
or commute to work while saving money on gas and reducing the
environmental impact on our world. It also gives you the opportunity
to pedal if you want to get exercise along the way.
We believe you will enjoy your riders with EMMO.
If you have any concerns, questions or suggestions about the EMMO
electric bike, please contact us at www.emmo.ca. Again, thanks
for choosing EMMO.
PLEASENOTE:
THISMANUALISNOTINTENDEDASADETAILEDUSER,
SERVICE,REPAIRORMAINTENANCEMANUAL.PLEASE
SEEKASSISTANCEFROMAQUALIFIEDTECHNICIAN
FORSERVICE,REPAIRSORMAINTENANCE.

4
WARNING
Electric Bikes can be dangerous to use. The user or consumer assumes
all risk of personal injuries, damage, or failure of the bicycle or system and
all other losses or damages to themselves and others and to any property
arising as a result of using the bicycle.
As with all mechanical components, the bicycle is subjected to wear
and high stresses. Different materials and components may react to
wear or stress fatigue in different ways. If the design life of a component
has been exceeded, it may suddenly fail possibly causing injuries to the
rider. Any form of crack, scratches or change of coloring in highly stressed
areas indicate that the life of the component has been reached and it
should be replaced.
For replacement parts, technical information and warranty assistance,
please contact your EMMO dealer or visit www.emmo.ca.
YOURINSURANCEPOLICIESMAYNOTPROVIDE
COVERAGEFORACCIDENTSINVOLVINGTHEUSE
OFTHISBICYCLE.TODETERMINEIFCOVERAGE
ISPROVIDEDYOUSHOULDCONTACTYOUR
INSURANCECOMPANYORAGENT.

5
ASSEMBLYINSTRUCTIONS
ForHandlebar
Your bike has been pre-assembled and requires only a few simple steps
to get it ready for you to ride:
1. Carefully remove your bike from the carton and gently rest it in place with the
kickstand down.
2. Remove all of the inside cardboard protection and bubble wrap on the bike.
3. Please locate and set aside the kit box containing the battery charger, pedals, and
tool kit etc.
4. Place the handle bar on the stem, and tighten four bolts with 5mm Allen Key
(Figure 1), Position the handlebars to your desired comfort level.
5. Once the handlebars are aligned and the top bolt is slightly secured, firmly tighten
the 2 side bolts on the stem with 6mm allen key (Figure 3). After tightening the 2
side bolts, firmly tighten the top bolt with 5mm allen key (Figure 2). After all 3 bolts
have been securely fastened, make sure there is no looseness in the headset.
WARNING:
Do not over-tighten the stem bolt. Over tightening the stem bolt can damage
the steering system and cause loss of control.
Figure 1
Figure 2 Figure 3

6
ASSEMBLYINSTRUCTIONS
ForFrontWheel
CAUTION: Your Electric bike is equipped with a front disk brake. Be careful not to
damage the disk, caliper or brake pads when installing the front wheel. Never apply
the lever unless the disk is correctly inserted in the caliper.
Your bicycle may be equipped with a different securing method for the front wheel
(1) With the steering fork facing forward, insert the wheel between the fork blades so
that the axle sits firmly at the top of the fork dropouts. The cam lever should be on
rider’s left side of the bicycle (fig. 4-1)
(2) Make the front wheel axle sits completely in the slots of the fork dropouts, and at
the same time centering the wheel rim in the fork:
With a cam action system, move the cam lever upwards and swing it into the CLOSED
position (fig. 4-1). The lever should now be parallel to the fork blade and curved
toward the wheel. To apply enough clamping force, you will need to wrap your
fingers around the fork blade for leverage, and the lever should leave a clear imprint
in the palm of your hand.
NOTE:If,onatraditionalcamactionsystem,thelevercannotbepushedallthe
waytoapositionparalleltotheforkblade,returnthelevertotheOPEN
position.Thenturnthetensionadjustingnutcounterclockwisefor one
quarterturnandtrytighteningtheleveragain.
WARNING: Securely clamping the wheel with a cam action retention device takes
considerable force. If you can fully close the cam lever without wrapping your fingers
around the fork blade for leverage, the lever does not leave a clear imprint in the
palm of your hand, and the serrations on the wheel fastener do not emboss the
surfaces of the dropouts, the tension is insufficient. Open the lever; turn the tension
adjusting nut clockwise for a quarter turn; then try again.
Spin the wheel to make sure that it is centered in the frame and clears the brake pads;
then squeeze the brake lever and make sure that the brakes are operating properly.
(3) Hex nuts or hex key bolts which are threaded on to or into the hub axle. (bolt-on
wheel, fig. 4-4 )

7
ASSEMBLYINSTRUCTIONS
ForSeatPostandPedals
Pull the seat clamp handle away from the seat post and slide the seat up
or down to adjust the height. Move the clamp handle inward toward the
seat post so that the seat post can be held securely by the clamp. Make sure the seat is
clamped properly so that you can’t twist it out of alignment.
If necessary, tighten the clamp by twisting the clamp handle clockwise while in the
unclamped position. Then, fold the handle in toward the seat post. This should
require a fair amount of force to ensure the seat post is held tight. If necessary, the
clamp can be further tightened with a 5 mm allen wrench while in the clamped
position.
WARNING:Makesuretheseatisnotsetwiththeverticalmaximumheight
marksabovetheclamp.
Using the 15 mm wrench to attach and
tighten the pedals. PLEASE NOTE – The
pedals are marked “L” for Left and “R” for
Right. The left pedal is attached by turning it
counterclockwise and the right pedal is
tightened by turning it clockwise.
Make sure the pedals are properly
attached to the crank arms to prevent
stripping.
TORQUESPECIFICATIONS

8
OPERATINGINSTRUCTIONS
For E-mini B
To remove or insert the battery
Lift up the seat by loose the seat clamp (Figure 1) to create room to insert and
remove the battery. Turn the key to the "OFF" position, then press and turn the key
to "UNLOCK" position. Lift up the battery by the handle on the top of the battery
(Figure 2) and remove the battery. The key switch must be in the “UNLOCK” position
to slide the battery in and out.
Figure 1 Figure 2
Charging of battery
To charge the battery, plug the charger plug (Figure 4) into the charging port on the
battery (red arrow on Figure 3). Then plug the charger into an AC outlet. The LED
indicator on the charger should be red when the charger is charging the battery. Once
fully charged, the indicator will turn green. Please unplug the charge once it is fully
charged.
Figure 3 Figure 4
WARNING: DO NOT overcharge the battery. Please unplug the charger once the battery is fully charged.

9
OPERATINGINSTRUCTIONS
How to fold frame.
How to fold head stem vertically.
Lift the locking nut and pull down the lever. Once
unlocked, the handlebar stem can be folded down.

10
OPERATINGINSTRUCTIONS
For E-Wild B / Monta B
To remove or insert the battery
The battery is fully inserted in the battery holder, to remove the battery, turn the key
counterclockwise to unlock the battery (Figure 1), slide the battery up along the rail
(Figure 2) and remove the battery from the bike.
Charging of battery
To charge the battery, plug the charger plug into the charging port on the bike. Then
plug the charger into an AC outlet.
.
Figure 1 Figure 2

11
BATTERYANDCHARGERCARE
The charger will charge a fully depleted battery in 5—6 hours. The indicator light on
the charger will be red when battery is charging. The indicator will turn green when fully
charged.
Prevent the battery against any sort of heat sources, such as directly under the sun, for
prolonged periods of time.
DO NOT drain the battery. Recharge the battery before it becomes completely
discharged. Completely discharging will affect the battery’s lifetime and performance.
Never store the battery in a discharged state. Please note that it is normal for the
battery capacity to decease after a certain charging-discharging cycles. If you find that
your battery does not hold a sufficient charge, you should contact your EMMO dealer
to order a replacement.
If the battery will not be used for an extended period of time, charge it fully and
recharge it every month. Store it in a cool, dry place. Your battery is engineered with
precision for high capacity and a long, useful life. Do not use it to power other
electrical devices. Improper use of the battery will damage the battery and shorten its
life and may cause fire or an explosion. If you experience unusual sounds or odors
coming from the charger or the battery, unplug charger immediately and contact
customer service.
Rechargebatteryaftereveryuse.
•Do not disassemble or alter the battery or battery charger.
•Do not place the battery near fire or corrosive substances.
•Do not allow any liquids on or inside the battery/charger.
•Do not expose the battery/charger to extreme weather conditions.
•Do not operate the battery/charger if damaged.
•Recharge the battery only with a charger specified by the manufacturer.
•Do not use the battery/charger for any use other than its intended purpose.
•Only use the battery/charger on approved products.
Pleaseinstructyourchildrentokeepawayfromthechargingplace.

12
SAFETY
Helmet:
Follow your local guidelines, please wear an approved helmet
while riding your bike if need to.
It is your responsibility to familiarize yourself with the laws of
where you ride your Bike and to comply with all applicable
laws.
Mechanical Safety Check:
Check the condition of your bike before every ride. Make sure no nuts, bolts or fixing
are loose, with particular attention to the axle nuts and handlebar stem. Make sure
the tires are correctly inflated to the recommended air pressure that is located on the
side wall of every tire. Ensure the brakes are in good working conditions. You must
have your bike serviced and checked by a qualified bike mechanic before 100 miles
(161 kilometers) of riding. This is a standard good practice for any new bike as cables
will stretch and components will "bed in". The service must include spoke tensioning
for both front and rear wheels.
Your First Ride:
When you buckle on your helmet and go for your first ride, be sure to pick an area
away from cars, other cyclists, obstacles or other hazards in order to become familiar
with the controls, features and performance of your new bike.
Additional Passengers:
The bikes are designed for one passenger only. DO NOT carry any additional
passengers on the front or rear of the bike.
Weight Capacity:
Bikes are designed with a maximum weight capacity for all models. Please visit
www.emmo.ca for more detailed information on the load capacity of different
models. The rear rack maximum weight capacity of a bike (if applicable) is 25
pounds. Exceeding the maximum weight capacity can result in damage of the bike
which can lead to serious injury.
Tires & Wheels
Make sure tires are correctly inflated. Follow the recommended tire pressure on
the wall of the tires.
Make sure the tires are in good shape: spin each wheel slowly and look for cuts in
the tread and sidewall. Replace damaged tires before riding the bike.
Check if the wheels are straight: spin each wheel and check for brake clearance
and side-to side wobble. If a wheel wobbles side to side even slightly, or rubs
against or hits the brake pads, take the bike to a qualified bike shop to have the
wheel adjusted.

13
GENERALWARNING
Like any sport, bicycling involves risk of injury and damage. By choosing to ride a
bicycle, you assume the responsibility for that risk, so you need to know — and to
practice— the rules of safe and responsible riding and of proper use and
maintenance. Proper use and maintenance of your bicycle reduces risk of injury.
Your electric bicycle is designed for use by persons 16 years old or older. Riders must
have the physical coordination, reaction time and mental capability to ride and
manage traffic, road conditions, sudden situations and also respect the laws
governing bicycle use where they ride, regardless of age. If you have an impairment
or disability such as a visual impairment, hearing impairment, physical impairment,
cognitive/language impairment, or a seizure disorder, consult your physician before
riding any bicycle.
Aspecialnoteforparents
As a parent or guardian, you are responsible for the activities and safety of your child,
and that includes making sure that the bicycle is properly fitted to the child; that it is
in good and safe operating condition; that you and your child have learned and
understand the safe operation of the bicycle; and that you and your child have
learned, understand and obey not only the applicable local motor vehicle, bicycle and
traffic laws, but also the common sense rules of safe and responsible bicycling. As a
parent, you should read this manual, as well as review its warnings and the bicycle’s
functions and operating procedures with your child, before letting your child ride the
bicycle.
Make sure that your child always wears an approved bicycle helmet when riding;
but also make sure that your child understands that a bicycle helmet is for
bicycling only, and must be removed when not riding. A helmet must not be worn
while playing, in play areas, on playground equipment, while climbing trees, or
at any time while not riding a bicycle. Failure to follow this warning could result
in serious injury or death.
Your electric bicycle is designed for use by persons of 16 years old and older. Do
not let a child younger than 16 years old ride the bicycle unless the local laws
state otherwise.

MeterProgramming&Use
14
800 or 810 LED
Operations:
Press ON/OFF to start the power:
Press 6km/h button to activate the walking mode.
Press mode to select the pedal assistant power with pedals and throttle
(Low-Med-High)
Low=40% of max speed;
Med=75% of max speed;
High=100%of max speed
L-H is indicating the battery power

15
MeterProgramming&Use
S900 LCD
1) Speed :Average SPEED/MAX SPEED
2) Speed unit :Kmh/MPH
3) Battery level: 5 levels, voltage interval could be customized
4) Head light icon : indicates when head light and back light are on
5) Error code :“ERROR”and code when there is error
6) Assist level :actual assist level 0~5, 0 –no assist, 1- ECO, 2,3-STD,
4,5-POWER)
7) Distance :Trip/ODO
8) 6km mode
To turn the unit on, press and hold the “M” button to start the display. Long press
again “M” will switch it off. The display switches off automatically if there is no
activity for ten minutes (default).
Display setting:
Short press M button to switch ODO/Trip.
Short press up or down button to change assist level, default value is level 1
Long press up button for 3 seconds turn on/off the head light when application
Long press down button to enter/quit walking mode, “walk” will show up on
screen
Advanced setting
Hold the up and down button for seconds to enter the setup interface, short press up
or down button to change the value, short press M button to save current value and
switch to next parameter.
Backlight-P01, press up or down button to change the brightness (range is 1 to 3)
Speed unit-P02, press up or down button to change between MPH and KMH.
Voltage-P03, press up or down button to change the voltage 24v/36v/48v.Please
don’t change the default value.

16
Sleep time interval setting-P04. Press up or down button to change the time,
range from 0 to 60 minutes. Display will sleep and cut off power after no
operation on system for the selected time, the default value is 5 minutes.
Assist level-P05. Press up or down button to change the level between 0(max
level=3) and 1(max level=5) and 2(max level=9)
Wheel size-P06. Press up or down button to change wheel size. Please don’t
change the default value.
Reset all parameters-P11. Long press up button 5 seconds, when displays “ssss”,
all parameters reset to default values (except for the ODO distance)
Error codes
When something goes wrong with system, an error code will flash on the display.
Check details on attached list.
The motor will stop working in the event of an error. Only when the error is gone, will
the motor work again.
ErrorCodes:
Error code Definition
0Normal
2Short circuit protection of motor
3Controller error
4Throttle error
5Motor error
8Low battery level
9High battery level
10 Motor hall sensor error
30 UART receive error

17
TROUBLESHOOTING - A Quick Checklist
Here's a quick checklist for troubleshooting if you should find yourself at the side
of a road with a problem.
In many cases, reported faults or problems are a simple case of understanding the
product better but unexpected problems can happen.
The following are some simple roadside assistance tips for electrical problems:
No meter power. Check the battery is charging and charged, check the battery
connections, display connections, check the key switch. If none of the above
applies, it may be your control unit or display depending on the model.
No throttle/pedal assist power (meter on). This means the battery is probably
fine and it is likely to be a connection issue. Check if the brakes/brake sensors
have bounced back properly, check connections to your motor, then connections
to your interface (throttle) and sensors. If none of the above applies, it may be
the controller failure.
Power cut-out. Check if the brakes/brake sensors have bounced back properly,
check battery contacts, check connections. Before seeking help try to notice
exactly when the cut-out occurs, i.e. on a long hill, on a short steep hill, how
many miles from last charge, after a bump, immediately after stopping or
slowing. This could be an issue with the motor.
Battery not charging. Check the charger fuse, check the power supply. Turn off
other appliances on the same power board, don’t use long extensioncables.
Battery cuts out, particularly under load. Check any connectors, check wiring
between battery and motor. This could be an issue with the battery.
Motor noise. Roll backwards to see if the same noise occurs, cycle without power
to see if the same noise is still there; check connections especially if you have
removed a component recently. Check for sources of friction behind the brake
pads and around the wheel.
Motor resistance. Ensure motor wheel is mounted correctly, check if brakes are
disengaging and set up correctly, check for sources of friction, disengage power
and see if resistance persists, roll the bike backwards with the power on – you
may have a sticky/rusty brake or hub especially if you’ve driven through flood
water (not advised).
Short riding distance. This could be an issue with Low tire pressure, Driving on
many hills, headwind, braking, departures, and/or excessive load, Battery
discharged for long period of time, without regular charges ,aged ordamaged.
Fault rates on ebikes are generally very low - about 1% over 12 months -
that's IF they are maintained well, are well built in the first place and are used as they
were intended.

18
SimpleMaintenanceTipsforyourElectricBike
Having an electric bike that breaks down or isn’t running smoothly is a real pain. Here
are few simple things you can do to avoid this and keep it running smoother for
longer.
Electric bikes are bicycles that have additional technology to provide pedal assistance.
Because they tend to get used so much more, and at greater average speeds,
maintenance is a critical factor in keeping them running smoothly.
You don’t need to have a fancy workshop, just do these few simple things:
Bicyclemaintenance
Regularly check the bolts of critical structural components – handlebars, seat
rails, wheels etc. Riding with loose bolts can be dangerous.
Lube your chain once every month.
Check tire pressures at least once a week. Pump up to the recommended
pressures if needed.
Clean your ebike with a regular hose and / or bucket & brush. Strictly no
power wash.
Electricsmaintenance
There is very little to do in terms of electrics maintenance however the main thing is
to take care! Particularly when you are moving your ebike in and out of cars, stairs or
tricky storage places.
Wiring.Be careful not to knock your wiring, particularly on things such as lights,
motor cables near wheels, sensor cables etc
Batteries.See our article on battery care and safety. Also take care sliding your
battery in and out so you don’t bend any nodes on the battery plate.
It is a good practice to have the bike serviced regularly by a skilled mechanic -
preferably one with experience working on electric bikes! Find or avoid problems
before they happen.

19
WARRANTYINFORMATION
We strive to make sure our items are accurately described so that people are clearly
aware in advance of what they are getting, Please feel free to contact us if you have
any questions before you place an order.
Warranty covers items that fail when used within their normal operating parameters.
SixMonth(upto4000km)LimitedWarrantyforBattery/Charger
Batteries and battery chargers have traditionally been our largest source of warranty
support. Right now, we are trying to tackle this and are only selling quality lithium
packs developed in partnership with Samsung or sinlion. The battery and charger
warranty is 6 months, and it would cover things like:
Faulty BMS circuits that trips below rated current or cause premature pack
cutout
Loose Internal cell tab soldering
Warranty does not cover:
Lithium batteries that have self-discharged from being left on the shelf for an
extended period of time
Water damage, which does not affect the cells but can lead to unreliable BMS
circuit behavior
Lithium batteries are liable to self-discharge over time because the BMS circuit
itself draws current from the battery pack. Although the amount of current is
usually small ( < 1mA typically) it is still enough to kill a battery in 1-2 months if
it is stored in an initially flat state. If you plan to store a lithium battery, be sure to
top it up with a charger at least once every month.
Often, we get issues that are wiring related, such as a fuse holder that starts to melt
from being loose, or a connector that gets corroded. In these instances, we will send
or replace just the wiring part.
OneYear(upto8000km)LimitedWarrantyforMotor/Controller
This warranty covers material and manufacturing defects in the motor and controller
itself, and not issues related to installation or physical damage. For instance, the
following items would not be covered by our motor warranty:
Problems resulting from Axle Spin-out
Water damage
Overheating damage
Broken Spokes
Examples of things covered by motor warranty:
Damaged sensors or gears in hub motor
Damaged freewheel mechanism
Bad ball bearings
Cracked spoke flange

20
Bad connector
Motor / controllers have a 1 year warranty. Warranty only covers the controller
when used with 36V or 48V battery packs with our own hub motors. Some examples
of things that would be covered:
Severed wire inside the controller enclosure
Random shorted mosfet when not caused from an axle spinout
Things that are not covered:
Controller that fails when used with 3rd party motor system
Corrosion of connectors from water exposure
Controllers that are modified for more than 60V
We can't really warranty controllers that are used with 3rd party motor systems. It is
possible to have a hub with very low winding resistance (think short circuit) which
would fry the controller mosfets when throttling from a stall, as none of the
controllers have pulse-by-pulse current limiting to protect them in this situation.
OneYear(upto8000km)LimitedWarrantyBicycleforotherComponents
Anything sold by us not included under motors, batteries, controllers, or charger is
covered under 6 months warranty. This includes such items as fork, brake lever,
display, throttles, freewheels and miscellaneous connectors/cables/tools. This
warranty does not include water damage, physical damage and normal wear and
tear. These components therein are warranted to the original retail purchaser
against manufacturing defects in materials and/or workmanship for a period of 12
months from the date of original retail purchase.
Returns
If you Change your mind and simply want to return it for a refund within 7 days of
receiving it, please make sure the bike in new condition and well packed, but
depending on circumstances we will charge a restocking fee( 20% of MSRP).
Shipping fee and other service fee are not refundable, and you are also responsible
for returning the item to us. We don't encourage either impulse purchasing or
impulse refunds, so spend the time in making the decision
Exchange
If you purchased something in error and need to exchange it for a different product or
model within 7 days, please make sure the bike is in good and unused condition. The
20% of MSRP restocking fee is still applicable in this case, depending on the condition
of the returned bike. We will not cover the shipping for the trade-in or desired
product.
This manual suits for next models
2
Table of contents
Other EMMO Scooter manuals
