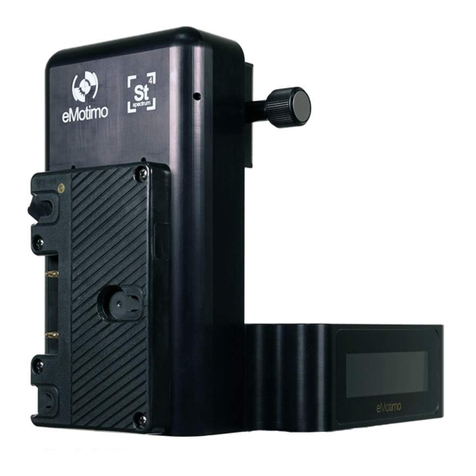
eMotimo spectrum ST4 User manual

eMotimo spectrum Instructions B003 - Copyright © 2016 eMotimo LLC
1"
eMotimo spectrum Instructions
Firmware B003

eMotimo spectrum Instructions B003 - Copyright © 2016 eMotimo LLC
2"
Hardware:
1) Mounting:
Mount camera to Arca-Type clamp illustrated above. You will need to have an Arca-Type
L-plate mounted to your camera (this is not included by default with spectrum orders). If
you do not already have one, we offer one in our store here:
http://store.emotimo.com/universal-q-r-l-plate-p111.aspx
This L-plate is shown in use below:

eMotimo spectrum Instructions B003 - Copyright © 2016 eMotimo LLC
3"
2) Ports:
3) Power: 12-24V. Minimum 2A. 3.5A preferred. Connector: 2.1mm x 5.5mm x
12mm circular barrel connector – center positive.

eMotimo spectrum Instructions B003 - Copyright © 2016 eMotimo LLC
4"
4) Controller:
5) Connection – easiest way to connect.
a. With remote off (no flashing or lights on), press and hold the share button
with your left thumb, and then press and hold the PS button (middle) with
your right thumb. When LED of the remote flashes white with quick blinks,
let both buttons go.
b. Power on the spectrum, wait 3 seconds and then press the spectrum’s
center button of the navigation joystick (you will feel a click a you press in).
The remote’s LED should turn light blue in a couple seconds.
c. If you want to see this process in action, watch instructional video here:
https://vimeo.com/159236220
6) Charging Remote – make sure your remote is fully charged before you head out
into the field. Plug in a micro USB cable (not included, but typical of many

eMotimo spectrum Instructions B003 - Copyright © 2016 eMotimo LLC
5"
phones / cameras) to the PS4 and then USB end to a computer. Look for an
orange glow on the back of the PS4 while it is charging. Once this turns off it is
fully charged. Watch out! Many field packs with USB ports will not charge the
PS4. Use the orange glow as an indicator that the charging process is working.
If the remote’s battery gets really low or sits for a long period of time, it might not charge
(indicated by orange glow). If it isn’t charging or connecting, reset it. You can do this by
using a thin tool to press the reset button on the bottom of the PS4.

eMotimo spectrum Instructions B003 - Copyright © 2016 eMotimo LLC
6"
Applications:
General firmware navigation:

eMotimo spectrum Instructions B003 - Copyright © 2016 eMotimo LLC
7"
Real time moves:
Power on the unit and select the first menu setting (Live Motion). Now you are on a
motor presets page that allows you to drive the head around and experiment with some
predefined motor move profiles.
On this page, use the Up/Down DPAD and Navigation Switch buttons to select a motor
move profile. The names and general parameters for relative speeds and accelerations
are shown, listed from 1-7.
You can hit Triangle to cycle through the motor profiles on this screen and others. There
are some motor profiles that are slow, some that are fast, some that are nearly silent,
and some are super damped.
Please bring the rig to a stop before hitting the Triangle – some motor settings are really
fast and you can crash the head easily.

eMotimo spectrum Instructions B003 - Copyright © 2016 eMotimo LLC
8"
Camera Triggering from Remote
Using right trigger (R2), a half press is focus, and a full press is shutter/focus to trigger
your camera to shoot. This functionality is for fun or for hot head camera still shooting.
This triggering is active in most modes and is good for firing test shots before starting a
timelapse sequence.

eMotimo spectrum Instructions B003 - Copyright © 2016 eMotimo LLC
9"
Presets – GoTo Positions:
There are four GoTo presets you can program. To set, scroll over to the GoTo positions
pages. Do this from the main menu by selecting the top menu (Live Motion) and then
pressing the right DPad button or right on the Navagation joystick until you see the GoTo
frames headers. The first heading you will see is the GoTo Presets: Square. By moving
right on the Dpad or right on the Navigation switch you will find the next GoTo preset,
which is GoTo Presets: Circle. Keep scrolling right to program all four presets.
Programming a preset:
1. Target: Set your target parameter by moving all 4 axis to a position you want to
lock in as a preset. Press X to lock in this position.
2. Time: Once Time is highlighted, scroll up and down to program the amount of
time/duration you want your move to take to arrive at your target position.
3. Ramp: Program the acceleration and deceleration in seconds at the start and end
of your move to the target position. Ramp is included in the overall duration of the
shot. In other words, ramp time is not added to the overall time of the shot.
4. Clear: Press X twice to clear your target position.
Once a preset is programed, you can move the head around freely. When you hit the
preset button, the head will drive all 4 axis to the preset (GoTo target position) with the
qualities you programed in to that preset.

eMotimo spectrum Instructions B003 - Copyright © 2016 eMotimo LLC
10"
Record and Playback screen:
Record and Playback mode allows you to record a move live and have the spectrum play
/ repeat that move back to you over again. To set Record and Playback, start by
selecting the top menu (Live Motion) and then pressing the right DPad button or right on
the Navagation joystick until you see the Rec and Playback heading.
1. Use triangle to set the feel of your move. Use the DPad up and down to select
Record.
2. Press X on the remote to start the recording
3. You have 10 seconds of time to record your move. The capture rate is 50Hz with
500 keyframes.
4. Move the head any way you want with live controls*
5. When the Record function is finished you will be able to use the Dpad or
Navigation joystick to move down to Play.
6. When you hit the Play button by pressing X, the unit will return to start**, pause for
1 second and then replay the move.
Known Issues for REC/Play;
•*There currently is no visual indicator that the head is recording or that it has
stopped. Recording is finished when cursor is active
•**The return to start is hardcoded to take only 3.0 second with 0.5 second
ramp. If you create a long on a long slider, this will exceed speed limits and
the unit will stall.
•You cannot save these moves
•You cannot record less or more that the preset amount.
•Clear and Return to start menu options are not active.
"
"

eMotimo spectrum Instructions B003 - Copyright © 2016 eMotimo LLC
11"
Programmed moves:
Setup is 2-point SMS or 2 Point Video: Use the up and down D-Pad on the remote or
the 8 ways switch to navigate through the setup screens, there are 4 of them. Center
button on the spectrum navigation joystick is the same as X on the remote.
You need to select (highlight) a value to change it. You do this by using the Center
button on the spectrum navigation joystick, or the X on the remote.
During the setup process, when choosing values, the DPads up/down buttons on the
remote move values the smallest amount. Using the DPads left right increments larger
values.
Parameters defined:
1. Type:
a. 2 Point SMS TL: This stands for a 2-point shoot-move-shoot timelapse
shot. If you are shooting timelapse and want the spectrum to trigger your
camera to shoot, select this shot type.
b. 2 Point Video: This stands for a 2-point video shot. If you are shooting a
continuous video move, select this shot type.
2. StartPoint: This is where your move will start. Once highlighted, control and
move all 4-axis to the point where you would like your move to start.
3. End Point: This is where your move will end. Once highlighted, control and move
all 4-axis to the point where you would like your move to end.
4. Interval (SMS TL): Interval is your frame rate for timelapse or stop-frame
animation. If you select a 2.0 second interval, the eMotimo spectrum will trigger
your camera to start a shot every 2.0 seconds. If you want to speed time more,
select a longer interval (good for shots taken over a long duration of time). If you
want to speed time less, select a smaller interval (good for shots taken over a
short duration of time). Interval time always needs to be set longer than the
exposure time set on your camera. TIP: When shooting long exposures, set your
interval to twice your cameras shutter speed.
5. Static Time (SMS TL): Static time is the amount of time the spectrum remains
stationary while triggering your camera. As a rule of thumb, take your camera’s
exposure time and add 0.1 seconds onto it. For example, if you are shooting a 2.0
second exposure, select a 2.1 second static time. If you are shooting daytime
shots with 1/100th sec. exposure, use default of 0.1 seconds static time.
6. Moving shots (SMS TL): Select how many frames you want your move to take.
Based on what you set your interval at and how many frames you want in your

eMotimo spectrum Instructions B003 - Copyright © 2016 eMotimo LLC
12"
shot, the spectrum will calculate how long your shot will take to complete in real
time at the bottom of the screen.
7. Duration (Video): In seconds, select how long you would like your move to take.
8. PreRoll (Video): This is the delay (in seconds) you can program into your shot
before your move starts. This is a great feature for setting delays in Ping Pong
shot style.
9. PostRoll (Video): This is the delay (in seconds) at the end of your move. This is
only active during a Ping Pong style shot. This is a great feature for setting delays
in Ping Pong shot style.
10.Ramp (SMS TL and Video): Ramp controls how smooth your starts and stops in
your final footage are going to look. A low ramp means you are going to have an
abrupt start and stop and a high ramp means you will have a very smooth start
and stop. The number you select for your ramp in SMS TL is the number of
frames in the final footage that show acceleration and deceleration. If you have 50
frames of ramp, you will have 50 frames at the beginning of your shot and 50 at
the end of your shot where the footage shows acceleration and deceleration. If
you are shooting in Video mode, your ramp will be represented as duration in
seconds. This will be the time at the start and end of your shot that is ramped.
11.Lead In and Lead out (SMS TL): Stationary lead-in/out is the number of
stationary shots at the beginning and end of your programmed move. For
example, if you set “24 in 48 out”, your program will have 24 shots at the start and
48 shots at the end where the camera and TB3 are not moving. If your frame rate
is 24 FPS, then you can think of it as 1 second of stationary time at the start of
your shot and 2 seconds of stationary time at the end of your shot.
12.Shot Style (Video):
a. Run Once: In this style, your move will run once, meaning once your move
completes, your move is over.
b. Ping Pong: In this style, your move will run continuously, meaning once
your move reaches its end point it will return to its start point with the same
ramp and duration and with continue this cycle over and over until
prompted to stop. In the style, your PostRoll will come into play at your end
point before your move returns to start.
13.Delay (Disregard – know bug): If you would like to add a start delay to your shot
you can do so here. Start delay allows you to start your shot after a specified
amount of time.

eMotimo spectrum Instructions B003 - Copyright © 2016 eMotimo LLC
13"
14.Summary/ Review page: If you are happy with your settings, then get to the last
screen and hit the center button (or X on controller). It will go to start, and then tap
it again to shoot.
While Shooting, pressing X on the remote or the center button on the spectrum will
pause the move. While paused, using DPad’s up/down buttons you can scrub the move
and go to a frame. The spectrum will move to that frame once you un-pause the shot by
hitting the X button.
After Shooting, a menu to repeat, reverse, or reset will pop up. Select the option you
want.
Hint – If you want to adjust timing or shot parameters, use the D-Pad to go back into the
setup process to change a value. You can even go back and adjust the start and end
points. Start the shot back up by getting to the review screen.

eMotimo spectrum Instructions B003 - Copyright © 2016 eMotimo LLC
14"
Soft Stops:
To avoid crashes, you can setup Soft Stops:
1) Go all the way left on the track, left on pan, down on tilt to the limit you want – hit the
L1 button (button above left trigger – L2)
2) Go all the way right on the track, right on pan, up on tilt to set the limit you want – hit
R1 (button above right trigger- R2)
3) If you make a mistake, hit option to clear all stops and start again
Now when you drive around, you will decelerate smoothly to hit the soft stop and not run
over. When you hit stops on pan and tilt, you will feel a rumble. Start slowly here and
don't change motor profiles while you are moving or you can run over and
crash. eMotimo will add software to enforce motor profile changes only during stops
later.
"
Other manuals for spectrum ST4
2
Table of contents
Other eMotimo Camera Accessories manuals
