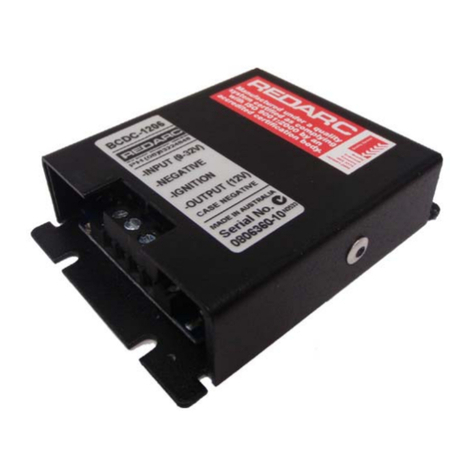
EMROL MultiPac Pro User manual

POWERFINN OY
Perämiehenkatu 6
24100 SALO
tel +358 (0)2 - 777 290
fax 2 - 777 2918
email: [email protected]
+358 (0)
Concept & Distribution
EMROL bvba
Zandstraat 106
B - 2980 Zoersel
Belgium
Tel: +32 3 309 24 24
Fax: +32 3 311 79 50
E-mail: [email protected]
Web: www.emrol.com
MULTIPAC PRO
INSTALLATION
AND USER’S
MANUAL

© 14.1.2003 Emrol bvba
Rights to chances reserved.
USER’S MANUAL FOR:
MultiPac Pro

Appendix C. The top plate label.
MULTIPAC PRO
EMROL +32(0)3 309 24 24 WWW.EMROL.COM
The charger should be installed into a dry environment. Read
instructions carefully. Connect the charger into an earthed socket only.
Always push the reset button before disconnecting the battery.. Check
always the liquid level of the battery.
STATUS Battery not connected = red
Constant current = orange
Constant voltage = orange
Completition = fast flashing orange
Pause/Trickle charge = green
Explosive gas will be generated during the charging process. Do not
use any open fire or sparking equipments close to the battery. The
Charging space must be very well ventilated.
Warning! Error = Flashing red.
28-45Ah 5h
35-55Ah 20h
6V
8V
12V
24V
36V
48V
45-70Ah 5h
55-85Ah 20h
110-170Ah 5h
135-210Ah 20h
170-265Ah 5h
210-330Ah 20h
70-110Ah 5h
85-135Ah 20h
265-410Ah 5h
330-510Ah 20h
A
BCDE
F
1
3
245
6
Unsealed (Wet) Sealed (Gel)
A
B
C
D
E
F
28-45Ah 5h
35-55Ah 20h
45-70Ah 5h
55-85Ah 20h
110-170Ah 5h
135-210Ah 20h
170-265Ah 5h
210-330Ah 20h
70-110Ah 5h
85-135Ah 20h
265-410Ah 5h
330-510Ah 20h
1
2
3
4
5
6
Wet
Gel
Capacity Voltage
POWERFINN CHARGERS
GENERAL
1
2
The MultiPac Pro can be used for a variety of battery types.
The MultiPac Pro is one of the few chargers that can charge
sealed and unsealed batteries in 6, 8, 12, 24, 36 and 48V for
different capacities.
The MultiPac Pro is a battery charger which uses modern
switching technology. Its intelligent micro-controller extends the
life of the battery by controlling the charging process. The
equipment is small, light and meets the safety and EMC
requirements established by the EU.
We believe that you will be satisfied with the reliability and
batteryfriendliness of MultiPac Pro- charger.
Keep this manual on hand for future reference.
The selection of these 6
different voltages can be
made by adjusting the
selector switch on the right
hand side.
With each of the 6 voltages
you can chose between 6
different charging currents
each for sealed and
unsealed batteries.
MultiPac Pro
- 5.0A -> 28 - 45 Ah/5h
- 7.5A -> 45 - 70 Ah/5h
- 12.0A -> 70 - 110 Ah/5h
- 18.5A -> 110 - 170 Ah/5h
- 29.0A -> 170 - 265 Ah/5h
- 30.0A -> 265 - 410 Ah/5h
With the MultiPac you can charge batteries from 28 to 410 Ah/5h
in 6, 8, 12, 24, 36 and 48V.

INSTALLATION
3
When choosing a location for the charger, please note the
following:
The location must be dry, dust-free, and indoors. The acceptable
temperature range for operation is -20°C* to +40°C. A higher
ambient temperature will limit the current supply, see Appendix
A. CAUTION: The charger is not waterproof. Keep it dry and
away from areas of high humidity to avoid the risk of electrical
shock and damage to the charger. .
The equipment
may be installed
either vertically or
horizontally.
To ensure
sufficient
ventilation, leave
approximately 10
cm of space
around all sides of
the charger. Do
not cover the
equipment.
The charging process generates explosive hydrogen gas.
Keep the area well ventilated. Never use an open flame or
equipment that produces sparks near the charger.
* The standard power cord may break if bent in temperatures below -5°C.
APPENDIXES
8
Appendix A. The effect of ambient temperature on output power
and fan speed.
-20
10
20
30
40
50
60
70
80
90
100
-10 0
2000
2500
3000
3500
4000
4500
5000
10 20 30 40 50 60 70
Output power/ %
Temperature
/°C
Fan speed / rpm

TROUBLESHOOTING AND REPAIR
6
The most common faults are described in Section 4 of the
operating instructions.
If the charger does not come on when the battery is connected,
there are a few things you can do.
- Check the supply voltage.
- Check if the battery voltage corresponds with the voltage
selection switch. If not, disconnect the battery, adjust the
voltage selection and reconnect the battery.
If the cause of malfunction cannot be found, contact your retailer or
EMROL bvba..
The charger should be repaired by authorized personnel only.
WARRANTY
7
The equipment has a warranty of one year from the date of
purchase. The warranty covers manufacturing and component
failures. The warranty is valid only when the equipment is installed
and used according to the instructions provided in this manual.
The warranty becomes void if the unit is opened.
Keep the receipt as evidence of the date of purchase.
Read these instructions carefully prior to charging. Familiarize
yourself with the safety instructions in Section 5.
To charge a battery with MultiPac Pro, follow these instructions:
Read also the
information in the label on top of the charger. Appendix C.
Ensure that the work environment meets the conditions
described in Section 3.
Put the battery type and voltage selection switches in the
correct position. Be very carefull! Selecting a wrong battery
type may damage you battery!
The charger constantly monitors its own temperature level and
reacts by controlling the charging current and fan speed. Under
normal conditions the charger will not overheat
WARNING: Because some sparking may occur as the cables
are connected to the battery, the battery should be placed as far
from the charger as possible and the charger's cables extended
to reach the battery.
. (See appendix
A).
Connect the charger cables to the battery terminals: the
positive (+) cable to the positive (+) terminal and the negative (-)
cable to the negative (-) terminal. The positive cable of the
charger is red and the negative cable is black.
OPERATION
4

During the charging process the STATUS light will show the
state of the charge.
Red => Battery not connected
Orange => I,U phase (constant current, voltage)
Fast flashing orange => Ia (completion)
Green => Pause / Trickle charge
Flashing red => Error
The battery is fully charged when the STATUS light is green.
After the main charging the MultiPac will switch to maintenance
charging.
To avoid sparking always push the reset button before
disconnecting the battery.
If the charging cables are too long, you can wind to reel the extra
cables. If there is a need for longer
cables, make sure you do not use cables with a smaller
diameter and always connect the sense cable when using
longer cables.
If the STATUS light shows a constant red light instead of
orange, the battery voltage is either too low or too high, or the
battery is not connected to the charger. Make sure the battery is
suitable for the charger and the voltage selection switches are
in the correct position and push the reset button on the side of
the charger.
Should the battery not be fully charged when MultiPac switches
to maintenance charging, the process will terminate and the
STATUS light will blink red. This may occur if the battery is
faulty or if the battery and the charger are incompatible (see
Section 2).
Do not cut the cables.
In addition to the safety measures in Section 3, the following
personal precautions should be taken whenever charging
batteries:
For emergency situations ensure in advance that help will be
available in time of need.
Batteries contain acid that is harmful to eyes, skin and clothes.
Always wear overalls and safety goggles. Never touch your
eyes with unwashed hands after handling batteries.
Ensure that a working, fresh water outlet is available. If acid gets
into your eyes or on your skin, immediately flush the area with
plenty of water for several minutes. If visible injury occurs,
contact a physician immediately. In the case of eye injuries,
always consult a physician.
The charging process generates explosive hydrogen gas. Do
not smoke or otherwise bring burning or sparking matter to the
vicinity of the charger when it is operating.
If a short-circuit occurs, the battery may explode or the item
causing the short may melt. Keep the work area clear of tools
and debris. Remove jewelry, watches, etc. before working with
the battery.
SAFETY INSTRUCTIONS
5
When connecting the cables (step first connect the charger
cable to the terminal of the battery which is not connected to the
vehicle chassis. Then connect the other cable to the car chassis
or negative post far away from any fuel lines and from the fuel
induction ie. carburator
When finished charging (step disconnect the cable
connected to the chassis of the vehicle (after turning-off the
charger.
ÜCAR USE:
)
.
) first
Table of contents

