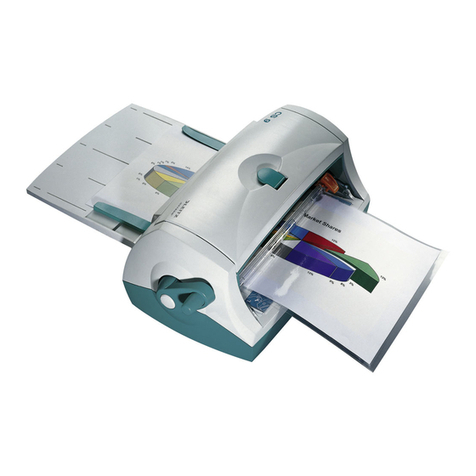
Emseal Centaur User manual

Assembly & Operators Manual

Ph : +61-3 9874 6155
Fax: +61-3 9874 8528
6-8 Azalea Street
Vermont, Victoria 3133
AUSTRALIA
www.emseal.com.au
COPYRIGHT NOTICE
DISCLAIMER
This manual is copyright © 2002 Emseal Pty Ltd. No unauthorised reproduction is
permitted.
Emseal Pty Ltd has taken care to ensure the accuracy of the information
presented, however accuracy is not guaranteed.
Emseal Pty Ltd can not be held liable for any errors or omissions from the
following manual. If in doubt about any of the following procedures, please
contact us before proceeding.
Rollers : As rollers are the most important part of the machine, damage caused
by misuse or unsuitable objects being passed through the rollers is not covered
by warranty.
Copyright © 2002, Emseal Pty Ltd.
Copyright © 2002, Emseal Pty Ltd.

Index
01 - About the Centaur
02 - Assembling the mobile stand
03 - parts and safety tips
04 - Setup
05 - The control panel / caring for your laminator
06 - Thermal laminating introduction
07 - Loading thermal film
08 - Pressure sensitive film introduction (optional extra)
09 - Loading pressure sensitive film
12 - Heat assist mode - double sided adhesive
13 - Selecting film - an introduction to laminating
14 - Preparing items for laminating
15 - Film tension adjustment
16 - Troubleshooting
19 - Adjusting roller pressure

The centaur laminator is a hybrid hot shoe / hot roller laminator, combining the best features of both
types of laminators. It provides very high quality, scratch free thermal laminating and pressure
sensitive laminating.
The Centaur is designed to provide years of trouble free service, however it is important that you
read this manual first in order to familiarise yourself with this machine.
About the Centaur
Page 1 of 20
Warranty Information
The Centaur laminator’s warranty is against failure of components or workmanship, but
does not cover damage caused by misuse or accident.
Rollers : As rollers are the most vulnerable part of the machine, damage caused by
misuse or unsuitable objects being passed through the rollers is not covered by warranty.
In the event of a warranty claim, please contact your dealer for assistance.

Using the spanner
provided, attach the
stringers to the leg of the
trolley, making sure the
tooth washers supplied
have been used. DO NOT
fully tighten the bolts yet.
Attach the cross brace if
supplied. Once the bolts
have been tightened,
attach the other leg.
Once this has been done,
check again that all bolts
are tight, and that the
trolley is stable.
Holes for
reinforcing
brace to rear
of trolley
Assembling the mobile stand.
Page 2 of 20
IMPORTANT SAFETY ADVICE
On top of each side of the stand is a hole for the securing
bolts. These line up with securing holes underneath the
laminator.
Once the laminator is on the stand and aligned with the
holes, firmly bolt it to the stand as shown. It is important to
do this before the machine is moved on the stand.
This stand is not designed for use on rough or angled
surfaces, and should be moved by two people at all times.
Lock the castors when in use.
6 x stringer bolts with washers
2 x machine bolts
1 x Spanner
front
top
1 Pair stand legs with castors
3 x Stringer bars

Page 3 of 20
Centaur parts
In the box you will find
2 or 3 Mandrels (depending on options)
Load plate
Mobile stand components
Tool kit
Manual
Safety Tips
Always lift from the base of the machine, never from the idler bar.
Always secure the machine to the stand with the securing bolts.
When moving the machine, have two people to push the mobile stand.
Move the mobile stand slowly.
Do not move the machine across very rough or sloping surfaces.
Do not leave power cords where people may trip on them.
Be careful of loose items such as ties, jewellery and long hair near the rollers.
Keep hands and fingers clear of the rollers when running.
Keep the work area clean to avoid the risk of tripping.

Page 4 of 20
Parts of the Centaur
Setting up the Centaur
1
5
2
6
3
4
1.
2.
3.
4.
5.
6.
Control Panel
Rollers
Feed table
Emergency Stop switch
Upper mandrel
Lower mandrel
7. Idler bars
8. Rewind mandrel
Positioning the Centaur
It is important to select an appropriate work area for the Centaur. The following are guidles to
selecting the best position.
Make sure the work area is well lit and ventilated.
Keep the machine out of drafts such as air conditioners, open windows and doorways. Drafts
will cool the film during thermal lamination and cause poor results.
Try to keep the machine in a clean environment. Dust will cause noticeable marks on
laminated items.
Make sure that the front and back of the machine are easily accessible. The laminated items
leaving the back of the machine should be able to either fall to the floor or exit onto a table
Keep power cords and the footswitch cable out of the way to avoid tripping.
Unpacking the Centaur
1. Remove the mobile stand from the box and assemble as shown in in the instructions.
2. Lift the laminator from the box. At least two people are required to lift this machine. Remember to
bend your knees when lifting.
3. Remove the plastic covering. Place the laminator on the mobile stand and attach the securing bolts.
DO NOT LIFT BY IDLER BARS OR ROLLERS - THIS WILL CAUSE
DAMAGE AND VOID WARRANTY. ALWAYS LIFT FROM BOTTOM OF SIDE CASES.
7
7
8

Page 5 of 20
Caring for your laminator
Don’t leave hard items on the feed table, if they are pulled into the rollers they will cause extensive
non-warranty damage to the rollers.
Don’t cut against the rollers. Any sharp instrument should be used
with extreme caution, as the rubber rollers are easily damaged with knives.
Laminate only flat and even items.
If dirty, rollers may be cleaned with a small amount of Kerosene on a soft cloth.
Do not use a scouring pad or abrasive cleaners. Do not soak the rollers with kerosene.
Do not use excessive brake pressure - you should be able to turn the rolls of film with one hand.
Do not leave the laminator on for extended periods if it is not being used. Turn the temperature
control off when the machine is not to be used for more than an hour.
Keep the temperature below 160 degrees celsius / 320 degrees Fahrenheit. Higher temperatures will
cause damage to the rollers.
Never cut against
the rollers.
The Control Panel
Speed control
Foot / Continuous switch (if fitted)
Forward / Reverse
Cooling Fans
Temperature control
Heat indicator.
Adjusts the motor speed. Clicks into `off’ position when turned
all the way counter clockwise
Allows you to select footswitch mode or continuous motor
mode. In footswitch mode, the rollers only turn when the foot
switch is depressed.
Reverse is mainly used in the unlikely event of a film wrap up. Do
not change from forward to reverse while the motor is in operation.
Cooling fans are used to prevent distortion during thermal
laminating. If no footswitch is fitted, this will be in position 2.
A simple thermostat control - dial the required temperature and
wait for the heat indicator to turn off.
This light will be on while the machine is heating, and off once
it reaches temperature. It will turn on and off during normal
operation as the thermostat maintains temperature.
1
1
2
2
33
4
4
5
5
6
6

The theory - Thermal laminating film
Thermal laminating, also known as encapsulation, is the original and most common form of
laminating. Its popularity is due to it’s low cost, and the durability and protection it provides to the
laminated item.
Thermal laminating film consists of a layer of plastic, usually polyester, which is then coated in a
heat sensitive adhesive. This adhesive melts when heated, and adheres to whatever it is pressed
against. Once cooled, it forms a flexible and watertight bond to the laminated item. This process
is usually irreversible - once the adhesive has stuck to the item, it cannot be removed.
The Centaur’s heated upper roller provides a perfect scratch free finish.
The built in cooling fans are to be used during thermal lamination to prevent distortion of a
laminated item during cooling. Rapid cooling of the item as it passes between the front and rear
rollers is the best method of preventing distortion and curling, particularly if laminating thick items
or using thick films.
Page 6 of 20
Thermal laminating - introduction
This loading diagram illustrates the film
path, and the parts of the laminator.
Upper Supply roll
Lower Supply roll
Upper Idler Bar
Upper Heated Roller
Lower Roller
Heater Bar
Lower idler bar

Page 7 of 20
Thermal laminating - loading
Step 1
The most critical thing to remember during loading is that the film must be loaded so that the
adhesive always faces away from the rollers. The non adhesive side is the only side that can touch
the rollers. Allowing the adhesive side to come in contact with the rollers may cause film wrap ups and
roller damage.
If you are using a gloss film, the non shiny side is the adhesive side. Some film comes with a sticker
indicating the adhesive side.
Take the mandrel with the large pulley, and load it so that the film unwinds from the back, with the matt
side facing you. Load this mandrel onto the laminator. Now take the lower mandrel and load the film so
that the matt side comes up from the rear, with the matt side facing you.
Step 2
Adjust the thermostat to the temperature recommended by
the film manufacturer. This is most likely around 120C / 250
F. Heat up time is around 5 minutes. This will give you time
to position the film so that you are ready to load.
Pull the film from the top roller so that it passes under the
top idler bar, and lies across the top roller.
Step 3
Pull the film around the lower idler bar, and bring it up so that
it lays over the top roller and the film. By now the machine
should be well on the way to being hot enough to laminate.
Once the machine is hot enough, the film will become clear
where it is contacting the heater bar and upper roller, and
the thermostat lamp will go out.
Upper film roll Lower film roll
This shows the non standard
rewind pulley from the pressure
sensitive laminating option.

When a roll of film comes to an end, you don’t need to repeat the entire loading process to reload the
laminator.
1. Cut off the film near the idler bar. TAKE EXTREME CAUTION NOT TO DAMAGE THE ROLLERS!
2. Load the new roll of film onto the mandrel.
3. Pull the film through and lay it against the old film which is laid over the roller. Allow the machine
to heat, then stick the layers together.
4. Select the motor mode required if available - foot switch control or continuous. Turn on the motor,
and let the film be pulled through the rollers. You are now ready to laminate!
Page 8 of 20
Step 4
If installed, switch the laminator to `foot’ control
mode and set the speed control to a low speed.
Take the plastic load plate and position it in the nip
of the rollers. Press the foot switch or turn on the
speed control, and push the load plate gently into
the machine. The rollers will grip the load plate and
pull it, and the film, through the laminator. Allow it to
pass through the rollers and exit the back, then cut
it free. The film can easily be peeled from it. Ensure
that the top and bottom rolls are aligned, to avoid
adhesive contacting the rollers.
Step 5
The brake pressure can be increased slightly to help the film run straight. Excessive brake pressure
may cause problems - make sure you can always easily turn the rolls of film with one hand. For more
information, see the machine tuning section. The initial wrinkles from loading will quickly pull straight,
and the film will look even and clear. Excess wrinkles or too much tension required to pull out
wrinkles may indicate faulty or poor quality film.
Always test laminate some scrap paper before comitting valuable work to be laminated.
Thermal laminating - loading
Thermal laminating - reloading
Congratulations, you are now ready to laminate!
Film is cut, old
roll is removed.
New film pressed
to old film. Film is
then pulled through
rollers.

Page 9 of 20
Pressure sensitive laminating - introduction
REQUIRES OPTIONAL TOP REWIND
Release Paper
Adhesive layer
Plastic layer
The theory - Pressure sensitive film
Cold or Pressure Sensitive laminating involves using a self adhesive
film, usually with a release paper. This has the advantage of
being able to stick to difficult to laminate items,
such as some inkjet prints or similar
media.
Laminating with pressure sensitive film
involves removing the protective
layer of release paper from the film,
and then pressing the adhesive layers
firmly to the item being laminated. This
firmly bonds the film to the surface of the
item, resulting in lasting protection.
Most laminating done with pressure sensitive
laminates is single sided, as the cost of double
sided lamination is expensive.
Underlay paper
Underlay is the term used to describe an inexpensive paper material which feeds into the machine
below the laminated item. Its sole purpose is to prevent the adhesive on the pressure sensitive
film coming into contact with the rubber rollers during single sided laminating.
Cheap paper or plastic of most types can be used. It should be wider than the pressure sensitive
film, and not easily stretched. When the laminated item is trimmed flush to the edges, the
underlay will fall off and can be discarded.
This illustrates how a cross
section of pressure sensitive
film would appear.
Release paper peeled back
to reveal adhesive.
This loading diagram illustrates the film
path, and the parts of the laminator.
Upper Supply roll
Underlay paper
Upper Idler Bar
Rewind core
Lower Roller
Heater Bar
Lower idler bar

Page 10 of 20
Step 1
Make sure the thermostat is set to 0.
Load the rolls as shown. Makre sure
that the film side of the laminate is
against the table, with the release
paper facing upwards.
The core adapters on the mandrel are
designed to slide into the roll, but grip
when the core turns. Rotating the
mandrel slightly left and right as you
slide it into the core can help make this
easier.
Step 2
Position the rolls as shown on in the diagram on page 9.
Step 3
Pull the film from the supply roll forward,
passing under the chrome idler bar. It should
now be lying across the top roller, with the
release paper facing upwards and the laminate
lying against the roller.
Separate the release paper from the film, and
attach it to the core. You can use adhesive
tape or a stapler.
The exposed film should be lying on the top
roller, with the adhesive facing towards you,
Film travels under
chrome idler bar.
Release paper attached
to rewind core.
Pressure sensitive laminating - loading
Supply mandrel
Loop belt around small pulley and stretch
to top of large pulley.
Rotate the large pulley to stretch the
belt into the pulley groove.
The belt is now in position and the
rewind function is now ready for use.
Underlay paper Rewind Core
Step 4 - The rewind belt

Page 11 of 20
Step 5
Pull the underlay around the lower chrome idler
bar, and then bring it up so that it comes in
contact with the exposed adhesive. Underlay
does not always need to pass behind the lower
idler bar.
Press the underlay to the adhesive so that the
they are both stuck firmly together.
Check the brakes on both rolls, they should only
be lightly applied so that the rolls can be easily
turned with one hand.
Step 6
Set the motor to a low speed setting, and
`footswitch’ mode if you prefer this.
Take the plastic load plate, and push it between
the rollers as you run the motor at a low speed.
The film and underlay will both be pulled through
the laminator, and pass out the back.
Remove the load plate from the film, and slowly
run the film until it pulls straight.
Position the feed table on the front of the
machine so it is securely placed.
Push the load plate into the turning rollers.
Pressure sensitive laminating - loading
Film with backing paper
Film removed from backing paper
Underlay paper
Supply roll
Rewind mandrel
Upper idler bar
Rollers
Lower Idler
Lower supply roll
Underlay roll
Loading Diagram
Press underlay to film. Paper will stick to the film.

Double sided adhesive
Heat Assist mode
Film with backing paper
Film removed from backing paper
Double sided adhesive film
Lower Idler
Double sided adhesive
Loading Diagram
Double sided adhesive film can be used for items that are to be laminated and then mounted, or for
making self adhesive stickers.
This can be done as a single process when using pressure sensitive film, or as a separate process.
To use double sided adhesive, load the laminator as
shown in the previous section, but instead of loading an
underlay film, load the roll of double sided adhesive.
As always, ensure the adhesive faces away from the
rollers.
It is important not to pass the double sided adhesive
behind the idler bar, as it will stick and require a difficult
clean up.
Laminate as normal. Once finished, you will be able to
peel the backing paper from the adhesive as required.
If you wish to apply a double sided adhesive to an item, but not laminate it at the same time, load an
underlay film in place of the pressure sensitive film. Pass the item through the laminator. Once it is
done, cut to the edges and remove the underlay paper.
Pressure sensitive laminates work best when warm, as the adhesive is softened. If you are not
already operating in a warm climate, you can turn the thermostat to a warm temperature in order to
improve the quality of the adhesion, and prevent the silver flecking effect caused by air bubbles.
This improvement can be quite noticeable, particularly in a cold environment. The rollers should be
warm, but not so hot you can’t leave your hand on them, as this may melt the film.
An appropriate temperature for use in heat assist mode would be around 40-60 C / 104-140 F.
Page 12 of 20

Pressure sensitive laminating became popular with the advent of wide format inkjet printers, many of
which use silicon oils when printing. Thermal laminate will often stick poorly, or not at all, when
trying to laminate some of these types of prints. If you prefer to laminate an inkjet print with thermal
film, it is recommended that you test laminate a sample of the same paper and ink used first. Also
note that the drier the ink, the better the adhesion.
The choice between Thermal or Pressure sensitive laminate depends on many factors :
Do you require full encapsulation? Will the item to be laminated accept thermal adhesive?
Is the paper or ink suited to heat exposure?
Page 13 of 20
An introduction to laminating
Thermal or Pressure Sensitive laminating?
Selecting laminating film
The Centaur is designed to provide reliable high quality laminating on a wide range of film thicknesses
and for many different types of paper. When laminating you may encounter a wide variety of items to
be laminated, on many different grades of paper and in conditions ranging from brand new to old and
damaged.
Laminating is much the same for thermal and pressure sensitive applications. The following section
shows how to laminate, with explanations where the process differs for thermal and pressure sensitive
laminating.
If you are an experienced operator of laminating machines, much of the following information will
already be known to you. If you are a first time reader, we strongly recommend that you carefully read
the following and make sure you understand the process involved. While laminating is not
tremendously difficult, it is important to understand the technique involved.
If you are new to laminating, you should expect that there may be some losses during your first
experience with the laminator. Consider this the cost of training yourself to be a good operator, and
don’t begin laminating with an expensive print! Practicing laminating with a few sheets of newspaper
will pay for itself as you gain experience.
Whether you are laminating using thermal or pressure sensitive film, it is recommended that you always
use a high quality laminating film.
High grade film behaves more predictably during laminating, and gives a much better result. Very low
priced film may seem attractive, but can cause problems, loss of items being laminated and excess
wastage due to difficulty in tuning the machine to run the film properly.
A more expensive film will often be as economical as a cheap film, as it can be tuned easily, will run
predictably and result in less wastage.
Thermal film Pressure sensitive film
Maps, posters, charts
Some inkjet prints
Some photographs
Heat sensitive items - wax print, plastics
Inkjet papers and inks
Vinyl lettering

Page 14 of 20
Preparing items for laminating
Down to business - laminating
The very best item to laminate is a thick paper which is dry, and very flat. Of course, not all items to be
laminated will be like this, and you will most likely find yourself handling rolled items, very thin paper,
items which have been creased or folded, and very recent prints which are still damp.
While an item which has been tightly rolled will laminate perfectly, you may wish to flatten it by rolling it
in the opposite direction. At the very least, it is a good idea to flatten the leading edge of the item so
that it will feed evenly into the rollers.
Ensure that items to be laminated are free of dust and debris. Make sure that there are no staples or
paper clips attached to the item, as these may damage the rollers.
Set the machine to the required temperature if thermal laminating, and wait for it to reach
temperature.
Thermal laminating
Switch the laminator to a low speed, and to foot mode. Hold the item on the feed table
in front of the rollers.
Take your time to position the item.
Prolonged exposure to heat will cause expansion and buckling of the item. Do not take too long
before feeding the item into the rollers.
Pressure sensitive laminating :
Depress the foot pedal, and slide the leading edge of
the item into the rollers. The two most important points
are :
The leading edge must be flat and level
You must move the item slower than the film is being
drawn through the rollers.
The item will begin to be drawn into the laminator.
1:
2.
Do
not stop the rollers, as this can leave a mark.
To ensure that materials to be laminated are dry, either use a heated drying cabinet, or keep the items
in an air conditioned, low humidity environment. Bear in mind that a stack of thick posters will take a lot
longer to dry than one or two thin prints.
!Items that are to be laminated with heat must be free of moisture
to avoid distortion and steam marks. In hot climates, you may
wish to wear cotton gloves to avoid marks from sweating hands.

As the item is drawn into the laminator, you will need to
use both hands to stretch it back and hold it flat.
Some materials will be more prone to buckling. During
thermal lamination, some materials will require very firm
stretching as they expand with heat. Thicker materials
will not require so much.
If the leading edge of the item was not fed in evenly, a
lot of stretching will be required.
If you are using thermal
laminating, turn on the cooling fans before beginning.
As the item is drawn into the laminator, you can switch the machine to `continuous’ mode, and take your
foot off the foot switch. Near the end of the item, be sure that it stays flat as the tail end feeds into the
rollers.
If you are laminating multiple items, pick up the next item as the last item finishes feeding into the
rollers. Leaving a small gap between items, feed the next item in as described above.
If you are laminating large items, be sure that they do not crush one another as they leave the machine.
You may need to have an assistant separate the items as they leave the machine and lay them flat.
If all is going well, you should have now laminated your first items. If you have experienced a problem,
please consult the troubleshooting guide,
Laminating - continued
Film tension adjustment - Thermal film
Film tension should never be a difficult matter. A good quality film will require little braking. A poor film will
require greatly increased braking pressure.
The three rules of brake pressure are :
Brake pressure is increased by turning the tension knobs clockwise, and is reduced by turning them
counter clockwise. When adjusting pressure, you should only adjust by a quarter turn at a time.
Upper and lower brake tension should be even. Film will curl towards the greater amount of brake
pressure, so film that curls upwards means that there is too much brake pressure on the top roll.
Cut a semi circle shape into a piece of laminated film. This will show the film tension
The best amount of brake pressure is the smallest amount needed to acquire a good result.
More brake pressure is not necessarily the answer.
You must always be able to turn the film rolls with one hand, feeling only light to firm resistance.
Quick brake pressure test
Page 15 of 20
Semi circle cut in film Cut curls down :
Increase upper tension or
Decrease lower tension
Cut curls up:
Decrease upper tension or
Increase lower tension

Problem : Film not laminating, or laminating in patches
Problem : Small round marks in laminated item
Problem : Streaks in laminated item
Problem : Creases or wrinkling of paper while laminating
Cause : Dust landing on items before / during lamination. Marks will have a speck in the center.
Solution : Move to a dust free environment, gently wipe items with a lint free cloth
Cause : Moisture in the paper is turning to steam
Solution : Allow item to dry, increase speed during laminating, use cooling fan at all times.
Creases and wrinkling are the most common source of problems when laminating. There are a
number of causes, and a number of different types of wrinkling. This section will help identify and
solve a wrinkling problem.
This may take the form of a series of horizontal or vertical
lines across the paper near the leading edge. They may
stop immediately or continue through the length of the item.
Pushing material too quickly into the machine
Thermal laminating - Holding material on the feed table too long allowing it to expand and buckle
Not ensuring that the leading edge is perfectly flat when it enters the rollers
Take care when feeding the item into the machine. Observe the leading edge as it is pulled into the
Problem : Creases at the beginning of an item
Possible Causes :
Solution :
Cause : Film adhesive is incompatible with the material being laminated
Solution : Check with your film supplier for a better film, or use pressure sensitive film
Cause : The temperature is too low for the thermal film being used
Solution : Increase the temperature, double check recommended temperature for film
Cause : A draft is chilling the thermal film as it passes the heated roller
Solution : Make sure the machine is out of the path of direct drafts, air conditioners, etc.
Cause : Dampness of item being laminated due to humidity or recent printing
Solution : Allow the item to dry properly, then try again
Cause : Poor quality film
Solution : Obtain a high quality film. It will quickly pay for itself.
Cause : Front roller pressure is too low, insufficient pressure to laminate properly
Solution : See technical section for adjustment of roller pressure (page 19)
Thermal film
Troubleshooting - laminating problems
Page 16 of 20

Problem : Arc shaped creases appear near the end
This is a faint arc that travels the width of the item. You may also notice
the item becoming slack as it is fed into the rollers. This may indicate:
(thermal laminating) the paper is slightly damp
(thermal laminating) the paper is expanding with heat
the rollers may not
tuned be properly (fig.1 - too much pressure) (fig 2 - too little
pressure)
l
l
lIf this occurs on all items being laminated,
Problem : Crease that travels through item
Causes :
This crease may travel as a single line through to the end, or continue
to branch off. This will be noticeable as the item becoming slack and
bulging in the middle as it is fed into the machine.
Neglecting to stretch the item as it enters the rollers
Excessive moisture
Badly tuned rollers
Problem : Film has wrapped around rear rollers.
Solution :
DO NOT EVER USE A
KNIFE OR SHARP OBJECT TO CLEAR A FILM WRAP UP
Causes of rear roller wind up :
If this has occurred while you are laminating an item, you must consider the item lost.
Stop the laminator, and switch to reverse mode. If no more than two or three revolutions have
occurred, do not cut the film. You can slowly reverse the film out of the rollers while pulling the film
at the front to stop it wrapping up on the front rollers.
If the film is very badly wrapped around the rollers, cut the film near the front idler bars, and
reverse the machine until the film is removed. Now reload the machine.
Misaligned film adhering to the rollers and pulling the film around.
Economising by cutting the film off too close to the rear roller
Incorrect film tension causing severe curling.
Once the film is freed from the rear rollers,
switch the machine to forward mode and run the machine until the film has become taut and free
of creases.
Solution :
l
l
l
Try drying the item being laminated. Increasing the roller speed may also help.
Holding back the item more firmly as it passes through the laminator can help.
If you suspect badly tuned rollers, see the roller tuning section.
Solution :
l
l
l
Try drying the item being laminated. Increasing the roller speed may also help.
Holding back the item more firmly as it passes through the laminator can help.
If you suspect badly tuned rollers, see the roller tuning section.
Troubleshooting - laminating problems
Troubleshooting - mechanical problems
fig 1
fig 1
fig 2
fig 2
Page 17 of 20
Table of contents

