Emtec MOVIE CUBE User manual

3
EN
N500H
SAFETY WARNINGS .............................................................................................................4
REMOTE CONTROL .............................................................................................................5
MAIN MENU ...........................................................................................................................7
TV ...........................................................................................................................................7
Watch a channel .......................................................................................................................................7
Scan channels ..........................................................................................................................................7
Sort channels ............................................................................................................................................8
EPG ..........................................................................................................................................................8
RECORDING..........................................................................................................................8
Schedule a recording ................................................................................................................................8
Manual recording ......................................................................................................................................9
Timeshift ...................................................................................................................................................9
Watch a recorded program .....................................................................................................................10
INTERNET SERVICES ........................................................................................................10
Acetrax for the Video-On-Demand..........................................................................................................10
Internet Bookmarks .................................................................................................................................10
VIDEO PLAYBACK ..............................................................................................................12
Play a movie ...........................................................................................................................................12
Display subtitles and change the color / size ..........................................................................................12
Change the audio track ...........................................................................................................................12
Play DVD in .ISO or .IFO format .............................................................................................................12
PICTURE PLAYBACK .........................................................................................................13
Display a photo .......................................................................................................................................13
Create a slideshow with transition effects ...............................................................................................13
Create a slideshow with music ...............................................................................................................14
Other picture tools ..................................................................................................................................14
AUDIO PLAYBACK .............................................................................................................14
Listen to a song ......................................................................................................................................14
Repeat mode ..........................................................................................................................................15
Build a music playlist ..............................................................................................................................15
FILES MANAGER ................................................................................................................16
Browse the storage device (HDD, USB) .................................................................................................16
Search for a fi le in the libraries ...............................................................................................................16
Rename a fi le ..........................................................................................................................................16
Copy a fi le ...............................................................................................................................................17
NETWORK ...........................................................................................................................18
Connect to network by WiFi ....................................................................................................................18
SETTINGS............................................................................................................................18
FIRMWARE UPDATE ..........................................................................................................20
Auto update ............................................................................................................................................20
Update with a USB key ...........................................................................................................................20
CONTENT

4
EN
SAFETY WARNINGS
Usage cautions
This player’s design and manufacture has your safety in mind. In order to safely and effectively use this
player, please read the following before usage.
This player’s design and manufacture has your safety in mind. In order to safely and effectively use this
player, please read the following before usage. User should not modify this player. If commercial hard disk
is being used, the environmental temperature should be within +5°C ~ +35°C.
Power
The player’s power voltage: DC 12V.
When using this player, please connect the supplied AC adapter or AC adapter cable to the player’s power
jack. When placing the adapter cable, make sure it cannot get damaged or be subject to pressure. To
reduce the risk of electric shock, unplug the adapter fi rst before cleaning it. Never connect the adapter to
the player in a humid or dusty area. Do not replace the adapter or cable’s wire or connector.
Radio interference/compatibility
- If not properly shielded, almost all electronic devices will get radio interference. Under some conditions,
your player might get interference.
- The design of this player has followed the CE standard, and has followed the following rules:
(1) This player may not cause harmful interference;
(2) This player could accept some interference received including interference that may cause undesired
operation.
Repair
If the player has a problem, you should take it to an appointed repair center and let the specialists do the
repair, never repair the player yourself, you might damage the player or endanger yourself or your data.
Disposing of the player
When you dispose of the player, be sure to dispose it appropriately. Some countries may regulate disposal
of electrical device, please consult with your local authority.
Others
When using this player, please do not let the player come into contact with water or other liquid, if water is
accidentally spilled on the player, please use a dry cloth to absorb the spillage.
Electronic products are vulnerable, when using please avoid shaking or hitting the player, and do not press
the buttons too hard.
Do not let the player come into contact with water or other liquid.
Do not disassemble the player; repair the player or change the design of the player, any damage done will
not be included in the repair policy.
Do not press the buttons of the player too hard.
Avoid hitting the player with hard object, avoid shaking the player, and stay away from magnetic fi elds.
During electrostatic discharge and the strong electromagnetic fi eld, the product will malfunction, then
unplug the power cable and the product will return to normal performance next time it is powered on.

5
EN
REMOTE CONTROL

6
EN
1 Power Press to enter standby mode or wake up.
2 TV SYS. Press to switch between NTSC, PAL, 480P, 576P, 720P, 1080I, and 1080P.
3 Info Press to display current status. Press during playback, an onscreen display
appears showing track number and time elapsed/remaining.
4&6 Numeric buttons Press to enter channel numbers or numeric input when changing settings.
5 Timeshift Press to pause the TV program. Press play to resume the playback where you left
it. Press Timeshift again to stop the pausing.
7 FR Press to fast rewind the current playback. Press repeatedly to select speeds
8 Prev Press to view the previous fi le / page up.
9 Home Press to enter the home screen.
10 Navigational buttons Press the arrow buttons to select menu options, and the OK button to confi rm.
Press Up/Down to rotate a photo during the viewing.
11 Mute Press to mute audio output, and press again to resume.
12 Vol - Press to decrease the volume.
13 REC Press to begin the recording. Press repeatedly to set one touch recording (OTR)
length (30 / 60 / 90 / 120 / 180 / 240 min or off)
14 DTV Press to access DVB-T channels.
15 @ Press to enter the Internet bookmarks menu.
16 Zoom Press to zoom the image (photo or video).
17 USB Press to safely remove the USB device.
18 Red 1. When you enter the Movie, Music or Photo menu, press this button to activate
the Copy function. 2. When you enter the Schedule Recording menu, press
this button to add a recording task. 3. When you enter a website in the Internet
Bookmarks menu, press this button to switch between Page Mode and Navigation
Mode.
19 Green (EPG) 1. When you enter the Movie, Music or Photo menu, press this button to
activate the Edit function. 2. When you watch a TV program, press this button to
enter the Electronic Program Guide which displays an on-screen list of programs
for the whole day. 3. When you enter the Schedule Recording menu, press this
button to delete the recording tasks.
20 Yellow (TTX) 1. When you watch a TV program, press this button to open the Teletext (when
available). 2. When you enter the Schedule Recording menu, press this button to
check the history of the recordings. 3. When you enter a website in the Internet
Bookmarks, press this button to activate the virtual keyboard.
21 Blue Press to open / close USB DVD-rom.
22 Select Press to make a selection.
23 Help Press to get information on our website.
24 VOD Press to enter Acetrax video-on-demand platform to rent or buy movies.
25 Vol + Press to increase the volume.
26 Option Press to enable the option menu, where you can change the review mode of
fi le manager and media library. Press to display or hide the option menu during
playback.
27 Return Press to return to the previous screen while navigating menus.
28 Stop Press to stop playback.
29 Next Press to view the next fi le / page down.
30 Play/ Pause Press to begin/pause playback.
31 FF Press to fast forward the current playback. Press repeatedly to select speeds.
32 Repeat Press to set repeat option.
33 Audio Press to select an audio track.
34 Subtitle Press to set subtitle options. You can change the color/size/offset/text encoding of
subtitle.
35 Setup Press to enter the setup menu.

7
EN
MAIN MENU
The main menu of your Movie Cube has 5 entries: TV, Internet bookmarks, Files manager, All media and
Setup.
NB: only the supported formats will be displayed on screen, therefore you may not view all the fi les of your
storage device (HDD or USB fl ash drive).
TV
Watch a channel
Enter the TV menu to access the TV channels. You can change channels with the numeric buttons or
navigational pad of the remote control. To display the channels list, press Ok
NB: you must connect the N500H player to an antenna and make a complete scan before receiving the TV
channels.
Scan channels
In the Setup menu, under TV & Rec, choose Channel scan. Select the auto or manual mode. When the
scan is complete, the number of channels found is displayed.

8
EN
Sort channels
When you are watching a TV program, press Option on the remote control and select Edit.
You have the choice to delete, rename a channel or swap its position in the list.
If you choose delete, the channel will no longer be available unless you redo a complete scan.
EPG
Press on the green EPG button of the remote control to display the schedules of the TV programs.
NB: the EPG service availability depends on each channel.
RECORDING
Schedule a recording
N.B.: prior to recording a TV program, you must set up the date and time in the Setup menu. Please go to
the Setup > System > Time section for more information.
Then select the device on which the video will be saved. Please go to the Setup > TV & Rec section for
more information.
Under TV, enter the Schedule record section to display the schedules page. Press on the red button of the

9
EN
remote control to add a recording.
Select the channel, date and time and validate by pressing Ok. Choose Confi rm: the scheduled recording
will be saved.
Manual recording
Press on the REC button of the remote control to start the recording. Press stop to end the recording.
Timeshift
The Timeshift function allows you to pause live TV and resume the program from the point you left it. While
paused, the program is recorded to the external HDD or USB device as long as the space is available.
10
EN
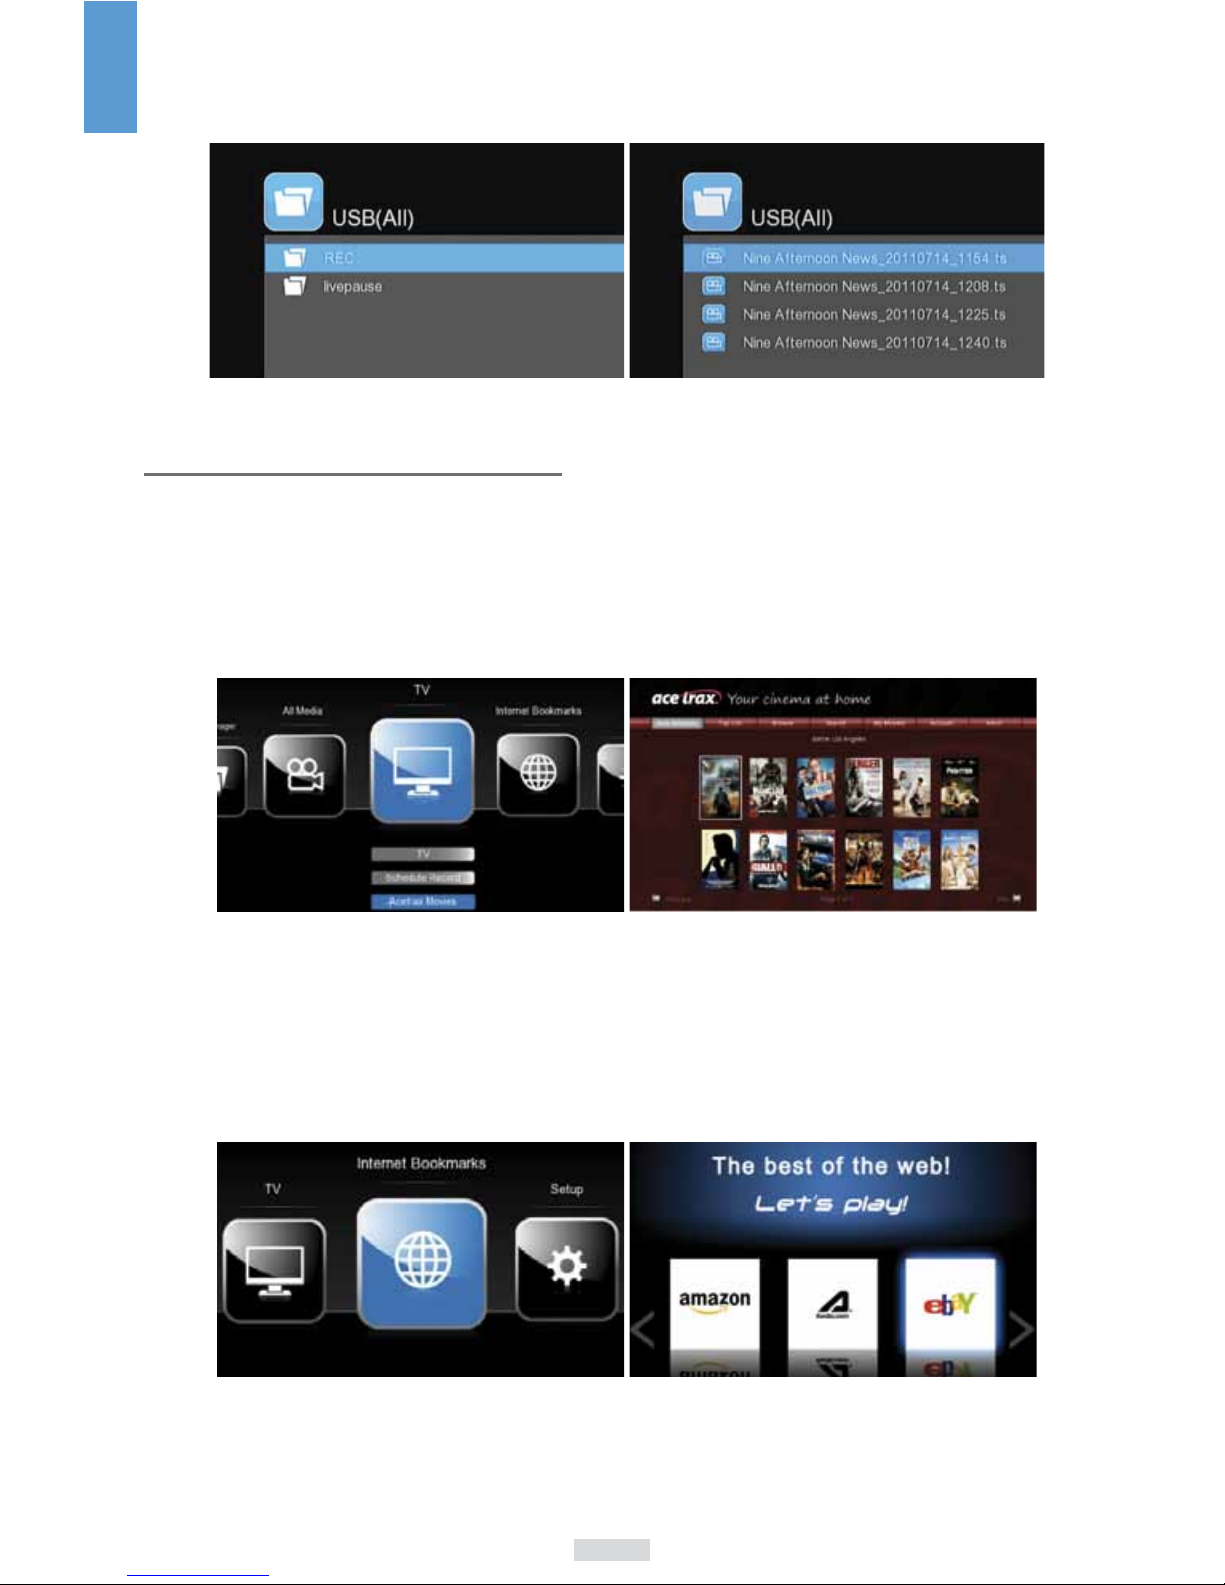
Watch a recorded program
All recorded programs are stored in a fi le named REC on the storage device connected to the Movie Cube.
INTERNET SERVICES
Acetrax for the Video-On-Demand
This player allows an access to Acetrax video-on-demand platform. Acetrax service is only available in the
following countries: Austria, France, Germany, Ireland, Italy, Switzerland, United Kingdom. Emtec is not
responsible for the quality of the streaming or service proposed. For more information on this service and
the device registration, please visit www.acetrax.com.
Internet Bookmarks
This product allows you to browse the websites available in the Internet Bookmarks menu. The remote
control provided or a USB keyboard and mouse can be used during the webpage browsing.
N.B.: the browser doesn’t support websites with Adobe Flash or secured (https) websites.
1. You can enter the Internet Bookmarks from the main menu to access a selection of websites.
11
EN
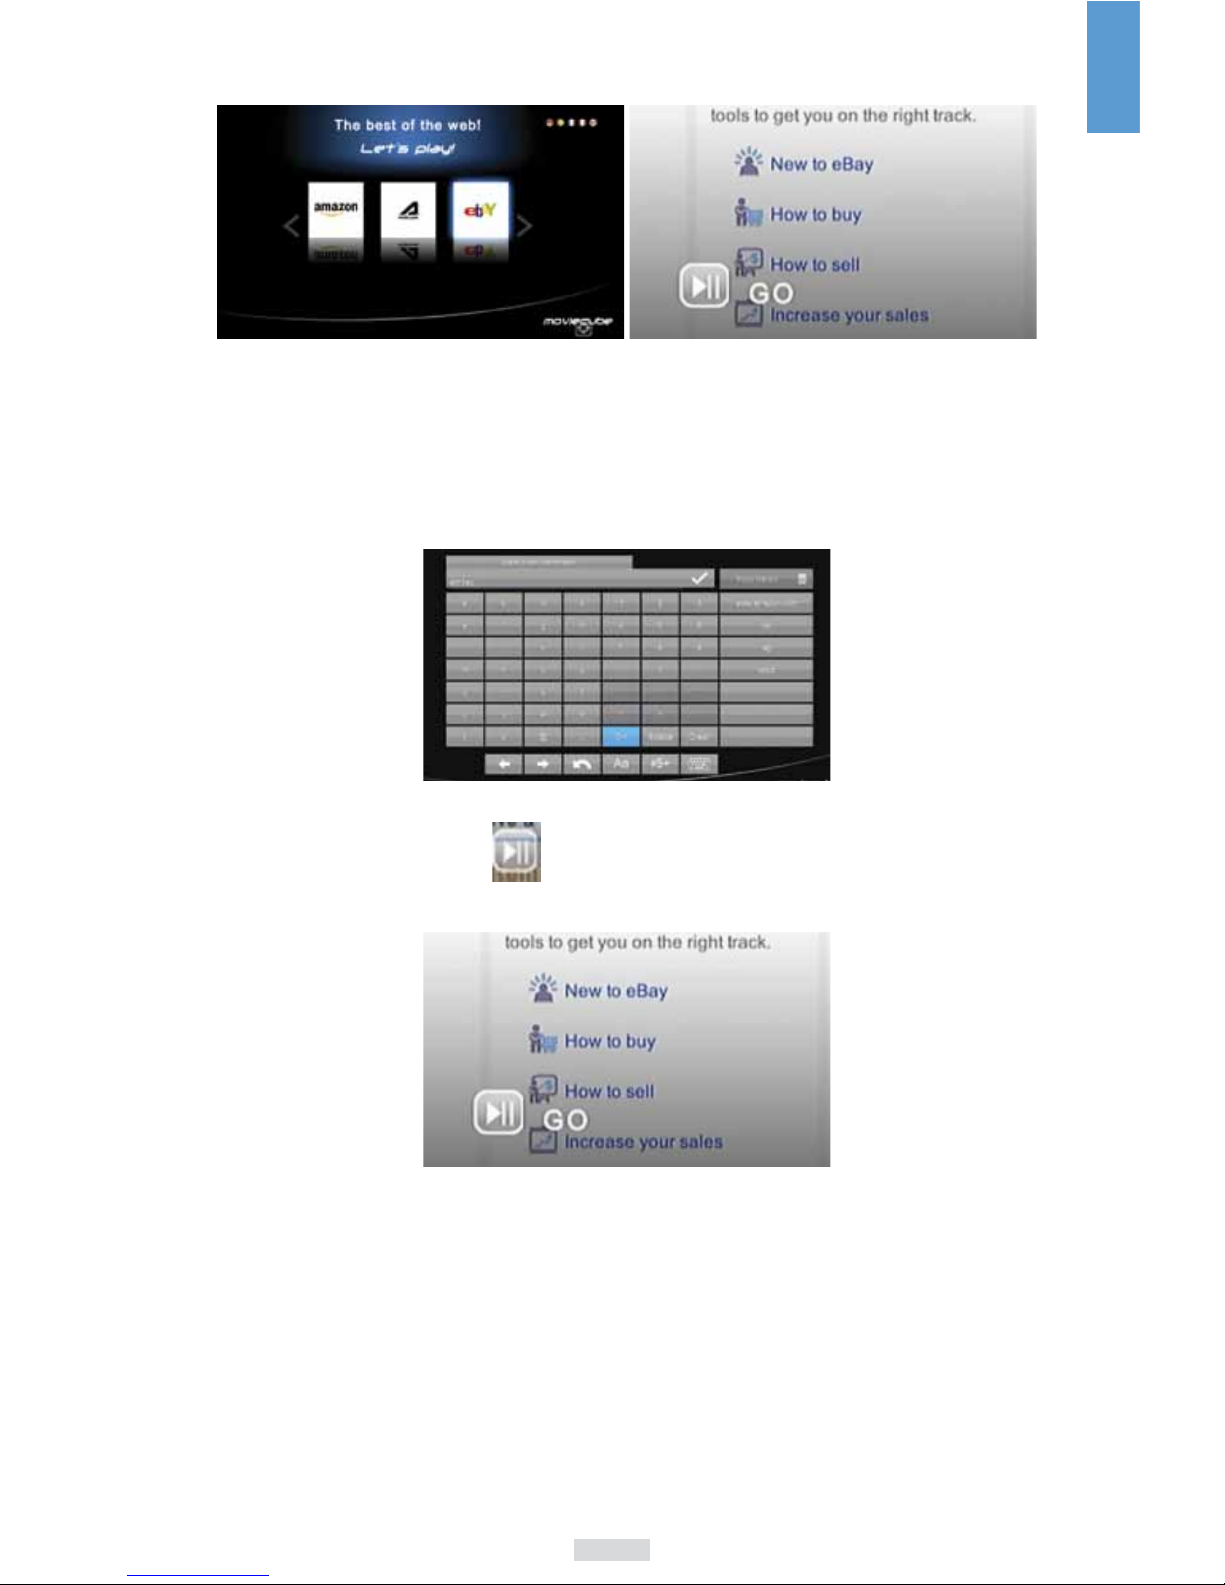
2. Select the website you want to browse then press the OK button.
3. Press the RED button on the remote control to switch between the Navigation mode and Page mode.
The Navigation mode allows selecting links and items in the page: use the Navigation buttons (up, down,
right, left) to move the cursor. The Page mode allows scrolling up or down the webpage.
4. Press the YELLOW button to activate the virtual keyboard and press OK on the virtual keyboard to
confi rm the words you typed in.
5. After the confi rmation, you will see on the webpage. Press this button on the remote control to
start the search.

12
EN
VIDEO PLAYBACK
Play a movie
In All media, enter the Movie library and select the video you want to play. Press Play on the remote
control to start the playback. This player supports AVI, MPG, DAT, VOB, DIV, MOV, MKV, MPEG, TS, MTS,
M2TS, RM, RMVB, ISO, IFO, WMV, ASF video formats.
Display subtitles and change the color / size
During a movie playback, press Subtitle on the remote control and select a subtitle. In the same window
you can change the color/size/offset/text encoding of the subtitle.
Change the audio track
Press Audio on the remote control and select an audio track amongst those displayed on screen.
Play DVD in .ISO or .IFO format
In the Movie library, press Option on the remote control to display the menu options, and select Show BD/
DVD to display only the ISO or IFO fi les.
Press Play on the remote control to start the playback.
13
EN
PICTURE PLAYBACK
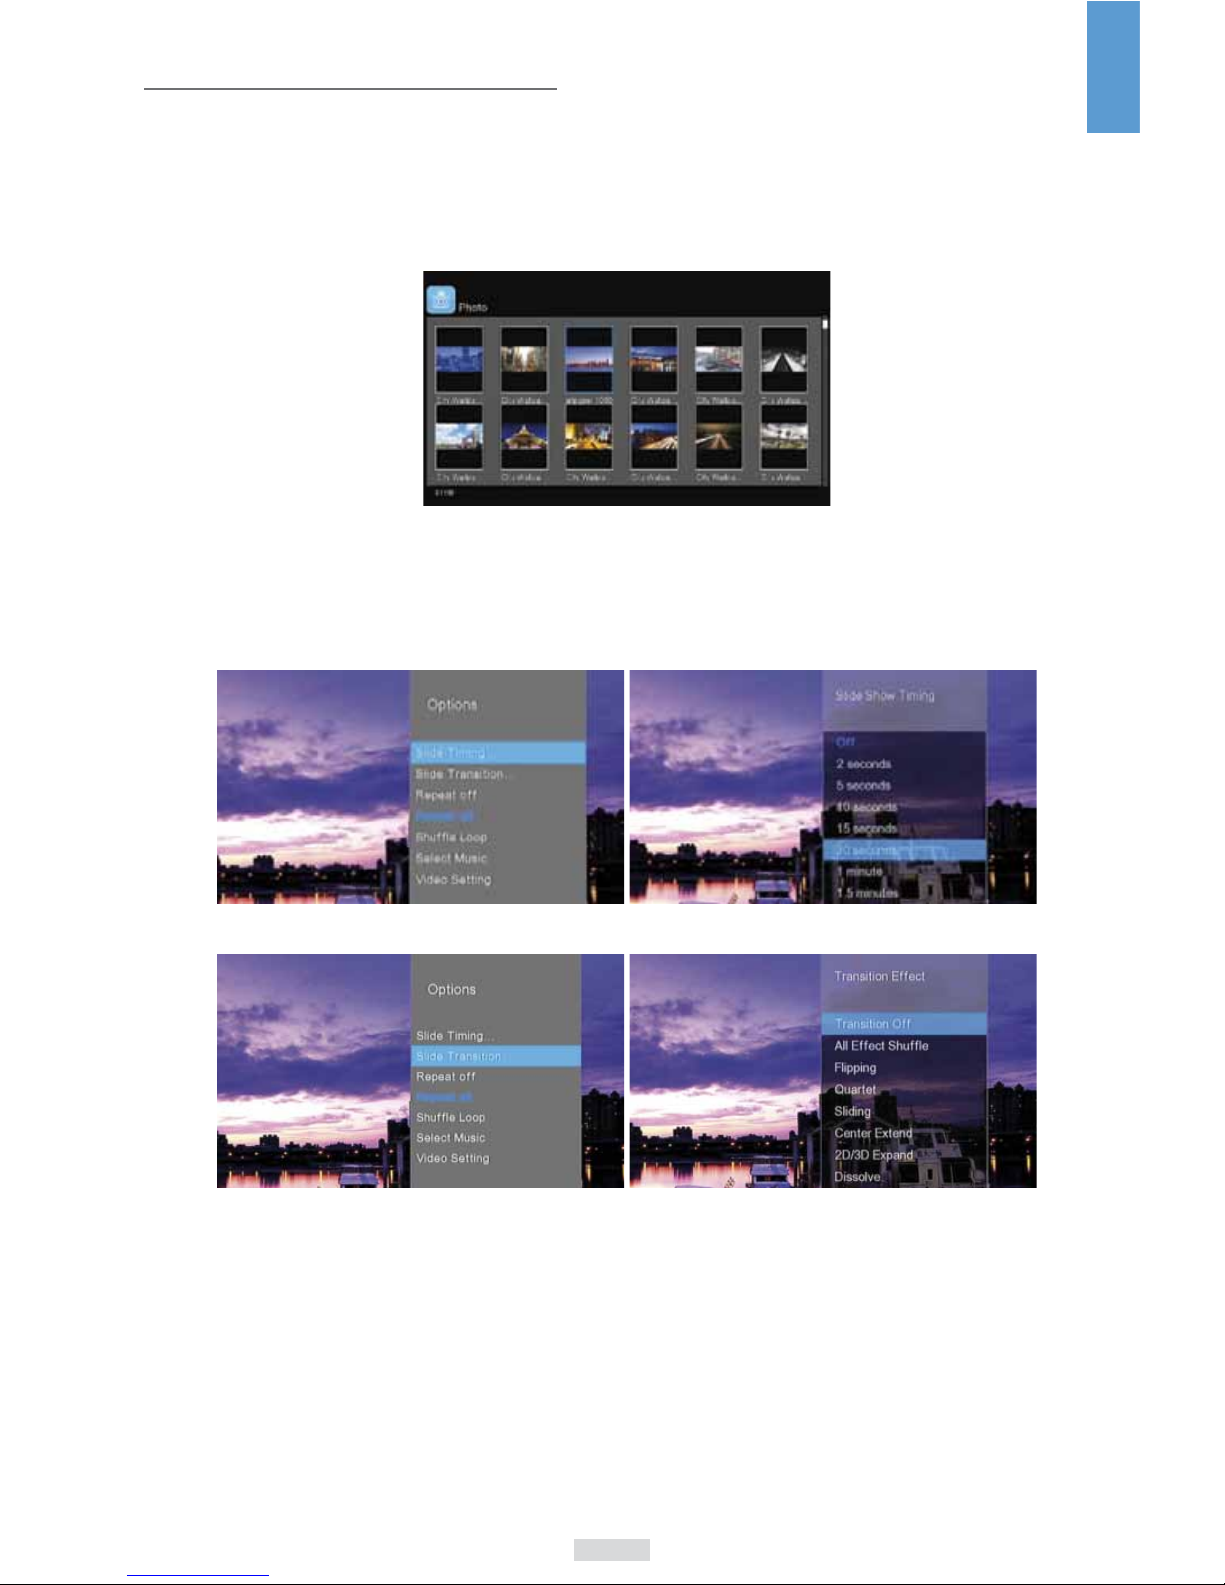
Display a photo
Enter the Photo library to select a picture then press Play on the remote control to display. Press FF to go
to the next picture and FR to go back to the previous one. This player supports JPG/JPEG, BMP, GIF, TIFF
(up to 1080p) fi les.
Create a slideshow with transition effects
During the photo playback, press Option on the remote control to select the Slide timing and have several
choices of intervals.
To add transition effects, choose Slide transition in the options window
14
EN
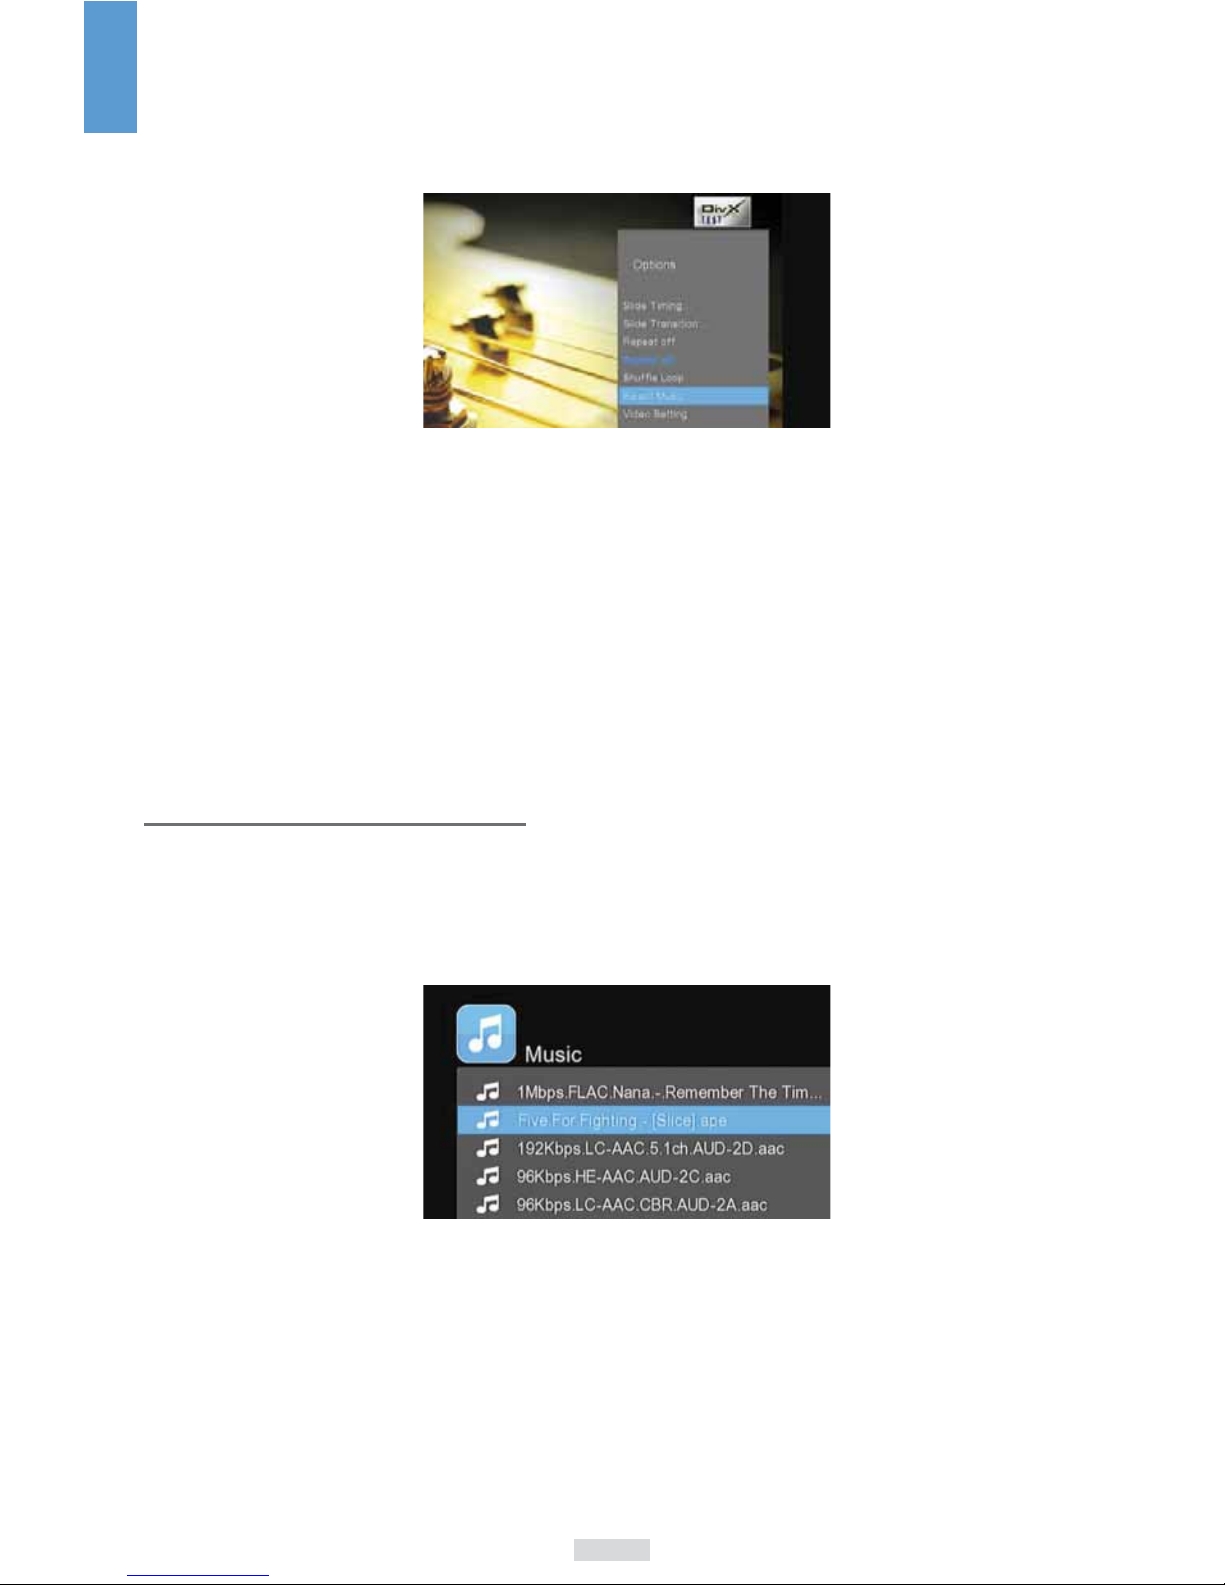
Create a slideshow with music
To add background music during the slideshow, press Option on the remote control.
Choose Select music in the options window. Choose On to start directly the playback of the music
embedded on your HDD or choose Select music to search for a specifi c audio track.
Other picture tools
The below keys of the remote control allow to control the picture playback.
PREV / NEXT View the previous or next photo.
UP / DOWN Rotate a photo in any angle.
OPTION Display or hide the options during playback.
STOP Stop the playback.
ZOOM IN / OUT Zoom in/out the image
AUDIO PLAYBACK
Listen to a song
Enter the Music library to select the audio track you want to play. Press Play on the remote control to start
the playback. This player supports MP3, WMA, RA, RM, OGG audio fi les.
15
EN
Repeat mode
During the music playback, press Option or Repeat on the remote control to select different playback
modes: repeat off, repeat one, repeat all and shuffl e loop.
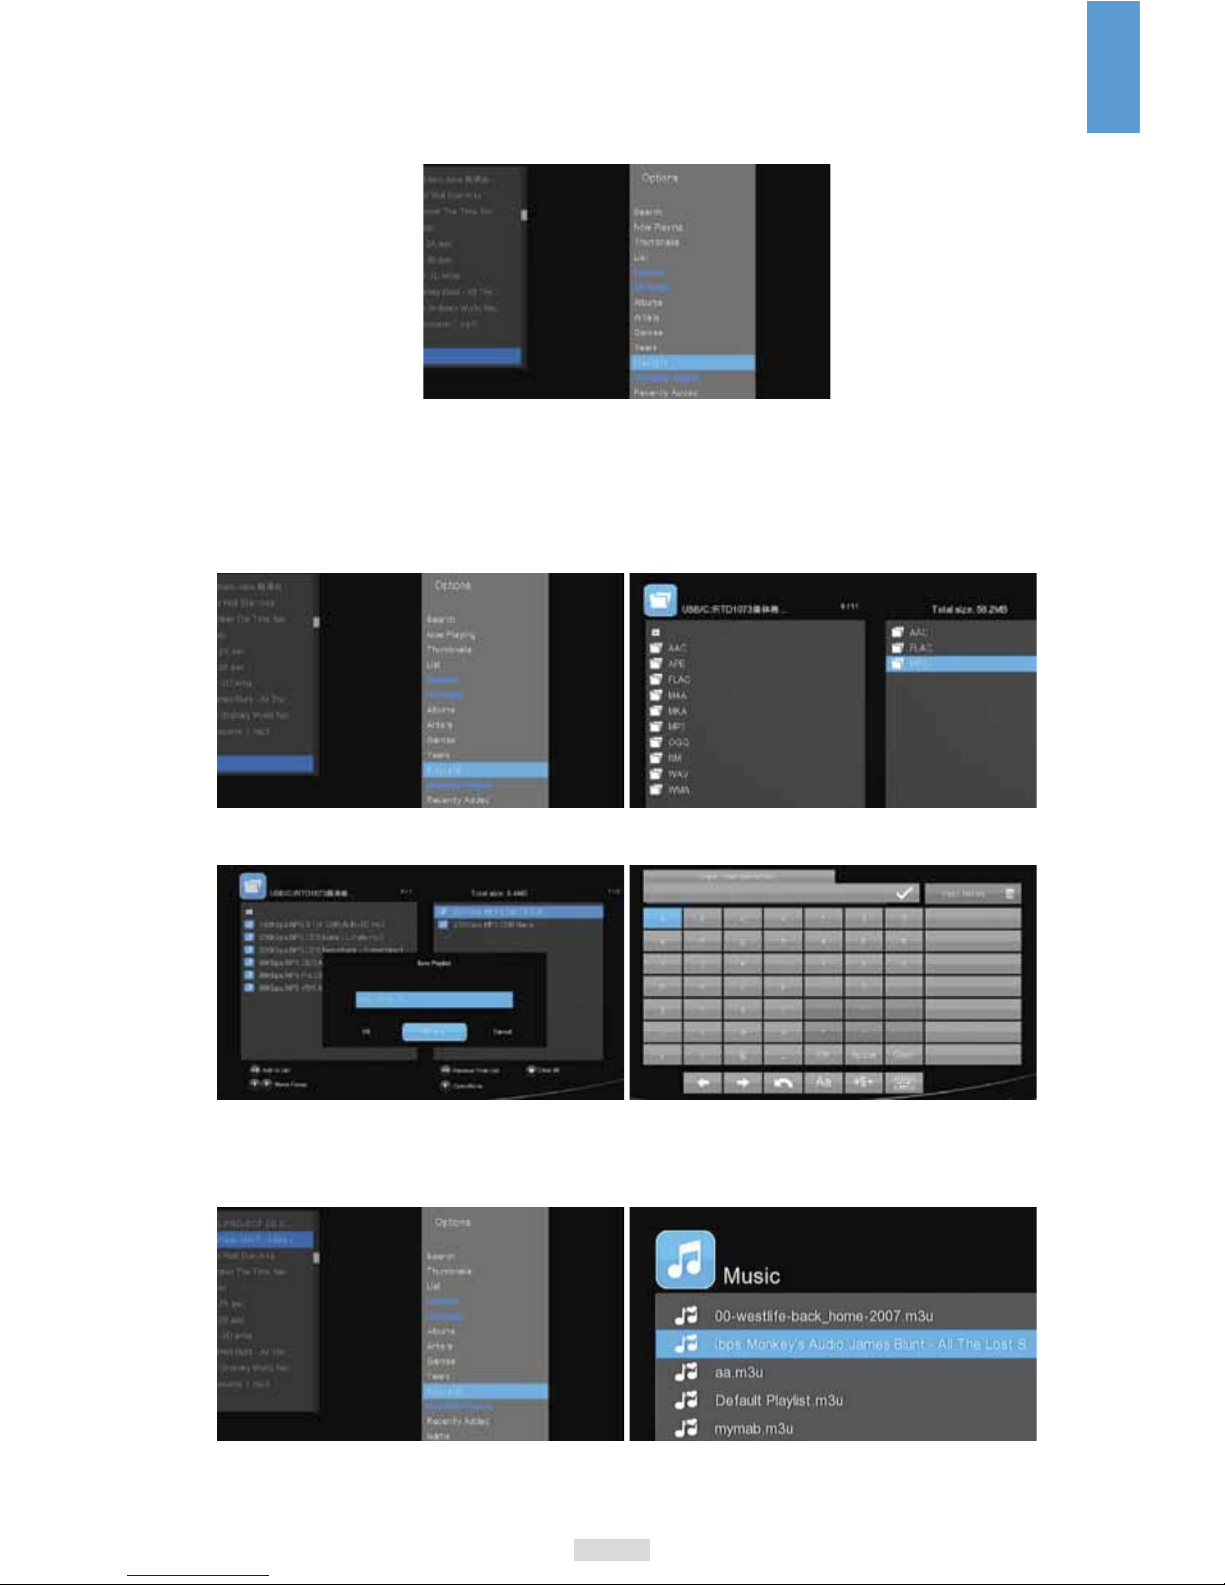
Build a music playlist
In the Music library, press Green on the remote control: the available options will be displayed. Select
Playlist and add the tracks by pressing Play on the remote control. Press Green and select Save playlist to
confi rm.
You can rename the playlist, a virtual keyboard will appear.
To fi nd the newly created playlist, press Music on the remote control then fi lter the fi les by pressing Option.
Select Playlists in the option window. All the saved playlists will be displayed.
16
EN
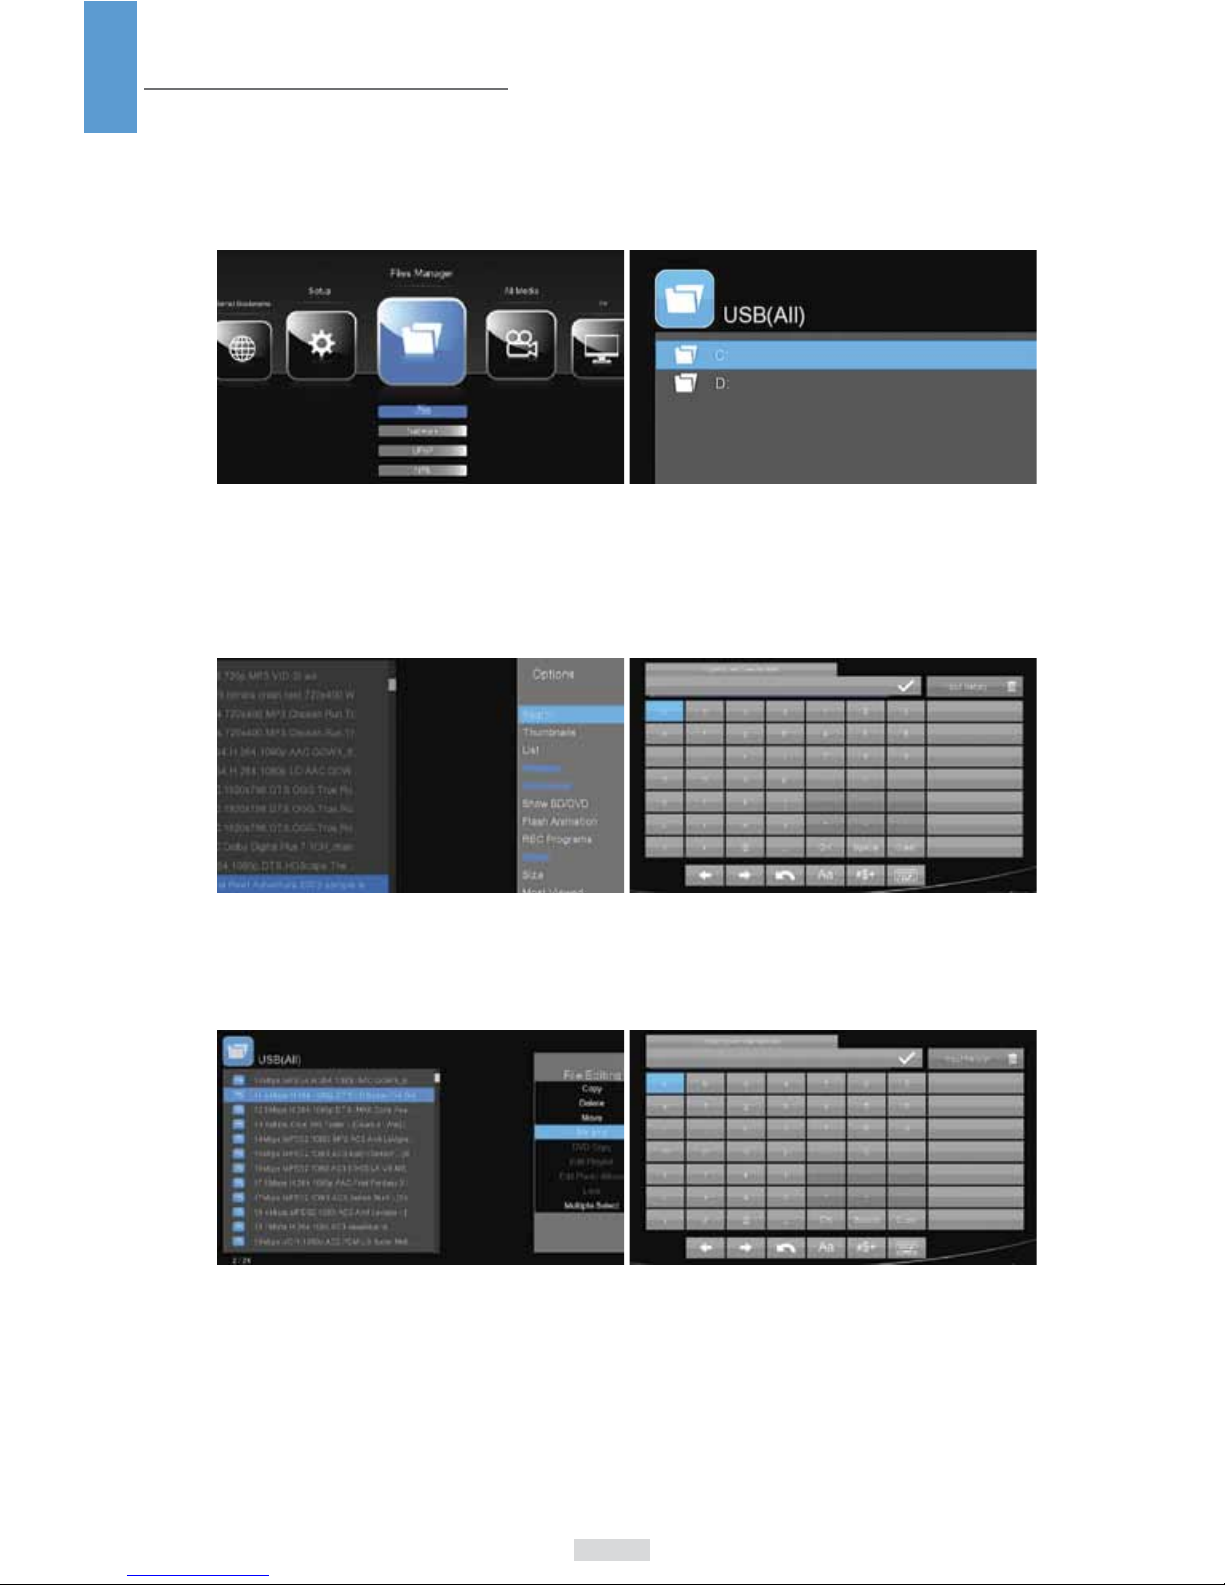
FILES MANAGER
Browse the storage device (HDD, USB)
Under Files manager, you can browse and play the audio, photo and video fi les stored on the internal or
external storage devices: USB key and HDD.
Search for a fi le in the libraries
Under All media, when you enter one of the libraries Movies, Photo, Music press Option > Search on the
remote control. The virtual keyboard will appear. Input the name of the fi le you want to search and press
Ok on the keyboard to confi rm.
Rename a fi le
Select the fi le you want to rename and press Green on the remote control. Choose rename and confi rm.
The virtual keyboard appears. Press the Ok on the keyboard to confi rm.
The Green button opens a File Editing window to copy, delete or move a fi le.

17
EN
Copy a fi le
NB: the copy function is only available within the libraries Movies, Photo, Music or in Files Manager.
1. Select the fi le you want to copy then press Green on the remote control to enter the copy menu. Select
copy in File Editing and confi rm by pressing Ok.
2. To add the selected fi le in the copy list, press Play on the remote control. Additional instructions are
displayed on screen.
3. Press Green on the remote control and select Copy. Confi rm by pressing Ok.
4. Choose the destination folder for the copy.
5. Press Play to confi rm the copy. Once fi nished, a confi rmation message will be displayed

18
EN
NETWORK
Connect to network by WiFi
This Movie Cube has a built-in WiFi to detect the WiFi signal of your network.
Enter the Setup menu. Under Network, select Wireless setup and choose the network you want to
connect to. NB. : the player automatically detects the networks available.
Enter the password of the network on the virtual keyboard and validate by Ok. The connexion starts.
NB. : if you prefer to use a wired LAN connexion, please refer to the Step 4 of the connexion guide.
SETTINGS
The Setup menu allows you to customize the preferences of your player. There are 5 entries within the
Setup menu: System, Audio, Video, Network, TV & Rec and Misc.

19
EN
- Language setting: under System, choose Menu language.
- Screen resolution: under Video, choose Aspect ratio and TV System.
- Recording device: under TV & Rec, choose Rec device to select on which device you want to save the
TV recordings.
- HDD formatting: under System, choose Format.
- Restore default: under System, choose this option to reset your Movie Cube with the factory settings.
20
EN
FIRMWARE UPDATE
Auto update
Please make sure that your Movie Cube is connected by LAN or WiFI to a network.
At booting, the Movie Cube will automatically propose to upgrade to a new fi rmware when available.
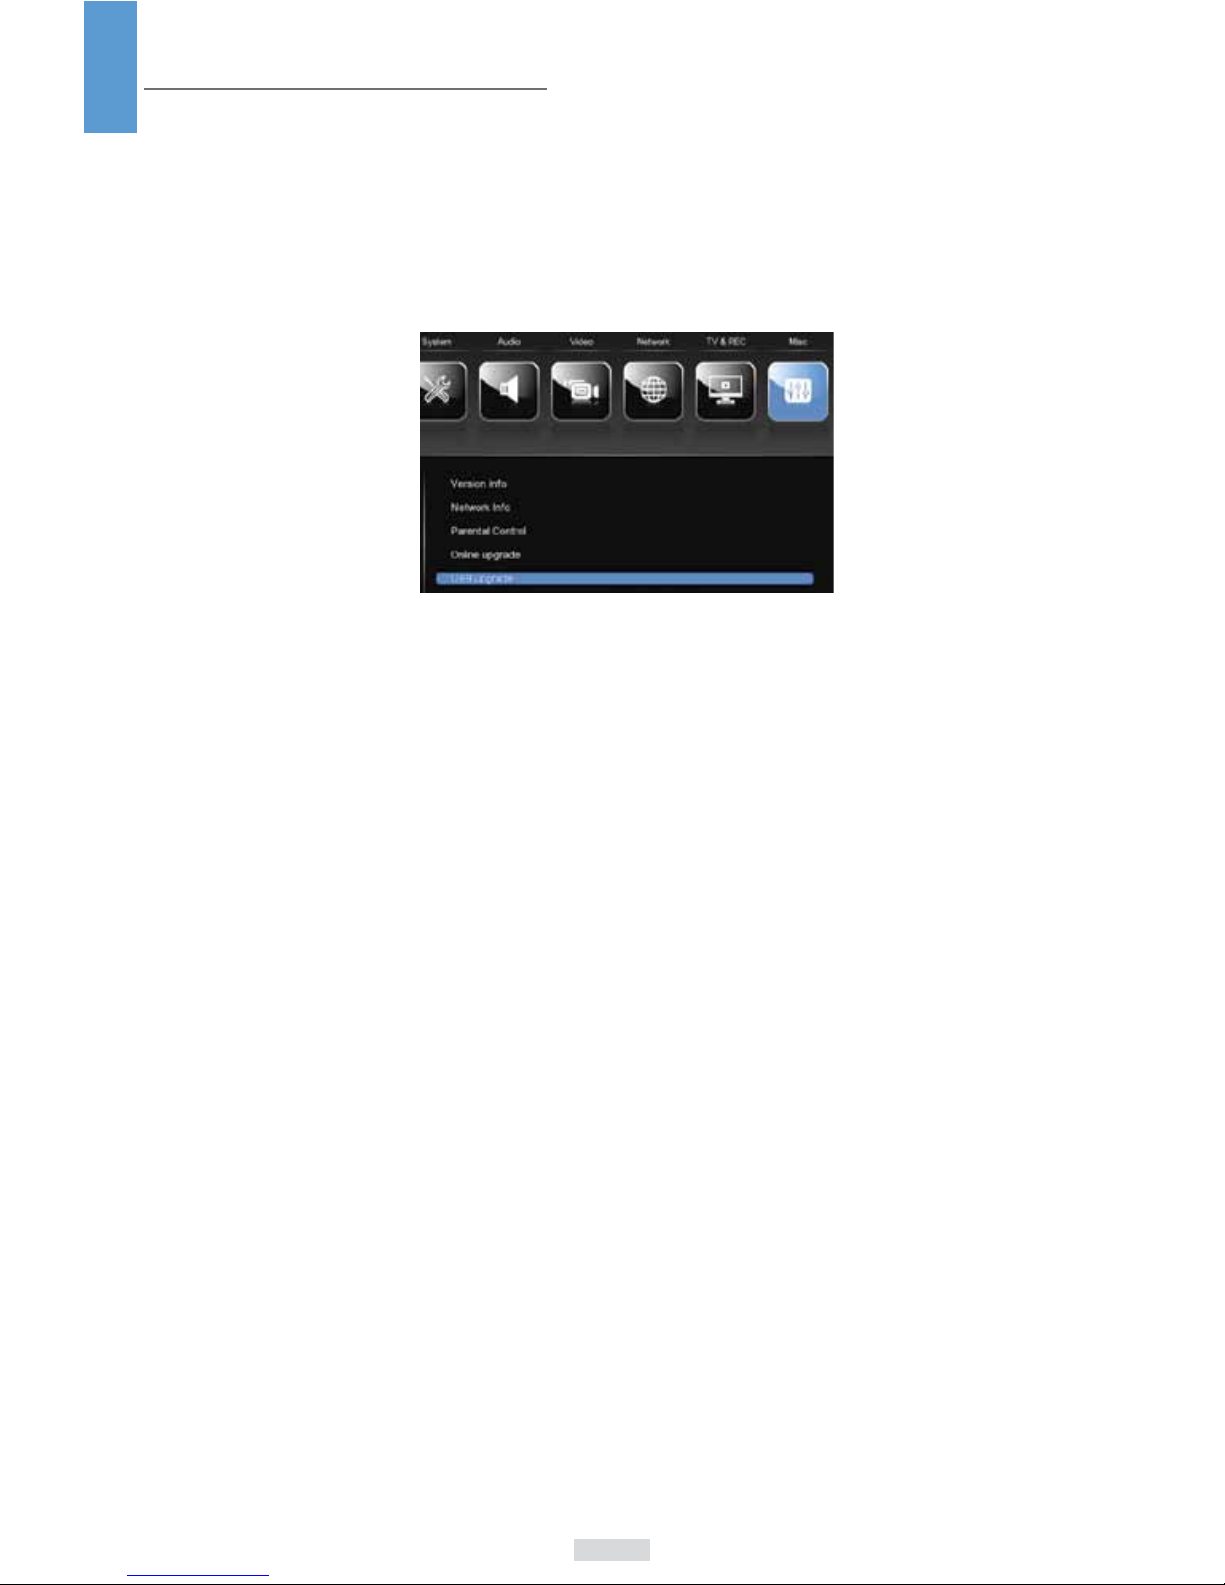
Update with a USB key
Please go to our website to download the latest fi rmware:
http://www.emtec-international.com «Download» «Movie Cube fi rmware»
1) Copy ‘install.img’ or extension fi les to the root directory of an empty USB stick
2) Connect your USB key to the USB host port of the player.
3) In the Setup menu, enter MISC and select USB Update.
4) Press Ok on the remote control to confi rm.
Other manuals for MOVIE CUBE
4
This manual suits for next models
1
Table of contents
Other Emtec Portable Multimedia Player manuals

Emtec
Emtec P800 Movie Cube Installation guide

Emtec
Emtec Movie Cube S900H Installation guide

Emtec
Emtec Movie Cube K220 Operation manual

Emtec
Emtec V120H Movie Cube Installation guide

Emtec
Emtec T800 Movie Cube Theater Installation guide

Emtec
Emtec Movie Cube K300H Installation guide

Emtec
Emtec K220H Movie Cube Installation guide

Emtec
Emtec Movie Cube K130 Operation manual


