MANUTENZIONE DEL TESSUTO
DELL'OMBRELLONE
1. Pulire le macchie presenti sul telo, utilizzando un
panno pulito ed assorbente.
2. Per una manutenzione generale, usare una
spazzola morbida per rimuovere la polvere o terra
secca, o sciacquare spesso con acqua calda e pulita
spesso per non far radicare la sporcizia nel tessuto.
Permettere al tessuto di asciugarsi naturalmente
prima di chiudere l'ombrellone.
3. Se è necessaria una pulizia radicale, pulire con
una spugna usando una delicata soluzione di sapone
neutro (2% in soluzione). Risciacquare
abbondantemente e interamente il telo per rimuovere
residui di sapone.
4. Non usare mai detergenti e solventi. Macchie di
grasso e olio possono essere rimosse usando
opportuni smacchiatori idonei per tessuto poliestere
con un panno assorbente.
La garanzia copre eventuali difetti riscontrati nei materiali, nella realizzazione dei componenti dello
SHADE PRO dalla data di acquisto. La garanzia copre eventuali notevoli scolorimenti del tessuto
dell'ombrellone.
La garanzia è valida 2 anni a partire dalla data di acquisto del prodotto.
Nel caso in cui si riscontrassero difetti nel periodo di garanzia, Emu Group S.p.A. esaminerà il
prodotto e valuterà se il problema rientra nella copertura della garanzia. A seguito dell'esame del
prodotto, Emu Group S.p.A. riparerà lo stesso se difettoso o provvederà a sostituirlo con un
prodotto uguale o paragonabile, a suo giudizio, nel rispetto della normativa vigente.
La garanzia è valida a partire dalla data di acquisto del prodotto ed è necessario esibire lo
scontrino in originale del prodotto.
La garanzia non è applicabile al prodotto che è stato conservato o montato in modo non corretto,
usato in modo non adeguato, che è stato manomesso, alterato o pulito con procedure o prodotti
non idonei. La garanzia non copre il normale logorio, tagli, graffi oppure danni provocati da urti,
incidenti, mancanza di manutenzione e uso improprio del prodotto. La garanzia non copre danni
accidentali dovuti a condizioni meteorologiche.
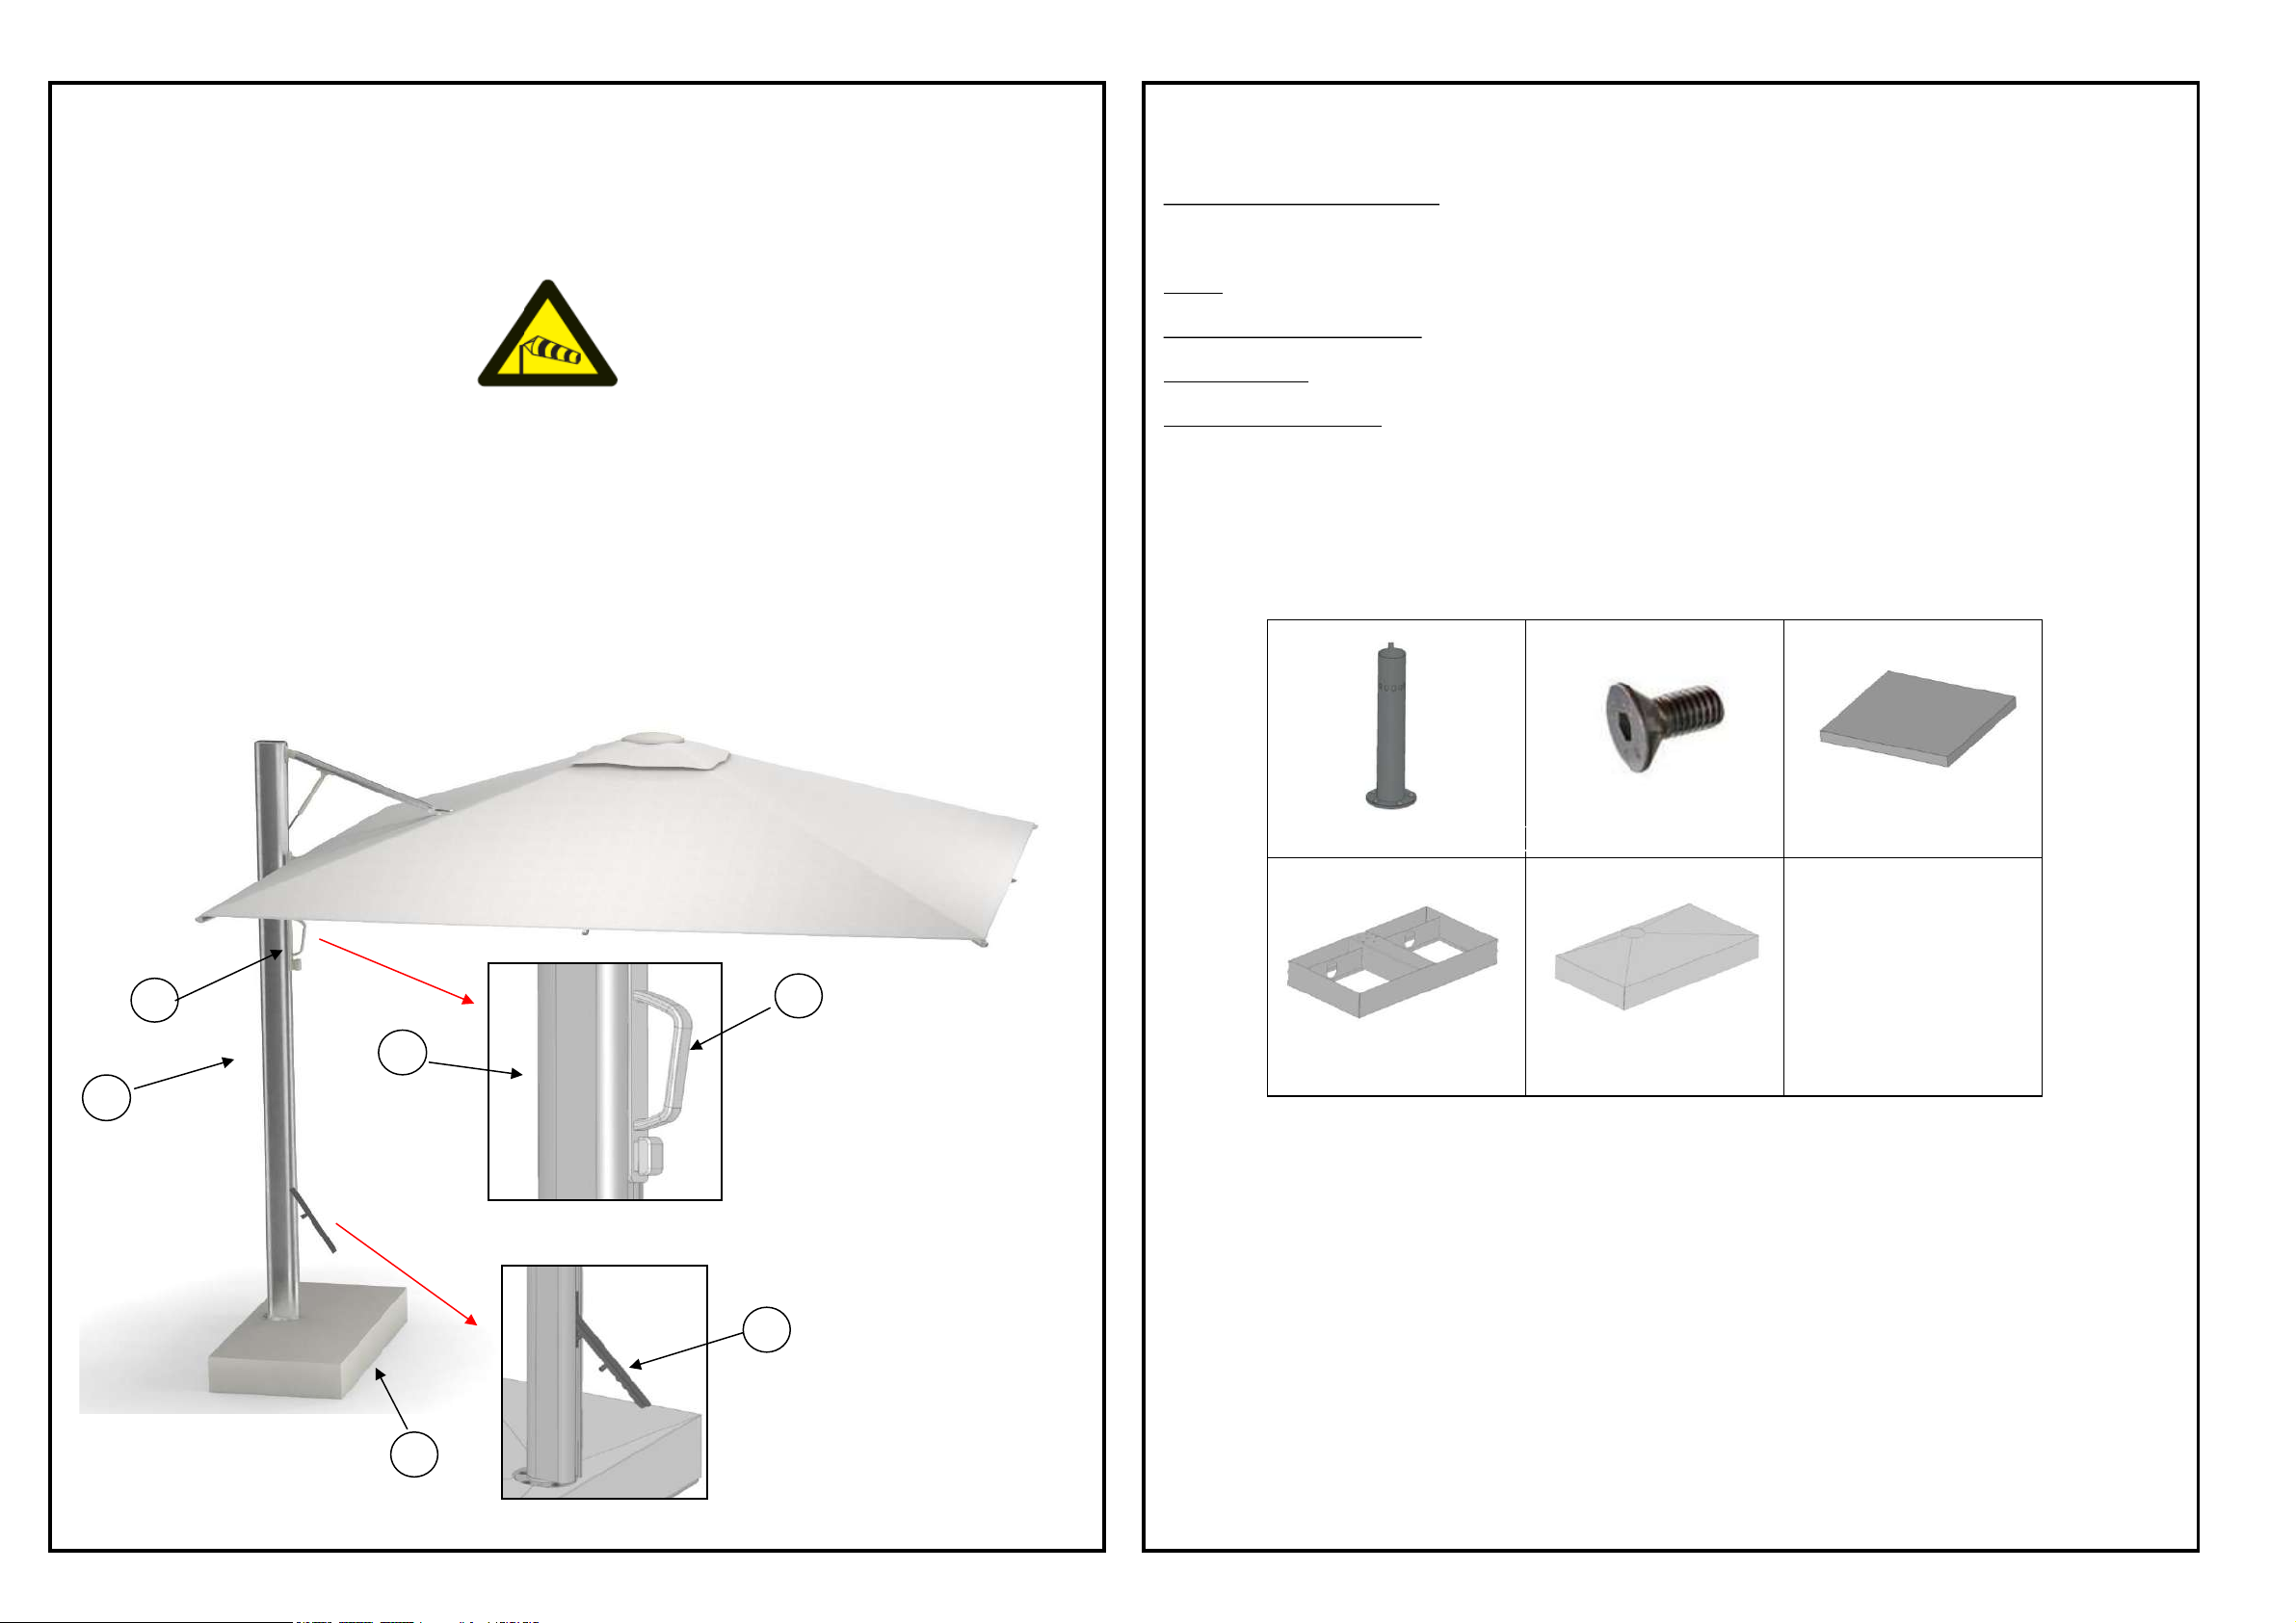
AVVERTENZE D'USO
Verificare periodicamente (almeno ogni settimana) tutte le parti in movimento e le varie giunzioni
dello SHADE PRO.
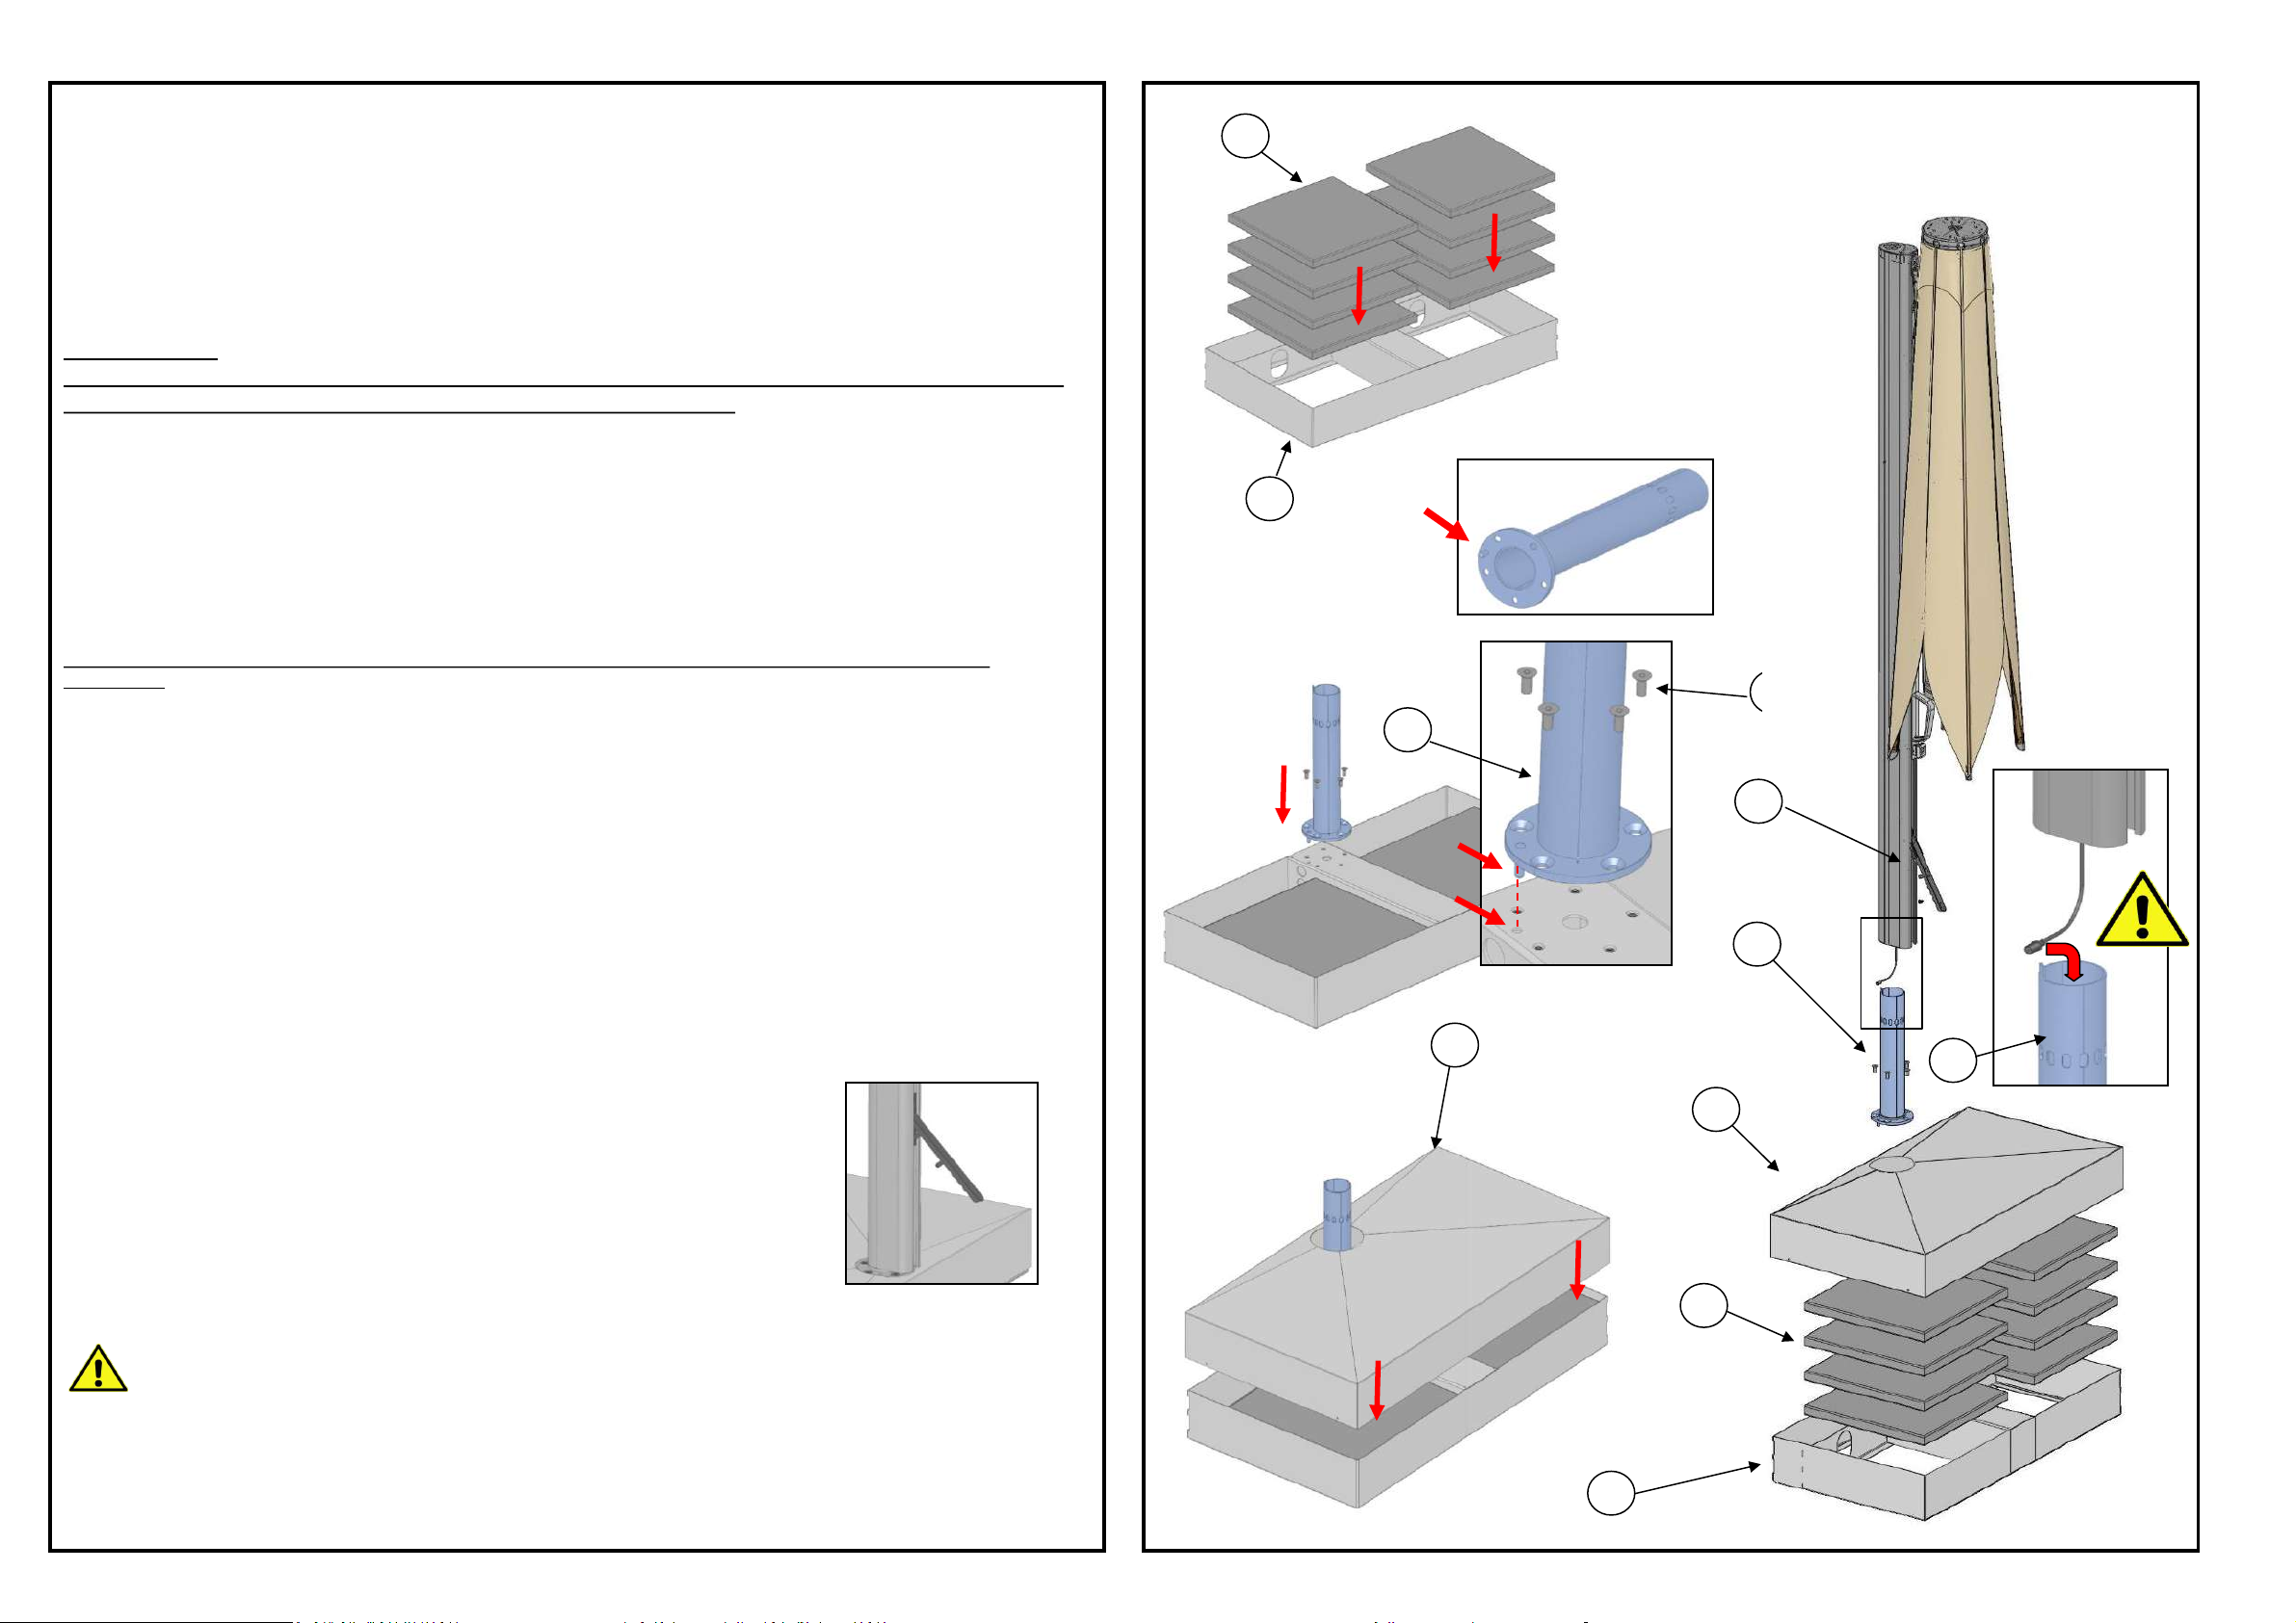
Non posizionare il basamento dello SHADE PRO su: piedistalli mobili o rialzati, carrelli con ruote,
piani inclinati e qualsiasi tipo di terreno instabile. Nel caso in cui si renda indispensabile posizionare
l'ombrellone su un piano inclinato è necessario ancorare il prodotto al pavimento.
E' necessario posizionare lo SHADE PRO all'interno di zone sicure e prive di qualsiasi tipologia di
rischio.
Non lasciare mai lo SHADE PRO aperto incostudito, anche in assenza di vento.
Se la zavorra presenta segni di deterioramento provvedere a sostituire le parti deteriorate. Non
utilizzare lo SHADE PRO con parti di zavorra mancanti o danneggiate.
Non permettere a bambini o persone non competenti di utilizzare i componenti dell'ombrellone,
affinchè gli stessi non diventino pericolosi per un uso improprio.
Emu Group S.p.A. non si assume nessuna repsonsabilità qualora, a causa di un uso improprio, di
errata installazione, della non osservanza di queste condizioni, si provochino danni a cose, persone
o allo stesso ombrellone.
LINEE GUIDA SULLA RESISTENZA AL VENTO DELL'OMBRELLONE SHADE:
Venti da leggeri a moderati.
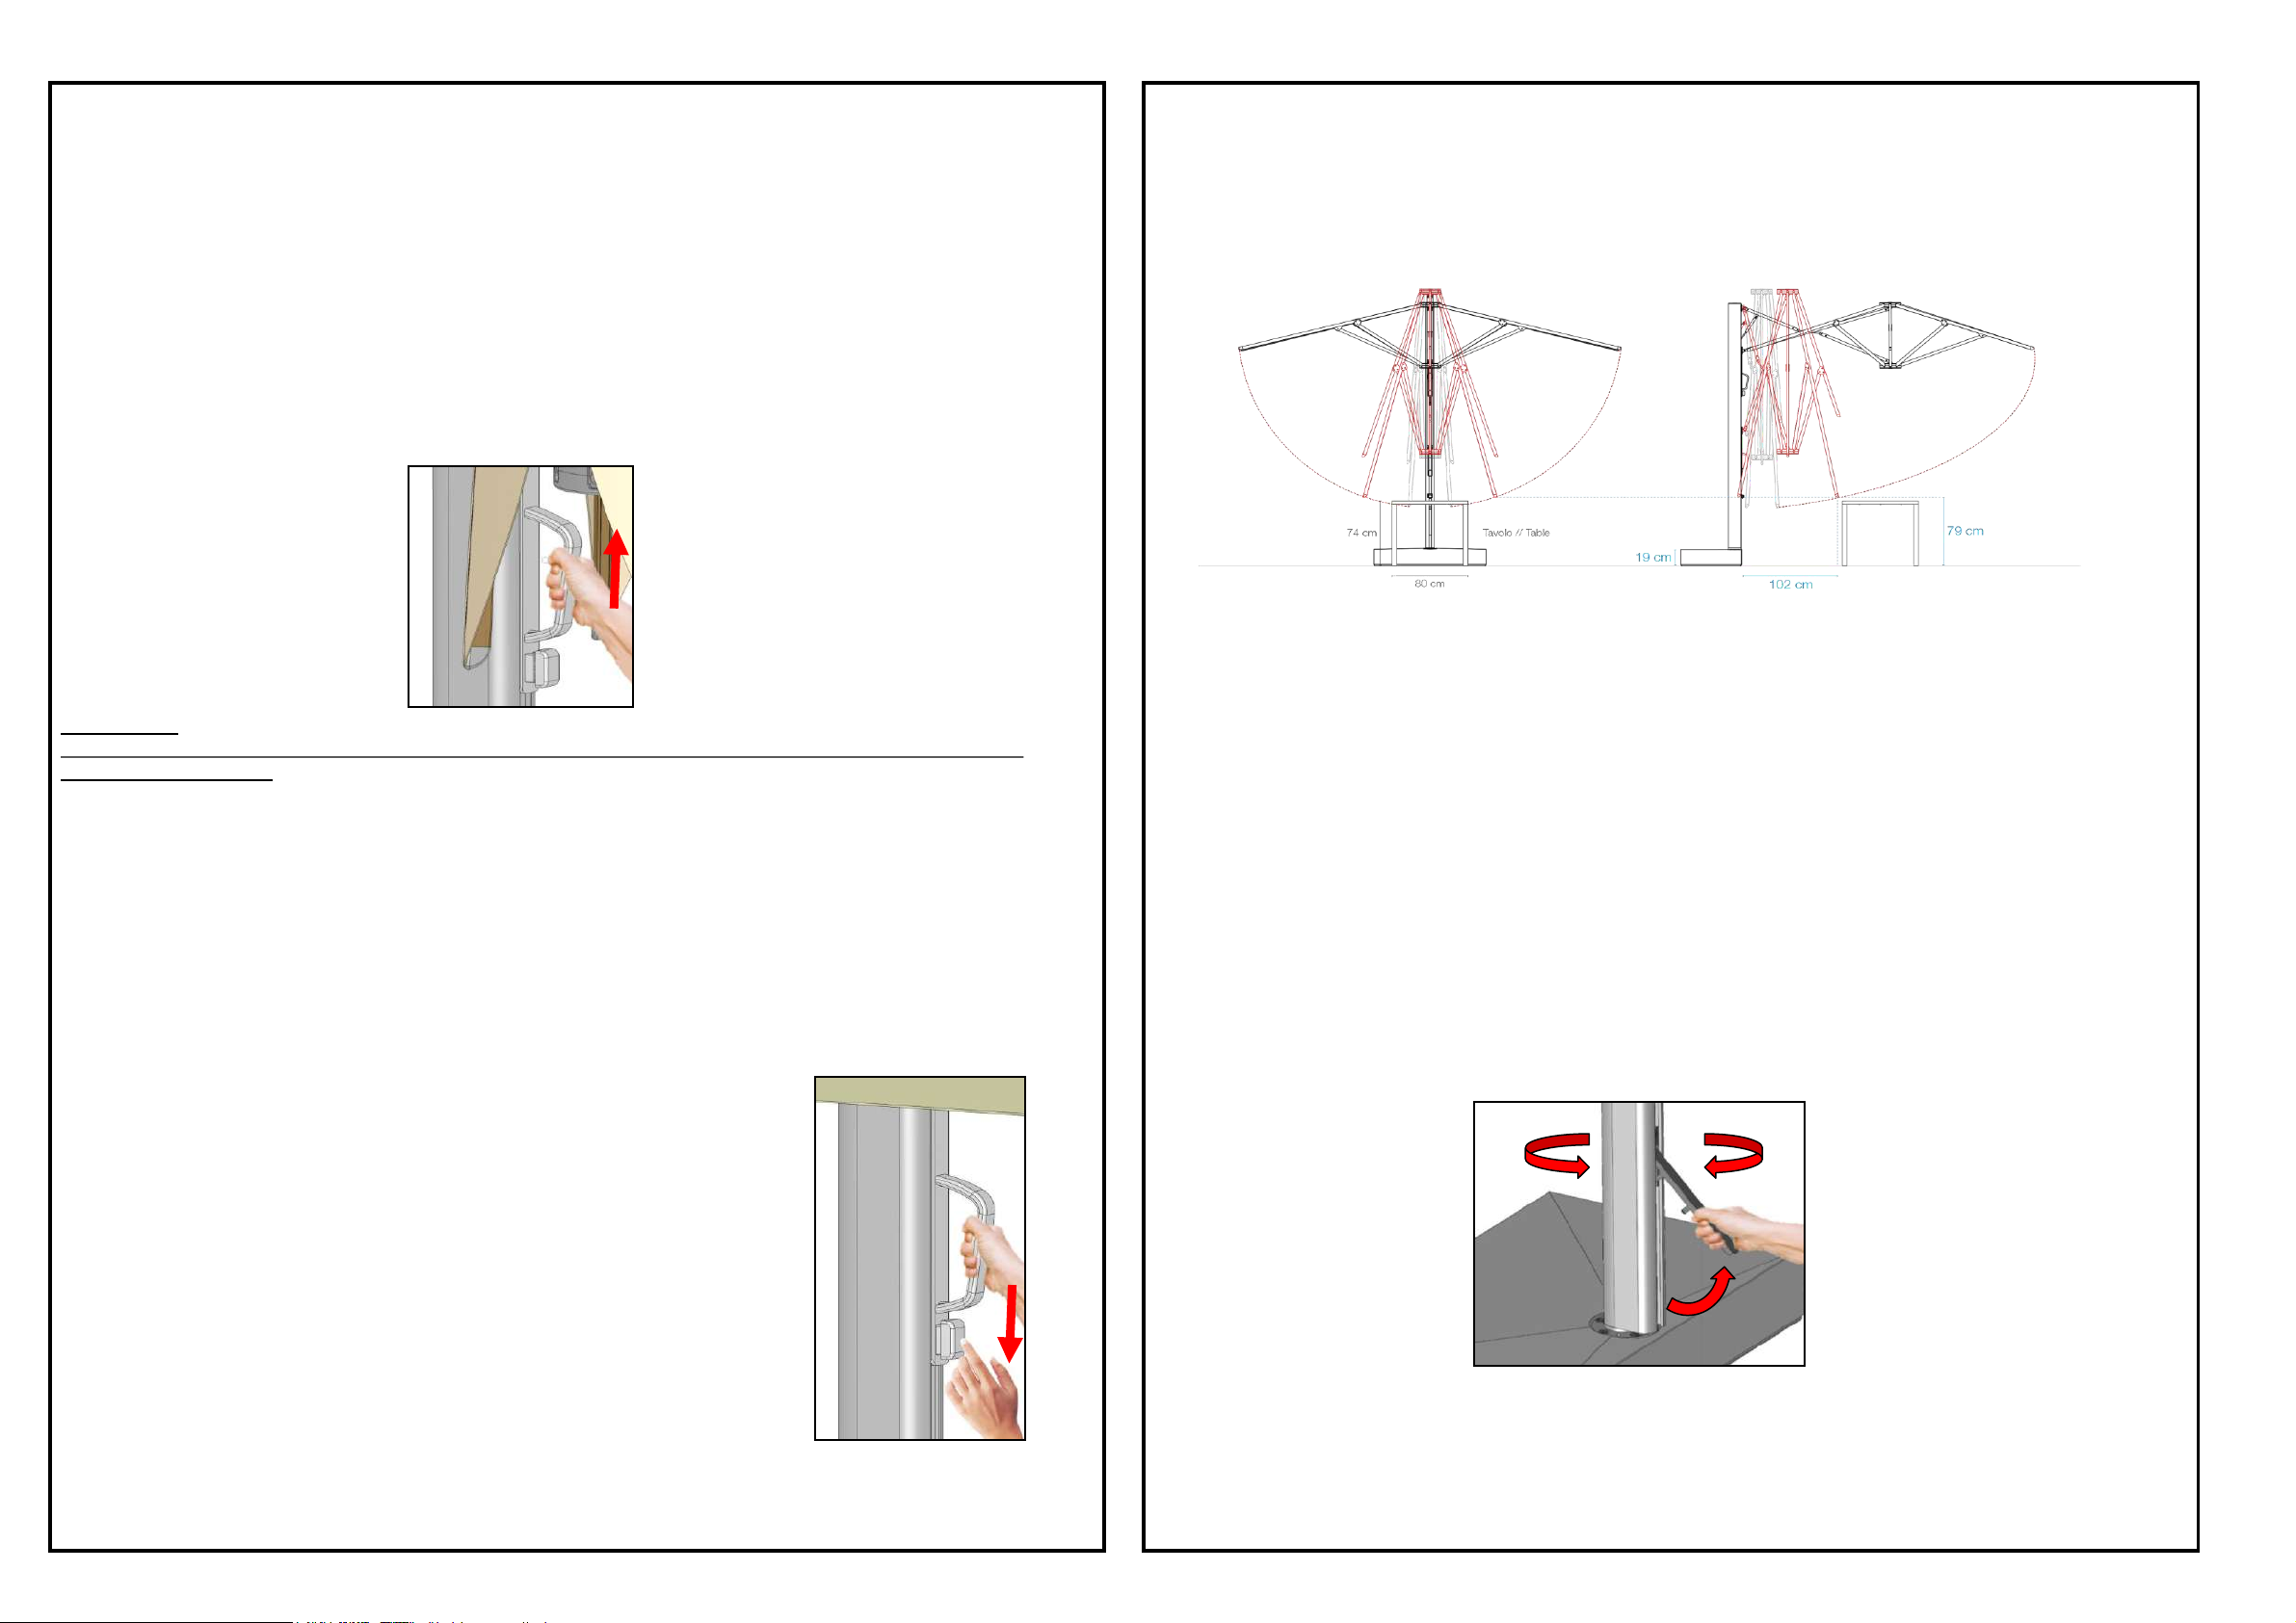
Una volta installato correttamente l'ombrellone SHADE PRO, lo stesso è adatto per essere
utilizzato in condizioni di vento leggero a moderato nella posizione con il telo aperto. Per cortesia
seguire queste linee guida:
1. Quando il vento diventa più forte o prima di condizioni atmosferiche incerte e preoccupanti,
l'ombrellone deve essere chiuso, abbassato e legato al palo laterale.
2. L'ombrellone va tenuto in posizione chiusa e legato al palo centrale in condizioni di non utilizzo.
3. Prima o durante condizioni meteorologiche estremamente gravi, è consigliabile rimuovere e
proteggere al chiuso l'intero ombrellone SHADE PRO comprensivo di struttura.