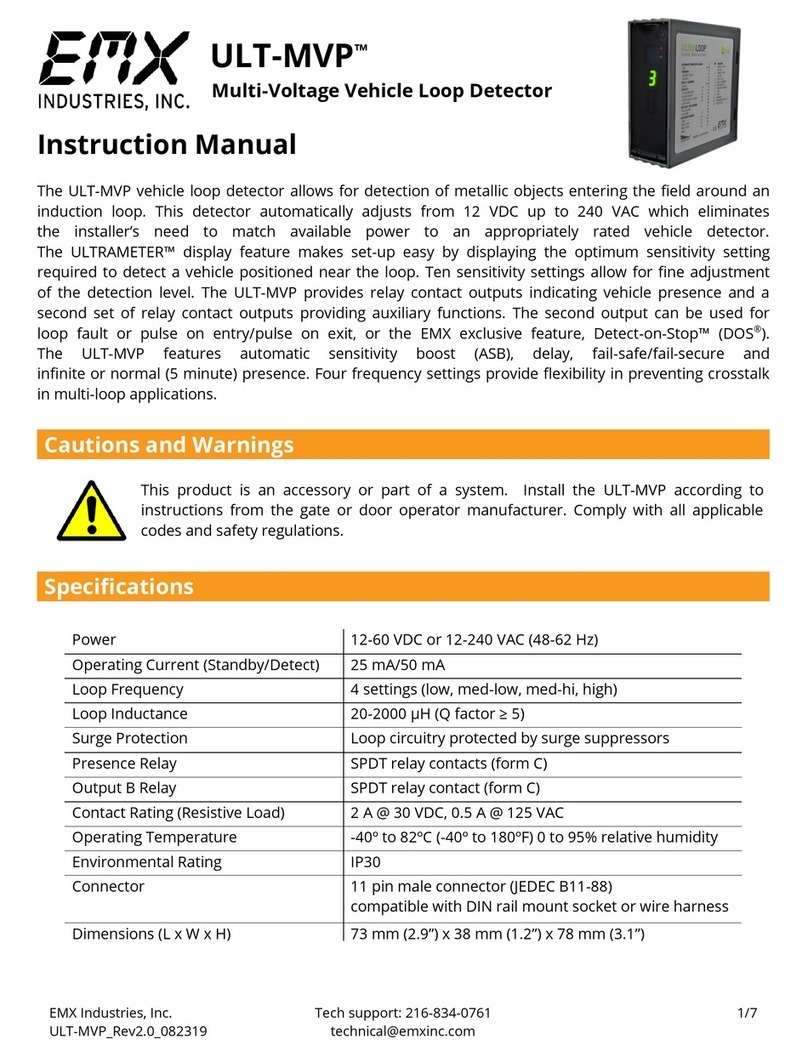
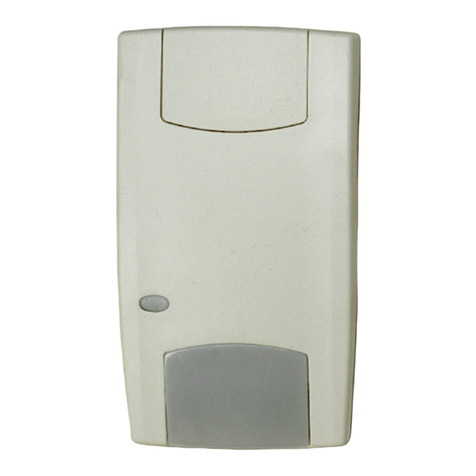
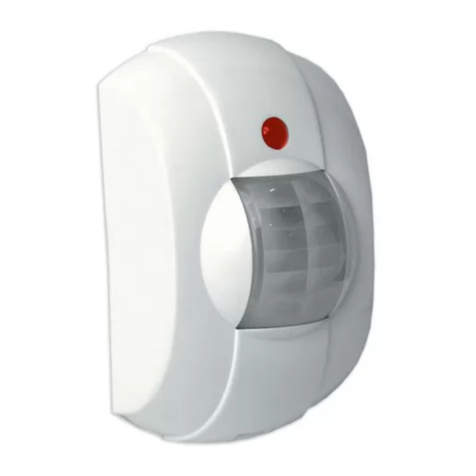
EMX Industries RAVEN User manual

EMX Industries, Inc. Tech support: 216-518-9889 1/10
RAVEN_Rev1.0_062420 techn[email protected]m
RAVEN™
Overhead Microwave Motion Sensor
Instruction Manual
The RAVEN is a motion sensor that utilizes microwave technology to activate automatic doors and
industrial gates. The sensor features two relay outputs that distinguish between vehicle and
pedestrian traffic. The RAVEN’s detection mode can be configured to approach-only, depart-only
or bidirectional movement. The programmable parameters allow for the fine tuning of the sensitivity,
responsiveness and relay hold time. All user settings can be adjusted directly on the sensor or by using
the optional remote control.
Cautions and Warnings
Install the RAVEN according to instructions from the door operator manufacturer.
Comply with all applicable codes and safety regulations.
When drilling, ensure no damage can be caused in desired mounting location.
(Ex: hidden wires, waterlines, etc.)
Specifications
Operating Frequency
24.150 GHz
Detection Range
Dependent on sensor height and housing angle
Max. detection range of 23 ft (7 m) x 23 ft (7 m) at an installation height of
16 ft (5 m) and a housing angle of 45°
Vertical Directionality
+/- 90° in 15° increments (up/down)
Horizontal Directionality
+/- 18° (left/right)
Mounting Height
8-23 ft (2.5-7 m)
Power
12-36 VDC or 12-28 VAC
Current Draw
50 mA @ 24 VDC
Relay Output
2 relay outputs (vehicle & pedestrian) NO/NC
Relay Hold Time
0.5 to 300 seconds (adjustable)
Relay Contact Rating
1 A @ 24 VDC/AC
Operating Temperature
-4° to 140°F (-20° to 50°C) below 90% relative humidity
Dimensions (W x H x D)
With mounting bracket –5.16” (131 mm) x 2.87” (73 mm) x 5.35” (136 mm)
Connection
26 ft (8 m) cable
Housing Material
Polycarbonate
Weight
1.4 lbs (650 g) with cable
Environmental Rating
IP67

EMX Industries, Inc. Tech support: 216-518-9889 2/10
RAVEN_Rev1.0_062420 techn[email protected]m
Ordering Information
•RAVEN Overhead Microwave Motion Sensor, includes 26 ft (8 m) of cable and two
mounting screws
•RAVEN-RC Optional remote control for programming the RAVEN
Components, Controls and Indicators
Installation
1. Loosen the hinge screw to remove the mounting bracket from the sensor housing.
2. In the desired location, install the mounting
bracket at a height of 23 ft / 7 m or lower.
Drill mounting holes as shown in the diagram
and attach with the provided screws.
The mounting bracket can be installed
at an angle (tilted left or right) to shape
the detection area.
Do not install the RAVEN:
•Facing moving objects or moving
parts of a door
•Facing and closer than 6.5 feet to fluorescent lights
•Facing an area where rain could provoke water fluxes
1.
Sensor Housing Screws
2.
FUNCTION Control Button
3.
SETTING Control Button
4.
Hinge Screw
5.
Mounting Bracket
TIP:
2
3
Green LED
Red LED
1
4
5

EMX Industries, Inc. Tech support: 216-518-9889 3/10
RAVEN_Rev1.0_062420 techn[email protected]m
3. Re-attach the sensor housing to the
mounting bracket with the hinge screw.
Adjust to the desired angle of detection
(up/down in 15° increments, ex: 15°, 30°,
45°) and re-tighten the hinge screw.
Refer to Programmable Parameters
for the recommended angle.
4. Wire the RAVEN to the door controller per the wiring table below.
Wire Color
Description
Brown
Power input + (12-36 VDC or 12-28 VAC)
Green
Power input –(12-36 VDC or 12-28
VAC)
White
Vehicle detection relay
Yellow
Vehicle detection relay
Gray
Human detection relay
Pink
Human detection relay
5. Apply power and allow 10 seconds for the unit to stabilize. The Red/Green LEDs will be flashing
during this time. Once stabilized, the sensor’s settings can be configured.
LED Indicators
Red/Green Flashing
Sensor Initialization
Green On
Standby
Fast Green Flashes
Human detection relay activated
Fast Red Flashes
Vehicle detection relay activated
Fast Green/Red Flashes
Vehicle and human detection relay activated
45°
30°
15°

EMX Industries, Inc. Tech support: 216-518-9889 4/10
RAVEN_Rev1.0_062420 techn[email protected]m
Programming the RAVEN
1. Program the RAVEN using the FUNCTION and SETTING control buttons on the front of the
sensor.
2. To enter programing mode, press and hold the FUNCTION button for ~ 2 seconds.
For example, two RED LED slow flashes indicate the vehicle detection function followed by
three GREEN LED slow flashes indicating a setting of high.
Programming Mode LED Indicators
Red LED
# of flashes indicates selected function
Green LED
# of flashes indicates current setting for selected
function
3. Use the FUNCTION control button to cycle through the nine functions. Next, press the
SETTING control button to set the desired value for the selected function. The function and
setting will be confirmed by the number of red and green flashes.
The setting is automatically stored every time the SETTING button is pressed.
Press and hold the FUNCTION button for ~2 seconds to exit programming mode.
Programming Example: Changing the Responsiveness Setting from Fast to Slow
1. Press and hold the FUNCTION button for ~2 seconds to enter programming mode.
2. Press the FUNCTION button seven times to switch to the responsiveness function.
The RED LED should now be flashing eight times with the number of GREEN LED flashes
indicating the current setting for the responsiveness.
For example, one green flash indicates a responsiveness setting of fast.
3. To change the responsiveness from fast to slow, press the SETTING button two times.
4. Eight RED LED flashes followed by three GREEN LED flashes will now indicate that the
responsiveness is set to slow.
5. Press and hold the FUNCTION button for ~2 seconds to exit programming mode and to
save sensor settings.
Programmable Parameters
Programmable parameters are adjusted using the control buttons or the optional remote control.
NOTE: The RAVEN will distinguish between vehicles and people. This distinction is dependent on the
programmable parameters: “Vehicle Detection”, “Human Detection” and “Responsiveness”.
All DEFAULT factory settings are noted in TABLE 1 on the following page.
After changing the settings, confirm proper operation.

EMX Industries, Inc. Tech support: 216-518-9889 5/10
RAVEN_Rev1.0_062420 techn[email protected]m
Detection Without Cross-Traffic Control
Detection With Cross-Traffic Control
TABLE 1
FUNCTION
# of red LED flashes
(1-9) / remote button
indicate function
SETTING
# of green LED flashes
indicate the setting for
each function
SETTING RECOMMENDATIONS
#1 / SENS
Sensitivity
Select 1-10 to increase or
decrease the detection
area.
1 Smallest detection area
---
6 (DEFAULT)
---
10 Largest detection area
Installation Height
Sensor Housing Angle
15°
30°
45°
> 45°
23 ft (7 m)
8
4
2
1
16 ft (5 m)
6
6
3
1
11 ft (3.5 m)
6
5
4
1
8 ft (2.5 m)
4
4
4
1
#2 / CAR
Vehicle Detection
1 Low
2 Medium (DEFAULT)
3 High
Installation Height
Sensor Housing Angle
15°
30°
45°
> 45°
23 ft (7 m)
1
2
2
1
16 ft (5 m)
1
2
2
2
11 ft (3.5 m)
1
2
2
3
8 ft (2.5 m)
1
2
2
3
#3 / PER
Human Detection
Select 1-7
1 Min (DEFAULT)
When 1 is selected,
cross- traffic control is
deactivated.
---
7 Max
When 2-7 is selected,
cross-traffic control is
activated.
Installation Height
Sensor Housing Angle
15°
30°
45°
> 45°
23 ft (7 m)
1
1
1
1
16 ft (5 m)
1
1
1
1
11 ft (3.5 m)
1
1
1
1
8 ft (2.5 m)
1
1
1
1
Installation Height
Sensor Housing Angle
15°
30°
45°
> 45°
23 ft (7 m)
4-7
2-7
2-7
2-7
16 ft (5 m)
4-7
4-7
4-7
4-7
11 ft (3.5 m)
4-7
4-7
6-7
6-7
8 ft (2.5 m)
4-7
6-7
6-7
6-7
#4 / OCAR
Vehicle Detection
Relay
Using Buttons
Behavior
Using Remote
1
Vehicle forward
4
2
Vehicle backward
5
3
Vehicle forward/backward
6
4
Person/vehicle forward
7
5
Person/vehicle backward
8
6
Person/vehicle forward/backward
9

EMX Industries, Inc. Tech support: 216-518-9889 6/10
RAVEN_Rev1.0_062420 techn[email protected]m
FUNCTION
# of red LED flashes (1-9) indicate function
SETTING
# of green LED flashes indicate the setting for each function
#5 /OPER
Human Detection Relay
1 Person forward
2 Person backward
3 Person forward/backward
4 Vehicle forward
5 Vehicle backward
6 Vehicle forward/backward
#6 / TIME
Relay Hold Time
The duration of time the relay will stay
active after detection
1 0.5 seconds
2 1 second (DEFAULT)
3 2 seconds
4 3 seconds
5 4 seconds
6 5 seconds
7 10 seconds
8 15 seconds
9 20 seconds
10 25 seconds
11 30 seconds
12 60 seconds
13 300 seconds
# 7 / OUT
Relay Contact
1 Normally open (NO) contact –Closes on detection
2 Normally closed (NC) contact –Open on detection
# 8 / STEP
Responsiveness
Setting
Behavior
1 Fast
More reliable detection of people
2 Normal (DEFAULT)
Reliable vehicle detection
3 Slow
Reliable differentiation between
vehicles and people
# 9
Device Address
If multiple RAVENS are located in close
proximity, their device addresses must be
set to different values.
*Not possible to set with the remote
control
1 Address 1 (DEFAULT)
---
15 Address 15
RESET
Reset the sensor to factory default settings.
The LED flashes green/red for ~10 seconds
Press and hold the FUNCTION and SETTING buttons
for ~5 seconds

1. Press the Unlock Key on the remote control to enter programming mode.
2. The RED LED on the RAVEN will flash slowly (twice per second) when in programming mode.
When the remote control has security enabled, the RAVEN’s RED LED will flash fast (five times
per second). This means the sensor is expecting a four-digit security code and once it’s entered,
the sensor’s RED LED will flash slowly (twice per second).
3. Pressing a function key on the remote will cause the RED LED to flash fast (five times per
second) indicating that a setting value is expected to be entered.
4. After entering a setting value, the GREEN LED will flash the same number of times as the
value entered. The +/- keys can also be used to change the settings as indicated in TABLE 2.
5. Pressing the function key followed by the Question Key ? will display the current setting.
6. To exit programming mode, press the Lock Key twice.
Setting a four digit security code for the RAVEN remote control the first time:
1. Press the Unlock Key followed by the Lock Key on the remote control. The RED LED on
the sensor will flash fast (five times per second).
2. Enter the new four-digit security code and note it. The RAVEN will return to its normal operating
state, this is indicated by the GREEN LED on the sensor.
3. Press the Unlock Key on the remote control. The RED LED will flash quickly (five times
per second) on the sensor. Key in the security code to enter programming mode, a successful
key entry is indicated by a slow flashing LED (twice per second). If the incorrect security code
is entered, the RAVEN will exit programming mode and return to a normal operating state
as indicated by the GREEN LED.
No security code is required to unlock the RAVEN for 30 minutes after a power reset.
Changing the four digit security code for the RAVEN remote control:
1. Press the Lock Key while the sensor is in programming mode. The RED LED on the RAVEN
will flash fast (five times per second), this indicates the sensor is waiting for a new four-digit
security code.
2. Enter a new four-digit security code within 60 seconds.
Locking the RAVEN’s remote control programming:
1. While in programming mode, press the Lock Key . The RED LED on the RAVEN will flash fast
(five times per second). Then press the “9” key to lock the sensor. The remote control can only
be used within 60 seconds after power on.
2. While in programming mode, press the Lock Key while the sensor is in programming mode,
followed by “0” to clear the security code or lock.
Programming with the Remote
NOTE:

EMX Industries, Inc. Tech support: 216-518-9889 8/10
RAVEN_Rev1.0_062420 techn[email protected]m
FUNCTION
TABLE 2
FUNCTION
# of red LED flashes (1-9) indicate function
SETTING
# of green LED flashes indicate setting for each function
SET-9
Factory Setting Reset
Reset the sensor to factory settings.
The LED will flash GREEN/RED for
~10 seconds.
9 Factory setting reset
F2
Permanent Relay Activation
(To assist with door maintenance)
1 Automatic (DEFAULT)
2 Vehicle & human detection relay permanently active
3 Vehicle relay only permanently active
4 Human relay only permanently active
5 Vehicle & human detection relay permanently inactive
Programmable Parameters –Remote Control Only
Change the setting of a
specific function
Enter programming mode
with security key
Check the current setting
of a function
Parameters can be adjusted using + or –keys.
X
X
X
X
?
FUNCTION
Exit Programming
0-9
Enter Programming
NOTE:

EMX Industries, Inc. Tech support: 216-518-9889 9/10
RAVEN_Rev1.0_062420 techn[email protected]m
Vehicle & Human Detection –Explanation & Examples
The RAVEN can distinguish between human and vehicle traffic in its zone of detection. This distinction
is dependent on the programmable parameters: “Vehicle Detection”, “Human Detection” and
“Responsiveness”. These parameters should be adjusted as explained in TABLE 1 to ensure detection
accuracy.
The RAVEN has two relay outputs:
Vehicle Detection Relay - can detect a vehicle only or a vehicle/person
Human Detection Relay - can detect a vehicle or a person
EXAMPLE 2: Door operator controlling one industrial door and one pedestrian door.
Wire the vehicle detection and human detection relay to the door operator, configure as
shown below.
Function
Setting
Vehicle Detection Relay / OCAR
Vehicle forward (1)
Human Detection Relay / OPER
Person forward (1)
Responsiveness / STEP
Normal (2)
Vehicle Detection / CAR
Dependent on height
Human Detection /PER
Dependent on height
EXAMPLE 1: Door operator using vehicle detection only.
Wire the vehicle detection relay to the door operator, configure as shown below.
Function
Setting
Vehicle Detection Relay / OCAR
Vehicle forward (1)
Responsiveness / STEP
Normal (2)
Vehicle Detection / CAR
Dependent on height

EMX Industries, Inc. Tech support: 216-518-9889 10/10
RAVEN_Rev1.0_062420 techn[email protected]m
Troubleshooting
Symptom
Possible Cause
Solution
No LEDs on
No power or faulty power
connection
1. Verify the voltage is between 12-36 VDC or
12-28 VAC using a digital multimeter.
2. If voltage is present and there are still no
LEDs on, the sensor is defective.
Door is detected
Sensor is angled toward
door
1. Adjust the sensor housing away from the
door.
2. Reduce the sensitivity setting.
3. Increase the responsiveness setting.
4. Increase the human detection setting.
Remote control
does not respond
Device is locked
Batteries are low
Cycle power to the sensor. The sensor can now be
configured without a code for 30 minutes.
Replace batteries with two AA lithium batteries
1.5V (in cold weather, battery life can be reduced)
Person is mistaken
for a vehicle
Vehicle detection set
too low
1. Increase the vehicle detection setting.
2. Increase the responsiveness setting.
3. If only detecting vehicles, reduce the
sensitivity setting.
Vehicle is mistaken
for a person
Vehicle detection set
too high
1. Lower the vehicle detection setting.
2. Increase the responsiveness setting.
Object is detected
too late
Vehicle and human
detection set too low
1. Reduce the responsiveness setting.
2. Increase the sensitivity setting.
Object detection is
too sensitive
Vehicle and human
detection set too high
1. Increase the responsiveness setting.
2. Reduce the sensitivity setting.
Back and forth
movement of
people not
detected
Human detection set
too low
Increase the human detection setting.
False activation
Vibrations or rain in the
sensor’s environment
Rain
1. Increase the responsiveness setting.
2. Increase the human detection setting.
3. Reduce the sensitivity setting.
Warranty
EMX Industries, Inc. products have a warranty against defects in materials and workmanship for a period
of two years from date of sale to our customer.
Other manuals for RAVEN
1
Table of contents
Other EMX Industries Security Sensor manuals

EMX Industries
EMX Industries VMD202 User manual

EMX Industries
EMX Industries ULT-MVP User manual

EMX Industries
EMX Industries OWL User manual

EMX Industries
EMX Industries VMD202 User manual

EMX Industries
EMX Industries MVP D-TEK User manual

EMX Industries
EMX Industries ULT-V2 User manual

EMX Industries
EMX Industries USVD-4X User manual

EMX Industries
EMX Industries CarSense 202 User manual

EMX Industries
EMX Industries IRB-MON2 User manual

EMX Industries
EMX Industries Ultra II DTEK User manual