En-Vision America ScripTalk ST400 User manual
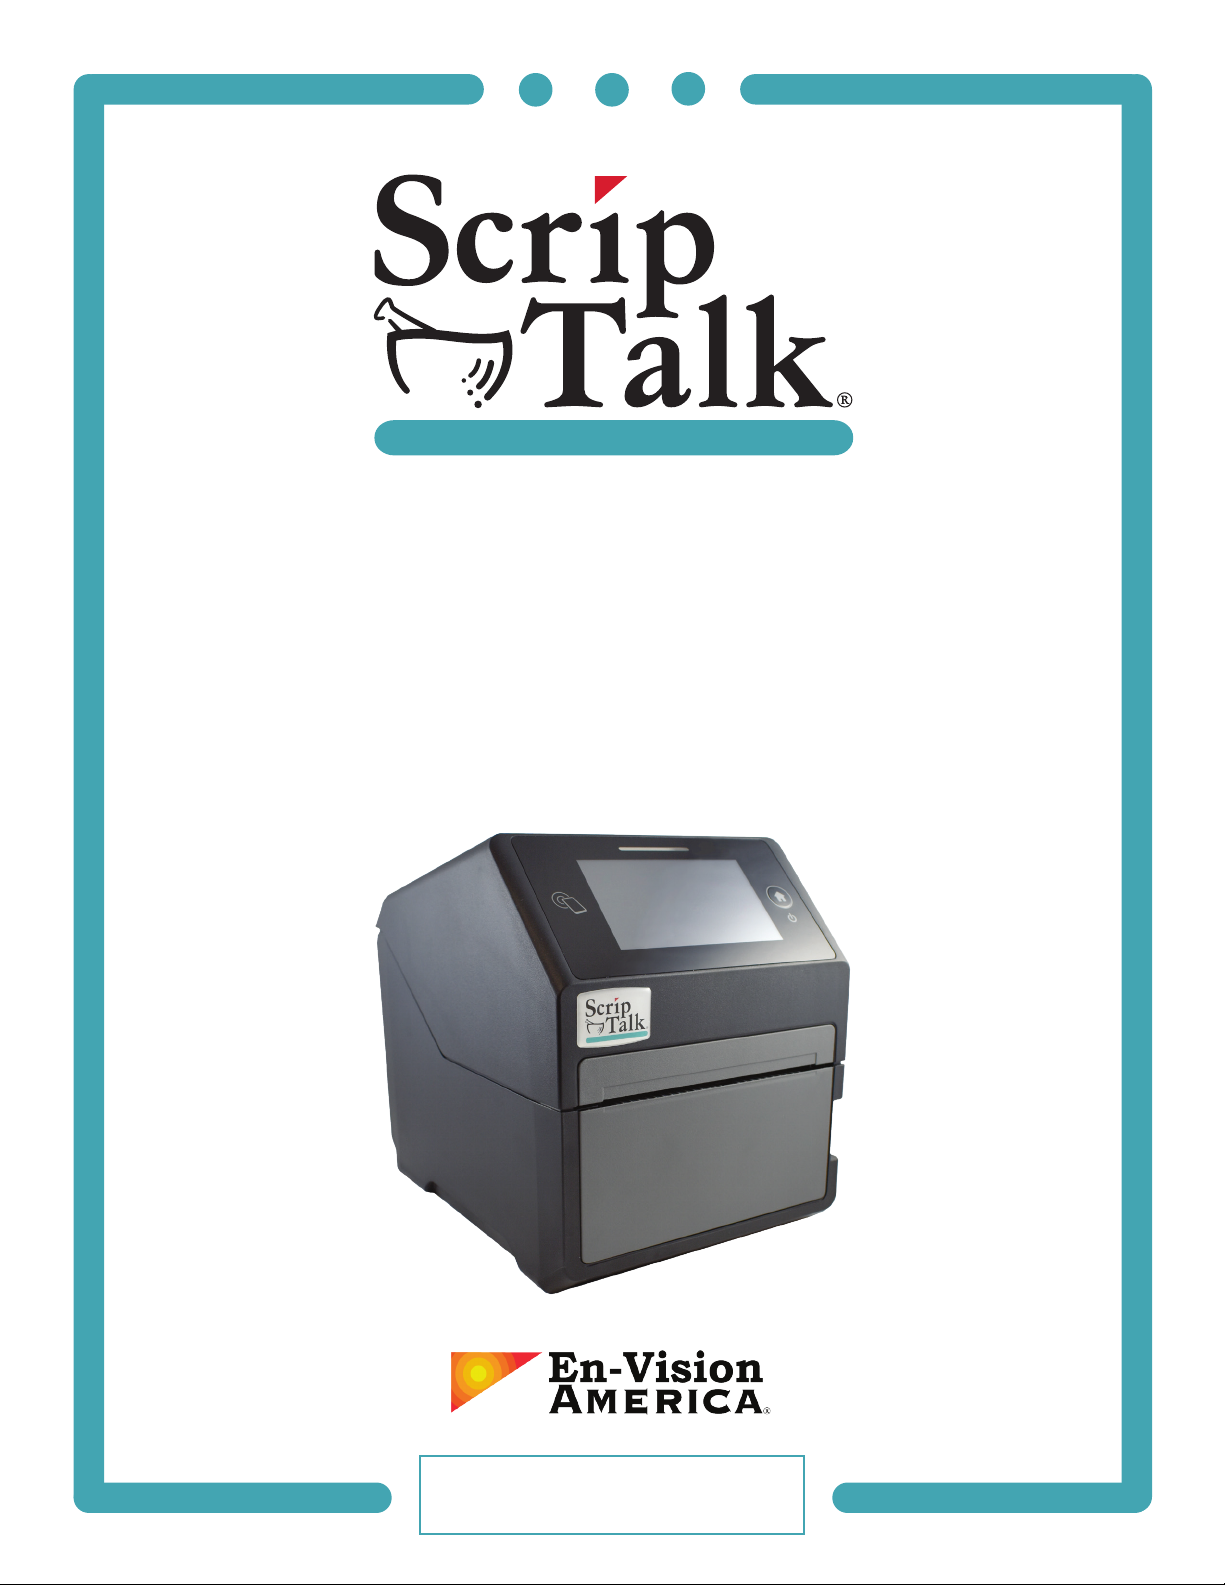
ScripTalk®Printer
User’s Manual
Model ST400™
User’s Manual No. ST400-001 v1.0
© En-Vision America, Inc.

FORWARD
This manual provides installaon and operaon informaon for the ST400 series printers manufactured by
En-Vision America, Inc.
COPYRIGHTS
This document contains informaon proprietary to En-Vision America, Inc. This document and the informaon
contained within is copyrighted En-Vision America, Inc. and may not be duplicated in full or in part by any
person without wrien approval from En-Vision America, Inc. While every eort has been made to keep
the informaon contained within current and accurate as of the date of publicaon, no guarantee is given
or implied that the document is error free or that it is accurate with regard to any specicaon. En-Vision
America, Inc. reserves the right to make changes, for the purpose of product improvement, at any me.
TRADEMARKS
ST400 is a trademark of En-Vision America, Inc. All other marks are trademarks or registered trademarks of
their respecve holders.
TROUBLESHOOTING & REPAIR
Before returning any equipment to En-Vision America for warranty or out-of-warranty repair, contact ScripTalk
Printer Technical Support for troubleshoong assistance.
Phone: 1-800-890-1180
Email: support[email protected]om
Mon-Fri: 8:00am-5:00pm Eastern Time
En-Vision America, Inc.
825 4th Street West, Palmeo, FL 34221
www.envisionamerica.com
©Copyright 2022 En-Vision America, Inc.
All rights reserved.

LIMITED WARRANTY
(a) Supplier warrants that each ScripTalk Printer Model ST400 purchased by Veterans Administraon for use
at its pharmacy locaon(s) will be free from defects or errors in materials, design, and workmanship and will
conform in all material respects to Supplier’s technical specicaons. Except where this limited warranty
becomes void pursuant to (b) below, this limited warranty will connue for one year from the date of Veterans
Administraon’s receipt of the Printer purchased. During the warranty period, Supplier will either repair
or replace the Printer at Supplier’s sole elecon as to which one applies and at Supplier’s cost. Such repair
or replacement will be Supplier’s sole obligaon and Veterans Administraon’s sole remedy and will be
condioned upon Supplier receiving wrien noce of such claimed defect and, at Supplier’s opon, Veterans
Administraon will return the Printer to Supplier, with shipping costs to be paid by Supplier.
(b) This limited warranty will be void to the extent: (i) Veterans Administraon’s subcontractor, agents,
employees or designees removes Printer casing or makes or aempts to make any modicaons, repairs
or addions to the Printer; or (ii) the Printer is not maintained or operated in accordance with Supplier’s
documentaon, or has been subjected to misuse, abnormal condions or grossly negligent handling or
operaon; or (iii) Veterans Administraon resold, leased or rented the Printer to or for the use by any person
other than Veterans Administraon.
THIS LIMITED WARRANTY IS EXCLUSIVE AND IN LIEU OF ALL OTHER REPRESENTATIONS AND WARRANTIES
OF SUPPLIER, EXPRESS OR IMPLIED, WRITTEN OR ORAL; SUPPLIER DISCLAIMS AND EXCLUDES ANY
IMPLIED WARRANTY, INCLUDING, WITHOUT LIMITATION, WARRANTIES OF MERCHANTABILITY AND
FITNESS FOR A PARTICULAR PURPOSE. IN NO EVENT SHALL SUPPLIER BE LIABLE FOR LOSS OF USE, LOSS
OF PROFITS, PUNITIVE DAMAGES, ATTORNEY’S FEES AND EXPENSES, CONSEQUENTIAL, INCIDENTAL OR
SPECIAL DAMAGES, OR ANY OTHER INDIRECT DAMAGES WHATSOEVER.
PRECAUTIONS FOR LOCATION AND ENVIRONMENT
Be sure the surface the ST400 printer is sing on and the environment around it sasfy the following
characteriscs for reliable and safe operaon.
• Place the printer on a surface that is at, level and free from vibraon
• Avoid environments with high temperature and humidity, and ones where rapid changes to
temperature and humidity are possible
• Avoid locaons where the printer may be exposed to water, oil, dust or direct sunlight
Failure to adhere to the recommendaons listed above may result in a shortened life span for the printer.
POWER SUPPLY
To avoid the risk of malfuncon, follow these guidelines for supplying power to the printer:
• Use only the power supply included with the ST400 printer (Output: 24V, 2.7A)
• Plug the power supply into a grounded power outlet
• Avoid plugging the power supply into an outlet shared by or near a heater, refrigerator or other large
appliance that draws a large amount of power

TABLE OF CONTENTS
INTRODUCTION................................................................. 1
Features of the Printer................................................................. 2
Unpacking .................................................................................... 2
Included Accessories.................................................................... 2
PartsIdentication ...................................................................... 3
INSTALLATION .................................................................. 6
Site Location................................................................................. 6
MediaIdentication .................................................................... 6
Loading Labels............................................................................. 7
Network Connection .................................................................... 10
USING THE TOUCH SCREEN.............................................. 11
Gestures........................................................................................ 11
Low Power Mode ......................................................................... 11
PoweringO ................................................................................ 11
Passwords .................................................................................... 12
NetworkConguration ............................................................... 13
TROUBLESHOOTING ......................................................... 14
Label Output Problems ............................................................... 14
Resetting....................................................................................... 14
ReloadingtheProle ................................................................... 15
Error Codes .................................................................................. 16
SPECIFICATIONS ............................................................... 19

1
INTRODUCTION
Thank you for your investment in the ScripTalk Printer Model ST400. The ST400 can print and program the
same 2in. x 4in. ScripTalk “talking labels” previously created with model 220-SN. ScripTalk labels can be placed
on any size or shape prescripon container, and have an embedded RFID chip that holds all of the prescripon
data printed on the visual poron of the label. This programmed data can be read out by a ScripTalk Staon
reader, or the ScripTalk Mobile smartphone app (Android and iPhone).
The ST400 ScripTalk Printer is fully compable with the exisng VA Class 1 soware system, and the latest
version of the VA Computerized Paent Record System (CPRS).
This operator’s manual contains the basic informaon about the installaon and specicaons of the printer.
A total of 5 topics are covered herein, and they are organized as follows:
Secon 1: Introducon
Secon 2: Installaon
Secon 3: Using the Touch Screen
Secon 4: Troubleshoong
Secon 5: Specicaons
It is recommended that you read carefully and become familiar with each secon before installing and
maintaining the printer. Refer to the Table of Contents at the front of this manual to search for the relevant
informaon needed.
This secon assists you in unpacking the printer from the shipping container. You will also be guided through a
familiarizaon tour of the main parts and controls.
The following informaon is provided herein:
• Features of the Printer
• Unpacking
• Parts Idencaon

2
Features of the Printer
The ST400 is a 4-inch direct thermal RFID printer, with 4 ips print speed and 4GB of ash memory. The key
features of the ST400 are:
• High Print Resoluon with crisp prinng quality (203dpi)
• Direct Thermal Prinng – no wax ribbon needed
• Ethernet LAN connecvity
• HF RFID
• Easy Media Loading – no round media plates required
• An-Microbial casing is ideally suited for clinical environments
• Safety Top Cover Latch
Unpacking
When unpacking the printer, take note of the following:
• The box should stay right-side up. Li the printer out of the box carefully.
• Remove all packaging from the printer.
• Remove the accessory items from their protecve containers.
• Set the printer on a solid, at surface. Inspect the shipping container and printer for any sign of
damage that may have occurred during shipping. Please note that En-Vision America shall hold no
liability for any damage of any kind sustained during shipping of the product.
Notes
• If the printer has been stored in the cold, allow it to reach room temperature before turning it on.
• Please do not discard the original packaging box and cushioning material aer installing the printer.
They may be needed in the future, if the printer needs to be shipped for repairs.
Included Accessories
Aer unpacking the printer, verify that you have the following materials:
* The shape of the power plug may vary, depending on where it was purchased

3
PartsIdentication
Front View
LED Status Indicator – 3 states: Online (blue), Oine (o), Error (red).
4.3” Full Color Touch Screen – Control and congure the printer with taps and swipes.
Home/Power Buon – Press and hold to power ON or OFF. Press and release while ON
to return to the main screen.
Top Cover – Open this cover to load the label media.
Media Ejecon Slot – Opening for media output.
Cover Open/Close Latch – Push down on the cover release latch on the right side to
open the Top Cover.
1
2
3
4
5
6

4
PartsIdentication(cont.)
Back View
DC Input Power Terminal – Supplies power to the printer by inserng the power plug
via the power supply adapter.
USB Prinng Terminal – Provides prinng connecvity via USB.
USB Printer Update Terminal – Used to update the printer’s rmware.
WARNING: DO NOT USE UNLESS INSTRUCTED TO DO SO BY SCRIPTALK TECHNICAL SUPPORT.
LAN Interface Terminal – Provides network connecvity via an RJ-45 Ethernet port.
7
8
9
10

5
PartsIdentication(cont.)
Internal View with Top Cover Open
Print Head – This component is used to print on the paper.
Roll Media Holder – Suspends the roll of labels for smooth feeding.
Platen Roller – Feeds the labels.
Media Guide Slide Lever – Push backwards to unlock the Roll Media Holder slides for
width adjustment.
11
12
13
14
6
INSTALLATION
This secon helps you with installing ScripTalk Talking Label media (10KB) in the ST400, as well as
adjustment instrucons.
The following informaon is provided:
• Site Locaon
• Media Idencaon
• Loading Labels
• Connecons
Site Location
Consider the following when seng up the printer:
• Place the printer on a solid at surface with adequate space. Make sure there is enough space above
the printer to provide clearance for the top cover to swing open.
• Place it away from hazardous materials or dusty environments.
• Place it within operaonal distance of the host computer, within interface cable specicaons.
MediaIdentication
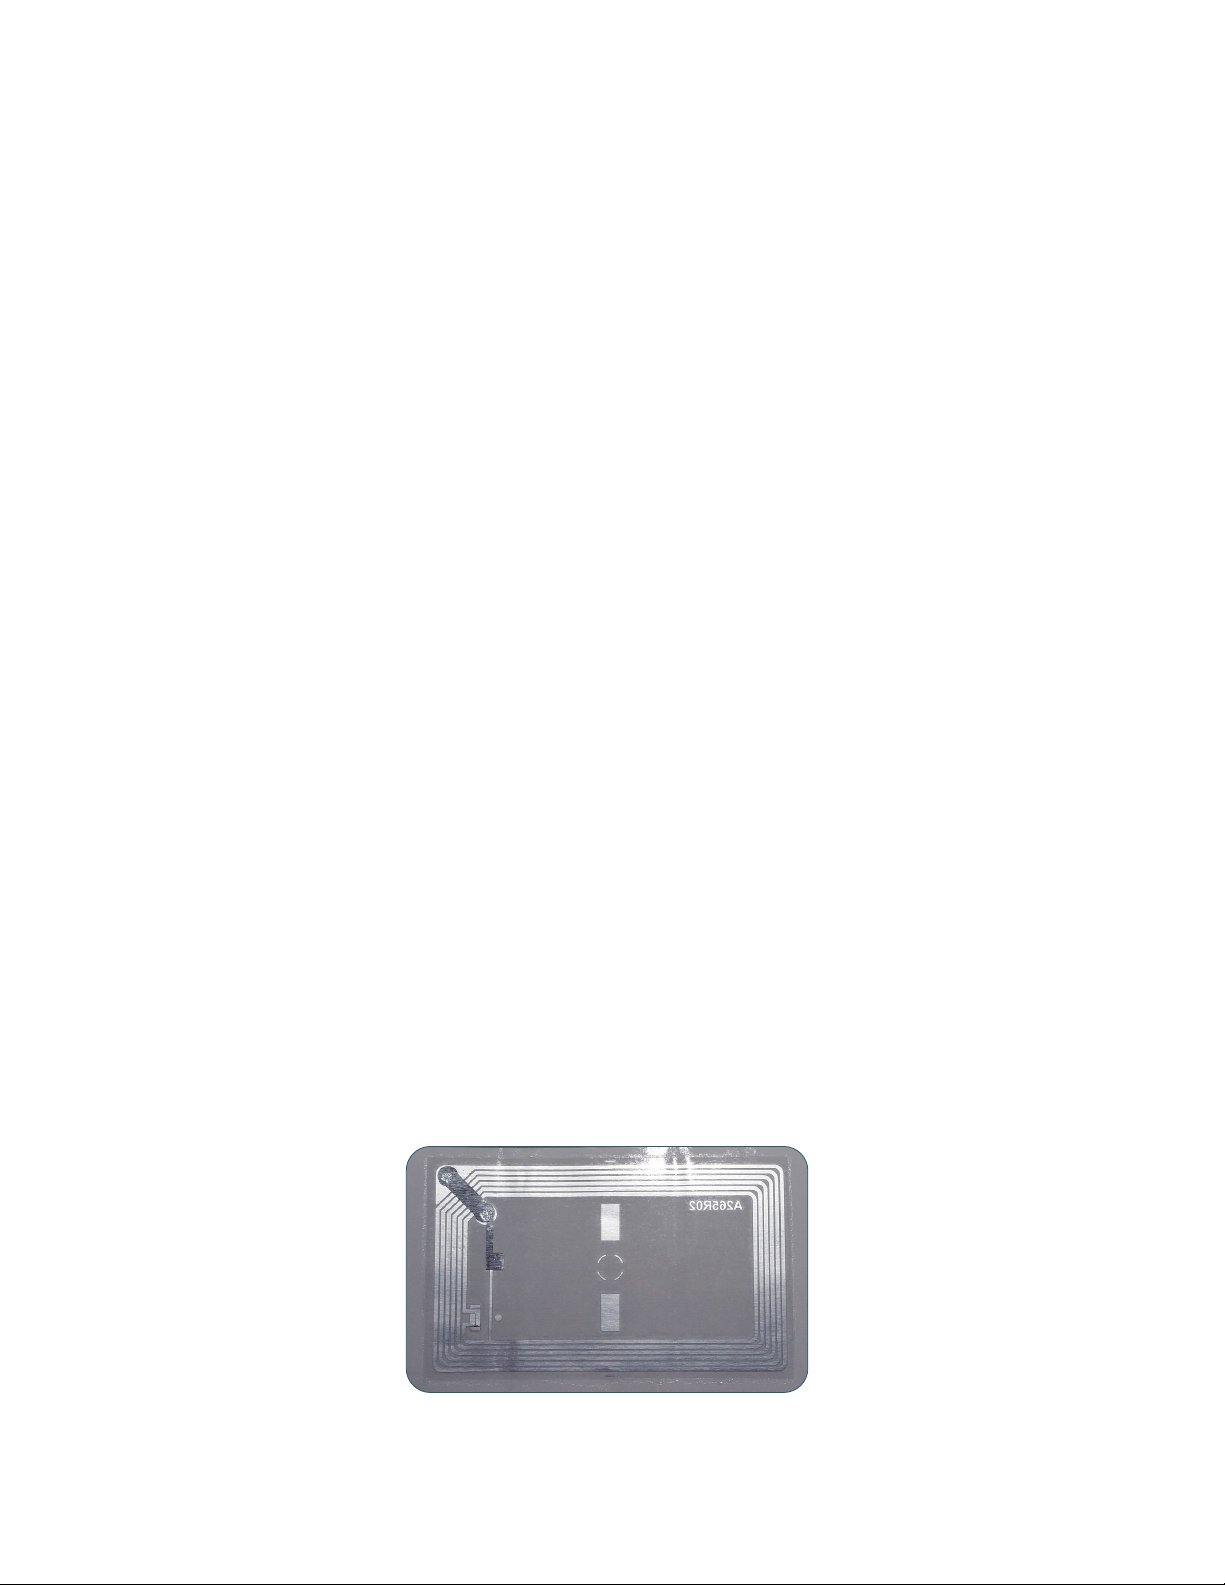
The ScripTalk Printer ST400 requires specic label stock that can only be purchased from En-Vision America.
If you need more labels, have your purchasing agent fax a PO to 309-452-3643 for the following:
00210-10K-0250 ScripTalk Labels, 10K, 250/roll
The back of a ScripTalk Label will look similar to the one below. Over me, some details have varied, but the
metallic “race track” antenna has always been a feature:

7
Loading Labels
With the power supply o, push the cover open/close latch (1)
on the right side to unlock the top cover, and then open
the top cover (2). Make sure the cover rests rmly in the
upright posion so that it will not fall forward and injure you.
Oponal Step: The media holder should already be set when you receive the ST400. If the width seems o:
a. While holding the media guide slide lever (1),
adjust the width of the media holder (2) to match
the media size. To do this, move the media holder
to its widest width, place a roll of ScripTalk Labels in
between, then move the holder towards the center.
b. Release the media guide slide lever (1) when the
proper width is set.
1
2
!CAUTION: The print head and surrounding area will
be hot if the printer has been on. Keep bare skin away
from these areas to avoid injury.

8
Load the media onto the media holder so
that the labels feed from the top of the
roll. Pass the leading edge of the labels
through the media guides and place it on
top of the platen roller.
Note: The black line on the label backing
will be down.
Gently close the top cover unl it clicks
into posion.
Connect the included power cable to the
power supply.
3
4
5

9
Plug the 3-prong plug of the power cable into a
grounded wall outlet or a grounded surge suppressor
strip (recommended).
Plug the other end of the cable into the
printer’s DC Input Power Terminal.
Turn on the power with the Home/Power buon.
When the printer is done boong up, tap the
blue “OFFLINE” buon:
7
8
9
6

10
Network Connection
Connect a Cat5 or faster Ethernet cable between the RJ45 port on the ST400 and your host PC or network.
Tap the orange “FEED” buon to output one blank
label, allowing it to align the next for prinng.
Tap the blue “ONLINE” buon to make the printer
ready to print.
9
10

11
USING THE TOUCH SCREEN
The ST400’s color LED touch screen provides easy access to nearly all of the informaon, sengs, and features
of the printer. This secon will cover only those aspects relevant to using the printer for creang ScripTalk labels.
WARNING:Itisrecommendednottochangeanysengsthatarenotcoveredinthissecon.
The following informaon is provided:
• Gestures
• Low Power Mode
• Powering O
• Passwords
• Network Conguraon
Gestures
The printer’s touch screen can be navigated with taps and swipes, much like a smartphone. Tapping is used
to do things such as select buons and place the cursor in text input elds. Swiping is used to scroll lists of
opons, either up and down, or right and le. When swiping to scroll, press rmly, and be sure to swipe passed
the edge of the touch screen. This will help avoid unintended tapping.
Low Power Mode
Aer three minutes of no prinng and no interacon with the touch screen, the printer will enter a low power
mode. It will be necessary to tap either the Home buon or touch screen once to bring it out of this low power
mode and perform other acons. You will noce the screen brighten slightly when this occurs.
PoweringO
To turn the printer o, press and hold the Home/Power buon unl you see the screen below. Tap the
checkmark buon to conrm, or the ‘X’ to cancel.
12
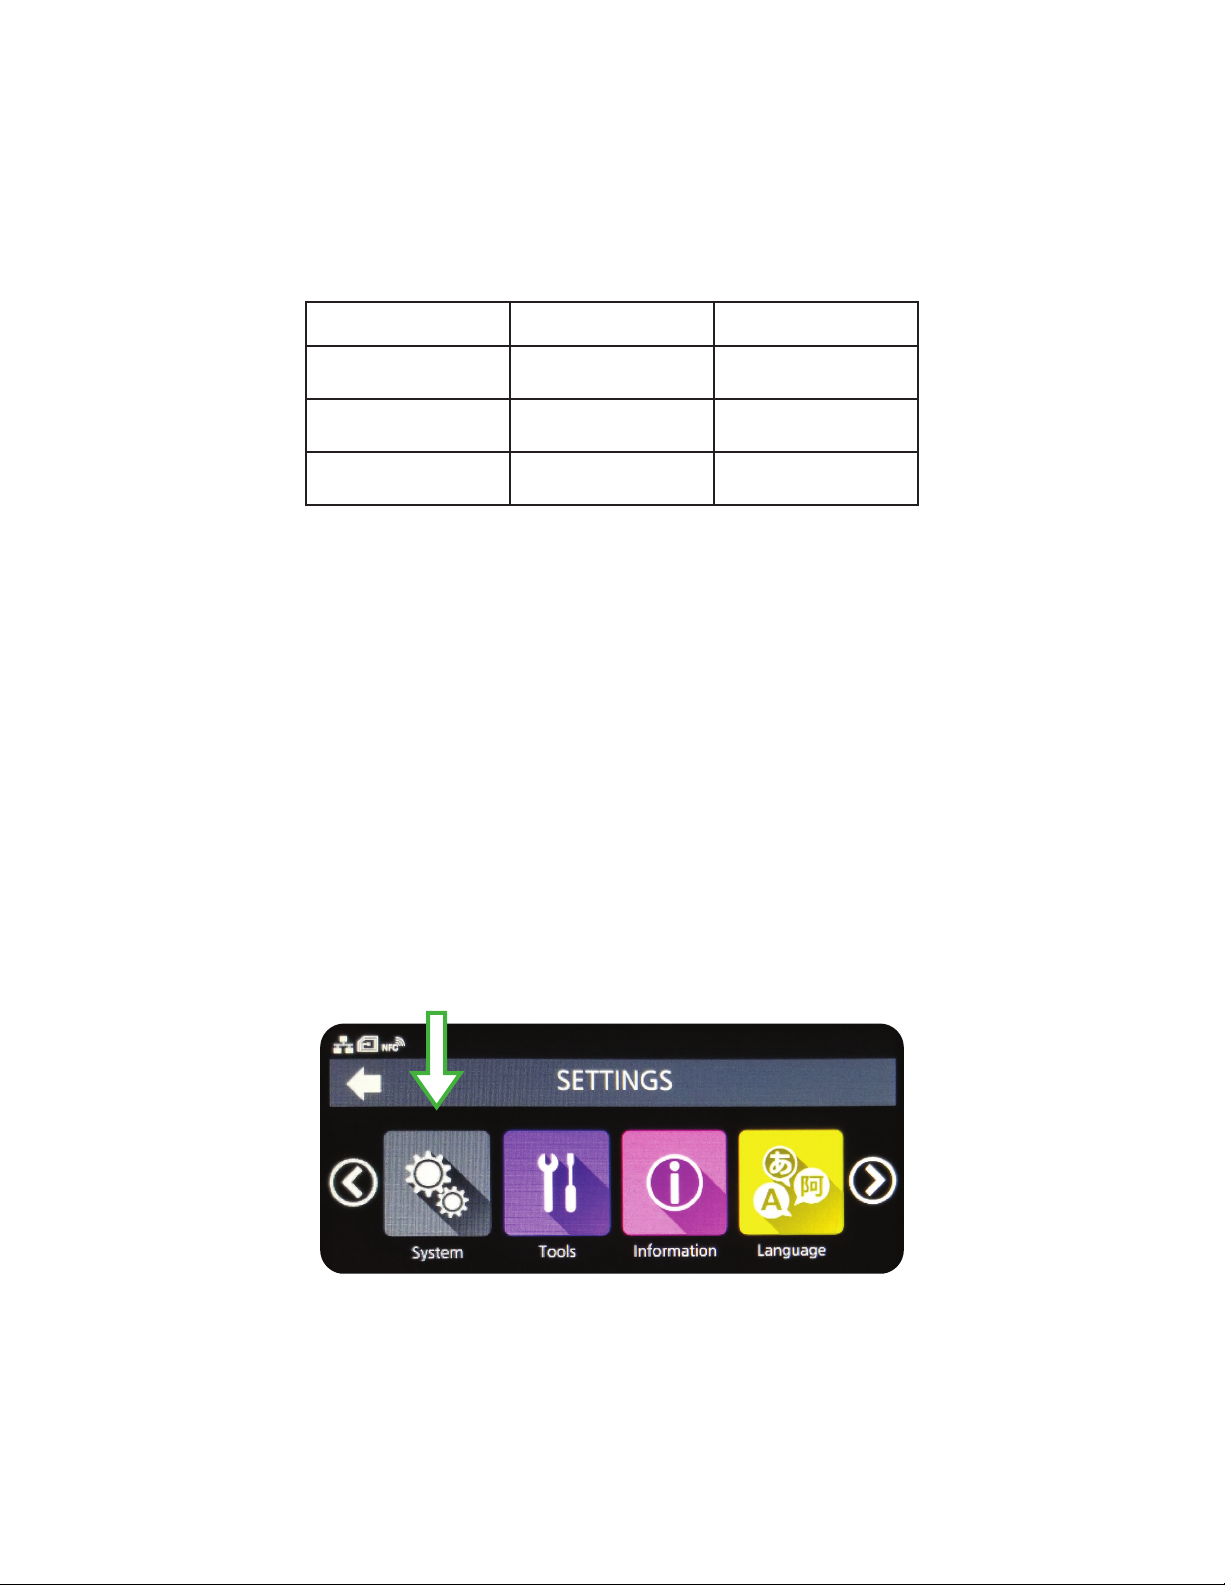
Passwords
By default, and according to Veterans Administraon policy, the password requirement feature for the printer
is enabled. Note: This feature should not be disabled.
The touch screen interface and the printer’s web admin – accessible via the printer’s IP address in a web
browser – have dierent usernames that share common passwords.
* The admin/factory password is reserved strictly for the manufacturer’s personnel, and is not shared
with the end user.
To change passwords, follow these steps:
1. Turn the printer on.
2. Tap the blue “OFFLINE” buon.
3. Tap the “SETTINGS” buon.
4. Use the ‘level1’ password to enter the System menu.
5. Swipe le or right, or use the le or right arrow buon, to see the “System” buon.
Tap it.
6. Scroll down and tap Password.
7. Scroll down and tap Change Password.
Touch Screen Web Admin Default PW
level1 sengs 0310
manager service 6677
admin factory *

13
NetworkConguration
To set the printer’s network conguraon sengs, follow the steps below.
1. Turn the printer on.
2. Tap the blue “OFFLINE” buon.
3. Tap the “SETTINGS” buon.
4. Use the ‘level1’ password to enter the System menu.
5. Tap the orange “Interface” buon.
6. Tap through the following series of opons: Network > Sengs > LAN.
7. Tap “IPv4” or “IPv6”.
8. Congure the printer’s Mode for “Stac”.*
9. Congure the printer’s IP Address, Netmask, Gateway, and DNS.*
* Usethecheckmarkbuontosave,andthe“X”tocancel.
The sengs should take eect aer several seconds. The printer should not need to be restarted.

14
TROUBLESHOOTING
Label Output Problems
Most ScripTalk Printer troubleshoong scenarios fall into one of two categories: No Output or Faulty Output.
No Output
If the printer is not outpung any labels:
• Try pinging the printer to establish whether basic network communicaon with it is present.
• Verify the printer’s internal network conguraon against the IP address that your VistA or Cerner
system is trying to send to. See Network Conguraon.
• Test the physical connecons, like the Ethernet cable and any network ports from the switch to
the printer.
• Try sending a sample label from VistA or Cerner.
• Check, and possibly reset, the VistA or Cerner print queue.
Faulty Output
If the label output is incorrect in some way:
• Be sure the correct ScripTalk label media is loaded. Check the inner core of the roll of labels for
Part Number 00210-10K-0250.
• Perform a Prinng reset. See Reseng for guidance.
• If a Prinng reset does not resolve the issue, perform a Factory (-Interface) reset, followed by a reload
of the prole. See Reseng and Reloading the Prole for guidance.
• If a Factory (-Interface) reset does not resolve the issue, contact ScripTalk technical support for
instrucons on reashing the printer’s rmware. Email support-sa@envisionamerica.com.
Resetting
Note: If you are faced with a situaon that may only be resolved with a reset acon, please contact
ScripTalk technical support for guidance.
There are several dierent kinds of resets that can be performed within the printer, each of which eect
dierent sets of conguraon values. Resets are available in the following touch screen menu:
Sengs > Tools > Reset

15
Reset Types
•Data – Fonts and graphics.
Do not include Data in your reset unless instructed to do so by ScripTalk technical support.
•Sengs:
oUser – Resets the Sengs values.
*User (-Interface) – Performs a User Reset without reseng Interface sengs.
oFactory – Resets to factory default sengs.
*Factory (-Interface) – Performs a Factory Reset without reseng Interface Sengs.
oInterface – Resets only those opons found in the Sengs > Interface area of the printer.
In parcular, this will set Network > Sengs > LAN > IPv4|IPv6 > Mode to “DHCP”.
oPrinng – Resets only opons found in the Sengs > Prinng area of the printer.
Aer performing any reset, restart the printer to complete it (but do NOT pull the power cable from the printer).
ReloadingtheProle
Aer User and Factory resets, reload the VA prole by following these steps:
1. Go to Sengs > Tools > Proles.
2. Tap “Load”.
3. Tap “Envision_Government”.
4. Tap the checkmark.
5. Tap the back arrow.
6. Tap “Start with”.
7. Tap “Envision_Government”.
8. Tap the checkmark.
To place the printer Online for prinng, push the Home/Power buon twice.
You can fully reash the rmware using a set of restore les, available upon request by emailing
support-sa@envisionamerica.com.
16
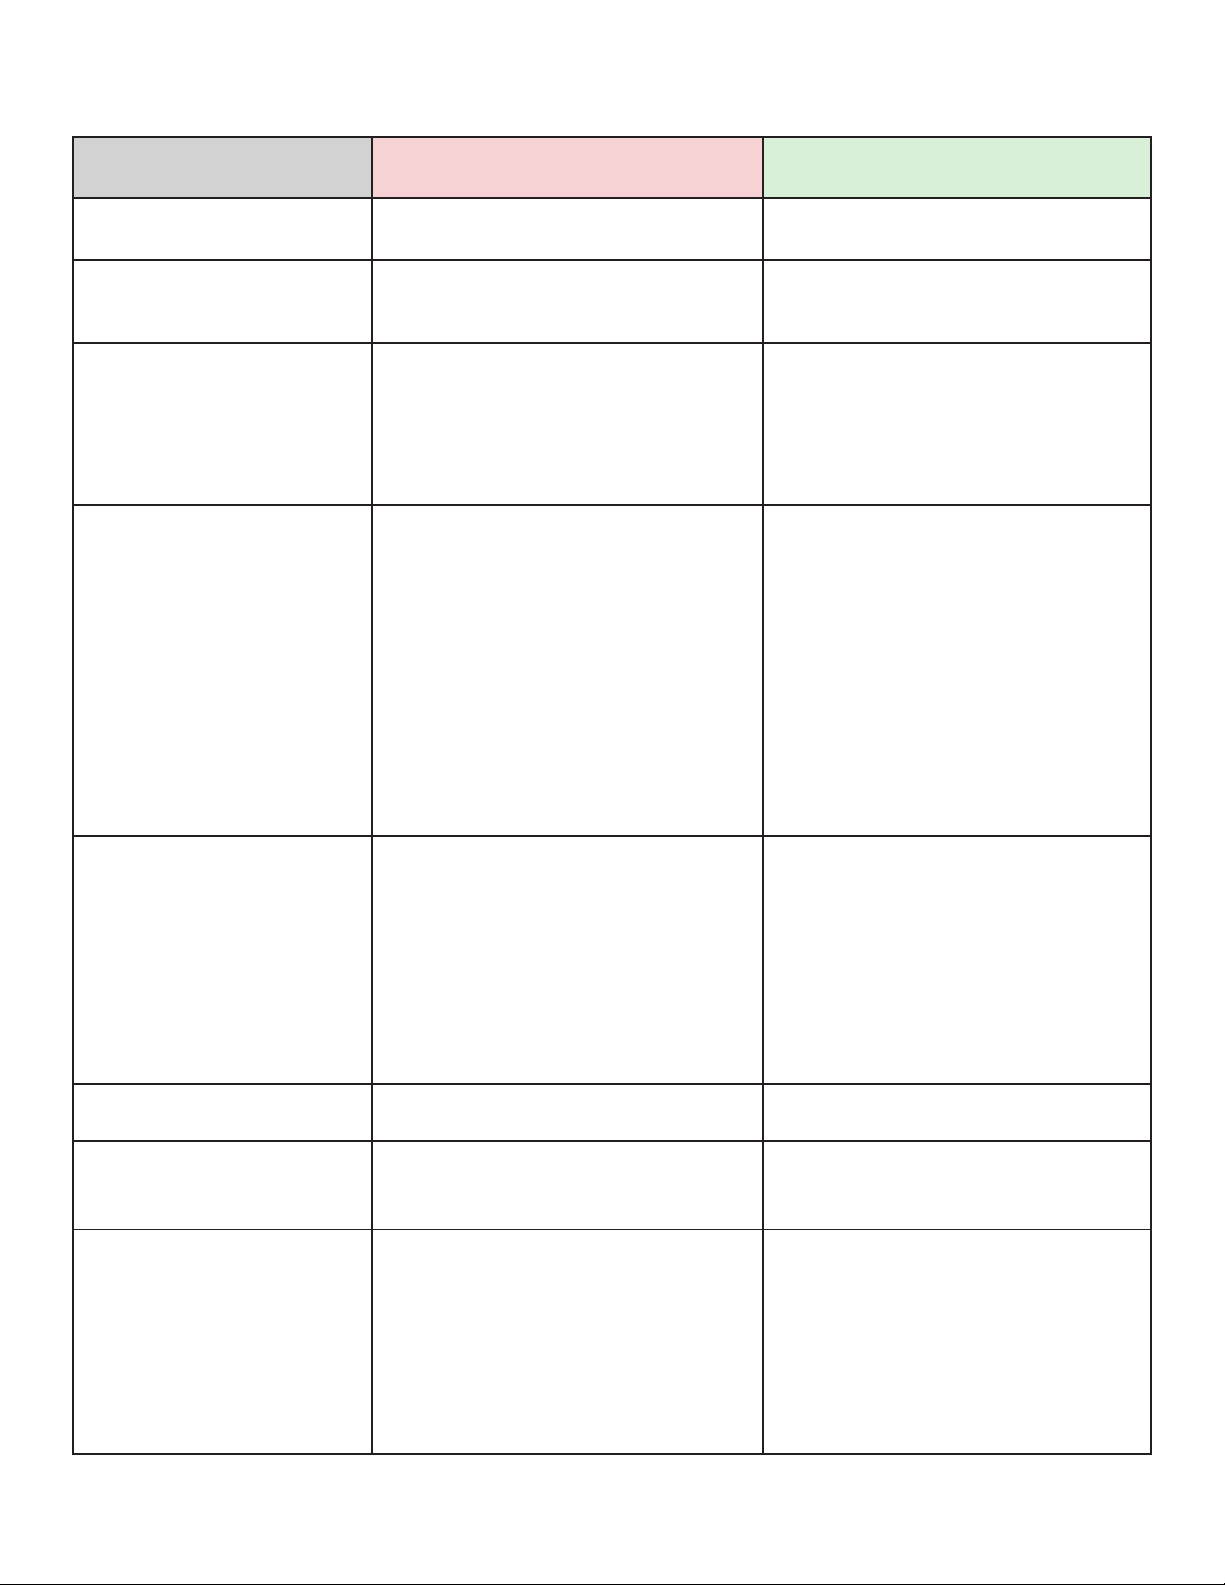
Error Cause(s) Soluon(s)
1001: Machine Error A defect has occurred in the product. Restart the printer.
1002: Program Error A program error occurred in the
memory.
Restart the printer.
1007: Cover Open 1. The top cover is open.
2. The sensor for detecng the
open/close status of the top cover is
dirty or defecve.
1. Close the top cover so that it
clicks when locked.
2. Clean the sensor using an air
duster.
1008: Out of Paper 1. The media is not loaded.
2. The media is not loaded correctly.
3. The media is jammed.
4. The media sensor is dirty, blocked,
or has poor sensivity.
5. The media sensor is not set
correctly.
1. Be sure the media is loaded.
2. Be sure the media is loaded
correctly.
3. Check for and remove any
misplaced media.
4. Clean the media sensor.
5. Contact ScripTalk technical
support.
1010: Media Error 1. There is a mismatch between the
media size and the media itself.
2. The media is fed a longer distance
due to the incorrect sensor level.
1. Check the media size of the print
data and the actual media size. Try
restarng the printer.
2. Try restarng the printer. If not
resolved, contact ScripTalk technical
support to adjust the media sensor
level.
1012: Head Error The print head is worn or damaged. Replace the print head.
1017: SBPL Command Error Incorrect command or parameter in
the print data.
Check the print data. If the error is
not resolved, restart the printer.
1019: RFID System Error 1. RFID module is not operang
correctly.
2. The seng of the RF Analyze
board is incorrect.
1. Repair or replacement of the
RFID module is required. Contact
ScripTalk technical support.
2. The seng of the RA board needs
to be changed. Contact ScripTalk
technical support.
Error Codes
Table of contents
Other En-Vision America Printer manuals


