ASSEMBLING & USING YOUR PRODUCT TROUBLE SHOOTING & CAUTION
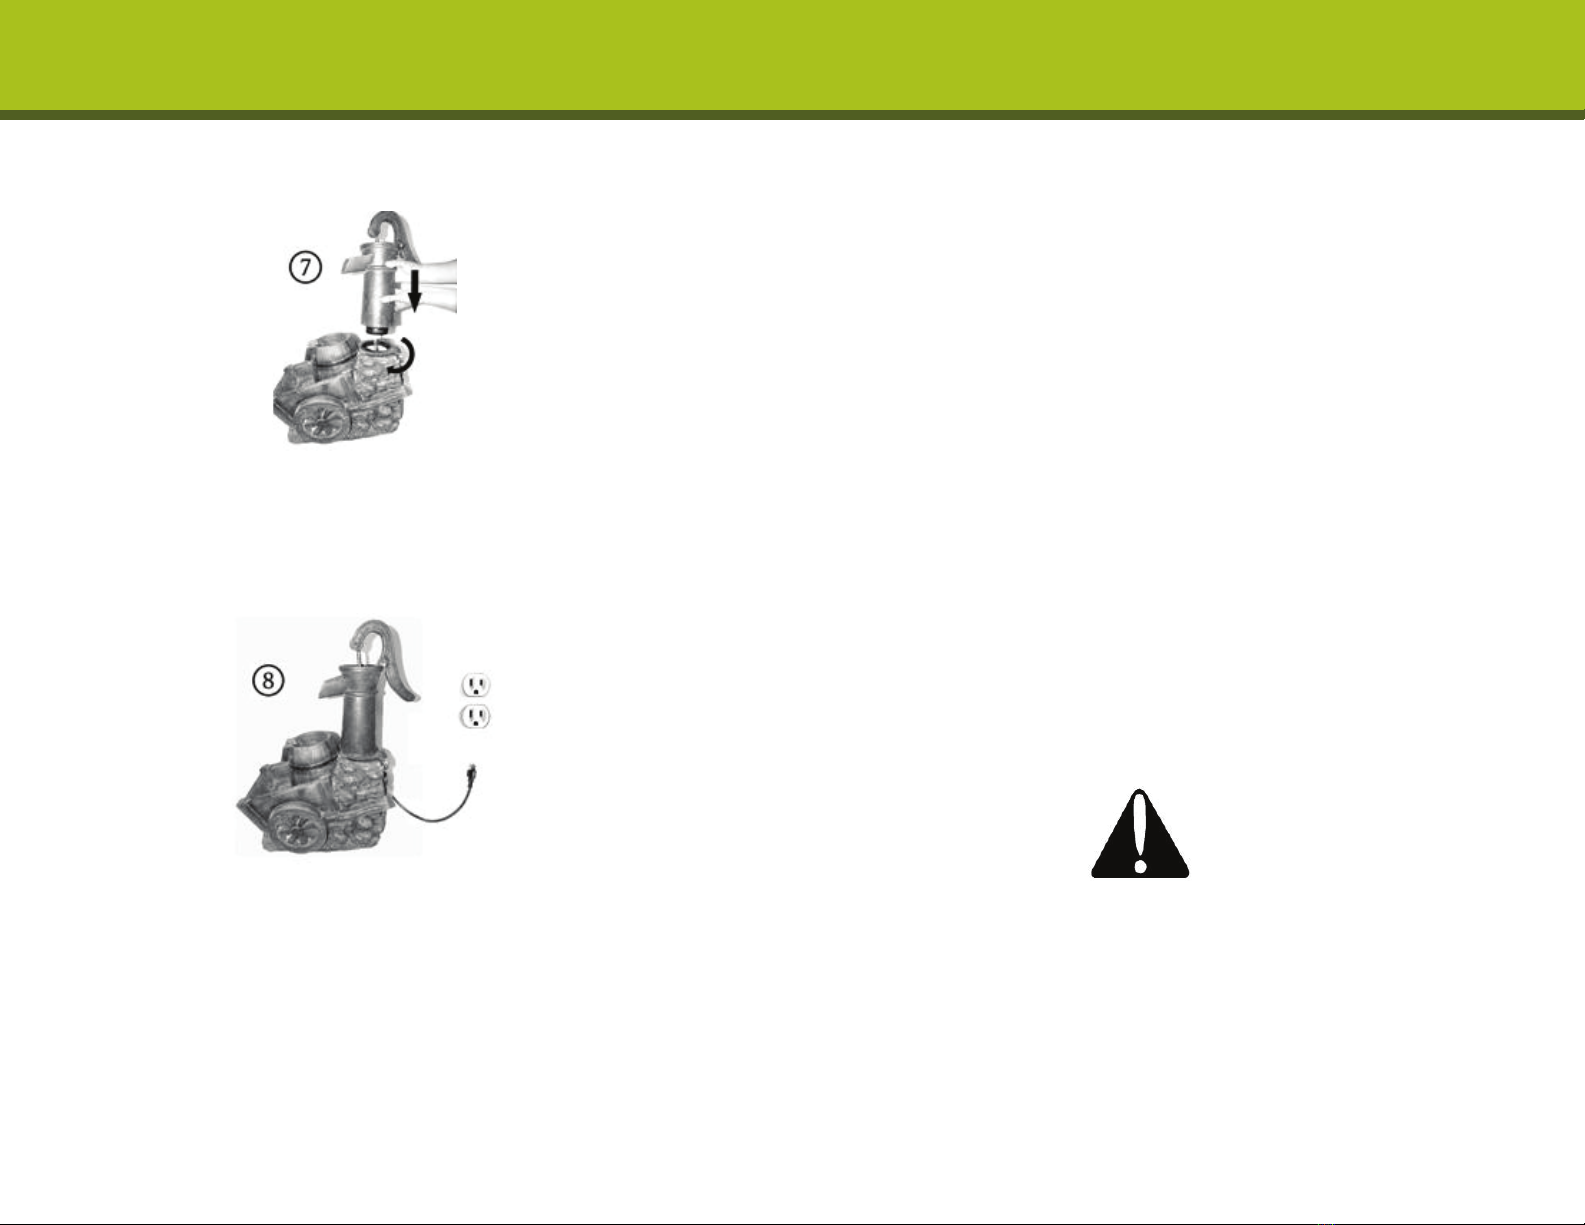
5. Once you have filled the Reservoir with enough water, place the Water Spout
Top Piece
in the opening at the top of the Fountain and twist the Water Spout
to the Left, until it is secured on tightly (See Diagram 7 Above).
6. Finally, plug the transformer into your local power supply. Make sure that
there is no water around the transformer and to always keep the power
source in a dry place (See Diagram 8 Above).
a. NOTE: We recommend that you use distilled water to prevent scale
build-up. The first time you operate the pump it can take up to 5
minutes for the air to be completely expelled and water begins to
flow properly.
If you have any questions and/or problems, please contact the retail store you
purchased this fountain.
If your pump fails to run
Check the circuit breaker or try a different outlet to make sure the pump is receiving
electrical power.
Check the pump discharge and tubing for any kinks and/or obstructions
Any buildup obstructing the water flow can be flushed with a garden hose
Check the rotor by removing the front cover & plate to access the impellor area. Turn
the rotor and make sure that the rotor is not jammed or broken
If your pump “spews”
Check the water level to make sure the pump is completely submerged and there if
enough water in the basin to operate your fountain. Not having enough water will
cause your pump to spew
If your pump is making abnormal loud noises
Disconnect the pump from the electrical power supply and remove the front cover &
plate
Carefully grip the impeller and gently pull the impeller/rotor assembly out of the pump
housing
Rinse the impeller/rotor assembly and clean the cavity with clean water. If breakage
or damage is found, contact your local retailer for part
Fountain Care
We recommend to use Enchanted Garden’s all natural cleansing formula to eliminate
foam, lime scale and calcium buildup, fight mineral deposits, leave water crystal clear,
help prevent staining, remove organic contaminants and treat discolored water. This
formula will help prevent pump damage due to hard water build up.
i. For small sized fountains holding water up to 7liters of water, we
recommend Enchanted Garden Item # PPL100
ii. For larger sized fountains holding water over 7liters of water, we
recommend Enchanted Garden Item # PPL102
iii. For more information please call 1-877-710-0162
Caution
oAlways unplug the pump from the electrical outlet before cleaning &
handling
oUses with clean water only, do not place the fountain and/or parts in any
other liquid.
oPeriodically change water & clean the pump to keep free from micro-
organisms
oDisconnect and store the unit in a dry place if not in use for an extended
period of time
oDo not operate with water above 90°F or 30°C
oDo not lift, carry or pull the pump by the power cord
oDo not exceed the maximum voltage & wattage on transformer
oNEVER LET THE PUMP RUN DRY
ASSEMBLING & USING YOUR PRODUCT TROUBLE SHOOTING & CAUTION
5. Once you have filled the Reservoir with enough water, place the Water Spout
Top Piece in the opening at the top of the Fountain and twist the Water Spout
to the Left, until it is secured on tightly (See Diagram 7 Above).
6. Finally, plug the transformer into your local power supply. Make sure that
there is no water around the transformer and to always keep the power
source in a dry place (See Diagram 8 Above).
a. NOTE: We recommend that you use distilled water to prevent scale
build-up. The first time you operate the pump it can take up to 5
minutes for the air to be completely expelled and water begins to
flow properly.
If you have any questions and/or problems, please contact the retail store you
purchased this fountain.
If your pump fails to run
Check the circuit breaker or try a different outlet to make sure the pump is receiving
electrical power.
Check the pump discharge and tubing for any kinks and/or obstructions
Any buildup obstructing the water flow can be flushed with a garden hose
Check the rotor by removing the front cover & plate to access the impellor area. Turn
the rotor and make sure that the rotor is not jammed or broken
If your pump “spews”
Check the water level to make sure the pump is completely submerged and there if
enough water in the basin to operate your fountain. Not having enough water will
cause your pump to spew
If your pump is making abnormal loud noises
Disconnect the pump from the electrical power supply and remove the front cover &
plate
Carefully grip the impeller and gently pull the impeller/rotor assembly out of the pump
housing
Rinse the impeller/rotor assembly and clean the cavity with clean water. If breakage
or damage is found, contact your local retailer for part
Fountain Care
We recommend to use Enchanted Garden’s all natural cleansing formula to eliminate
foam, lime scale and calcium buildup, fight mineral deposits, leave water crystal clear,
help prevent staining, remove organic contaminants and treat discolored water. This
formula will help prevent pump damage due to hard water build up.
i. For small sized fountains holding water up to 7liters of water, we
recommend Enchanted Garden Item # PPL100
ii. For larger sized fountains holding water over 7liters of water, we
recommend Enchanted Garden Item # PPL102
iii. For more information please call 1-877-710-0162
Caution
oAlways unplug the pump from the electrical outlet before cleaning &
handling
oUses with clean water only, do not place the fountain and/or parts in any
other liquid.
oPeriodically change water & clean the pump to keep free from micro-
organisms
oDisconnect and store the unit in a dry place if not in use for an extended
period of time
oDo not operate with water above 90°F or 30°C
oDo not lift, carry or pull the pump by the power cord
oDo not exceed the maximum voltage & wattage on transformer
NEVER LET THE PUMP RUN DRY
TROUBLE SHOOTING & CAUTION
ASSEMBLING & USING YOUR PRODUCT


