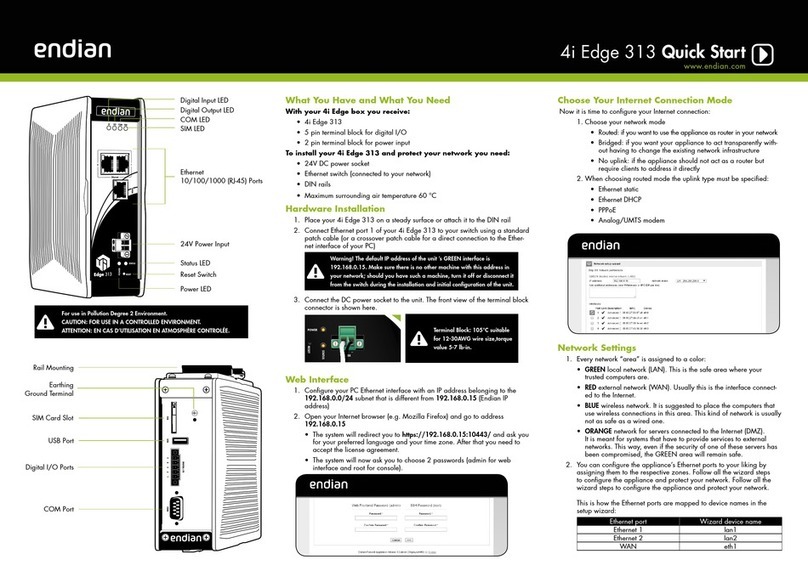
ENDIAN 4i Edge X Operator's manual

Secure everyThing
www.endian.com
4i Edge X Quick Starter
COM Port USB PortsStatus /Activity LEDPower Switch
Digital I/O PortsReset Switch Console
WiFi MAINWiFi AUX
GSM MAINGSM AUX

4i Edge X Quick Start
www.endian.com
What You Have and What You Need
With your 4i Edge X you should receive:
• 4i Edge X
• 2x WiFi Antennas
• a VESA plate for wall installation
To install your 4i Edge X and protect your network you need:
• AC power socket
• Ethernet switch (connected to your network)
4i Edge X Optional Kits:
• Desktop Kit: a Power Adaptor (12V) and US/EU
Power Cords
• DIN Rail Kit: DIN Rail mounting kit
• 4G Kit: 2x 4G Antennas
LED Table
LED OFF Fixed
GREEN
Blinking
GREEN
Fixed
BLUE
Blinking
BLUE
Fixed
RED
Blinking
RED
Flashing
RED
Power Button No Power Power On - - - Standby - -
Status -System Up Support Ac-
cess Enabled
System
Initializing
System
Booting -
Action
Needed (eg.
HD almost
full,Reboot
Required,...)
Fatal Error
Uplink Not cong-
ured
Main Uplink
Online -Secondary
Uplink Online -
All Uplinks
Offline/Con-
necting
- Fatal Error
VPN/SB
Not Con-
gured or
Enabled Open-
VPN Client or
Connecting
At least 1
Enabled Open-
VPN Client
Connection
Established
---
All Enabled
OpenVPN
Client Connec-
tions in Error
Status
- Fatal Error
Hardware Installation
A DHCP server is running on Ethernet port 1 of your appliance. If you already have a DHCP server in your local
network make sure to connect your computer directly to Ethernet port 1, go through the installation procedure
and connect the appliance to your local network only after having disabled the DHCP server
1. Place your 4i Edge X on a steady surface or attach it to the DIN rail (DIN rail kit - optional)
2. Connect your computer to Ethernet port 1 of the 4i Edge X Appliance.
3. Connect the port 3 of your 4i Edge X Appliance to the uplink. The appliance will automatically try to connect
to the Internet via DHCP once turned on. If you are using a mobile broadband connection and you have the 4G
modem, insert your SIM card in the 4i Edge X now.
4. Connect the AC power cord to the AC power socket and push the power button. The Endian 4i Edge X Appliance
turns ON
If your device was preconfigured using the Plug & Connect feature, there are no additional steps to
complete (you can skip the Web Interface section below). You can check that the Plug & Connect pro-
cedure completed successfully by accessing your Endian Switchboard and verifying your device is listed
as online and available.
Insert microSD Insert SIM

4i Edge X Quick Start
www.endian.com
Web Interface
1. After booting the appliance your PC will automatically get an IP address from the Endian appliance.
If your computer is not set up to configure its IP address through DHCP you will need to con-
figure your PC’s Ethernet interface manually. In that case configure your interface with an IP
address belonging to the 192.168.0.0/24 subnet that is different from 192.168.0.15 (which is the
IP address of the Endian appliance).
2. Open your Internet browser (e.g. Mozilla Firefox) and go to address 192.168.0.15
• The system will redirect you to https://192.168.0.15:10443/ and the Configuration Wizard will start, and
you need to select your language and accept the License.
Choose Your Configuration Mode
You have 3 choices:
• Plug & Connect: if you have an Endian Connect Switch-
board this is the easiest way to connect and activate
your Endian 4i Edge
You (or someone from your company) must
initially congure your device on the Switchboard
in order to utilize the Plug & Connect feature (for
more info please go to help.endian.com and look
for the “The Plug And Connect (Autoregistration)
Procedure” article)
• Restore a Backup: choose this mode if you have any existing backup to restore
• Setup Assistant: if you want to congure your appliance manually with the conguration wizard, choose this
mode and follow the steps
Endian Network Account
The Configuration Assistant will ask you for an Endian Network account, needed for your Endian Network sub-
scription and keep your appliance always up-to-date with the latest features and security updates.
A. You already have an Endian Network account
1. When the system asks you if you have an Endian Network account choose “yes” and go to the next step.
2. Now fill in the form using your data and the activation code on the back of this Quick Start.
B. You do not have an Endian Network account
1. When the system asks you if you have an Endian Network account choose “no” and go to the next step.
2. Click on the “Endian Network account” link and insert the activation code on the back of this Quick Start.
3. Fill in the registration form and create your account.
4. Close the registration window and go to the next step.
5. Now fill in the form using your data and the activation code.
Your Endian appliance is now ready!
Connector Pinout Table
COM Port
1 2 3 4 5
6 7 8 9
Pin RS232 RS485 RS422
1DCD B - TX-
2RXD TX+
3TXD A+ TX+
4DTR RX-
5GND GND GND
6DSR
7RTS
8CTS
9RI
Digital I/O
12345
678910
Pin REF
1GND
2INPUT 0
3INPUT 1
4INPUT 2
5INPUT 3
6VCC Out *
7OUTPUT 0
8OUTPUT 1
9OUTPUT 2
10 OUTPUT 3
* Output voltage same as power supply

4i Edge X Quick Start
www.endian.com
DIN-Rail Kit Installation (Optional)
If you purchased the Endian 4i Edge X DIN-Rail kit (Optional) you should connect the DIN-Rail jumper cables and
mount your 4i Edge X on it before attaching anything to the DIN-Rail:
Plug the 3 Ethernet cables of your DIN-Rail kit to
the 3 Ethernet ports of your 4i Edge X ensuring
that the port number on the DIN-Rail Kit matches
the same port number on the 4i Edge X appliance
Plug the power adaptor of the DIN-Rail kit to
the 4i Edge X power port
Tighten the 4 screws included in the DIN-Rail
Kit to join it to the bottom side of the 4i Edge X
Attach 4i Edge X with DIN-Rail kit to the DIN-
Rail
1 2 3 4

3 2 1
DC IN
9 24V
Power Input
Ethernet Ports
GSM AUXGSM MAIN
WiFi AUXWiFi MAIN
Table of contents
Other ENDIAN Gateway manuals
