Endless Pools WaterWell Owner's manual

WaterWell Manual Aquatic Treadmill Supplemental Guide
Page 1 of 5
Endless Pools Inc. 3/2/2010
Parts List
Manual Treadmill Kit (supplied by Endless Pools)
(1) Treadmill Body
(2) Treadmill Sides
(1) Lower Front Support Bar
(20) 10/32 Stainless Steel Machine Screws
(6) Suction Cups
(1) 3/16” Hex Head Wrench
Tools Required (supplied by others)
#2 Phillips Head Screwdriver
Description
The Manual Aquatic Treadmill allows you to enjoy a full walking or running workout without the pounding of
land-based exercise. The Manual Aquatic Treadmill offers a spacious 20" wide belt for walking or running.
You expend as much or as little effort as desired and still achieve a great cardio workout.
Placement Considerations
Our underwater treadmills are typically installed in pools with deeper panels. The front of the treadmill should
be placed immediately next to a pool wall so that the provided grab bar can be utilized.
We recommend that the grab bar assembly be mounted to the pool wall via a stainless steel nut and bolt. Holes
will have to be drilled into the panel for these bolts prior to installing the liner. Access will need to be
maintained to the backside of the panel so that the bolt head can be accessed for the initial installation as well
as for any future maintenance. We have provided self-drilling screws and washers to simplify the grab bar
installation.

WaterWell Manual Aquatic Treadmill Supplemental Guide
Page 2 of 5
Endless Pools Inc. 3/2/2010
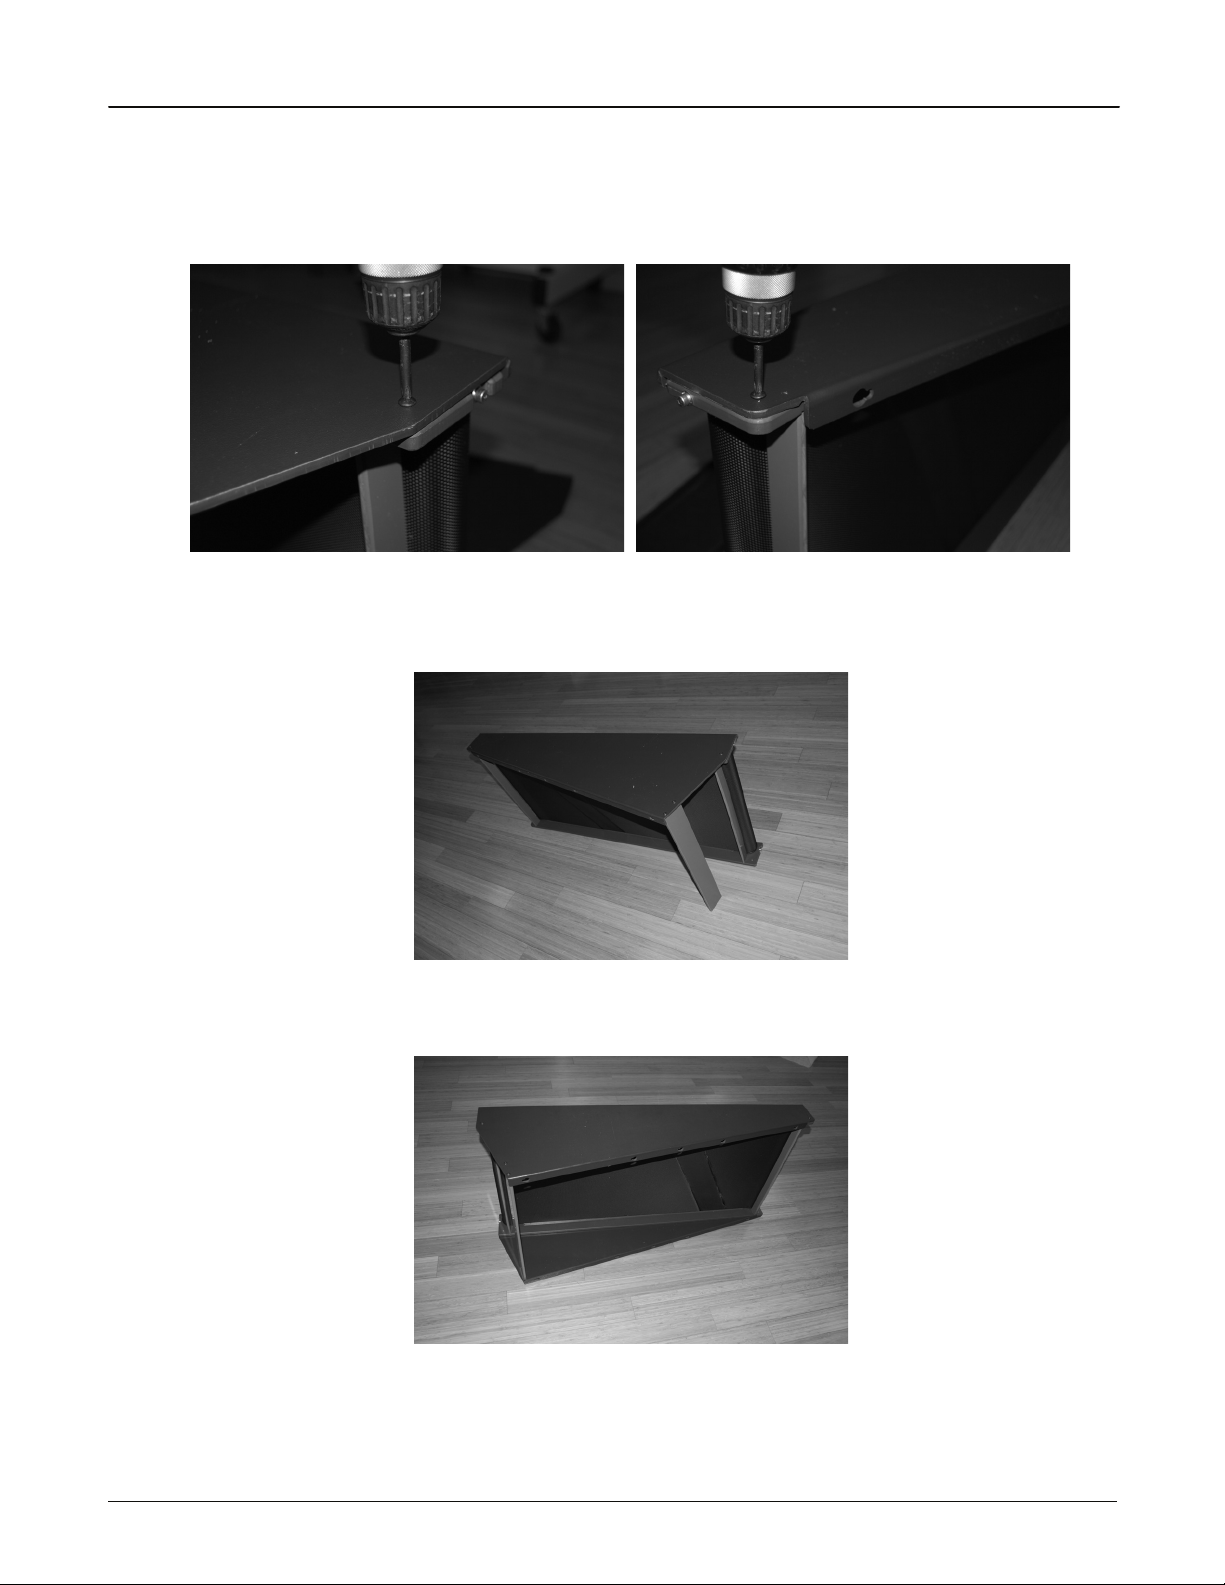
Grab Bar Installation
1.
Follow the installation instructions for your WaterWell up to step 9, “Optional Lights, Jet, and
Treadmill” found in the “WaterWell Installation, Operations, and User’s Manual.” If you intend to use
the mounting bolts to secure the grab bar bracket, then this will have to be done prior to installation of
the liner. Draw a level line 3/4” down from the top flange where you intend to place the grab bar
bracket. Align the top of the bracket with that line. Mark the 2 small outer holes of the bracket onto the
panel. Drill out these holes with a 3/8” drill bit. Then, continue with the installation of your WaterWell.
2.
Once the liner is in place and there is water in your pool, find the 3/8” holes in the panel and puncture
the liner at these points. The grab bar bracket will be secured to the pool wall via stainless steel nuts
and bolts. Push bolts through the liner from the inside out. Place the washer and nut on the bolt from
the outside of the pool. The larger inner holes of the bracket will be unused in this application.
3.
If you intend to use the stainless steel self-drilling screw and washer, then place the bracket in the pool
where you intend to place the treadmill. Note: the top of the bracket cannot be greater than 1” away
from the top of the panel. Make sure that the bracket is level and secure the bracket to the pool wall.
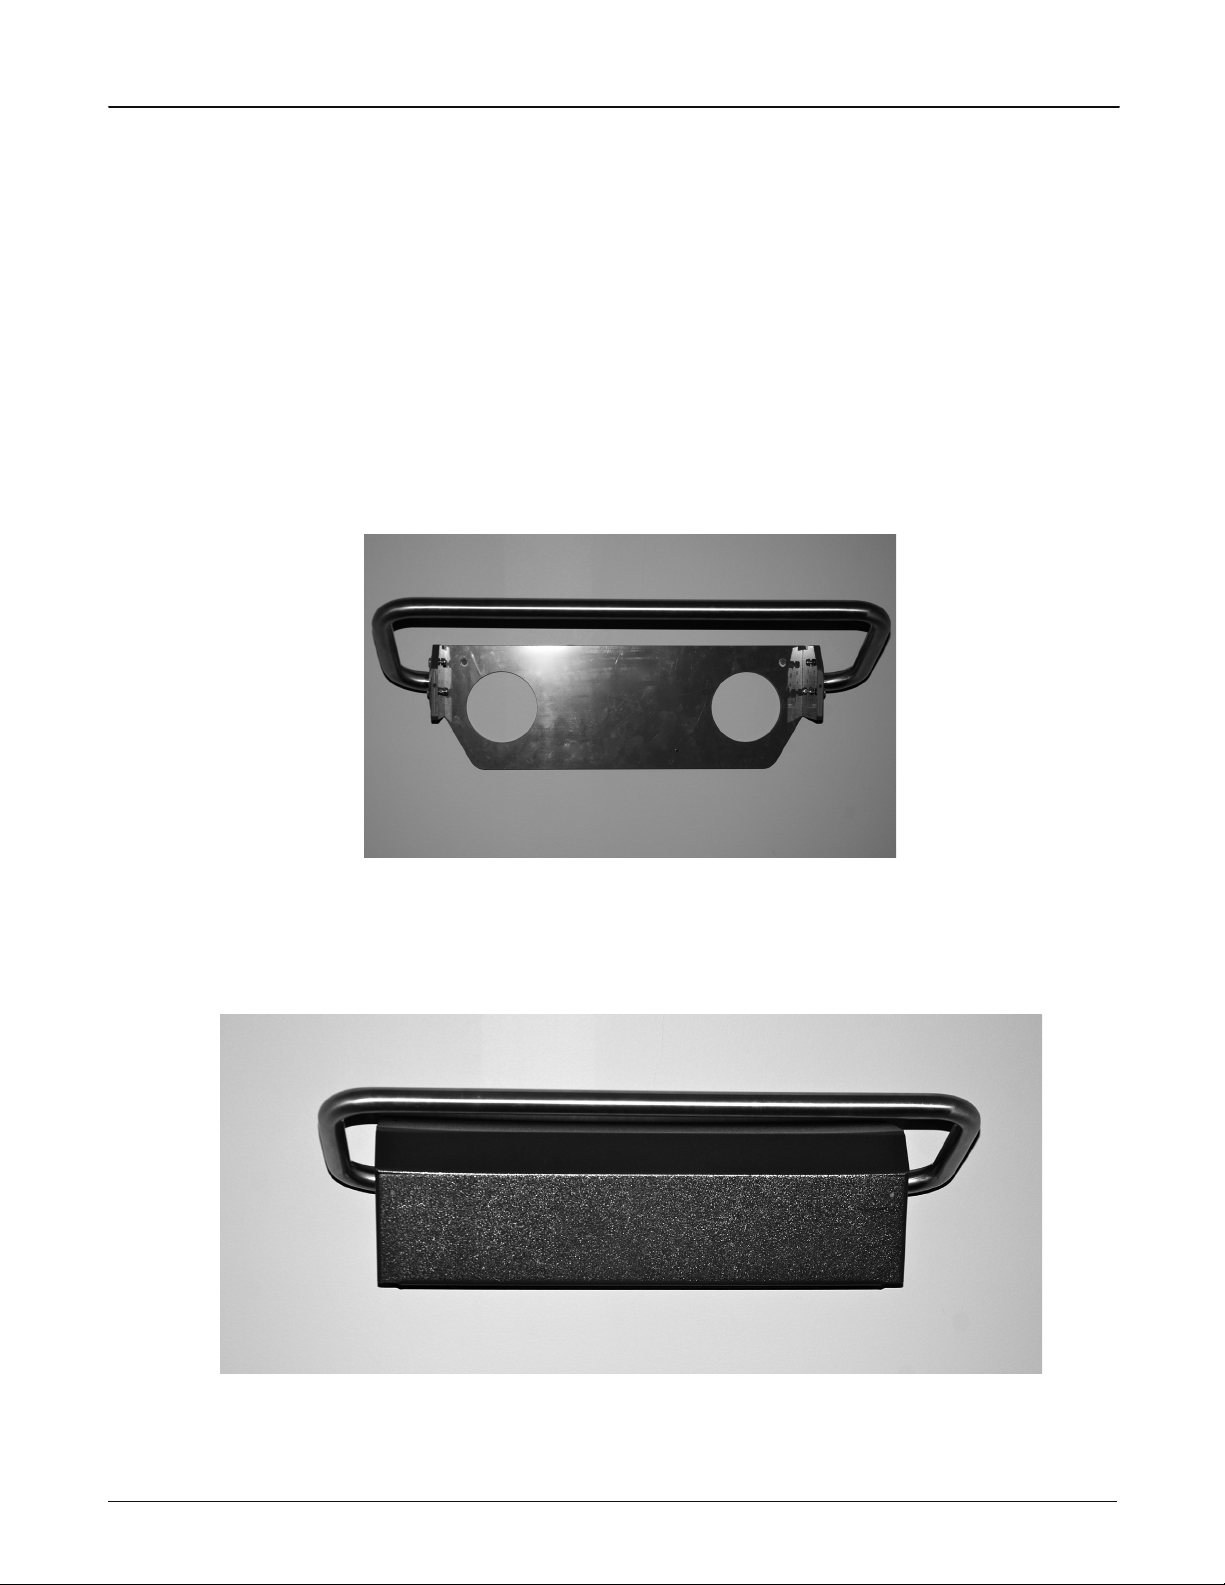
4.
Install the grab bar to the bracket with the provided nuts and bolts. There are several positions that you
can place the grab bar. Make sure that the bar will not interfere with any retractable security cover that
may have been purchased.
5.
Finally, install the grab bar cover to the grab bar bracket using the provided stainless steel machine
screws.
Grab Bar Bracket

WaterWell Manual Aquatic Treadmill Supplemental Guide
Page 3 of 5
Endless Pools Inc. 3/2/2010
Treadmill Assembly Instructions
1.
Begin by opening the box and laying out the components of the treadmill as shown below.
2.
Place the treadmill body on its side. Determine which end is the front and which end is the rear. The
rear of the treadmill body has the larger slotted hole for the treadmill axle.
Treadmill Body
Treadmill Sides
Lower Front Support Bar Hardware Kit
(Including screws
and suction cups)
Front Axle Slot Rear Axle Slot

WaterWell Manual Aquatic Treadmill Supplemental Guide
Page 4 of 5
Endless Pools Inc. 3/2/2010
3.
Place the treadmill side onto the body so that the two holes in vertical face of the sides line up with the
two holes in the vertical face of treadmill body. The holes in the top lip of the face should also line up
with the top edge of the body. Use the provided stainless steel machine screws to attach the treadmill
side to the treadmill body. There will be a total of ten screws per side.
4.
Next, set the lower front support bar in place and align the holes in the vertical face of the side with the
holes in the end of the support bar. Use the provided stainless steel machine screws to attach.
5.
Flip the treadmill over and attach the other side to the body and repeat steps 3 and 4.
Front Hole in Vertical Face Rear Hole in Vertical Face

WaterWell Manual Aquatic Treadmill Supplemental Guide
Page 5 of 5
Endless Pools Inc. 3/2/2010
6.
Finally, install the suction cups into the holes in the bottom of the lip of the treadmill sides. A minimum
of four should be used, two in the front and two in the rear. Insert the suction cup into the larger portion
of the opening and push the suction cup into the smaller portion of the opening. Make sure that the tab
of the suction cup is facing out. This will allow you to more easily break the suction of the suction cup
should the treadmill need to be moved.
7.
Should the tension or alignment of the treadmill belt need adjustment, a 3/16” hex head wrench has
been provided. Turning the axle adjustment screw clockwise will increase the belt tension and turning
the adjustment screw counter-clockwise will decrease the belt tension. The rear axle should always be
parallel to the front axle.
Suction Cup Tab
Axle Adjustment Screw
Table of contents