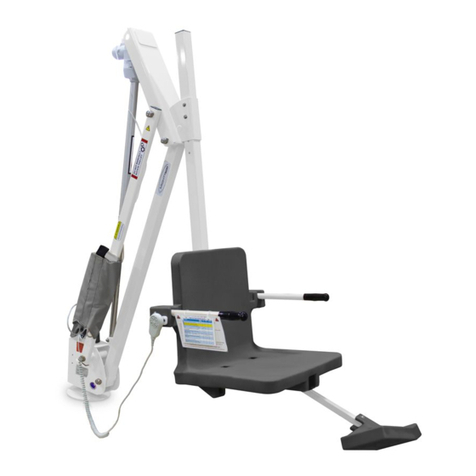
Endres AKKULIFT STANDARD User manual

Operating Instructions
AKKULIFT®-Bathlift STANDARD
AKKULIFT®-Bathlift FELIX
AKKULIFT®-Bathlift FELIX2/ 2T
AKKULIFT®-Bathlift SOFTLINE

________________________________________________________________________________________
2 of24
Content
AKKULIFT®-Product Description.................................................................................................3
For Your OwnSafety......................................................................................................................4
Important Information...................................................................................................................4
Important SafetyRegulations.......................................................................................................5
Installation and Use........................................................................................................................6
Unpacking....................................................................................................................................6
Instructions for use ofside flap protectors for bathlifts..................................................................6
Insertingthe AKKULIFT®intothe Bathtub....................................................................................7
Operatingthe AKKULIFT®inthe bath...........................................................................................9
ManualControl...........................................................................................................................10
Removingthe lift from the bathtub..............................................................................................11
Maintenance and Care.................................................................................................................13
Maintenance ofthe AKKULIFT®..................................................................................................13
Maintenance ofAKKULIFT®FELIX / FELIX 2/2T........................................................................14
Assemblyofnewcushion plugsfor AKKULIFT®FELIX..............................................................15
Chargingof12-Volt StorageBattery(tobe connected directlytothe charger)...........................17
Supplement...................................................................................................................................18
TechnicalData............................................................................................................................18
Troubleshooting..........................................................................................................................19
Disposal......................................................................................................................................20
Warranty.....................................................................................................................................20
Spare Partsand Accessories for AKKULIFT®.............................................................................21
Explanation ofsymbols...............................................................................................................22
Type Labels................................................................................................................................22
Information about thismanual....................................................................................................22
Index -inAlphabetical Order.......................................................................................................23
Addresses.....................................................................................................................................24

________________________________________________________________________________________
3 of24
Akkulift®Standard
AKKULIFT®-Product Description
Manythanks for decidingfor AKKULIFT®, designed byPeter Endres GmbH & Co. KG.
This sturdy, high-qualityproduct will simplifygettingin and out ofthe bath fromnowon.
AKKULIFT®mainlyconsists ofhigh-quality,recyclable
light-weight plastic. It is therefore easyto transport,
easyto store and simple to use -at home, at the
nursinghome, or on journeys.
The storagebatteryis accommodated in arobust ABS
plastic housing.It can be inserted without anydifficulty
into the compartment in the backrest.
Usingthe manual control, which floats on the water,
comfortable raisingand loweringis possible in the
normal sittingposition. AKKULIFT®can also be
adjusted to variable positions.
The driveis housed in asealed hood, the control
electronics in the sealed manual control. It is therefore
also possible to use AKKULIFT®with the shower
facilityin the bath.
The sturdycollapsible frameenables the chair to be
raised and lowered from8to 42 cm.The liftingrod
effects the raising/loweringmovement ofthe seat top
after pushingthe Up- and Down-buttons.
The backrest and drive, which can be tilted forward, is notched into the seat ofthe chair and
automaticallylocks when it is raised. Therefore, the backrest cannot be tilted unintentionally.
Due to an integrated power control, AKKULIFT®onlylowers ifthere is still sufficient power
available to raise it.

________________________________________________________________________________________
4 of24
For Your OwnSafety
Attention!
Important Information
· AKKULIFT®must not be used as aladder, or as ameans for gettinginto and out ofany
place other than the bath; nor should it be employed as astand, liftingdevice or for any
other similar purpose. It mayonlybe used for bathing persons inside the bath.
· AKKULIFT®must be inaccessible to children and animals.
· Repairs must onlybe undertaken byauthorised specialists or the manufacturer. Further
information, e.g.the circuit diagram,is available fromthe authorised specialists at Peter
Endres GmbH &Co. KG. On non-compliance, anyguarantee claimswill becomeinvalid.
For further information please read the supplement.
· Onlyraise or lower the liftingrod when the backrest is upright and notched in!
· Always remove the storage batterybefore transportingAKKULIFT®.
· If AKKULIFT®has been exposed to lowtemperatures for alonger period of time
(e.g. longer storage in avehicle during the winter), allowit to warm up to room
temperature before use, in order to avoid damages.
· AKKULIFT® must be cleaned directlyafter use (preferablyunder ahot shower) in order to
avoid unforeseen defects and to maintain AKKULIFT®in a perfect, hygienic condition.
· Do not use anydetergents containing acetic acid for cleaning the AKKULIFT®.
· The chargingunit must onlybe used outside the bathroomin adryenvironment. The
chargingunit must onlybe used for chargingthe storagebatterysupplied together with
AKKULIFT®.
· Please read the enclosed instructions for the batterycharger thoroughlybefore use.
· The chargingunit must not be connected to the mains until the storagebatteryhas been
correctlyinserted/connected.
Safe bathing with AKKULIFT®is onlyensured
if the operating instructions are read carefully
and the given information is strictlyobserved.

________________________________________________________________________________________
5 of24
· The batteryhas to be charged before the first use of AKKULIFT® and should be
charged after each use!
· Onlyuse the storage batterysupplied with AKKULIFT®to operate it.
· The contacts ofthe storagebatterymust not comeinto contact with metal parts (danger
ofexplodingor catchingfire).
· Used storagebatteries must be disposed ofin the proper manner. Storagebatteries must
not come into contact with open fire (danger ofexploding!)
· The AKKULIFT®,chargingunit and storagebatteryare ofrobust construction, but should
not be allowed to fall. Should anyvisible or audible damagebe detected, AKKULIFT ®
must no longer be used. In this case please contact your specialist dealer (the address
can be found in the supplement ofthese operatinginstructions).
· Please note:
The suction cups on the underside ofthe AKKULIFT®must be clean and drywhen
placingthe bathliftonto aclean drybath surface. Werecommend that you frequently
clean the suction cups and bathtub to ensure optimumsuction is achieved.
· For further information, technical details and addresses, please read the supplement to
these operatinginstructions.
· In the event ofafailure, please read the supplement to these operatinginstructions and
the "Troubleshooting"chapter. Make sure to observethe information and instructions
given there. For your ownsafetyyou should not use AKKULIFT®in the meantime, until
the fault has been remedied.
Important Safety Regulations
a) Alwayssit in the middle ofthe lift,stretch your legsforward slightlyand place your free
hand either on the edgeofthe bath or on your lap. Usingthe other hand, regulate the
AKKULIFT®movement up or down.
b) Whilst raisingor loweringAKKULIFT®,do not place your hands between the edgeofthe
bathtub and AKKULIFT®or under the seat ofthe chair, as this can cause injuries.
c) Persons with severe physical handicaps or mentallydisturbed persons should never be
left unattended in the bath.
d) Before usingthe bathlift, atest run should be carried out (for raising,loweringand
stopping, and also for checkingthe Emergency-Stop, the red button on the manual).
e) Ifamalfunction has occurred, please do not operate AKKULIFT®,but contact your
distributor and ask himto remedythe problem.
f) Do not take anyobjects into the bathtub when bathing!
These operating instructionsshouldbekeptinasafe place!

________________________________________________________________________________________
6 of24
Installation and Use
Unpacking
Please check the shippingcarton for completeness. The carton should contain the following
parts:
1. Backrest with drive and manual control unit
2. Collapsible frame with base-plate incl. central suction cup (black)
3. Chargingunit
4. Storage battery
5. Operatinginstructions
6. 4 xSuction cup (transparent) for mountingon the underside ofbase-plate
7. 2 xSide flap protector
Please note that the twoside flap protectors are onlysupplied for USE in the UK
market!
If one of these parts should be missing, please inform your dealer.
Unpack the chargingunit first, then unpack the remainingparts. The shippingcarton should
be kept for later use (i.e. transportingand storingAKKULIFT®).
Prior to startingup the device for the first timewerecommend to chargethe storagebattery.
Please observe the information given in section ‘Chargingthe Storage Battery’ on page 17.
Instructions for use of side flap protectors for bathlifts
The side flap protectors must be used on baths fitted with handles!
Note:Failure in using the side flap protectors on integral bath handles, mayresult in
damage to your bathlift, which can not be covered under fair wear and tear.
1. Place hooked end ofside flap protector over bath handle and pull downwards, as shown.
2. The side flap protector acts as a guide rail and prevents the hand support rail from
obstructingthe side flap when raisingthe bathlift.

________________________________________________________________________________________
7 of24
Inserting the AKKULIFT®into the Bathtub
1.
Make sure that the bottomofthe empty
bathtub is clean. Removeanynon-
slip
mats fromthe bathtub.
2.
Insert the seat frameinto the empty
bathtub. The rear suction cups
should be
located at the bevelled edgeofthe
bathtub.
3.
Press downthe suction lever ofthe front
mid suction cup. This automatically
adjusts the mid
suction cup to the bottom
ofthe bathtub and fixes it into position
(see Figure 1).
4.
Place the backrest with cover on the
framein the bathtub. Then insert the
guide pins ofthe backrest into the bearing
blocks ofthe frame, as shown in Figure 2.
Attenti
on:Alwaysmake sure that both
guide pins are inserted in the bearing
blocks!
5.
Take the manual control lever in one hand
and pull it awayfromthe liftuntil the cable
is slightlytensioned.
6. Take the hand grip
with the other hand
and fol
dup the backrest until it reaches
the stop position ofthe base-
plate (see
Figure 3).
Figure 1
Figure 2
Figure 3
Bearing block
Guide pin (red)
Hand grips

________________________________________________________________________________________
8 of24
7.
Make sure that the unlock rampis in its
correct position (see Figure 4+5).
Figure 5
8. Insert the storagebatteryin the batter
y
compartment (Figure 6).
Note:If the bathtub wall on the side of
the backrest is vertical and, con-
sequently,there is arisk that the backrest
is pushed against it, the lift must be
installed outside the bathtub and must be
driven to its upper positio
nbefore it is
placed into the bathtub again. However, it
maybe possible that the backrest can no
longer be tilted back during the bath,
because the distance between the
backrest and bathtub wall is too close.
Figure 4
Figure 6
Batterycompartment
Battery

________________________________________________________________________________________
9 of24
Operating the AKKULIFT®in the bath
1. Before startingup your AKKULIFT®,make sure
that the batteryis inserted in the battery
compartment and the manual control is correctly
connected (plug-type connection –see figure 7).
Press the ON-button at the manual control. The
green lamp is illuminated.
2. Press the orangekey(“UP”-button). The backrest
is moved into an upright position first; then the lift
moves up to its end position and switches off
automatically.When the button is released, the lift
is stopped, thus makingit possible to moveto
intermediate stop positions.
3. Fold out the side flaps until theyrest on the sides
ofthe bathtub.
4. Help the disabled person to sit downon
AKKULIFT®.
5. Tolower AKKULIFT®,press the blue key(“DOWN”-button
). The liftmoves downuntil it
reaches its end position and switches off automatically.When the button is released,
the lift is stopped, makingit possible to move to intermediate stop positions.
Attention:Release the blue button immediat
elyif the backrest is pushed against the
wall of the bathtub!
In case of an emergency, press the red button on the manual control. Then all
movements come to a halt. To reset you have to press the “ON”-button again!
6. After bathing,press the orange key(“UP”-button
) ofthe manual control in order to move
the liftback to aconvenient height (the max.position is the upper stop position). Make
sure that the slide flaps do not get caught at anybathtub fittings or handles.
7. Help the disabled person to leave the bathtub.
The bathlift switches off automaticallyafter 30 minutes, but ifyou want to switch it
off manuallythen use the red button (LED is then off).
Note:When moving up or down, the disabled person should lean back against the
backrest and put his or her hands on the lap.
If the lift is to remain inside the bathtub, then remove the batteryfrom the
batterycompartment. This will prevent unintended discharging of the storage
battery.
Figure 7

________________________________________________________________________________________
10 of24
Manual Control
The capacityofafullycharged storagebatteryis accordingto the user’s weight maximal 20
baths. Duringthese baths, the green control lamp ofthe manual control is illuminated.
As soon as the charginglevel of the storagebatteryfalls to factory-defined value, the colour
ofthe control lampchanges to yellow,and the lampflashes slowly,which means that there
is onlysufficient power for one more bath. After that, the storagebatteryshould be
recharged accordingto the instructions given under “Chargingthe StorageBattery“on page
17.
Ifthe device is used duringthe yellowphase ofthe control lampofthe storagebattery,the
colour ofthe lampmaychangeto red, and the lampmaystart flashingat fast intervals. This
indicates that the liftwill nowmoveupward to ensure that the handicapped person can leave
the bath safely.Ifthis condition occurs, the storagebatterymust be charged immediately
(see “Chargingthe Storage Battery“ on page 17).
The chargingstatus ofthe storagebatteryis monitored byelectronic control elements. After
one liftingmovement the storagebatteryneeds approx.30 seconds to recover and is
subsequentlychecked bythe control elements. Therefore, at the end ofabath, wait for
approx. 20 seconds and check the colour ofthe manual control lamp.
GREEN Lamp:
YELLOWLamp:
RED Lamp:
è
è
è
Lift is readyfor
operation.
Limited readiness for
operation (sufficient
power for just 1 more
bath).The storage
battery should be
charged now.
The lift is no longer
readyfor operation and
will onlymove upward
for leavingthe bath.
The storage battery
must be charged now.
Figure 8
EmergencyStop-button (red):
Ifthere is anysituation in which it is necessaryto stop all functions ofthe bathlift,
press the red emergencybutton. To reset you have to press the “ON”-button again.
The bathlift switches off automaticallyafter 30 minutes, but ifyou want to switch it
off manuallythen use the red button.
ON-Button
UP-Button
(orange)
DOWN-
Button (blue)
Control lamp
EmergencyStop
(red)

________________________________________________________________________________________
11 of24
Removing the lift from the bathtub
Usingthe manual control, first driveAKKULIFT®to its lowest position. Tilt back the backrest
until the drivestops automaticallyin its end position. Make sure that the backrest does not
push against the wall ofthe bathtub. Then removethe batteryfrom the battery
compartment.
1. The backrest is unlocked bypressingthe
red button at the top ofthe backrest
downwards (Figure 9).
2. Then fold downwards the backrest by
still pressingthe red button and
simultaneouslyfoldingthe backrest
towards the seat until it rests on the seat
(Figure 9+10). Use the provided handle.
Figure 9
Figure 10

________________________________________________________________________________________
12 of24
3. The backrest can nowbe removed
fromthe framein the direction ofthe
arrowshown in Figure 11.
Note:The backrest cannot be
removed from the frame when it is
completelyfolded downto the
seat, because the backrest is then
in a locked position again!
4. Removeall suction cups fromthe
base-plate bypullingat the venting
clips and take off the frame.
5. Make sure that the liftingbar is
retracted (Figure 12+13).
Figure 11
Figure 12
Figure 13

________________________________________________________________________________________
13 of24
Maintenance and Care
Maintenance of the AKKULIFT®
AKKULIFT®is equipped with bearingsand runningsurfaces which are completely
maintenance-free and do not require anylubrication. However, the liftshould be cleaned
thoroughlyunder the shower after each bath. Toclean the bathliftwithout covers either use
disinfectant or bathroomcleaner (e.g. Viss).
Toremovethe cover ofthe backrest, hold the
backrest at its lower end and pull it up (Figure 14).
This releases the backrest and makes it possible to
pull it off towards the front and to remove the cover.
The cover ofthe seat can be removed byfoldingin
the side flaps and pullingthe fasteningknobs from
the side flaps and seat with two fingers (Figure 15).
Figure 14
Figure 15

________________________________________________________________________________________
14 of24
Takingcare ofyour covers requires frequent cleaning,either byhand or washingmachine -
theycan be machine-washed up to 60°C usinganon-bio washingpowder which does not
contain anyenzymes. Please be aware anyoil based products, which you add to your bath
water maystain the covers, failure to undertake regular cleaningofyour covers will cause
your covers to discolour.
Note: Anyformofdiscolouration is not covered under warrantyscheme, as theyare
consumables. Do not tumble-drythe covers, but hangthemup to dry.Please observethe
manufacturer’s instructions.
Toreplace
the cover, place it correctlyon the seat
and press the fasteningbuttons completelyinto the
openings ofthe seat and side flaps (Figure 16).
Slide the backrest cover over the backrest, making
sure that the openingsofthe cover match with the
fastenin
gpoints ofthe backrest. Close the Velcro
fastener. Hold the backrest over the four fastening
bolts and press it downto its end position. Due to the
special arrangement ofthe fasteningpoints for the
backrest, the backrest cannot be placed on
incorrectly.
Figure 16
Maintenance of AKKULIFT®FELIX / FELIX 2/2T
The AKKULIFT®FELIXwith its seat and upholstered
backrest offers the followingadditional advantages:
• The surfaces can be cleaned veryeasilywith a soft
brush and anycommercial disinfectant.
• Non-water absorbent material which remains
hygienicallyclean for a longtime.
• The seat and backrest surfaces will stayfree of
contamination.
• The cushions can be removed veryeasily
for cleaning(just use the buttons shown in
Figure 17).
Note:Do not machine-wash or tumble-drythe cushions!
Figure 17

________________________________________________________________________________________
15 of24
Assembly of new cushion plugs for AKKULIFT®FELIX
Lead the newplugthroughthe openingofthe
cushion (fromtop to bottom)and press it into the
washer at the underside ofthe cushion (see
Figure 18).
Please observe the followinginstructions for mobile use ofthe device:
1. Take the storage batteryout of the batterycompartment and store it separately.
2. Secure the lift against slidingor slippingduringtransportation.
3. IfAKKULIFT®was exposed to lowtemperatures (e.g.storagein avehicle duringthe
winter), allowit to warmup to roomtemperature before use and recharge it, ifnecessary.
Transport in a dismantled condition Transport in an interlocked condition
The seat and backrest can be held at both
handles for convenient transport (see
arrows).
Figure 19
Figure 20
Figure 18

________________________________________________________________________________________
16 of24
Maintenance of the Charging Unit
The chargingunit does not require anymaintenance. The housingmust onlybe cleaned
with mild detergents, which are free fromsolvents, or bymeans ofadampcloth. Make sure
that no liquid penetrates the chargingunit. Before startingup the chargingunit again, always
make sure that the unit is completelydry.Ifnecessary,store the unit in adry,ventilated
place for several hours without connectingit to line power.
Attention:
Always pull the line power plug before cleaning the charging unit!

________________________________________________________________________________________
17 of24
Charging of 12-Volt Storage Battery (to be connected directly to the charger)
Due to technical changes and improvements please read the enclosed instructions for
the batterycharger thoroughlybefore use!
1. Connect the 3,5 mm phone plugto the
associated socket ofthe battery(Figure 21).
2. Connect the line power plugofthe charger
(Type 400UK450, Model HK-F304-T144) to
the line socket UK: 220-230 V-/ 50 Hz
USA / Canada / Japan: 110-120 V-/ 60 Hz
The chargingprocess will be started
automatically.
3. Check ifthe batterychargingindicator is lit
up (LED lights red).
4. After the final chargingvoltagehas been
reached the batterychargingindicator will
changeto green and indicate atrickle
chargecondition. Ifthe trickle charge
condition period lasts longer it is possible
that the chargingindicator will flash green.
The batteryis charged and readyfor use.
5. Always pull the line power cord first.
6. Disconnect the chargingunit fromthe
battery.
7. After the chargingunit has been dis-
connected fromline power anewcharging
process can be started immediately.
Important Remarks!
·Ifthe batterychargingindicator should not be lit up after the batteryhas been
connected, please check the followingpoints:
- Interconnection
(check ifthe DC jack has been fullyinserted into the chargingunit)
- Batterycondition
(batteries that have remained uncharged for a longer period oftime maysulphatise
and lose their abilityto be charged)
·Always use the unit indoors and protect it against water and humidity.
Never use the instrument in bathrooms.
·Never attempt to charge non-chargeable batteries.
·WAR N I N G !
Explosive gases maydevelop when charginglead batteries.
Do not expose to open fire and avoid sparks.
·If the batterycharger should be damaged, please return it to the supplier for
examination.
Figure 21

________________________________________________________________________________________
18 of24
Supplement
Technical Data
AKKULIFT®
Overall length(backrest inreclined position) 860 mm
Overall width(seat incl. side flaps) 700 mm
Widthofseat370 mm
Depthofseat450 mm
Overall lengthofseat580 mm
Sittingheight min.approx. 80 mm
Sittingheight max.approx. 420 mm
Height ofbackrestapprox. 560 mm
Widthofbackrestapprox. 320 mm
Angleofinclination (backrest)12°to40°
Widthofbase plateapprox. 310 mm
Lengthofbase plateapprox. 545 mm
Load, max.130 kg
Weight, incl. storagebatteryapprox. 15.5kg
Motor unit (without battery)approx. 7.5kg
Seat unitapprox. 8.0kg
Duration oflifting/loweringmovementapprox. 25 seconds (each)
Operatingvoltage12 V
Storagebattery12 V 2-2.6Ah (rechargeable)
BatteryCharging Unitfor 12-V Storage Batteries, black
Type ModelHK-F304-T144
Input voltageUK: 230 V-/50 Hz
US: 120 V-/60 Hz13 W
Output voltage12 V-/300 mA 3.6VA
Chargetermination 14.4V+/-2%
Voltagelimitfixed at 14.4V
Connection 3.5mm phone plug
HousingmaterialABS
Dimensions 45 x64 x28 mm
Indicators LEDred, fast charge
LEDgreen, tricklechargeor no battery
connected
Weight approx. 0.1kg
General Operating Conditions (of AKKULIFT)
Ambient temperature +10...+50°C
Relativeairhumidity10...100 %
Airpressure 700 hPa...1060 hPa
Transport and Storage
Temperature +10...+30°C
Relativeairhumidity10...100 %
Airpressure 700 hPa...1060 hPa

________________________________________________________________________________________
19 of24
Troubleshooting
Error PossibleCause Remedy
Lift does not workNostoragebatteryinthe
batterycompartment
Insert storagebatteryintothe
batterycompartment
StoragebatteryisemptyChargethe storagebattery
Contactsare contaminated Removethe storagebattery;
clean the contactswithadry
cloth, and insert the storage
batteryagain.
Manualcontrolisnot correctly
connected
Checkthe plug-type
connection.
Lift stops repeatedlyStoragebatteryisemptyChargethe storagebattery
Excessiveliftingload Reduce the liftingload
(max. 130 kg)
Drivefailure Contact your specialist
dealer. DO NOT USE THE
DEVICEANYLONGER.
Manualcontrolfailure Contact your specialist
dealer. DO NOT USE THE
DEVICEANYLONGER.
Storagebatteryfailure Insert newstoragebattery
Lift creates loud noise
Drivefailure Contact your specialist
dealer. DO NOT USE THE
DEVICEANYLONGER.
Lift creates arattlingnoise Liftingmechanism has run inNoremedy, since thisis
irrelevant
When initsupper and/or
lower stop position, the lift
creates aloud, joltingnoise
Defectivestop switch Contact your specialist
dealer. DO NOT USE THE
DEVICEANYLONGER.
Storagebatterycannot be
charged
Chargingunit isnot
connected toline power
Connect the chargingunit to
line power.
Defect withinthe charging
unit
Havefuses replaced by
specialist dealer
DefectivestoragebatteryReplace the storagebattery
Contactsare contaminated Clean contactswithadry
cloth.
Important Remark for Troubleshooting:
Should it not be possible to operate AKKULIFT®despite observingall ofthe above-
mentioned information, please contact the specialist dealer who sold you the device.

________________________________________________________________________________________
20 of24
Disposal
At the end ofthe product life, all components ofthe AKKULIFT ®and storagebatteryshould
be disposed ofin an appropriate manner. Please separate the different materials carefullyin
accordance with the material designation shown on the individual components.
AKKULIFT®does not include anyhazardous substances. The base-plate, backrest,
collapsible frame, drive compartment and electrical drive are fullyrecyclable.
Electronic boards and storagebatterymust be disposed ofin an appropriate recycling
procedure.
The storage batterymust not be disposed ofin the regular domestic waste!
Proper and complete disposal ofAKKULIFT®is offered bythe manufacturer against a
disposal fee.
Warranty
Our warrantyfor AKKULIFT®will be in accordance with legal stipulations and/or regulations
valid in the different countries. (Toqualifyfor our warranty,the customer must present an
original invoice, deliverynote or date stamp ofthe authorised dealer).
Damage due to natural wear or improper treatment is not part ofour warranty.
Damagecaused bydefectivematerial or manufacturingerrors will be remedied byrepair or
replacement free ofcharge.
Our warrantywill be becomeinvalid if the device is changed or manipulated byunauthorised
persons or in an unauthorised manner.
Warrantyclaimscan onlybe accepted ifthe complete device is returned to the
manufacturer. The device must not be dismantled! Anyfurther claimsare excluded, unless
there are anybindingnational rules and regulations.
Wecannot be held liable for anydirect or indirect defects or damages resultingfromdefects,
or anylosses or costs in connection with the use or unusabilityofthe device for any
purpose.
Tacit agreements regardingthe use or suitabilityfor aspecific purpose are explicitly
excluded.
This manual suits for next models
4
Table of contents
