Endurance 2.5r User manual
User Manual
Endurance
B2.5R Recumbent bike & B2.5U bike
®

SAFETY TIPS
MOVING
LEVELING
SEAT ADJUSTMENTS
CONSOLE
BUTTONS
THE PROGRAMS
MANUAL
ALL PROGRAMS
CARDIO
HILLS
INTERVAL
FAT BURN
RANDOM
TARGET HEART RATE ZONE
LIMITED HOME USE WARRANTY
LIMITED LIGHT COMMERCIAL WARRANTY
DEVELOPING A FITNESS PROGRAM
LIMITED LIGHT COMMERCIAL WARRANTY (continued)
FLEXIBILITY
EXERCISE GUIDELINES
ACHIEVING YOUR FITNESS GOALS
SAMPLE GOALS
DIARY
1
3
4
5
6
7
8
9
11
13
14
15
16
17
18
20
21
22
23
24
28
29
30
31
..........................
...........................
..........................
....................
..........................
..........................
......................
..........
.............
.....
........................
...................
.............
...........................
..........................
..........................
......................
..........................
..........................
.........................
.........................
..........................
................
...............

IMPORTANT SAFETY INSTRUCTIONS SAVE THESE INSTRUCTIONS
When using an electrical product, basic precautions should always be
followed, including the following: Read all instructions before using this
exercise product.Your ENDUEANCE RECUMBENT BIKE & BIKE is
self-generating (requiring no external power source) and in this mode
must be pedaled to power-up the console.Alternatively, the RECUMBENT
BIKE & BIKE can instead be plugged into an outlet using the included
power supply.
WARNING!
To reduce the risk of burns, fire, electrical shock or injury to persons:
Use this exercise product for its intended use as described in this
Owner's Guide. Do not use attachments not recommended by the
manufacturer.
Never drop or insert any object into any opening.
Do not remove the RECUMBENT BIKE & BIKE side covers. Only an
authorized ENDUEANCE retailer should perform Service.
Never operate this RECUMBENT BIKE & BIKE if it has a damaged
cord or plug, if it is not working properly, if it has been damaged, or
immersed in water. Return the RECUMBENT BIKE & BIKE to a retailer
for examination and repair.
Do not use outdoors.
CHILDREN
Keep children off your ENDUEANCE Products at all times.
When the ENDUEANCE Products is in use, young children and pets
should be kept at least 10 feet away.
SAFETY TIPS
1

OTHER SAFETY TIPS FOR YOUR ENDURANCE RECUMBENT BIKE
& BIKE
CAUTION!
If you experience chest pains, nausea, dizziness or shortness of breath,
stop exercising immediately and consult your physician before continuing.
Do not wear clothing that might catch on any part of the RECUMBENT
BIKE & BIKE.
Read this Owner's Guide before operating this RECUMBENT BIKE &
BIKE.
CLEANING
Clean with soap and slightly damp cloth only; never use solvents.
2

To move the ENDUEANCE RECUMBENT BIKE & BIKE, firmly grasp the
rear foot assembly, carefully lift and roll on the transport wheels.
Caution: Our RECUMBENT BIKE & BIKE are wellbuilt and heavy. Take
caution and use additional help if necessary.
3
MOVING

The RECUMBENT BIKE should be level for optimum use. If your
RECUMBENT BIKE wobbles when you have placed it where you intend
to use it, raise or lower one or both of the adjustable levelers located on
the bottom of the rear foot support. Once you have leveled the
RECUMBENT BIKE, lock the levelers in place by tightening the wing nuts
against the rear foot support.
as well as the one located in the
middle frame
LEVELING
4
5
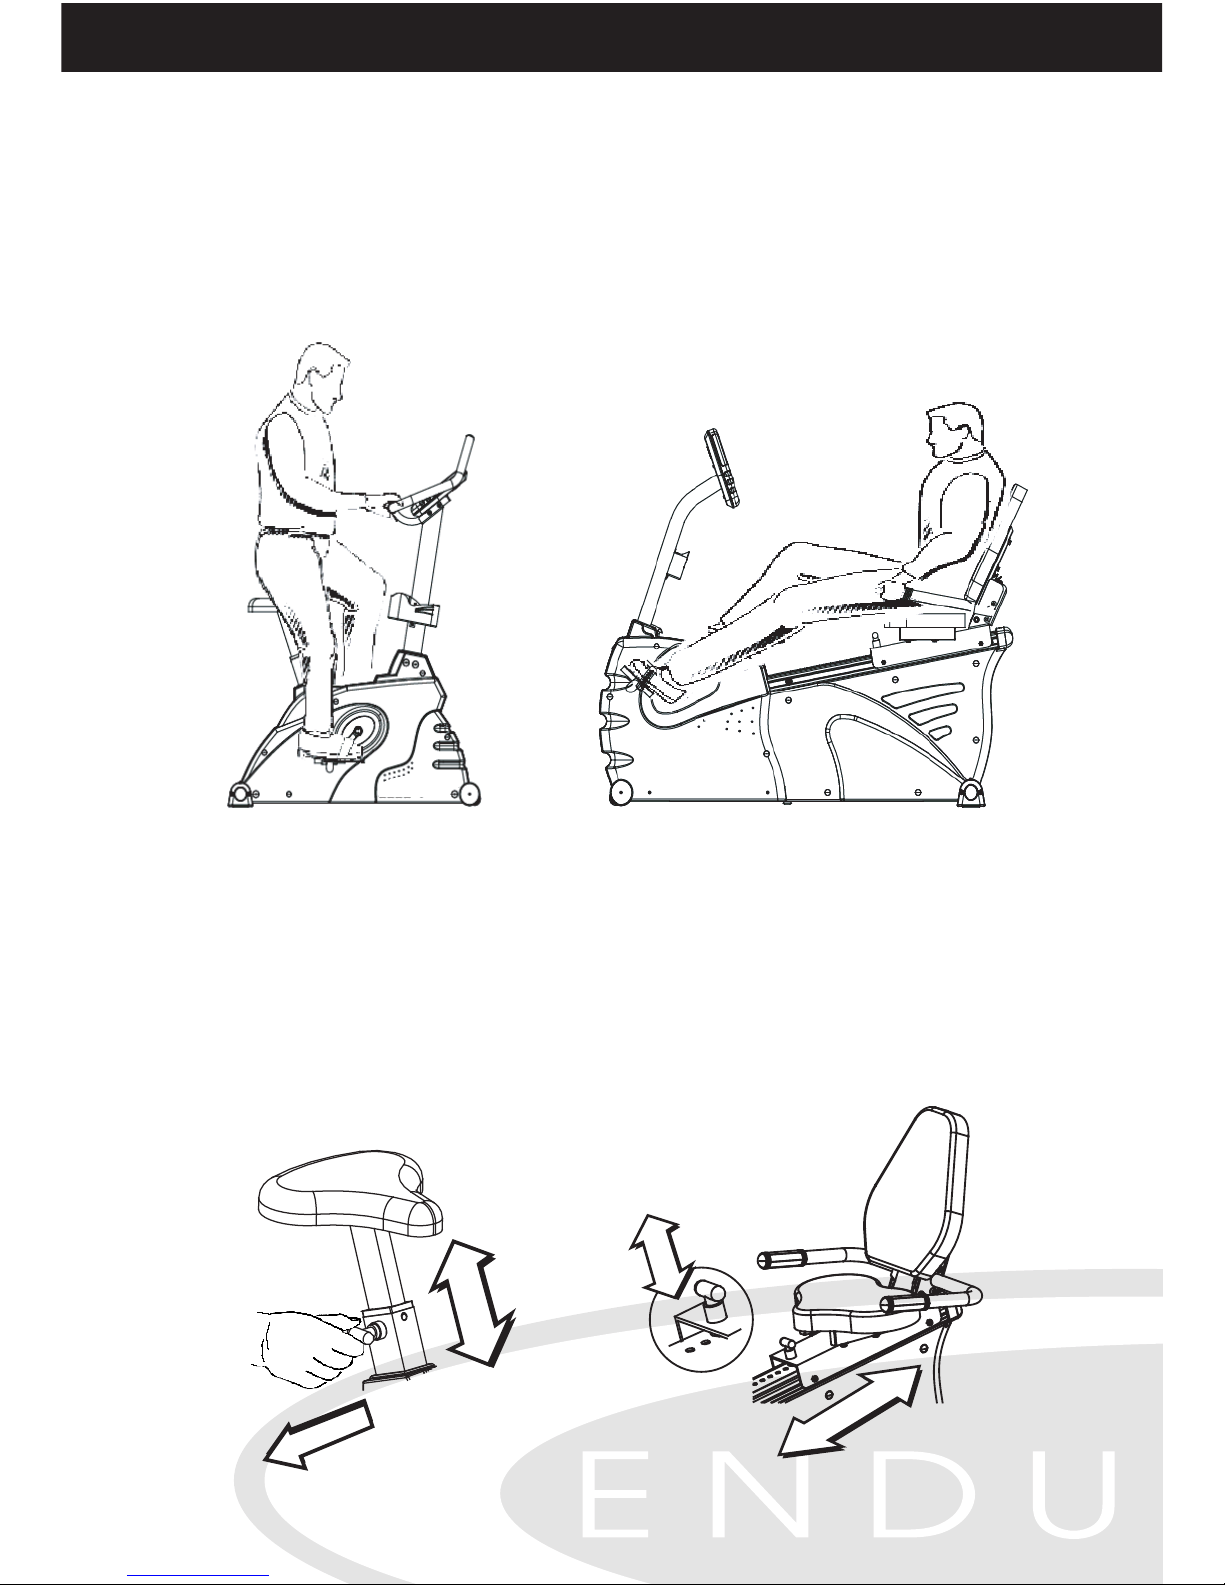
SEAT ADJUSTMENTS
SEAT POSITIONING
The seat is at the proper position when your knee is slightly bent when
the pedal is in the furthest position.
SEAT ADJUSTMENT
Grasp the Seat Adjustment Knob, located at the base of the seat post.
Pull out then raise or lower the seat post to the desired height. Release
the knob and allow the seat post to lock into position.
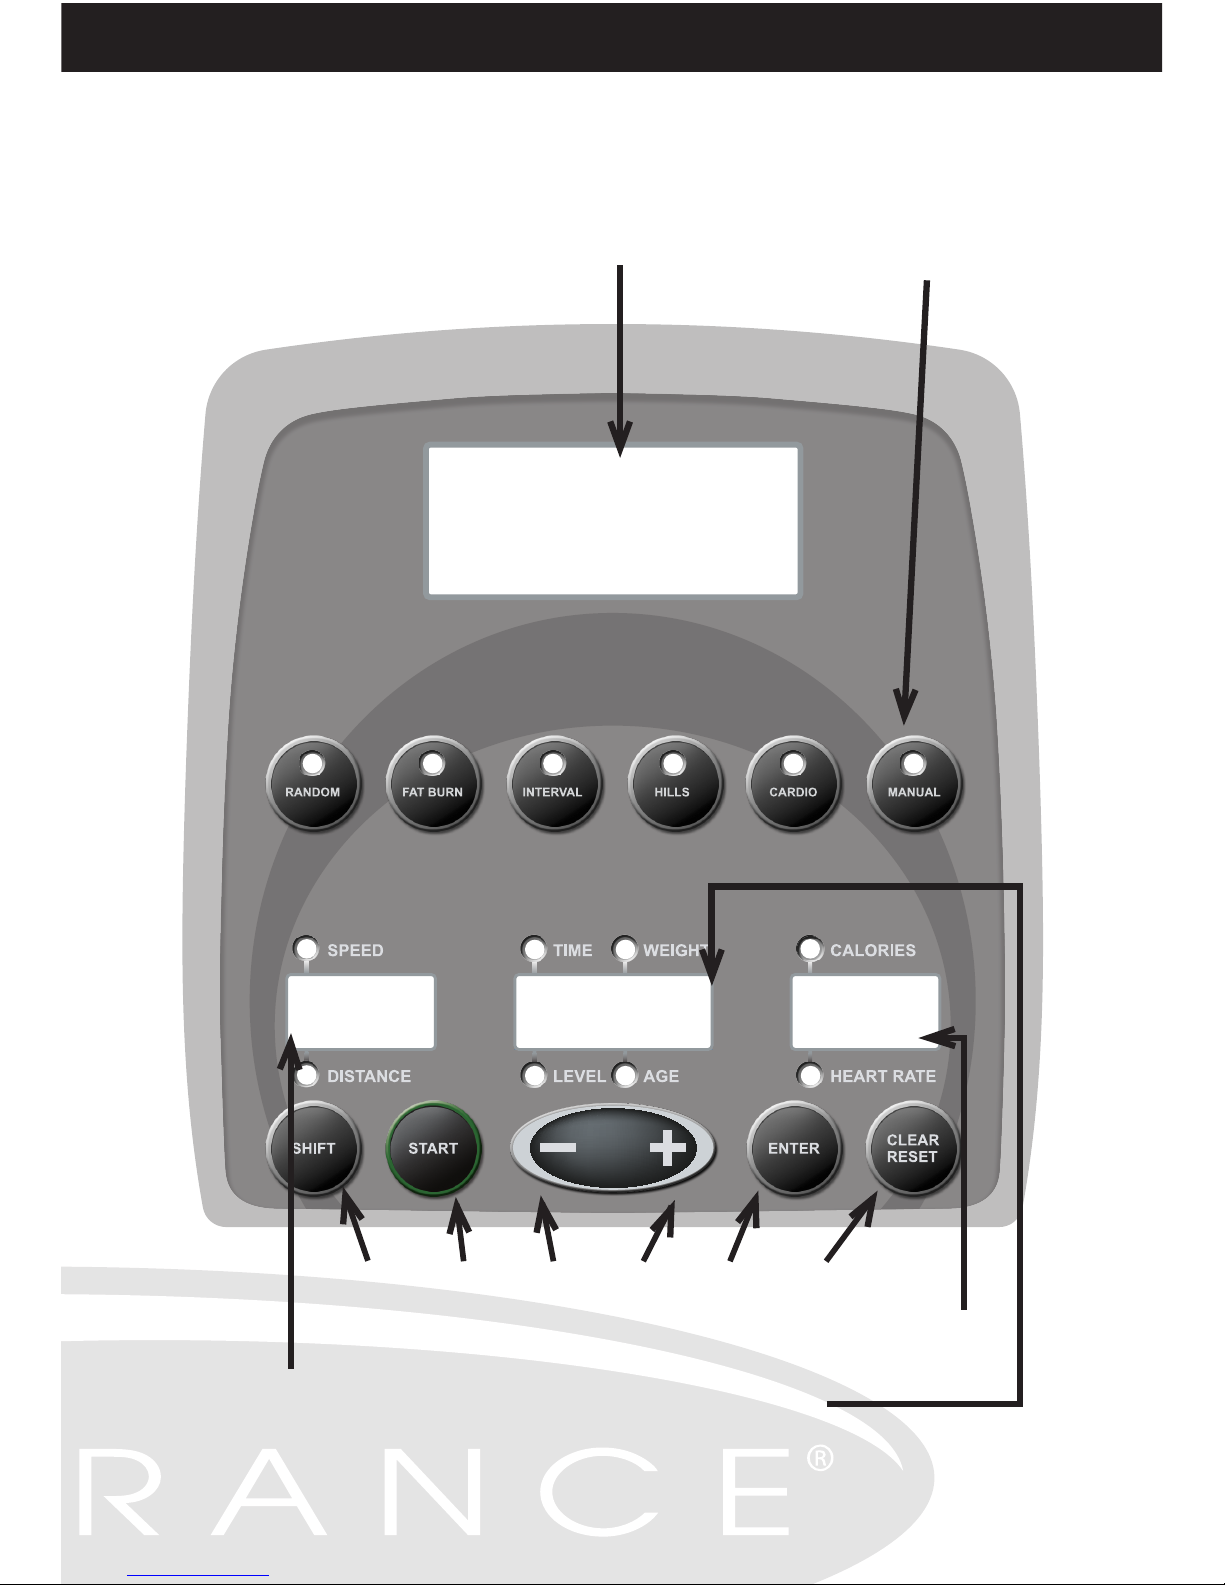
CONSOLE
6
Program Function
Buttons
Main LED
readout
Calories and
Heart Rate readout
(BUTTON IDENTIFICATIONS ON PAGE3)
1. 2. 5. 6. 3. 4.
Time, Weight Level ,
and Age readout
Speed and
Distance out
7
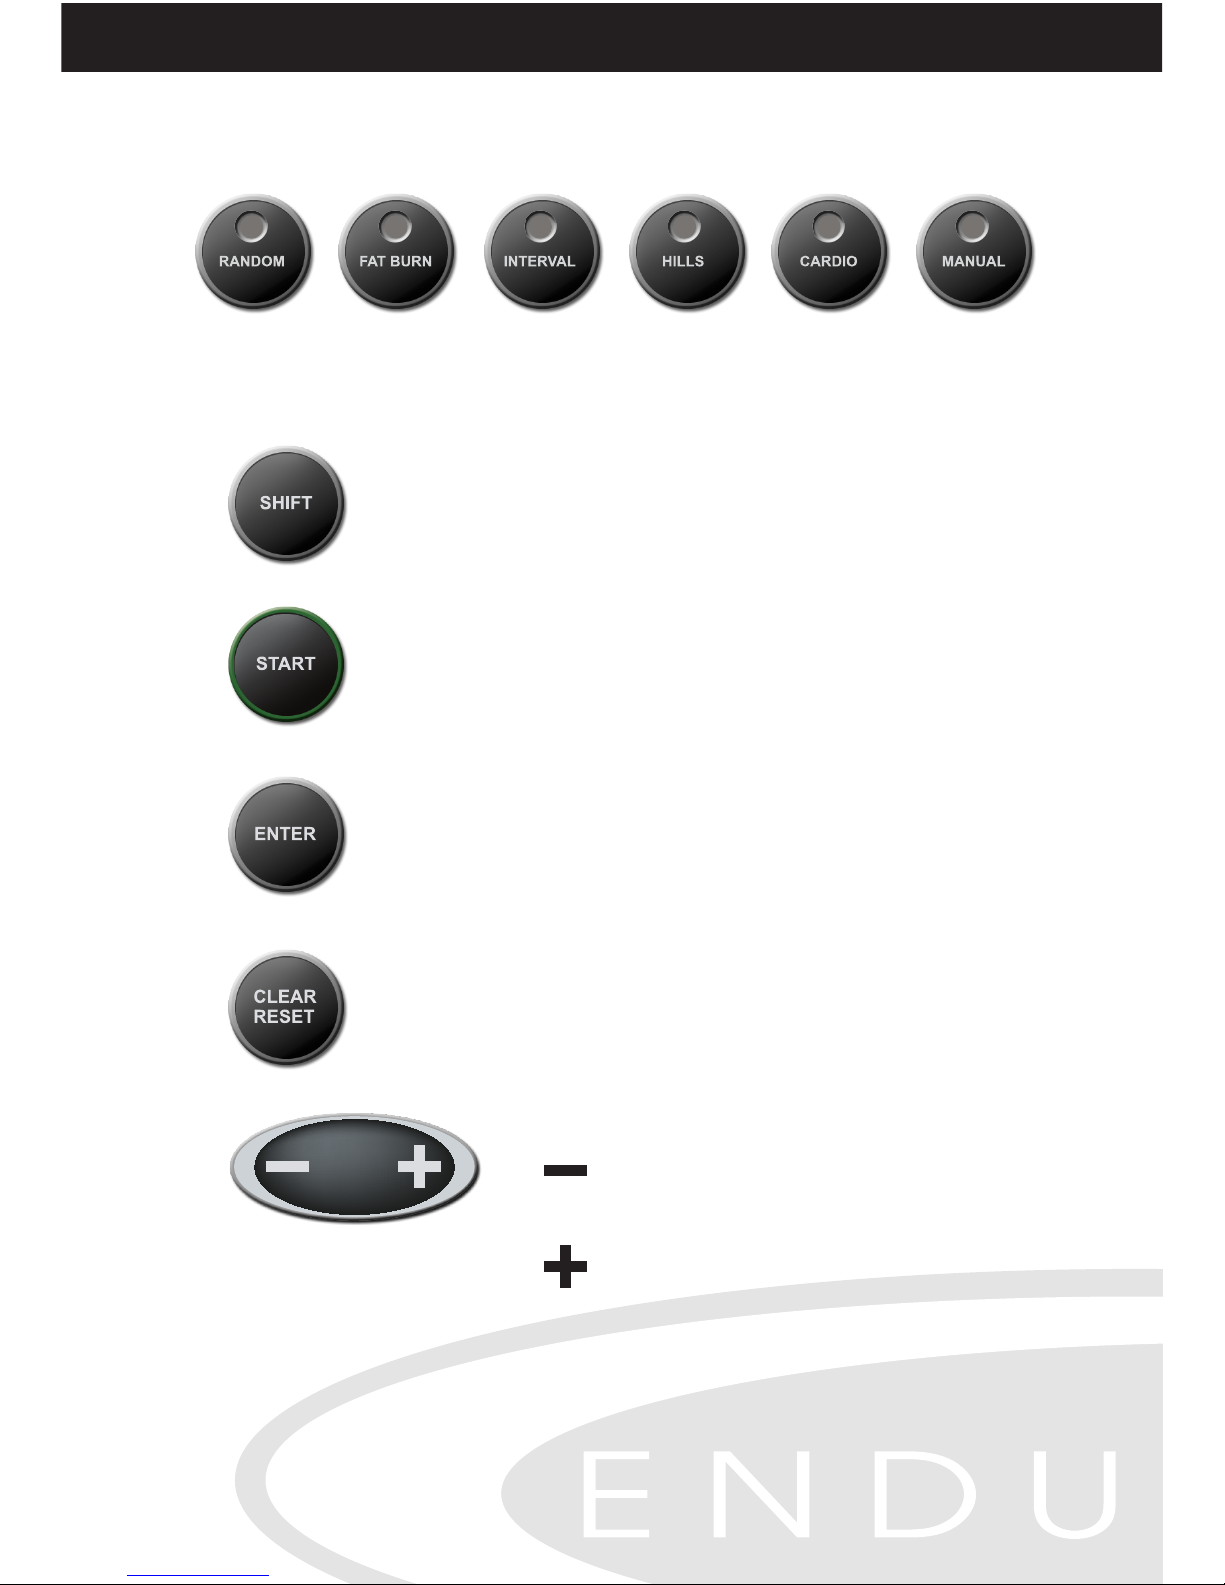
BUTTONS
Program Function Buttons
1.
2.
3.
4.
5.
Automatically shifts display information every 8 seconds,
or stays fixed on the information.
Start the program
Confirm Button
Pauses program, or hold for 3 seconds to CLEAR all
information to RESET.
Decrease the value of program /
Select the program
Increase the value of program /
Select the program

THE PROGRAMS
8
The RECUMBENT BIKE & BIKE motion exercise machine is the result of
combining the vertical motion of a stair climber and the striding motion of
a RECUMBENT BIKE & BIKE. The machine generated RECUMBENT
BIKE & BIKE shape is designed to move in both a forward or reverse
motion and when combined with the upper body work out supported by
the moving handles, train all the body's major muscle groups: Gluteals,
Hamstrings, Quadriceps, Calves, Lats, Chest, Deltoids, Biceps and
Triceps. The low impact of the RECUMBENT BIKE & BIKE motion
provides a cardiovascular workout for everyone from beginners to serious
athletes. When compared to other cardio exercises, the RECUMBENT
BIKE & BIKE trainer's unique motion requires a higher level of oxygen
consumption that results in a more intense workout with the same amount
of effort typically required on other cardio equipment.
The main exercise programs are designed for two reasons; get you
moving quickly with the least amount of set up, and also to guide you
through a number of different and motivating routines that maximizes
your workout.
Turn the power on, all the lights will go on for one second. The Main
Readout will display the programs sequence: Manual, Cardio, Hills,
Interval, Fat Burn, Random, HR Fat Burn, HR Cardio, HR Interval,
HR Hills.
1. Press the "Start" button or move the pedals, this will start the Manual
program.
During any of the programs, you can use the buttons to
adjust the Level of resistance, at any time.

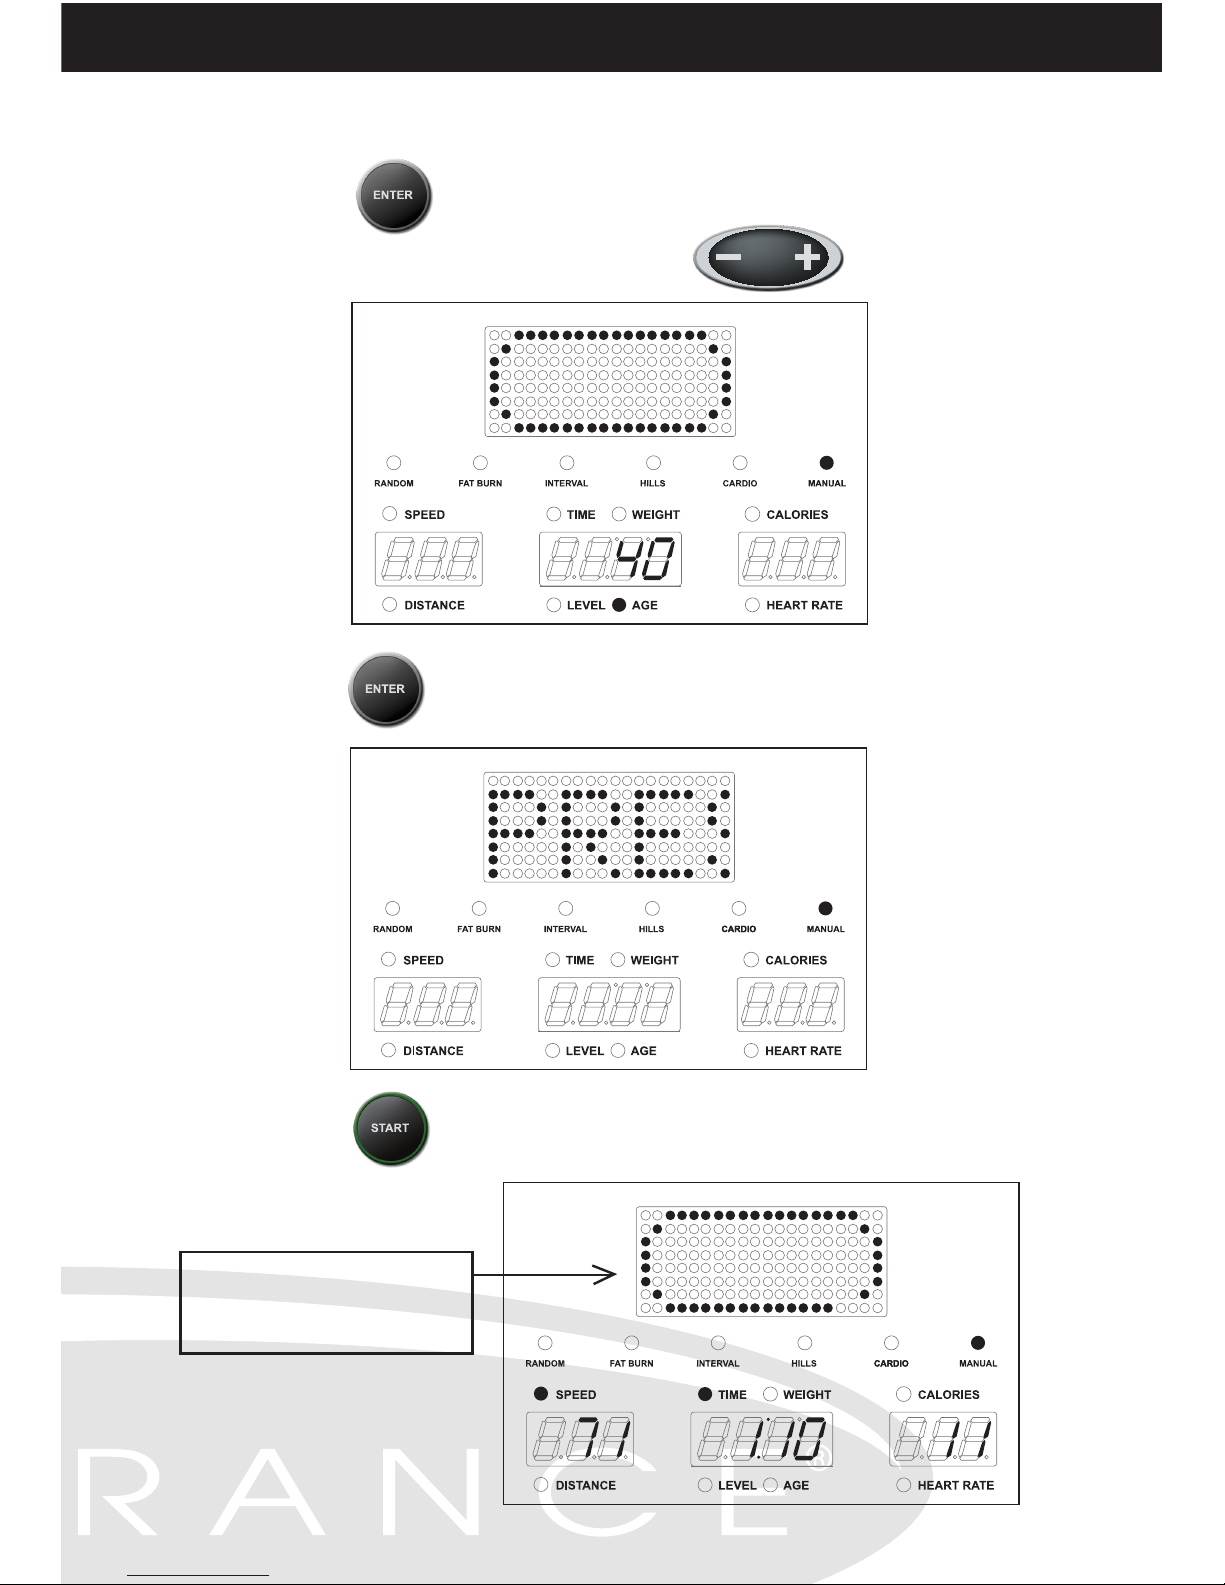
2.MANUAL Program: The fastest and simplest way to get started. Just
get on the machine, input the basic information and
start moving.
A.Press the " " button (the MANUAL light will go on, and the Main
Readout will display an "oval" graphic). Set up the Time, using the
" " button.
9
B.Press the " " button, until the WEIGHT light goes on. The
Weight Screen will display 150(flashing), us the " " button
to adjust.
MANUAL
MANUAL
10
C.Press the " " button, until the AGE light goes on. The Age
Screen will display 40(flashing), us the " " utton to adjust.
D.Press the " " button, until the Main Readout scrolls"PRESS
START"
E.Press the " " button, to start the program.
The oval track distance
equals .25 miles

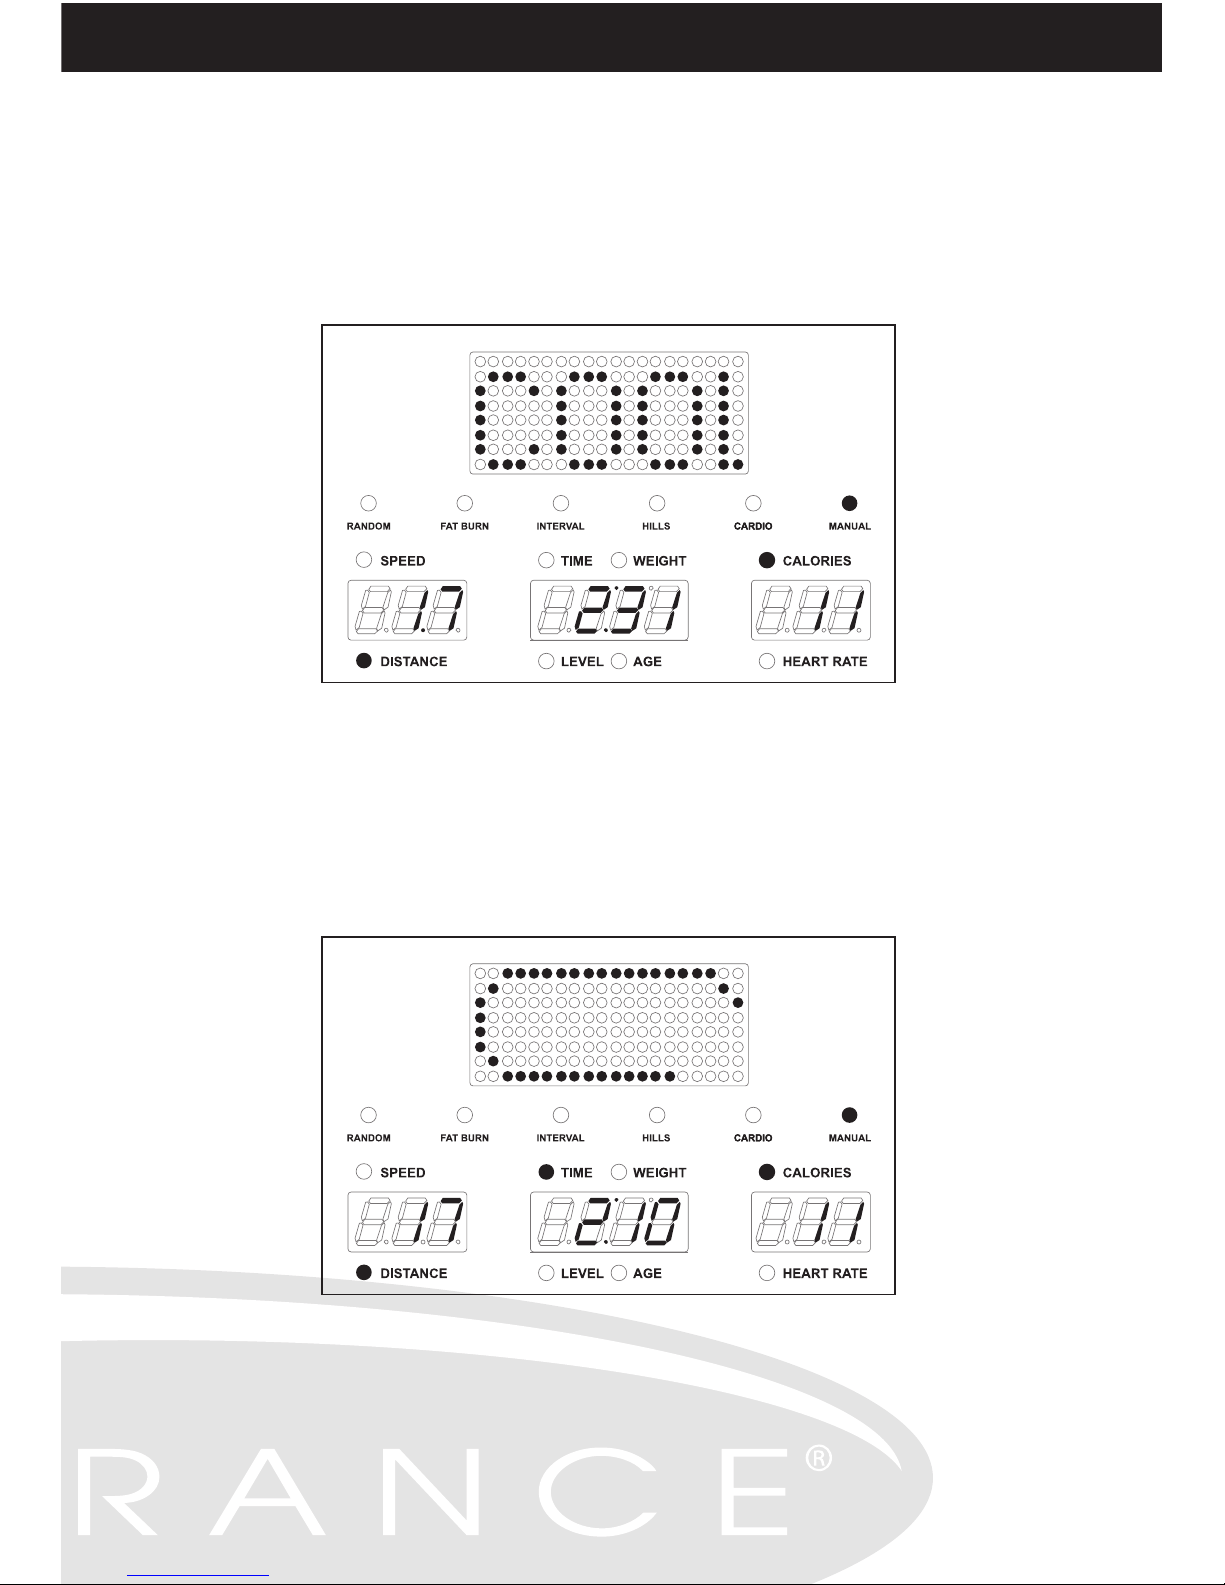
A.During all programs, you can adjust the resistance level by using the
" " button.
11
ALL PROGRAMS
B.If you stop pushing the petals for 10 seconds or press the " "
button the Main Readout will scroll "PAUSE". Then will start a 10 minute
count down. If there is no motion during these 10 minutes, the program
will reset.
C.There will be three beeps at the conclusion of the pre-set time.
ALL PROGRAMS
12
D.At the end of the program:
The Main Readout will scroll "COOL DOWN", twice.
E.After the display of "COOL DOWN", the Main Readout will go back to
the oval track.
F.After the count down, the Main Readout will display "END".
B.Setup the "LEVEL"
*Setup the same way as in the Manual program. (on pages 8 and 9).
Press " ENTER " .
C.Setup the "TIME " , * , Press " ENTER " .
D.Setup the " WEIGHT " , * , Press " ENTER " .
E.Setup the " AGE " , * , Press " ENTER " .
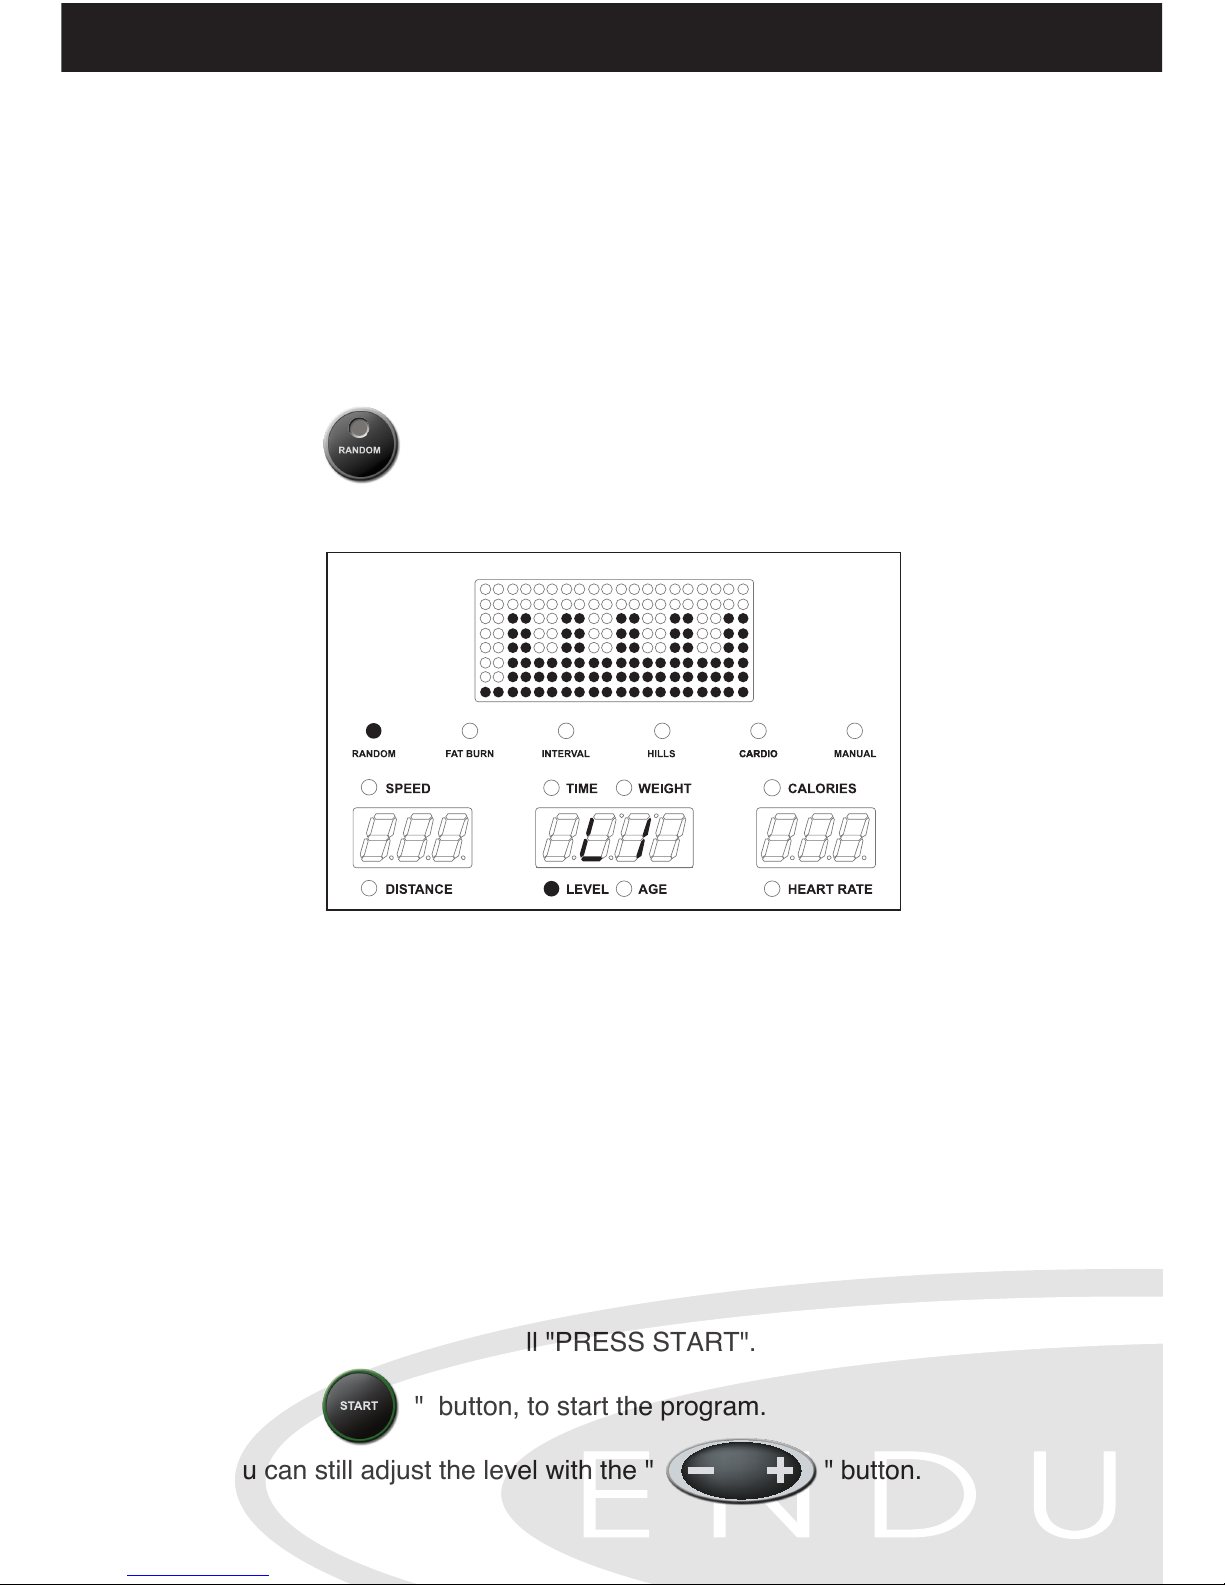
F.The Main Readout will scroll "PRESS START".
Press " " button, to start the program.
G.You can still adjust the level with the " " button.
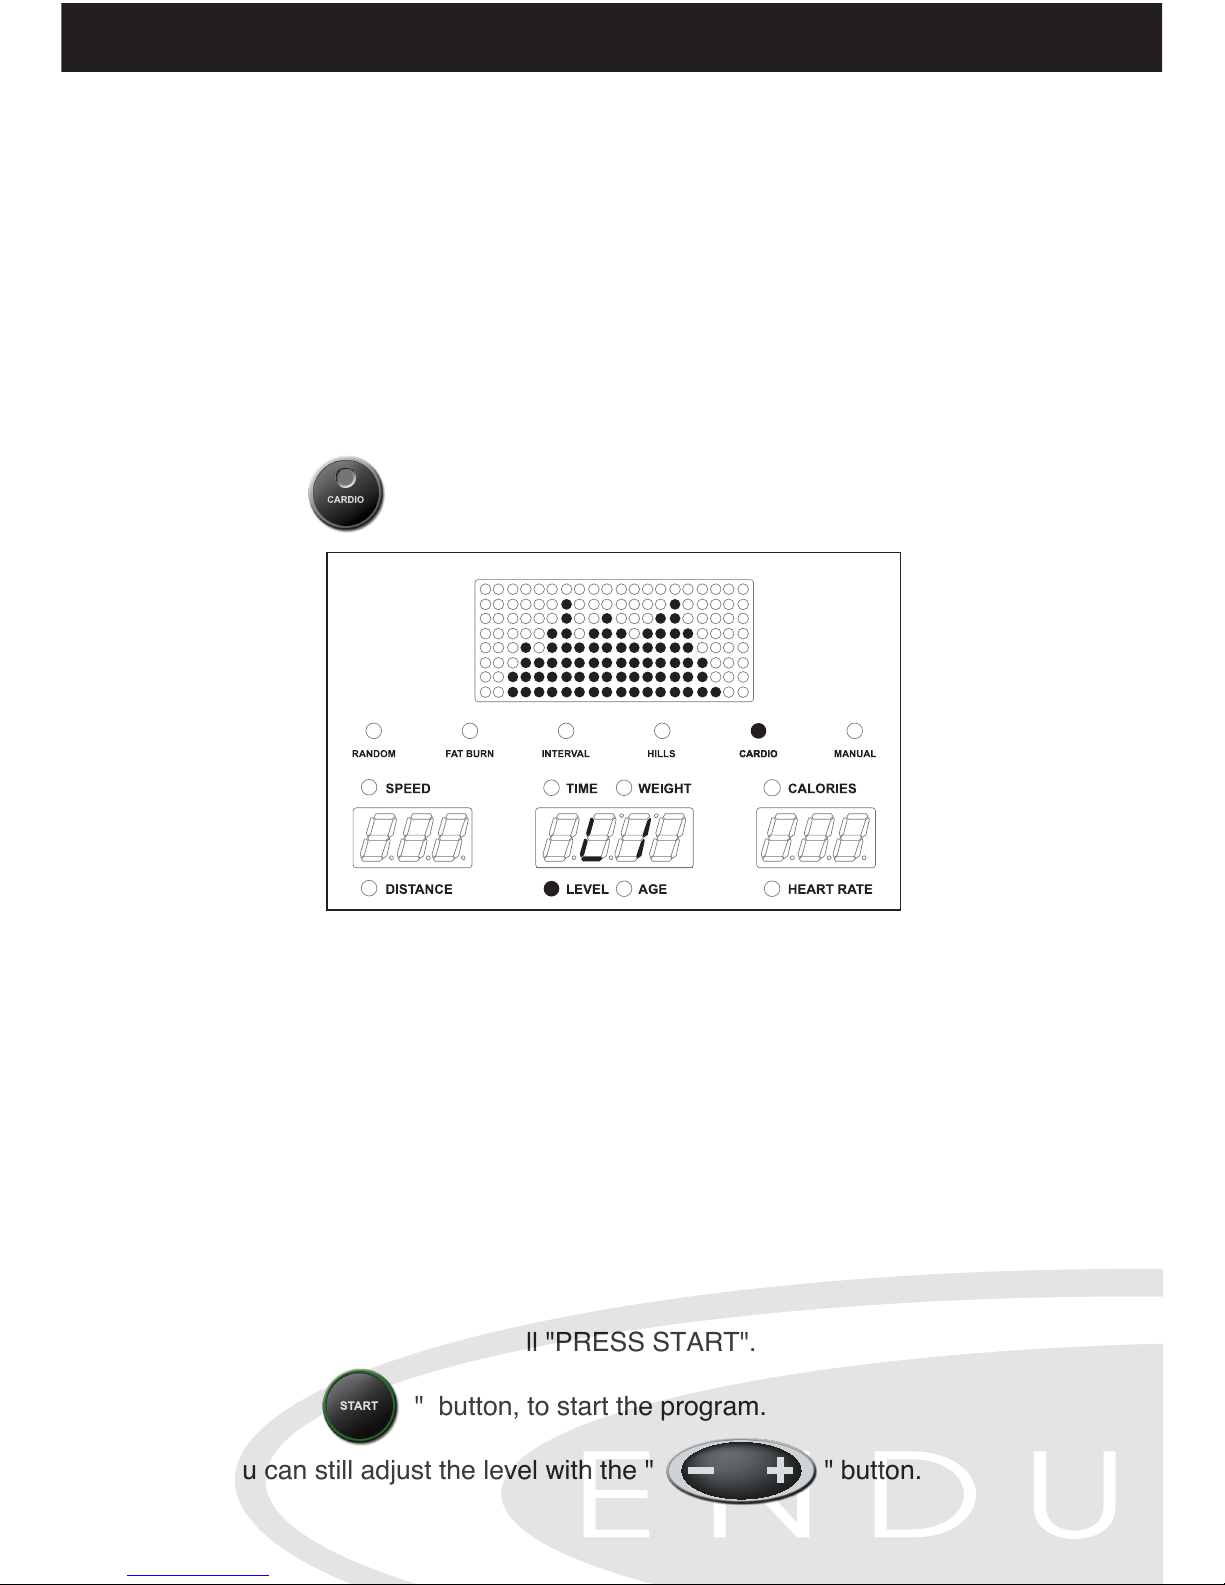
3.CARDIO program:
The gradual increasing and decreasing of the resistance provides a
challenging workout along with maximizing cardiovascular benefits.
The program is designed to keep your heart rate at 80% of your
calculated maximum heart rate.
A.Press " " button ( " CARDIO " light will go on).
13
CARDIO

HILLS
14
4.HILLS program:
Like walking or jogging up a hill, the stepped increase of the resistance
provides a challenging workout that continually builds resistance and
heart rate during the length of the program. Similar to sporting activities
such as basketball and soccer.
A.Press " " button ( " HILLS " light will go on).
B.Setup the "LEVEL"
*Setup the same way as in the Manual program. (on pages 8 and 9).
Press " ENTER " .
C.Setup the "TIME " , * , Press " ENTER " .
D.Setup the " WEIGHT " , * , Press " ENTER " .
E.Setup the " AGE " , * , Press " ENTER " .
F.The Main Readout will scroll "PRESS START".
Press " " button, to start the program.
G.You can still adjust the level with the " " button.
5.INTERVAL program:
This program varies the intensity of the workout between low and high
resistance to quickly raise and lower the heart rate in 2 minute
intervals, similar to endurance type training. The upper and lower
resistance lev the interval.
A.Press " " button ( " INTERVAL " light will go on).
15
INTERVAL
FAT BURN
16
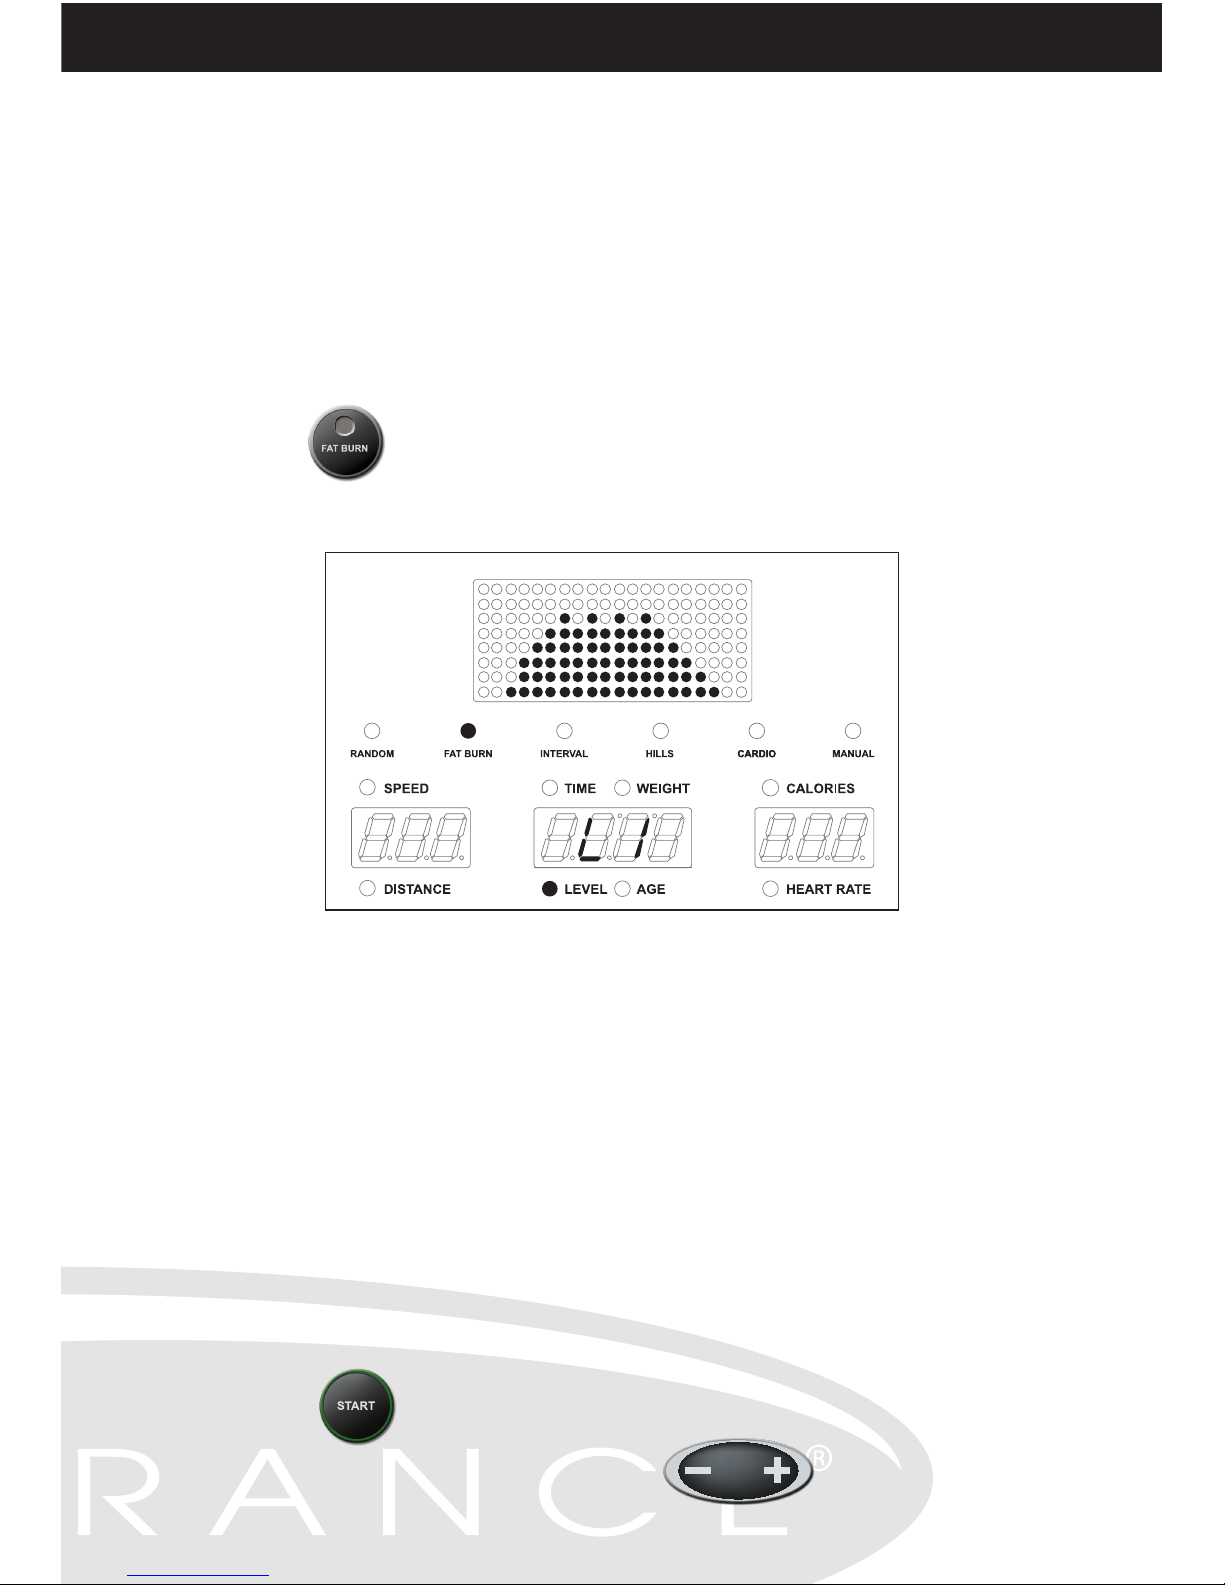
6.FAT BURN program:
This program does just what the name suggests -gets your heart rate
up fast and maintains it at 65% of your calculated maximum heart
rate with slight variations to provide optimal calorie burn.
A.Press " " button (" FAT BURN " light will go on).
B.Setup the "LEVEL"
*Setup the same way as in the Manual program. (on pages 8 and 9).
Press " ENTER " .
C.Setup the "TIME " , * , Press " ENTER " .
D.Setup the " WEIGHT " , * , Press " ENTER " .
E.Setup the " AGE " , * , Press " ENTER " .
F.The Main Readout will scroll "PRESS START".
Press " " button, to start the program.
G.You can still adjust the level with the " " button.
7.RANDOM program:
This program provides different combinations of increased and
decreased resistance designed to motivate and challenge. Each time
this program is selected, the computer generates a new course.
A. Press " " button ( " RANDOM " light will go on).
17
RANDOM
18
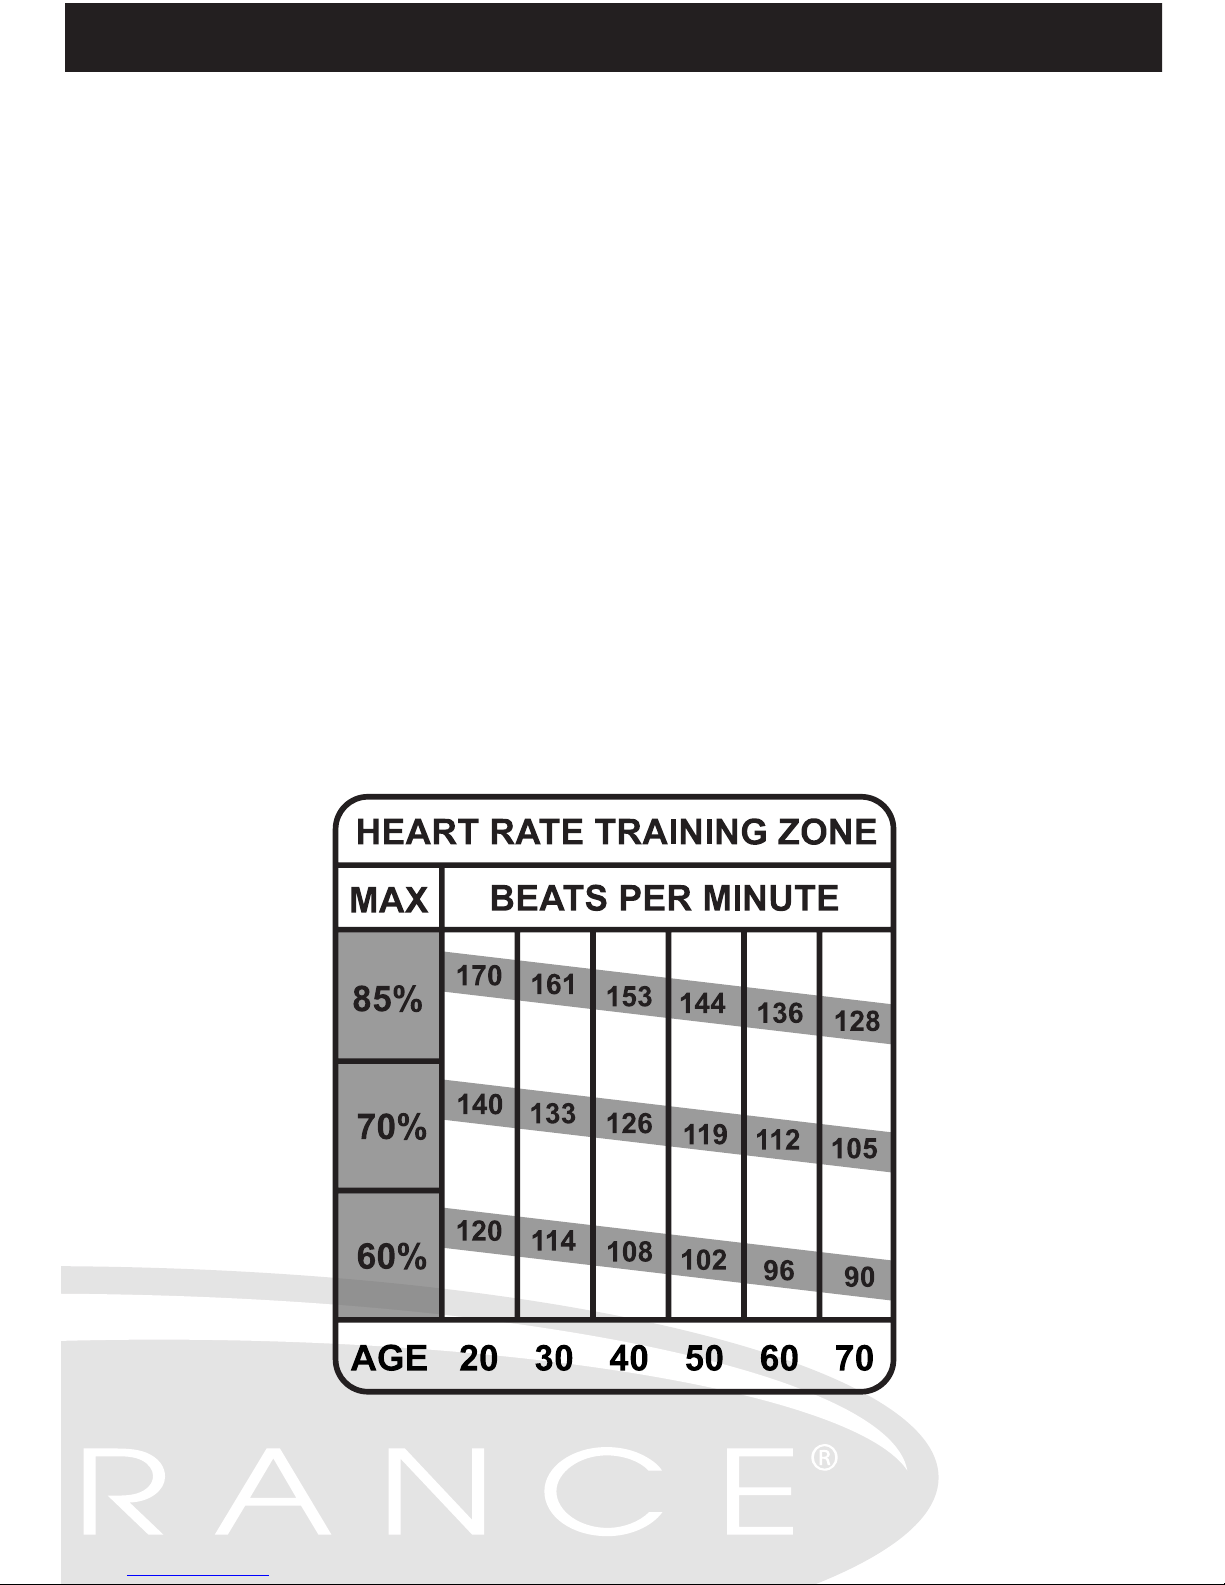
Your Target Heart Rate Zone is a percentage of your maximum heart
rate. Target Zone will vary for each individual, depending on age, current
level of conditioning, and personal fitness goals. The American College
of Sports Medicine recommends working-out at a Target Heart Rate
Zone of between 60% of maximum heart rate. See the chart below for
convenient reference.
EXAMPLE:
For a 35-year old user: find AGE along the bottom of the chart, follow the
AGE column up to TARGET ZONE bar. RESULTS: 60% of maximum
Heart Rate = 111 Beats per Minute, 75% of maximum Heart Rate = 139
Beats per Minute. With this Target Zone of 111-139 Beats per Minute it is
best to enter an average Target Heart Rate of about 118 Beats per
Minute into the Console.
TARGET HEART RATE ZONE
This manual suits for next models
2
Table of contents
Other Endurance Exercise Bike manuals

Endurance
Endurance ESB250 User manual

Endurance
Endurance ESB250.2 User manual

Endurance
Endurance FB300 Fan Bike User manual

Endurance
Endurance B3R User manual

Endurance
Endurance ESB150 Quick start guide

Endurance
Endurance B4R User manual

Endurance
Endurance B5U User manual

Endurance
Endurance B2U User manual
Popular Exercise Bike manuals by other brands


Tunturi
Tunturi Cardio Fit B25 user manual

Rogerblack
Rogerblack SILVER SPIN BIKE AG-10221 user guide

BODY BIKE
BODY BIKE Smart troubleshooting manual

Keys Fitness
Keys Fitness Alliance 900U owner's manual

Skandika Fitness
Skandika Fitness FOLDABLE X-1000 Assembly instructions and user guide

Finnlo
Finnlo Speedbike CRS manual


