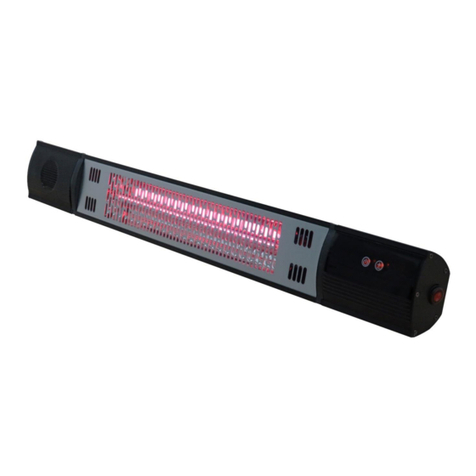
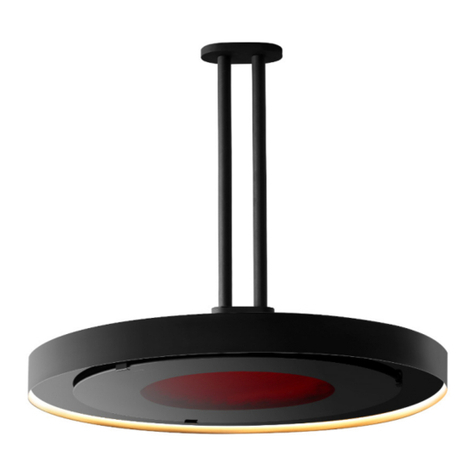
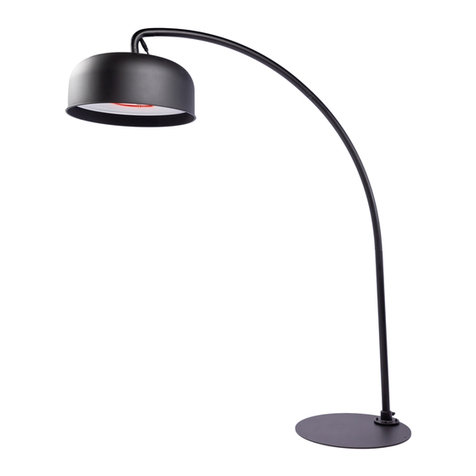
Ener-G+ ZHQ2080-CWM-RM User manual

Instruction Manual
Electric Patio Heater
ZHQ2080-CWM-RM
Please read these instructions carefully before using your
new heater
Unpack the halogen heater making sure that all the items
are present and that there are no components left in the
box and that the heater head is free from any packing
material.
Using the detailed drawing follow the steps to assemble
your halogen heater.
Do not connect the halogen heater to the electrical
supply until all the assembly is complete.
Do not connect the halogen heater to the electrical
supply if any of the components or the power cord is
damaged in any way.
If in doubt contact your supplier.
This appliance can be used by children aged from 8 years
and above and persons with reduced physical, sensory or
mental capabilities or lack of experience and knowledge if
they have been given supervision or instruction
concerning use of the appliance in a safe way and
understand the hazards involved. Children shall not play
with the appliance. Cleaning and user maintenance shall
not be made by children without supervision.

WARNING: This heater is not equipped with a device to
control the room temperature. Do not use this heater in small
rooms when they are occupied by persons not capable of
leaving the room on their own, unless constant supervision is
provided.
Children of less than 3 years should be kept away unless
continuously supervised.
Children aged from 3 years and less than 8 years shall only
switch on/off the appliance provided that it has been placed or
installed in its intended normal operating position and they have
been given supervision or instruction concerning use of the
appliance in a safe way and understand the hazards involved.
Children aged from 3 years and less than 8 years shall not plug
in, regulate and clean the appliance or perform user
maintenance.
CAUTION — Some parts of this product can become very
hot and cause burns. Particular attention has to be given where
children and vulnerable people are present.
1. Mount the heater outside or in a large open area and
well away from any obstructions such as branches or
where the heater is near any objects that can be affected
by heat, such as furniture, curtains or other inflammable
objects (minimum distance 1 meter).
2. Do not position immediately above or below an
electrical socket.
3. The unit must be placed with the clearance of 180cm to
the floor and 30cm to the ceiling.
4. When the power supply cord is damaged, it must be
replaced by authorized agent or other professional
people to avoid danger.
5. This appliance is not intended for use by persons
(including children) with reduced physical. Sensory or
mental capabilities, or lack of experience and knowledge,
unless they have been given supervision or instruction
concerning use of the appliance by a person responsible
for their safety.
6. Children should be supervised to ensure that they do not
play with the appliance.
7. Do not use near bath tubs, wash areas or swimming
pools.
8. Do not use in unventilated areas.
9. Do not use where gas, petrol, paint or other
inflammable goods are stored.

10.Do not push any items through, obstruct or cover the
grill of the heater head.
11.Do not move when connected to an electrical supply
and always wait for the patio heater to cool down before
storing away.
12.Do not touch the heater head when in use.
13.Do not leave turned on and unattended especially
when children and or animals are in the vicinity.
14.The indication of the different positions of switches shall
be visible from a distance of 1M.
15.The Marking concerning covering shall be visible after
the heater has been installed. It shall not be placed on
the back of heaters.
16.The unit must be correctly installed according to the
instructions. Make sure the head is at least 1.8m from
the floor.
17.The unit must be securely placed on a vertical and flat
wall.
18.The unit is at high temperature during operation. It keeps
hot for a period after shut down. Potential danger would
occur when touching it during this period.
19.Don’t place the unit closed to curtain and/or other
flammable objects. Otherwise there will be a danger of
catching fire.
20.Don’t cover the unit with anything during operation or a
short time after it’s shut down.
21.Don’t wrap the power supply cord on the unit.
22.The unit must be handled with care, and avoid vibration
or hitting.
23.The unit must be securely grounded during operation.
24.If the unit gets damaged, it must be repaired by
professional electricians.
25.The unit must not be positioned under a socket.
26.When assembling, keep clear from any board or
flammable material.
27.The unit must be supervised by adults if it’s used by a
child.
28.It is not safe to use on a building site, greenhouse, barn
or stable where there’s flammable dust.
29.The head of the unit is at high temperature during

operation. Unplug the unit and wait till it cools before
cleaning.
30.Don’t use this unit in place where causticity or volatile
air exists, i.e. dust, steam, gas, etc.
31.Don’t use this unit as a cloth drier or towel drier.
32.Don’t use this unit as a sauna heater.
33.Don’t use this unit as a room heater.
34.Don’t use this unit in place of animal propagating and
rising.
35.Don’t immerse this unit into water for cleaning.
36.The unit should be plugged in a socket, which is easily
visible and reachable.
37.Two Dark points may exist on the surface of the heating
elements during the first few minutes after it is turned on.
This is normal, and will not affect the performance of the
unit.
Accessories
Ref.
Name
Qty
1
Explosive bolt M6*50
4
2
M6 spanner
1
3
‘L’ hexagonal wrench
1
4
Remote control
1
5
Hanging string chain with hook
2
Installation
Heater ZHQ 2080-CWM-RM is built with the best quality
components in accordance to the prevailing legal regulations
and certified for safety in use. For best results from the
appliance please ensure that the installation is done by a
qualified electrician in accordance with the following instructions
and taking full account of current regulations. When using the
heater, please carefully follow the instructions and
recommendations below.

You could loosen the two M6*10 screws to change the best
Angle of heating. Then retighten them.
Installation to Wall
When fixing the heater to a wall, ensure hinges are in the
underside so that the lid hands down in the open position.
Minimum required distances:
a) 500mm from the side wall
b) 500mm from the ceiling
c) Installation height above 1.8M
Installation to ceiling
Minimum required distances:
a) 50cm from the side wall
b) 50cm from the ceiling
c) Installation height above 240cm
The heater must be fixed to a wall with the bracket supplied
to allow adequate ventilation.
Never fix or place heater near flammable or combustible
materials.
Generally heaters must be placed at a safe distance (clear
space) of at least 2.0m from combustible materials and glass
walls. If installed in workshops or garages where
inflammable or combustible paints are used, the heaters
must be installed at a distance of at least 4.0m from the
source of danger.
If the heaters are placed in areas where spray painting of
any description is taking place, they should not be used
during the painting operations.
Never use the heater in particularly dusty and explosive
areas.

Connection to 220-240 Volts Power Supply
It is important to ensure that the electricity supply is of
adequate capacity for the electrical load required by the
appliance being installed.
These appliances must be earthed.
Assembling Process
Step 1: Put 4 Explosive bolt M6*50① into the wall.
Step 2: Take off the nuts, the spring locks washers and the plain
washers from four explosive bolts. Keep them for the next step.
Step3: Installer the heater on the wall
Complete!

Assembling Process for ceiling
Step 1: Screw the nut of handing string chain nuts into the M6
screw hole of the heater cover.
Step 2:Press on the lock crown to adjust the height.
Installation to tube
Product support from the ceiling should be no less than
10cm;
Warm distance from the wall should be not less than 10cm;
Far from inflammable, explosive;
Any object that is directly covered by the product is
prohibited;
Make sure that the irradiation distance is not less than
50cm;
Children are prohibited from using without a guardian;
Prohibited toward ceiling or wall;
No direct touch to the heating zone and its outer shell;

Do not cover!
Assembling Process to tube
Accessories
Ref.
Name
Qty
1
M6*12 screws
4
2
‘U’ support
1
3
M6 nuts
4
4
Non-slip mat
1
5
M6*50 screws
2
6
M8*25 handle
1
7
‘L’ hexagonal wrench(5mm)
1
Step 1: Fix the ‘U’ support to heater.
Step 2: Fix the ‘U’ support to tube.

Complete!
Operation
Connect the power cable to a 13 amp supply which is located in
a safe, dry area.
The switch on the heater is used to control the Heater. When
the switch turn to the position 【ON】, the indicator light will
be turn red, the heater will be in standby mode. The【OFF】
position will turn off the Heater.
The panel control:
When the switch is on the 【ON】 position, press the remote
control once, the heater will be on 2000W power. Press the
remote control again, the heater will be in standby mode.
When the switch is on the 【ON】 position, press the
on the panel control . Press it once, the heater will be on
2000W power. Press it again, the heater will be in standby
mode.
Although the patio heater is waterproof, do not use when
raining or in wet conditions.
Never connect the power cable from the electrical supply,
when the patio heater is not in use.
Care and maintenance
•When disconnected from the electrical supply, clean the
surface of the patio heater with a damp cloth. Never use
corrosive or solvent cleaners or immerse in water.
•Any maintenance or repairs including replacing the
halogen tube should only be carried out by a qualified
electrician or by a recommended service center.

Technical specification
•Power supply 220-240V 50-60Hz
•Wattage max 2000W
•Insulation class I
WEEE This symbol on the product or in the
instructions means that your electrical
and electronic equipment should be
disposed at the end of its life separately
from your household waste. There are
separate collection systems for recycling in the EU. For more
information please contact the local authority or your retailer
where you purchased the product.

사용설명서
전기 파티오 히터
ZHQ2080-CWM-RM
새히터를 사용하기 전에 이설명서를 주의 깊게 읽으십시오
할로겐 히터의 포장을 풀고 누락된 품목이 없는지, 상자에 부품이
남아 있지 않은지, 히터 헤드에 포장재가 없는지 확인하십시오.
상세도면을 이용하여 절차에 따라 할로겐 히터를 조립하십시오.
조립이 완료될 때까지 할로겐 히터를 전원에 연결하지
마십시오.
부품이나 전원 코드가 손상된 경우에는 할로겐 히터를 전원에
연결하지 마십시오.
궁금한 점이 있으면 공급업체에 문의하십시오.
8세이상의 어린이, 신체적/감각적/정신적 능력이 저하된 사람
또는 경험과 지식이 부족한 사람은 안전한 기기 사용 방법에 관한
지도나 지침을 받고 관련된 위험을 이해한 경우에 본기기를
사용할 수있습니다. 어린이가 기기를 가지고 놀지 않도록
하십시오. 어른의 지도 없이 어린이가 청소와 유지보수를 하지
않도록 하십시오.

경고: 이히터에는 실내 온도 제어장치가 장착되어 있지
않습니다. 지속적으로 감시하지 않는 경우 스스로 방에서 나갈 수
없는 사람이 있는 작은 방에서 이히터를 사용하지 마십시오.
지속적으로 감시하지 않는 한3 세미만의 유아는 기기에서 멀리
떨어져 있어야 합니다.
3세에서 8 세미만의 아이는 기기를 정상적인 작동 위치에 놓거나
설치하고 안전한 기기 사용 방법에 대한 지도나 지침을 받고 받고
관련된 위험을 이해한 경우에만 기기의 스위치를 켜거나 꺼야
합니다.
3세이상 8 세미만의 아이는 제품의 플러그를 꽂거나, 제품을
조절하고 청소하거나 유지보수를 수행할 수없습니다.
주의 - 이제품의 일부 부품은 고온으로 인한 화상을 초래할
수있습니다. 어린이와 취약한 사람이 있는 장소에서는 각별한
주의를 기울여야 합니다.
38. 가구, 커튼 또는 기타 인화성 물질과 같이 열의 영향을
받을 수있는 물체 또는 나뭇가지와 같은 장애물에서 멀리
떨어진(최소 1m 이상 떨어진) 개방된 장소 또는 외부에
히터를 설치하십시오.
39. 전기소켓 바로 위나 아래에 기기를 두지 마십시오.
40. 바닥에서 180cm, 천장에서 30cm 의간격을 두고 기기를
설치해야 합니다.
41. 전원코드가 손상된 경우에는 위험을 피하기 위해 지정
대리점 또는 전문가가 교체해야 합니다.
42. 안전책임자로부터 기기 사용에 관한 지도나 지침을 받지
않는 한신체적/감각적/정신적 능력이 저하되거나 경험과
지식이 부족한 사람(어린이 포함)은본기기를 사용하지
않아야 합니다.
43. 어린이가 기기를 가지고 놀지 않도록 하십시오.
44. 욕조, 세면대, 수영장 근처에서 사용하지 마십시오.
45. 환기가 되지 않는 장소에서 사용하지 마십시오.
46. 가스, 휘발유, 도료 또는 기타 인화성 물질이 있는
장소에서 사용하지 마십시오.

47. 히터헤드 그릴에 물건을 넣거나 막거나 덮지 마십시오.
48. 전원에 연결된 경우에는 이동하지 않도록 하고 파티오
히터가 식을 때까지 기다렸다가 보관하십시오.
49. 사용중에 히터 헤드를 만지지 마십시오..
50. 특히어린이나 동물이 근처에 있을 때전원을 켠채로
방치하지 마십시오.
51. 스위치의 위치 표시는 1M 거리에서 볼수있어야 합니다..
52. 덮개에 관한 표시는 히터를 설치한 후에 볼수있어야
하며 히터 뒷면에 표시하지 않도록 하십시오.
53. 지침에 따라 올바르게 기기를 설치해야 합니다. 헤드가
바닥에서 최소한 1.8m 떨어져 있어야 합니다.
54. 수직으로 된평평한 벽에 기기를 단단히 고정하십시오.
55. 기기는 고온으로 작동하며 전원이 꺼진 후에도 일정 기간
고온으로 유지됩니다. 이기간 동안 접촉하면 위험할 수
있습니다.
56. 커튼및/또는 기타 인화성 물체가 기기를 덮지 않도록
하십시오.화재가 발생할 수있습니다.
57. 작동중또는 종료 후잠시 동안 기기를 덮지 마십시오.
58. 전원코드를 기기에 감지 마십시오.
59. 기기를 조심스럽게 취급하고 흔들거나 충격을 가하지
마십시오.
60. 작동중에는 기기를 확실하게 접지하십시오.
61. 기기가 손상된 경우에는 전문가에게 수리를 맡기십시오.
62. 기기를 소켓 아래에 두지 마십시오.
63. 조립시보드나 인화성 물질로부터 멀리하십시오.
64. 어린이가 사용하는 경우에는 반드시 어른의 지도가
필요합니다.
65. 가연성 분진이 있는 건설현장, 온실, 축사, 마구간에서
사용하면 위험할 수있습니다.
66. 작동중에는 기기의 헤드가 고온이 됩니다. 기기의
플러그를 뽑고 식을 때까지 기다린 후청소하십시오.

67. 부식성 또는 휘발성 공기(예: 먼지, 증기, 가스 등)가있는
장소에서는 본기기를 사용하지 마십시오.
68. 본기기를 의류 건조기나 타월 건조기로 사용하지
마십시오.
69. 본기기를 사우나 히터로 사용하지 마십시오.
70. 본기기를 실내 난방용으로 사용하지 마십시오.
71. 동물번식 및사육 장소에서 사용하지 마십시오.
72. 청소시에 본기기를 물에 담그지 마십시오..
73. 쉽게볼수있고 닿을 수있는 소켓에 기기를
연결하십시오.
74. 전원을 켠후처음 몇분동안 발열체 표면에 두개의
어두운 점이 나타날 수있습니다. 이러한 현상은 정상이며
기기 성능에 영향을 미치지 않습니다.
부속품
번호
명칭
수량
1
폭발 볼트 M6 * 50
4
2
M6 스패너
1
3
'L' 육각 렌치
1
4
리모콘
1
5
후크가 달린 스트링 체인
2
설치
히터 ZHQ 2080-CWM-RM 은현행 법규에 따라 최고 품질의
부품으로 제작되었으며 사용 상의 안전에 대해 인증을 받았습니다.
최상의 결과를 얻기 위해서는 현재 규정을 충분히 고려하여 다음
지침에 따라 자격을 갖춘 전기 기술자가 기기를 설치해야 합니다.
히터를 사용할 때는 주의를 기울여 다음 지침과 권장 사항을
따르십시오.

M6 * 10 나사 2 개를 풀고 최적의 가열 각도로 조절할 수
있습니다. 조절 후나사를 다시 조이십시오.
벽에 설치하기
히터를 벽에 고정할 때경첩이 아래로 오게 하여 열림
위치에서 뚜껑이 아래로 향하도록 하십시오.
최소 요구 거리:
d) 측벽에서 500mm
e) 천장에서 500mm
f) 설치 높이 1.8M 이상
천장에 설치하기
최소 요구 거리:
d) 측벽에서 50cm
e) 천장에서 50cm
f) 설치 높이 240cm 이상
제공된 브래킷으로 히터를 벽에 고정하여 잘환기되도록
하십시오.
인화성 또는 가연성 물질 근처에 히터를 두거나 고정하지
마십시오.
일반적으로 히터는 가연성 물질과 유리 벽으로부터 최소한
2.0m 의안전 거리(여유 공간)를유지해야 합니다. 인화성 또는
가연성 도료를 사용하는 작업장이나 차고에서는 위험
요인으로부터 4.0m 이상 떨어진 곳에 히터를 설치해야 합니다.
스프레이 도장을 하는 장소에 설치한 경우 도장 작업 중에는
M6 x 10 나사
천장
벽
바닥
천장
벽
바닥

히터를 사용하지 마십시오.
특히 먼지가 많고 폭발 위험이 있는 장소에서는 히터
사용을 금합니다.
220-240 볼트 전원에 연결
전원이 기기에 필요한 전기 부하에 적합한 용량인지
확인해야 합니다
본기기는 접지가 필요합니다
조립 절차
1단계: 폭발볼트 M6 * 50①4 개를 벽에 끼우십시오.
2단계: 폭발 볼트 4 개에서 너트, 스프링 잠금 와셔 및평면
와셔를 제거한 후다음 단계에서 사용할 수있게 잘보관하십시오.
벽
벽

3단계: 벽에 히터를 설치합니다
완료!
천정 설치 시조립 절차
1단계: 스트링 체인 너트를 히터 커버의 M6 나사 구멍에
조이십시오.
2단계: 락크라운(Lock Crown)을눌러 높이를 조절하십시오
벽

튜브에 설치하기
제품 지지대는 천장에서 10cm 이상이어야 합니다.
벽에서부터 거리는 10cm 이상이어야 합니다.
인화성, 폭발성 물질에서 멀리 떨어져야 합니다.
제품이 물체를 바로 가리지 않도록 하십시오.
조사 거리는 50cm 이상이어야 합니다.
보호자 없이 어린이가 사용하지 않도록 하십시오.
천장이나 벽을 향하지 않도록 하십시오.
가열 부위와 외부 쉘에 직접 닿지 않도록 하십시오.
가리지 마십시오!
튜브 설치 시조립 절차
부속품
번호
명칭
수량
1
M6 * 12 나사
4
2
'U' 지지대
1
3
M6 너트
4
4
미끄럼 방지 매트
1
5
M6 * 50 나사
2
6
M8 * 25 핸들
1
7
'L' 육각 렌치(5mm)
1
1단계: 'U' 지지대를 히터에 고정하십시오.
히터
최소 10cm
최소
10cm

2단계: 'U' 지지대를 튜브에 고정하십시오.
완료!
작동
안전하고 건조한 장소에 있는 13A 전원 장치에 전원 케이블을
연결하십시오.
히터의 스위치는 히터를 제어하는데 사용됩니다. 스위치가
【ON】위치가 되면 표시등이 빨간색으로 바뀌고 히터는 대기
모드가 됩니다. 【OFF】위치에서는 히터가 꺼집니다.
조작 패널:
스위치가 【ON】위치에 있을 때리모컨을 한번누르면 히터가
2000W 전력으로 작동합니다. 리모컨을 다시 누르면 히터는
대기 모드가 됩니다.
스위치가 【ON 】위치에 있을 때조작 패널의 를
누르십시오. 한번누르면 히터가 2000W 전력으로 작동합니다.
다시 누르면 히터가 대기 모드가 됩니다.
40mm 미만
튜브
작동모드
수신기
대기모드

파티오 히터는 방수 기능이 있지만 우천 시또는 습한
환경에서는 사용하지 마십시오.
파티오 히터를 사용하지 않을 때는 전원 케이블을 전원에
연결하지 마십시오.
관리 및유지보수
•전원에서 분리된 상태에서 젖은 천으로 파티오 히터의
외부를 청소하십시오. 부식성 또는 솔벤트 세척제를
사용하거나 물에 담그지 마십시오.
•할로겐 튜브 교체를 포함한 모든 유지보수 또는 수리
작업은 자격을 갖춘 전기 기술자 또는 지정 서비스
센터에서만 수행해야 합니다.
기술 사양
•전원 220-240V 50-60Hz
•최대 전력 2000W
•절연 등급 I
WEEE 제품 또는 설명서에 표시된 이기호는
전기전자 장비가 수명이 다하면 가정용
쓰레기와 분리하여 폐기해야 함을
의미합니다. EU 에는 재활용을 위한
별도의 수거 시스템이 있습니다. 자세한 내용은 지역 당국이나
제품을 구입한 판매점에 문의하십시오.
Table of contents
Other Ener-G+ Patio Heater manuals
