EnerCharge DCW Wallbox User manual

Web Service Tool - DC Product Line
Operating Manual
1/2023
Rev. 04
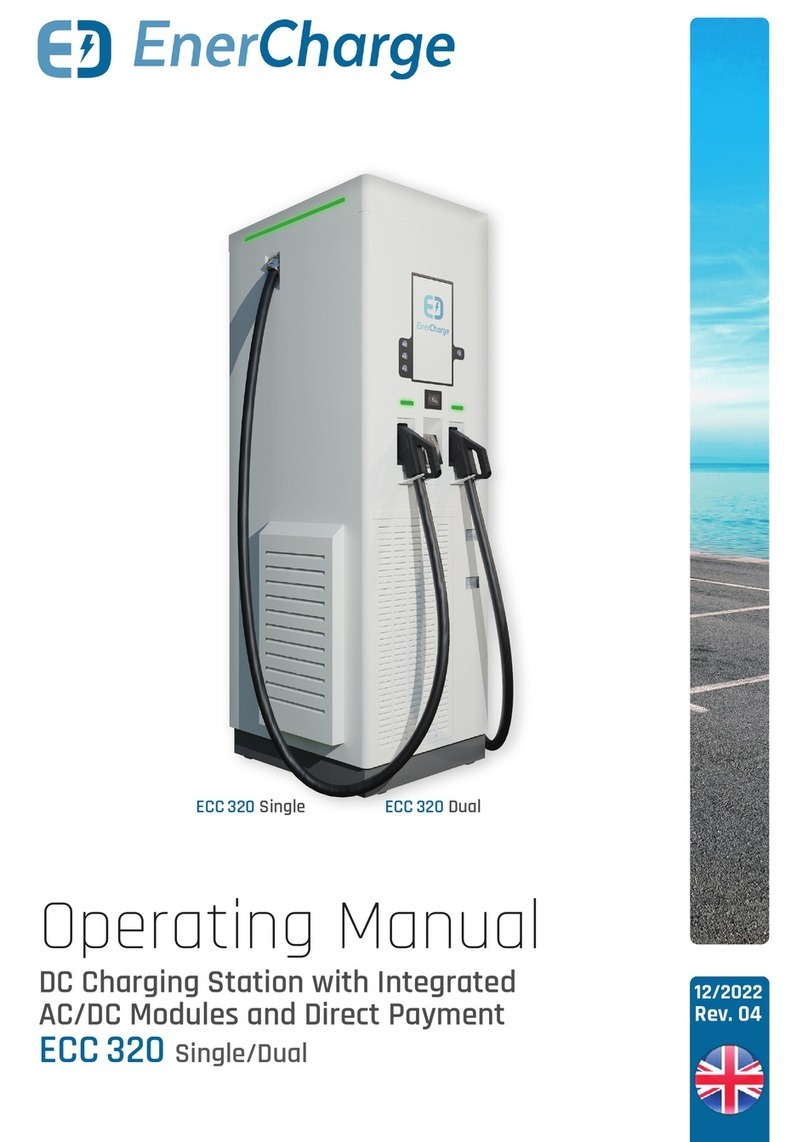
DCW Wallbox ECC320 EC500 DC BusPillar

2
Operating Manual: Web Service Tool DC Product Line ©EnerCharge GMBH
EnerCharge GmbH
Kötschach 66 |9640 Kötschach-Mauthen |Austria |
|www.enercharge.at |www.e-charging.at
© Copyright by EnerCharge GmbH,
Subject to change.
This document is protected by copyright. It sup-
ports the user in the safe and ecient use of the
device.
Any unauthorized reproduction and / or distribution of this
manual is strictly prohibited both in whole and in part. In
the event of a violation, EnerCharge is forced to take legal
action.
Please retain this operating manual for future
use.
About this Document

3Operating Manual: Web Service Tool DC Product Line ©EnerCharge GMBH
Table of Contents
1. Introduction 4
1.1 Structure of this Manual 4
2. General 5
2.1 Safety Symbols 6
3. Operation of the Web Service Tool 7
3.1 Web Service Tool Controls 7
3.2 Default User Data 7
3.3 Remote Access to Charging Station 8
3.4 Opening the Web Service Tool 9
3.5 Logging into the Web Service Tool 10
3.6 Changing Your Log-in Information 11
4. Layout and Functions of the Web Service Tool 12
4.1 Start Page 12
4.2 Menu 13
4.3 Status 14
4.4 Functions 16
4.5 Parameters 18
4.6 Maintenance 25
4.7 Logging 30
5. Attachments 31
5.1 Copyright 31
5.2 Customer Service 31
5.3 Legal Notice 31

4
Operating Manual: Web Service Tool DC Product Line ©EnerCharge GMBH
INTRODUCTION
1. Introduction
The DC Product line by EnerCharge
(EC500 ECC320, DCW Wallbox and DC
BusPillar) is supplied pre-congured.
For the installation procedure, refer to the
"Transport, Installation and Start-Up" ma-
nual. The operating instructions also pro-
vide important information on operation.
This user manual describes the web in-
terface of the DC Product LIne and pro-
vides information about all functions of
the web interface that are available for
the conguration of the EC500, ECC320,
DCW Wallbox and DC BusPillar products.
EnerCharge products are perma-
nently developed further and fulll
all European-wide valid regulations
and standards for the charging ope-
ration of E-vehicles according to
the standard IEC 61851-1, Mode 4.
Visit our website at www.enercharge.at
EnerCharge's DC product line (EC500, ECC320, DCW Wallbox and DC BusPillar) is an
innovative and future-proof solution for the public and industrial charging sector.
1.1 Structure of this Manual
>General:
Contains general information about the operating instructions of the web interface.
>Safety:
Contains information on the presentation of safety instructions.
>Operation:
Contains all information about the operation of the web interface.
>Layout and Functions:
Contains all information about the structure and functions of the web interface. In this
section, for example, the adjustment of parameters or the adjustment of the pricing
models are explained in detail.
>Attachmetns:
Includes information on customer service and legal notice.

5Operating Manual: Web Service Tool DC Product Line ©EnerCharge GMBH
GENERAL
2. General
This document contains all important information for operating the web interface of the
DC charging systems via web browser. It is an original part of the complete product pro-
vided by the manufacturer and serves as an aid for the operation and conguration of the
product.
This manual is an essential operating aid
for operating and setting the web interface.
This is done via a web browser and the web
interface is identical for all models of the DC
Product Line - EC500, ECC320, DCW Wallbox
and DC BusPillar.
Read this manual carefully before you start
operating the web interface.
This manual will help you to:
>operate the service tool,
>change or set important functions and
parameters,
>administrate the pricing models, invoice
information and loyalty cards,
>change the layout and lighting,
>identify status and error codes.
These operating instructions are only inten-
ded to provide assistance for the web inter-
face. For information on the installation and
startup of the charging system, please refer
to the "Transport, Installation and Start-Up"
and "Operating" manuals.
Keep this operating manual for later use
and pass on all documents if the charging
station is used by other persons. Any use
that deviates from this operating manual is
not permitted and will result in the exclusi-
on of warranty, guarantee and liability.
All notes that are important for the safety
of the user are marked with a correspon-
ding symbol. This is important information
which, if ignored, may cause health conse-
quences for the user and damage to the
charging station, the vehicle or the building.
Symbol Explanation
üRequirement: Indicates a requirement that must be met, before the
next action can be performed.
uAction step: Indicates a single action step.
1
2
3
4Sequence of action: Indicates a sequence of action steps, that must
be executed in sequence.
Result: Indicates the result of an action.
G INFORMATION Information: Indicates information for special attention.
The following symbols are important to note when reading this manual:

6
Operating Manual: Web Service Tool DC Product Line ©EnerCharge GMBH
INTRODUCTION
Please take note of the following safety symbols:
2.1 Safety Symbols
Passages marked with this symbol contain important notices or particular information necessary
for successful operation. Actions marked with this symbol should be carried out as required.
This symbol in conjunction with the signal word "Warning" signies a possibly dangerous situati-
on. Disregarding this safety notice can lead to serious injury or death.
• This is a warning text with a known remedial action
This symbol in conjunction with the signal word "Danger" signies an immediate danger. Disre-
garding this safety notice can lead to serious injury or death.
• This is a warning text with a known remedial action
DANGER
WARNING
CAUTION
ATTENTION
This symbol in conjunction with the signal word "Careful!" signies a possibly dangerous situati-
on. Disregarding this safety notice can lead to minor or slight injuries.
• This is a warning text with a known remedial action
Nature, Source
Nature, Source
Nature, Source

7Operating Manual: Web Service Tool DC Product Line ©EnerCharge GMBH
OPERATION OF THE WEB SERVICE TOOL
The graphical web interface allows the charging system to be
adjusted via a web browser from a computer, smartphone or other
web-enabled interface. The following functions can be adjusted:
>Display of the current status of charge points and statistical
evaluation of charging processes: daily or monthly evaluation
by payment methods, turnover, energy.
>Display of the read-in loyalty cards (RFID/NFC) and updating
of the loyalty cards.
>Adjustment of charging system parameters, such as visualiza-
tion, lighting and notications.
>Adjustment of the pricing model and tariffs of the active char-
ge points.
>Retrieve specic device information on payment, maintenance
and logging.
3. Operation of the Web Service Tool
3.1 Web Service Tool Controls
3.2 Default User Data
>Log-in Data Operator:
User: [email protected]
>Passsword: !OP15944ksdkl
>Login-in Data User:
Password: !Us75676dkJkd
You can log in for the rst time with the default user data.
Important: Change the user data immediately (see „3.6 Changing Your Log-in Information“ on page 11):
When logging in as "User", the functions of the web interface are only available to a
limited extent. Settings can only be adjusted to a reduced extent. The operating instruc-
tions show the possibilities when logged in as "Operator".
G INFORMATION
Information on how to integrate the charging system into a LAN or WAN
network can be found in the respective "Transport, Installation and Start-
up" manual for the charging station in question.
ATTENTION

8
Operating Manual: Web Service Tool DC Product Line ©EnerCharge GMBH
OPERATION OF THE WEB SERVICE TOOL
3.3 Remote Access to Charging Station
For remote access to the charging station, EnerCharge offers three
connection types for the customer to choose from.
The following connection types are available:
1. Access via internal network (internal IP address): Remote access from
external IPs is not possible with this connection type.
Example: https://192.168.100.101:8000
2. Access via public IP address:
This connection type requires a public IP address for the Internet
connection. Monthly costs are incurred via the provider (e.g. t-mobile).
Note: A public IP address can only be requested via the provider and
not via EnerCharge.
Example: https://80.120.233.84:8000
3. Access via web-direct link:
This requires no public IP address. Remote access is via a web-direct
link provided by EnerCharge. There is an annual subscription cost for
this optional service.
Note: If a web direct link is desired, contact EnerCharge Support.
Example: https://v0014987-6500.prj3774-mpn.mdex.de/

9Operating Manual: Web Service Tool DC Product Line ©EnerCharge GMBH
OPERATION OF THE WEB SERVICE TOOL
Access the web interface by entering an IP address directly in the web
browser. Keep the IP address safe and only share this information with people
who are authorized to access the web interface.
To open the web interface in the browser
please note the following action steps:
EnerCharge recommends using the "Microsoft Edge or Mozilla FireFox"
browsers. For information about installing a web browser on a computer
or other interface, refer to the browser provider's installation instructions.
ATTENTION
The IP address depends on the type of remote access. Please see: „3.3
Remote Access to Charging Station“ on page 8.
ATTENTION
Action steps: Open the Service Tool
üThe charging system and the computer/smartphone/interface
are connected to the Internet.
1Make a note of the IP address of your charging system:
e.g.: https://XX.XXX.XXX.XXX:5001
The IP address depends on the type of remote access. See:
„3.3 Remote Access to Charging Station“ on page 8
2Open a web browser on your computer/smartphone/interface and
enter the IP address from step 1 in the browser's address bar (see
image on the right).
G INFORMATION
Accept the certificate when you open the web interface
for the first time.
The web interface of the charging system opens.
3.4 Opening the Web Service Tool
G INFORMATION

10
Operating Manual: Web Service Tool DC Product Line ©EnerCharge GMBH
OPERATION OF THE WEB SERVICE TOOL
The start page The start page of the Service Tool web interface provides infor-
mation on the "Status", "Functions", "Parameters", "Maintenance" and "Logging"
of the DC charging system. The start page is primarily used for an overview.
Changes can be made after „Login“.
Observe the following steps when "Logging in":
Action steps: Open the Start Page
üThe web interface is open: see 3.4.
1Click the 1tab and select the desired language.
Then click the button „Change“.
The desired language is set.
2Klick the "Sign in" button 2on the top right side of the
start page.
The sign-in window opens.
3Log in with your access data (see 3.2). The access data can
also be found in the documents you received when you
purchased the charging station.
4Click the 4„Sign in“ button.
The start page is open.
uTo log out, cklick the 5„Sign out“ button.
The user data for the rst login can be found in this documentation. Change this
user data after the rst login. Make a note of the new user data for later use. See
also: „3.6 Changing Your Log-in Information“ on page 11.
ATTENTION
3.5 Logging into the Web Service Tool
1
2
3
4
5

11Operating Manual: Web Service Tool DC Product Line ©EnerCharge GMBH
OPERATION OF THE WEB SERVICE TOOL
3.6 Changing Your Log-in Information
After the first log-in, the user name and password should be changed immediately.
To do this, follow the action steps below:
Action Steps: Changing the Log-in Information
üYou have successfully logged in: see 3.5.
2The window "Manage your account" opens.
Enter the desired phone number and click the button 2„Save“.
3Click on the menu item 3a „Email“ on the left.
Enter the desired email address and click the button
3b „Change email“.
The email address has been successfully changed.
4Click the menu item 4a „Password“ on the left.
4b Enter your current passwort in the "Current password" field.
4c Enter your new password in the "New password" field.
4d Enter your new password in the "Confirm new password" field.
Click the button 4e „Update password“.
The password has been successfully changed.
5Click on the menu item 5a „Personal data“.
5b Click on „Download“to download your personal data.
5c Click on „Delete“to delete your personal data.
6Click on the menu item 6„ECWEBSERVER“ on the top left.
The start page opens.
1
2
3a
3b
4a
5a
5b
5c
4b
4c
4d
4e
6

12
Operating Manual: Web Service Tool DC Product Line ©EnerCharge GMBH
LAYOUT AND FUNCTIONS OF THE WEB SERVICE TOOL
4. Layout and Functions of the Web Service Tool
This section provides an overview of the structure and functions of the web
interface. The menus and the individual functions are explained in the following
sections of this operating manual.
Site Language
By clicking on the tab, the language of the service portal is selected.
To confirm, click on „Change“.
Sign in / Sign out
Logging in and logging out as a user on the service portal. Bei
Clicking on „Sign in“opens the sign-in window.
Change
Confirmation of the selected language for the ser-
vice portal.
About
Link to the EnerCharge website: „www.enercharge.at“.
Webserver version
Information on the current version of the web
server: „X.X.X.X“.
6
1
3
2
4
5
1 2 3 4
5
4.1 Start Page
Sign-in Window

13Operating Manual: Web Service Tool DC Product Line ©EnerCharge GMBH
LAYOUT AND FUNCTIONS OF THE WEB SERVICE TOOL
4.2 Menu
The extended menu of the start page provides information on the available func-
tions. The submenus open by clicking on the individual menu items in the left area of
the start page. The advanced menu provides access to the advanced settings areas
of the charging system.
Status
Displays information about the charge points:
E.g. turnover, availability and current charging power.
Functions
Customer card management: shows all currently
scanned customer cards (RFID/NFC).
Parameters
Display and adjust all basic settings such as station
name, address, serial number, payment settings,
LED settings, billing email and OCPP settings.
Maintenance
Shows the current software version, any error
messages and the status of the charging station
or EC controller. It also shows whether an update is
available.
Logging
Display of the system log data with date, time, com-
mand and description.
EnerCharge
Home-Button: Access the start page
8
9
10
11
6
8
9
10
11
76
7
As a customer/operator, you can make individual settings at "Status",
"Functions" and "Parameters". The menu items "Maintenance" and "Log-
ging" are for information only.
G INFORMATION

14
Operating Manual: Web Service Tool DC Product Line ©EnerCharge GMBH
LAYOUT AND FUNCTIONS OF THE WEB SERVICE TOOL
The "Status" menu item shows the following information
and allows the following functions:
4.3 Status
4.3.1 Live Charging View
Shows live data of the active charge points 1 and 2:
>Type: DC (DC = direct current)
>Status: available / not available
>Current power output: 0 kW (e.g. 50 kW = 50 kilowatts of charging power)
>Click button 1„Details“ for extended information on the desired charge point.
>Click button 2„Minimize“ to hide the extended information.
See section: 4.3.1 on page 14
See section: 4.3.2 on page 15
1
2
2
1
2
1
4.3.1.1 Charging View Screen

15Operating Manual: Web Service Tool DC Product Line ©EnerCharge GMBH
LAYOUT AND FUNCTIONS OF THE WEB SERVICE TOOL
4.3.2 Analysis
Enables the monthly or daily display of statistical evaluations accor-
ding to turnover (Euro) and energy (kWh). In addition, the individual
payment methods are displayed.
Action steps: Display and Download of Evaluations
üThe extended "Status" menu is open.
1Click on the menu item „Analysis“.
2Click on „Day“or „Month“to select the desired evaluation time frame.
3Click on the „Calendar“symbol to select a date.
4Click „Search“to show the corresponding evaluation.
The selected evaluation is displayed.
Find the information in the tables and graphs displayed.
In the lower area there is a table of all charging processes of the
selected period with detailed information such as amount of energy,
charging time, parking time, tariff, payment method, etc.
5Click on „Download“to save the invoice information for the selected
time period on your device (computer/smartphone/interface).
6In the pop-up window, select „Save File“ and click on „OK“.
The table with the invoice information is saved locally as a CSV file and
can be edited with "Microsoft Excel", for example.
3
2
4
5
6

16
Operating Manual: Web Service Tool DC Product Line ©EnerCharge GMBH
LAYOUT AND FUNCTIONS OF THE WEB SERVICE TOOL
4.4 Functions
The "Functions" menu item provides information on customer cards and enables
the management of customer cards (RFID/NFC). These can be easily added, edited
or removed.
See section: 4.4.1 on page 16
1
1
4.4.1 Card Management
Action Steps: Adjust/Delete Loyalty Cards
üThe extended "Functions" menu is open.
1Click on the menu item „Card Management“.
2To change customer cards click in the desired field
in the desired line.
Select existing text and enter new text.
3Scroll the display window to the right side to view or change all data
windows.
4To confirm your changes, click on the „Change“ button for the corres-
ponding line.
5To delete a card, click on the „Delete“ button for the corresponding line.
Loyalty cards successfully changed/deleted.
2
3
4 5
4.4.1.1 Updating/Deleting Loyalty Cards

17Operating Manual: Web Service Tool DC Product Line ©EnerCharge GMBH
LAYOUT AND FUNCTIONS OF THE WEB SERVICE TOOL
Action Steps: Adding new Loyalty Cards
üThe extended "Functions" menu is open.
1Click on the menu item „Card Management“.
2Click on „Refresh“to display the last RFID/NFC customer data read at
the charging station.
The data of the last customer cards read in are displayed in the lower
part of the window.
4Click „Add“to create a new loyalty card.
5Transfer the data (Tag ID, CARDTOKEN or CARTOKEN) of the last custo-
mer card read into the newly created line of customer cards.
4To confirm your changes, click on the „Change“ button for the corres-
ponding line.
5The new loyalty card is displayed at the top of the page
under "Loyalty Cards".
New loyalty card successfully added.
4.4.1.2 Add a New Loyalty Card
2
4

18
Operating Manual: Web Service Tool DC Product Line ©EnerCharge GMBH
LAYOUT AND FUNCTIONS OF THE WEB SERVICE TOOL
4.5 Parameters
The "Parameters" menu item provides information and enables settings for the
system, visualization, payment system, notications and OCPP:
See section: 4.5.1 on page 18
See section: 4.5.4 on page 21
See section: 4.5.2 on page 19
See section: 4.5.5 on page 23
See section: 4.5.3 on page 20
See section: 4.5.6 on page 24
1
4
2
5
3
6
2
4
6
1
3
5
4.5.1 System
Shows the current basic settings of the charging system:
>Station name: Name of the charging station
>Address line 1/2: Address for the charging sttion
>ZIP: Address ZIP code
>Country: Country of installation
>Station abbreviation: Short unique identier for the charging station
>Serial number: Serial number of the charging station
4.5.1.1 Changing the Station Data
Action Steps: Change the Station Data
üThe extended menu "Parameters" is open.
1Click on the menu item „System“.
2Click in the respective field and enter the desired station data.
3To confirm your changes, click on the „Set“button for the correspoding
line.
Station data changed successfully.
2
3

19Operating Manual: Web Service Tool DC Product Line ©EnerCharge GMBH
LAYOUT AND FUNCTIONS OF THE WEB SERVICE TOOL
4.5.2 Visualization
Shows the current visualization settings for the charging system:
General settings:
>Standard Display language: Set default display language: e.g. DE = German, EN = English
>Standard Payment method: Set default payment method
>Accept loyalty cards: Dene whether the system accepts loyalty cards as payment:
Inactive = no/active = yes
>Accept Debit/Credit cards: Dene whether the system accepts debit/credit cards:
Inactive = no/active = yes
>Accept App Payment: Dene whether the system accepts app payments:
Inactive = no/active = yes
>Show QR Code: Dene whether QR code for live view is displayed during charge:
Inactive = no/active = yes
Advanced Parameters:
Indication of display duration in seconds (e.g.: 180 = 180 seconds)
>Timeout thank you message and QR: Display time of screen showing thank you message and QR code
>Timeout user interface: Time until menu activates home screen when inactive
>Timeout plug not in holder: Display time of information that plug is not correctly in holder
>Timeout QR code charging view: Display time of information about current charge incl. QR code
>Timeout car not plugged: Time until menu activates home screen when car is not connected
and no activity is registered
4.5.2.1 Changing the Visualization
Action Steps: Adjust the Visualization
üThe extended menu "Parameters" is open.
1Click on the menu item „Visualization“.
2Click in the respective field and make the desired changes/adjustments.
3To confirm the changes/adjustments click the „Set“ button in the
respective line.
4Click on „Change“to make any changes to areas of the "General set-
tings".
Additionally, see section „4.5.2 Visualization“ on page 19 for more
details.
Visualization successfully changed.
4

20
Operating Manual: Web Service Tool DC Product Line ©EnerCharge GMBH
LAYOUT AND FUNCTIONS OF THE WEB SERVICE TOOL
4.5.3 Lighting
Shows the current color settings for the LED system status:
R = Red
G = Green,
B = Blue
* = Blinking
Basic Settings:
>Head LED Status Occupied: LED color set, e.g. B = Blue
>Head LED Status Charging: LED color set, e.g. B = Blue
>Head LED Status Service: LED color set, e.g. R* = blinking Red
>Head LED Status Error: LED color set, e.g. R = Red
>Head LED Status Available: LED color set, e.g. G = Green
>Plug LED Status Selection: LED color set, e.g. G* = blinking Green
>Plug LED Status Occupied: LED color set, e.g. B = Blue
>Plug LED Status Available: LED color set, e.g. G = Green
2
1
Head LED:
left and right
Plug LED:
left and right
1
2
4.5.3.1 Changing the Lighting
Action Steps: Changing the Lighting
üThe extended menu "Parameters" is open.
1Click on the menu item „Lighting“.
2Click in the respective field and make the desired changes/adjustments.
3To confirm your changes/adjustments, click the „Set“ button in the
respective line.
Lighting successfully changed.
This manual suits for next models
3
Table of contents
Other EnerCharge Automobile Batteries Charger manuals
