Model # E3SB series
LIGHTING
Please read and understand this entire manual before attempting to assemble, operate or install the product. Failure to do so could
lead to electric shock, fire or other injuries that could be hazardous or even fatal.
Be sure the electricity to the wires you are working on is shut off. Either remove the fuse or turn off the circuit breaker.
Changes or modifications not expressly approved by the party responsible for compliance could void the user’s authority to
operate the equipment.
This product must be installed in accordance with local, state and national electrical codes.
Installation work shall be completed by a licensed installer that is familiar with the construction and operations of the product.
*Take note of the position of any seals and
gaskets, ensure that they are properly replaced if
disturbed.
1. Feed the input cord through the center opening
on Bracket C and affix Bracket C to fixture body
using the 4 screws provided,
2. Bracket angle can be adjusted by loosening the
two locking screws and re-tightening once desired
angle has been reached.
3. Mount the bracket to the desired location with
two screws through the two slots provided.
1. Adjust Bracket A to the desired angle relative to
the tenon arm by removing the two screws on
side cover, loosen the inner locking bolt and
re-tighten once desired angle is reached.
Replace cover and gasket.
2. Fit the slip-fitter over tenon post and secure to
tenon by tighenting outer locking screws.
1. Remove side cover plate from Bracket B by
loosening the two screws.
2. Use Mounting Plate 2 as a template to drill
trhough mounting surface, two for screws and
center for power cord.
3. Secure Bracket B to mounting surface using
Mounting Plate 2 on outside and Mounting Plate 1
as an inner backing plate using 2 screws/nuts.
4. Replace side cover plate and gasket.
1. Remove side cover plate from Bracket B by
loosening the two screws.
2. Use Mounting Plate 3 as a template to drill
through mounting surface, two for screws and
center for power cord.
3. Secure the Bracket B to mounting surface
using Mounting Plate3 on the outside, and
Mounting Plate 1 as an inner backing plate using
2 screws/nuts.
4. Replace side cover plate and gasket.
www.EnergeticLighting.com 13445 12th St. Chino, CA 91710 (866) 492 - 6566
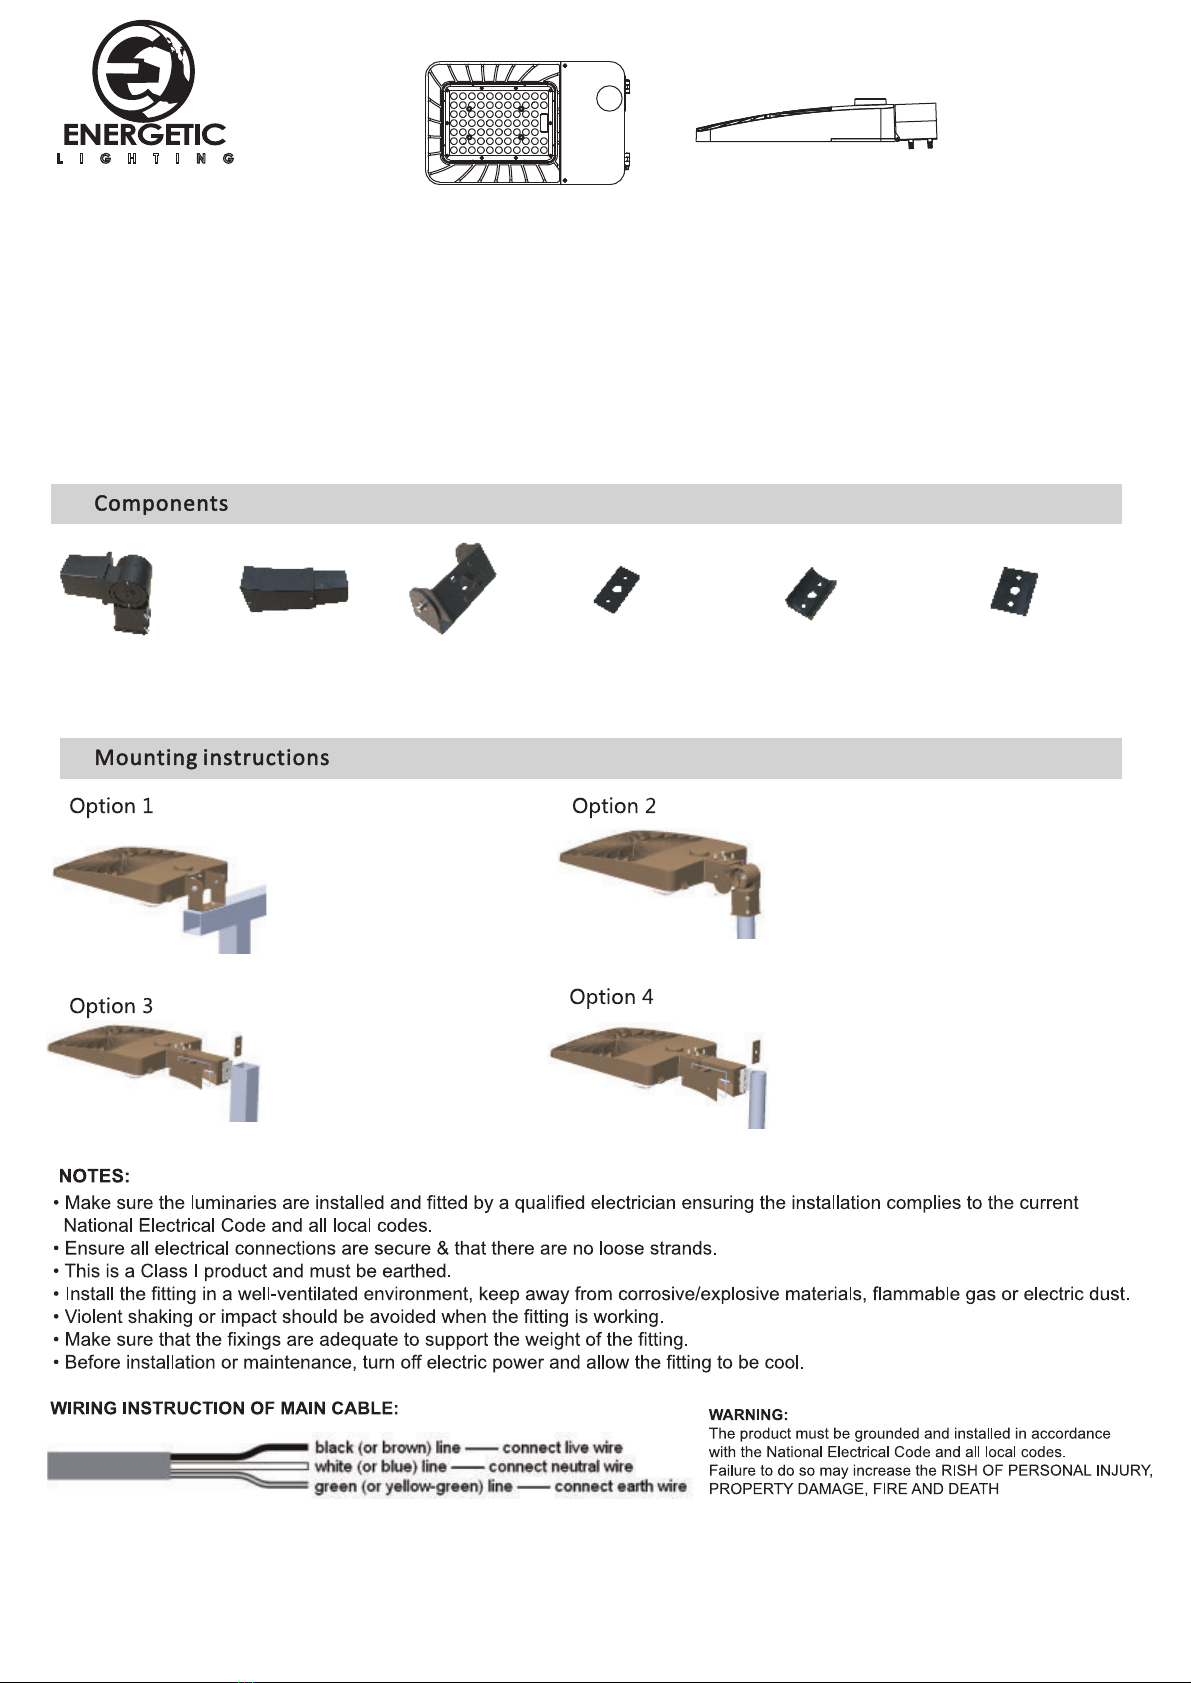
Bracket A Bracket B Mounting Plate 1 Mounting Plate 2 Mounting Plate 3Bracket C
LED Area Light


