enLighten Zorro Unplugged SSL06-4K-TIII-GRY User manual

The Zorro unplugged is a solar light with an integrated battery and a
microwave motion sensor. It can be set to work on a time controlled
mode after sunset or activated via motion sensor.
It will automatically switch on at dusk and switch off at dawn.
Zorro Unplugged
Installation Instructions
The average sunshine in the installation area should be above 4.0h/day to ensure full function of the light fixture. The fitting needs to be mounted in
an area that does not have shadows on the solar panel. The fitting has to be recharged manually with a charger every 3 months if stored for longer
periods. If the fitting is stored, ensure the battery is fully charged and the fitting is turned off.
If two fittings are set to microwave sensor mode they should be mounted >5m apart to avoid microwave sensor interference.
The light will dim to 50% when the battery charge is less than 40%.
Connued next page
General
•To ensure optimal working conditions for the light, ensure the solar panel is facing north.
•To allow for self-cleaning of the solar panel, solar panel must be mounted at a minimum angle of 15 degrees.
•Adjust the fixture angle to optimize the solar panel performance
(see panel tilt angle section below for details)
•Adjust the LED panel to direct the light to the desired area (see page 2)
•At installation, point the remote at the fitting and press the ON/OFF switch (see picture
on right)
•Check indicator LED on fitting during day time
•To test operation of the light, cover the solar panel (e.g. with a piece of cardboard).
The LEDs should switch on within 30s.
•Select the operating mode of the light (see remote control section on page 3 for details)
Panel tilt angle
To achieve the best performance of the solar light, the lt angle of the solar panel should be as close as possible to the following
depending on the installaon locaon. The panel should be facing North.
The light will continue to operate if not positioned perfectly, however the battery charging will be reduced.
30° 35° 30° 25° 40° 35° 15°
Indicator LED
Flashing red slowly: Fing charging normally
Solid red: Fing fully charged
Flashing red quickly: Charging problem
No indicator light: Baery level too low. Recharge with charger (see page 4)
Page 1 Distributed by: Reduction Revolution Pty Ltd www.reductionrevolution.com.au

Installation
Slip fitter (included in box) fits 45 - 60mm round poles
Remove bolts from the attachment point of the light (fig. 1)
Slide slip fitter over the attachment point on the light (fig. 1)
Secure slip fitter to the light with the bolts (fig. 1)
Adjust tilt angle of solar panel to achieve maximum solar exposure as mentioned on
page 1 (fig. 1)
Loosen screw on LED panel and adjust beam angle, then tighten to fix (fig. 2)
Slip the slip fitter mount over pole. Tighten screws to secure to pole (fig. 3)
Trunnion mount (optional extra)
square hoop (part no. SSL-TRSQ, fits round pole 60-100mm diameter or square pole 50-100mm diameter)
round hoop (part no. SSL-TRRD, fits round pole 50 - 120mm diameter)
Attach the slip fitter to the back of the light fitting with the bolts provided (fig 1)
Adjust tilt angle to achieve maximum solar expose as mentioned on previous page (fig 1)
Loosen screw on LED panel and adjust beam angle, then tighten to fix (fig 2)
Secure bracket to pole (fig 3)
Alternatively, the bracket can be screwed straight onto a larger square pole (fig5)
Slip the fitting over the bracket and tighten bolts to fix to bracket (fig 4 or 5)
Connued next page
Fig 1 Fig 2
Fig 1 Fig 2
Fig 5Fig 4
Page 2
Fig 3
Fig 3
Fig 3
Distributed by: Reduction Revolution Pty Ltd www.reductionrevolution.com.au

Remote control
The remote control can be used to set the settings on the Zorro Unplugged luminaire. There are 3 main modes available:
Motion sensor mode
Time intelligent mode
Constant light level
1. Integrated microwave motion sensor modes
Between dusk and dawn the light will switch on at standby level. When movement is detected, the light will switch to full light mode.
Once movement ceases, the light will dim to standby level. Ideal for pedestrian walkways and car parks.
Two modes are available: 40% standby to 100% brightness OR 20% standby to 80% brightness.
This is the preferred setting as it enables battery storage to be extended across several days to allow for low charging (cloudy) days.
2. Pre-programmed time intelligent modes
The time intelligent mode will switch the light on at 70% at dusk for the first 30min. The next 3 hrs the light will operate at 100%, then dim down to 70% for the next
1hr, then to 50% for a further 1 hour and then to 20% for the remainder of the night until dawn. It can be set to automatically switch to 70% before dawn to provide
light if the area has activity before sunrise.
3. Constant brightness modes*
The light can be set to constant brightness during the night: 100%, 70%, 40%.
Switch between ON and OFF
Motion controlled modes,
see section 1 below
Time intelligent modes,
see section 2 below
4hr and 8hr timer. The light
will be in the modes selected
above for 4hrs or 8hrs after
sunset, then switch off.
Tests light operation. Light will go through charging and discharging cycle
for approx. 15s. Red and green charge indicators will be illuminated.
Do not press any other button until test sequence has finished.
To apply a setting:
Point the remote control at the light and press a
button. The light will flash to indicate the setting
has been received successfully.
Strong sunlight might interfere with the
programming of the lights with the infrared
remote. If the fitting does not receive the setting
successfully on a sunny day, try again in the late
afternoon or early morning.
*Maintaining constant light levels at
100% throughout the night is only
possible if the battery is fully charged.
Full charging of the battery is unlikely
on cloudy days or non summer periods.
Connued next page
In this mode fitting will stay on 100% brightness for 2min after last
movement is detected before dimming to the standby level of 40%.
In this mode fitting will stay on 80% brightness for 2min after last
movement is detected before dimming to the standby level of 20%.
Page 3
Cancel 4hr and 8hr timer. The
light will resume operation
previously selected
Constant brightness modes,
see section 3 below
Factory seng: Moon sensor mode with 20% standby and 80% full light
Distributed by: Reduction Revolution Pty Ltd www.reductionrevolution.com.au

Page 4 Sept 2018 E&OE
enLighten Australia Pty Ltd
www.enlighten.com.au 8 / 78 Reserve Road Artarmon NSW 2064 T: 02 8084 6971
Battery replacement and maintenance
In case of battery failure or end of life, the battery & controller can be replaced by following
the steps below:
•Loosen the screws on the battery cover with a security torx screw driver
•Disconnect the inline connector to the solar panel
•Disconnect the inline connector to the LED panel
•Connect new battery & controller to the light by connecting the inline connectors
•Check that the rubber seal around the battery cover is in place
•Tighten screws on the battery cover
Indicators on the light fitting
During the day
•Red indicator flashing slowly: Battery charging
•Red indicator solid: Battery fully charged
•Red indicator flashing quickly: Faulty battery charging or fitting not turned on
(see page 1)
During the night
•Green indicator solid: Battery charge level OK
•Green indicator flashing: Battery charge level below 10%, fitting will turn off soon
Technical data
Charging the fitting manually with the charger
Please note: This is only required if the fitting is stored for longer periods or if the battery is discharged to a very low level
1. Connect the charger (order no. SSL-Charger) to the charging point on the light.
2. Plug charger into mains power
3. The red indicator LED will start to flash slowly.
4. When the battery is fully charged, the red indicator LED will stay lit.
5. Disconnect the charger.
6. If the fitting is charged before being stored, ensure to turn the fitting off with the ON/OFF button on the remote
Charging point, DC 14.6V 4A
Only use enLighten LiFePO4
charger
Indicator LED
Distributed by:
Reduction Revolution Pty Ltd www.reductionrevolution.com.au
This manual suits for next models
2
Popular Outdoor Light manuals by other brands

One Stop Gardens
One Stop Gardens 57679 Owner's manual & safety instructions
MELINERA
MELINERA 103533 Operation and safety notes
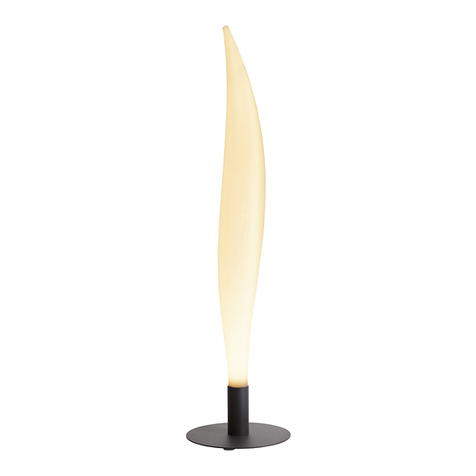
degardo
degardo LUNOCS Flame Instructions for assembly and use

Good Earth Lighting
Good Earth Lighting SE1303-BP2-00LFW-G quick start guide
Vista
Vista 2117 installation instructions

Endon
Endon EL-40098 instruction manual
