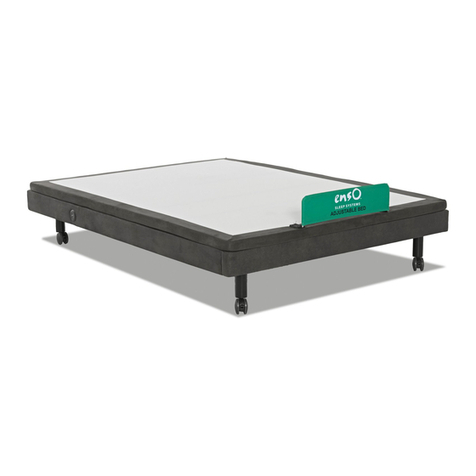
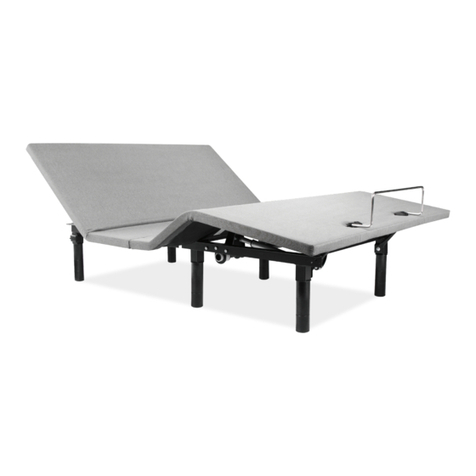
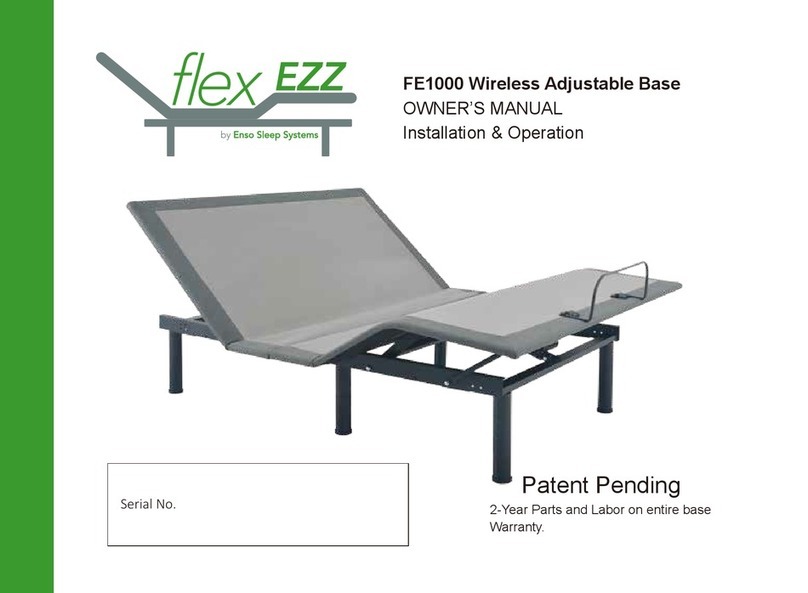
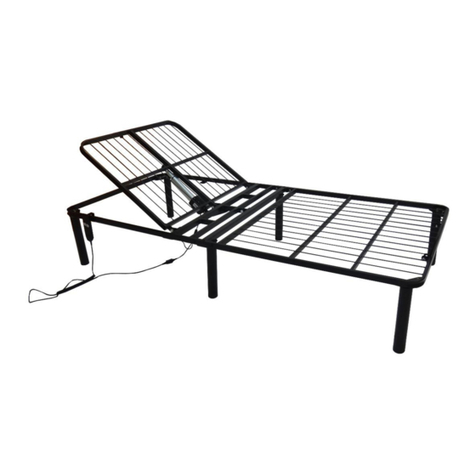
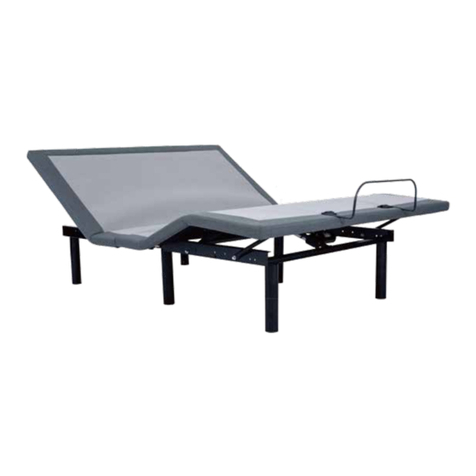
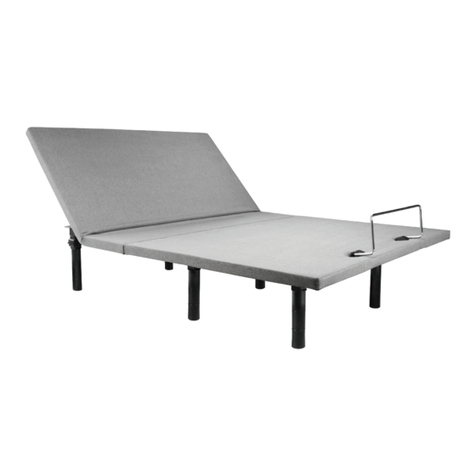
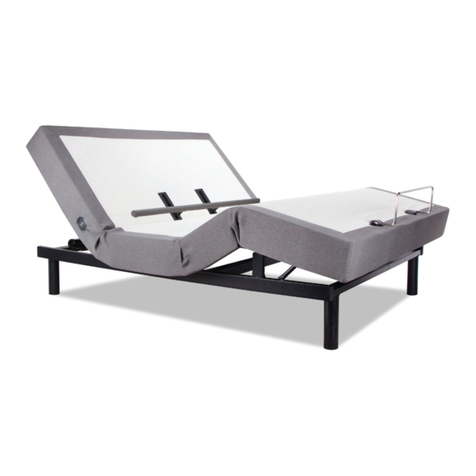
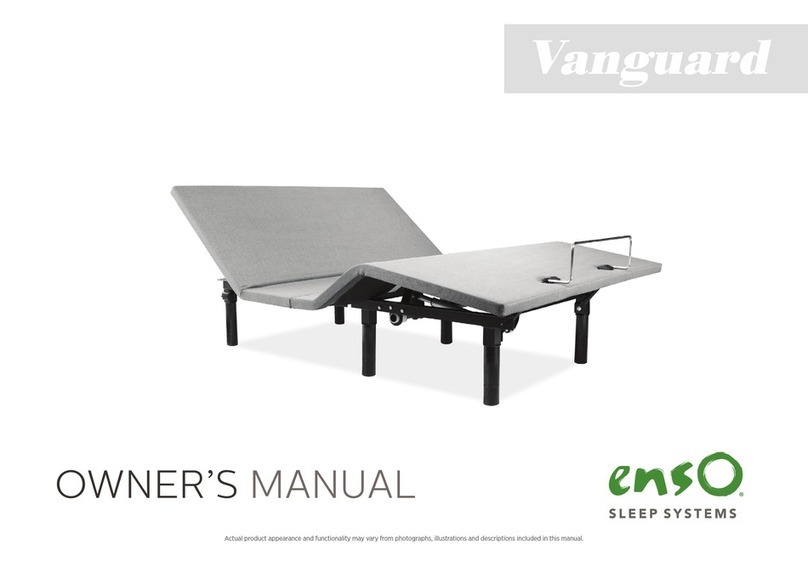
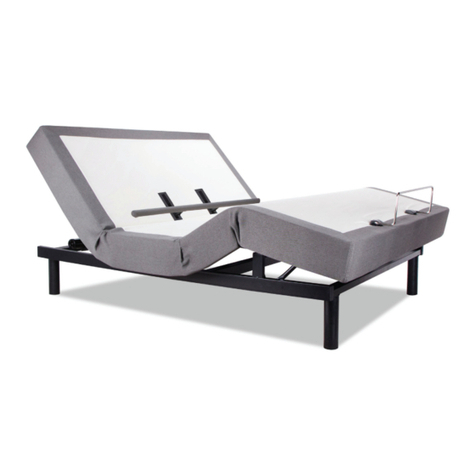
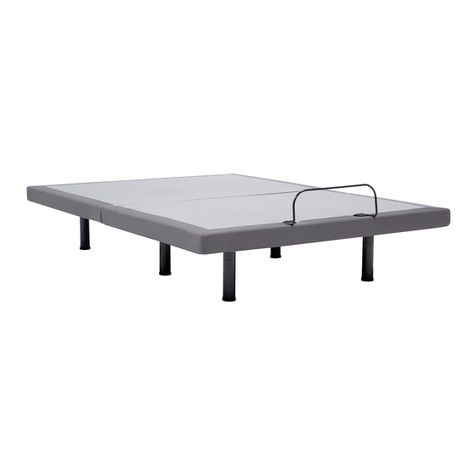
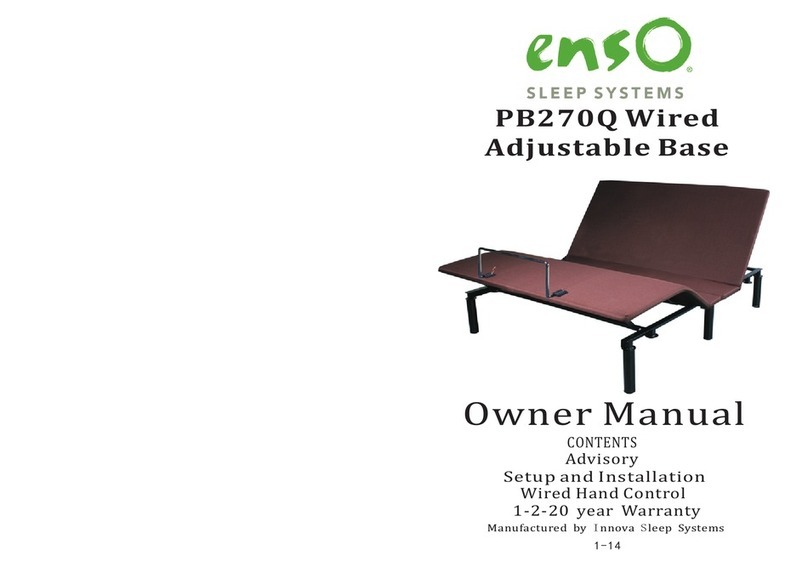
Enso Voyager User manual

Actual product appearance and functionality may vary from photographs, illustrations and descriptions included in this manual.
Voyager
OWNER’S MANUAL

table of contents
Safety Precautions and Usage Statements ....................................................................... 1-3
Parts List ..................................................................................................... 4
Base and Remote Overview .....................................................................................5
Quick Reference Guide ..........................................................................................6
Installation Guide ............................................................................................7-8
Connecting Strap ..............................................................................................9
Syncing Two Bases.............................................................................................10
Headboard Brackets ............................................................................................11
Troubleshooting ...............................................................................................12
Notes ........................................................................................................13
Español ....................................................................................................14-17
Français ....................................................................................................18-21

1
TO REDUCE THE RISK OF SHOCK, BURNS, FIRE OR INJURY:
For optimal safety and operation, plug bed base into a surge protector
(not included). The bed base should only be plugged directly into a wall
outlet or surge protector (strongly recommended). Always unplug the
base from the electrical outlet before servicing any part of the base. To
reduce risk of electric shock, unplug the base before cleaning. To safely
disconnect, ensure the base is in a flat position with all motors o, and
unplug from power source. Keep the power cord away from heated
surfaces. Never operate the base when the air openings are blocked. Keep
air openings free of lint, hair and the like. Do not drop or insert any object
into any opening. Discontinue use of the bed base and contact a qualified
service center if: it has a damaged cord or plug, if it is not working
properly, or it has been dropped into water. Only use this bed base for
its intended use as described in this manual. Do not use accessories/
attachments that are not recommended by the manufacturer. Close
supervision is required when the bed base is used by or near children,
convalescents, disabled persons or pets. Improper connection of the
equipment can result in the risk of electrical shock, electrical fire or faulty
operation of this bed base. If the plug does not fit your outlet, contact a
qualified electrician to install a suitable outlet. Unauthorized modification
or failure to use a wall outlet or surge protector could void the electrical
portion of your warranty.
PETS AND CHILDREN:
Immediately dispose of all packing materials as it may pose a smothering
risk to small children and pets. To avoid injury, it is not advised to allow
children and small pets to play on or under the bed. Children should not
operate the bed base without adult supervision.
PACEMAKERS:
Some products contain Neodymium MAGNETS which may interfere
with devices such as pacemakers, ICD’s and any other device sensitive
to magnetic fields. It is STRONGLY recommended that owners of such
medical devices consult their physician prior to using products that
contain Neodymium MAGNETS. It is also possible that some pacemakers
may falsely interpret the optional massage feature vibrations as
movement/exercise. This is a common occurrence with any product that
creates a vibrating movement and may not aect the pacemaker. Please
consult your physician before using the massage feature.
IN-HOME USE AND HOSPITAL STANDARDS:
Enso adjustable bed bases are designed solely for in-home use. This
base was not designed as a hospital bed and is not designed to meet
hospital standards. Do not use this base with TENT TYPE oxygen therapy
equipment or near explosive gases.
ADDITIONAL SAFETY FEATURES
Casters (optional leg accessory) are equipped with locking wheels to
prevent unwanted movement. Even when locked and unable to roll, it is
possible for the casters to slide. Free release head and foot motors are
designed to lower the mattress by retracting only with gravity, never
pulling downwards, which minimizes pinch points
LIFTING/LOWERING MECHANISMS
The lift/lower feature will emit a minimal humming sound during
operation. This is normal. During operation, the lift arm wheels make
contact with the platform support of the base. This contact may result in
metal on metal or metal on plastic contact. This applies slight tension on
Attention: Important Safety Disclaimers
Read the following information before using this product. Failure to use a surge protection device could
compromise safety or cause product malfunction and could void the electrical portion of your warranty.
safety precautions and usage statements

2
the moving components and resonance is reduced to a minimum level. If
excessive noise or vibration is experienced, reverse the movement action
(up or down) of the base with the remote control. This should realign
the base’s activating mechanisms to the proper operational position. In
normal base operation, the wheels, which allow the bed to maintain its
distance from the wall, will make contact with the steel platform supports
of the base creating a contact noise. When entering, exiting or shifting
weight on the base, this contact noise may be audible as the wheels make
contact. This is normal.
MATERIALS
Enso adjustable bases are constructed from various materials including
woods, metals, plastics and fabrics. Tension, pressure or movement
applied to the frame, platform or shroud through general use may create
an audible sound.
MASSAGE OPERATION AND LOCATION ENVIRONMENT
The massage feature will emit a tone during operation. This is normal.
As the massage intensity level is increased, the tone will intensify. The
volume of this tone is directly related to the location environment.
For example, when demonstrated in a show room, the surrounding
environmental noise will cover some of the massage noise. However,
when installed in a home setting with wooden floors, carpeted or not,
the massage volume will be more noticeable. To minimize this resonance,
place a piece of carpet, or rubber caster cups, under each leg or caster of
the base. It is possible to experience vibration or noise from the exterior
bed frame, headboard brackets, headboards or footboards if mounting
bolts are not firmly tightened.
Levels 1-6 of massage intensity represent the revolutions of the motor
per minute. Level 6 provides the maximum number of RPMs. However,
this does not mean that the feeling of vibration is the strongest.
Depending on the mattress material, thickness, and positioning of the
user, the feeling of vibrations will dier. We encourage the user to find
the massage intensity setting that suits them best. It is important to
understand the physics of vibrations. Just as an engine may run rough
during idle, as the RPMs increase, the vibrations change concurrently.
TOLERANCE
All Enso adjustable foundations, depending on make and model, are
designed and manufactured to perform and function within designated
quality control parameters. Bases are subject to meticulous and rigorous
inspections during the quality control process to ensure bases will operate
within these standards during normal operating use. Normal operating
use is defined as the following: Adjustable foundation is to be operated
with a mattress and load. Testing procedures require lifetime cycle tests
with up to 120kg distributed load. The angle (designated “α” in figure 1)
between the back section and the flat
section for various configurations of the
mattress support platform shall be ± 3°,
which translates to a tolerance of up to
1 ½”.
The angle (designated “β” in figure 1)
between the flat section and foot section
for various configurations of the mattress
support platform shall be ± 3°, which translates to a tolerance of up to ¾”.
Any adjustable foundation deemed to be within these allocated
tolerances is considered to have met the manufacturer’s quality control
standards.
THAT “NEW PRODUCT” SMELL:
Some people notice a slight odor to their new adjustable base—this can
come from our material manufacturing process. This smell is normal and
usually disappears before the product reaches you. Sometimes, however,
this smell may still be noticeable. It usually disappears after a few weeks,
providing adequate ventilation of the product and the environment.
safety precautions and usage statements
Adjustable
Bed Tolerance
Ergomotion Inc. | ph 1-888-550-3746 | fx 805-979-9399 | www.ergomotion.com
All Ergomotion adjustable foundations, depending on make and model, are designed and manufactured to perform and
function within designated quality control parameters. Bases are subject to meticulous and rigorous inspections during
the quality control process to ensure bases will operate within these standards during normal operating use.
Normal operating use is defined as the following:
-Adjustable foundation is to be operated with a mattress and load. Testing procedures require lifetime cycle
tests with up to 120kg distributed load.
The angle (designated “α” in figure 1) between the back section and the flat section for various configurations of the
mattress support platform shall be ± 3°, which translates to a tolerance of up to 1 ½”.
The angle (designated “β” in figure 1) between the flat section and foot section for various configurations of the mattress
support platform shall be ± 3°, which translates to a tolerance of up to ¾”.
Any adjustable foundation deemed to be within these allocated tolerances is considered to have met the manufacturer’s
quality control standards.
(α°)
(β°)
When operating a "paired" split base setup there may be a time latency up to 1.5 seconds between each bases articulation.
Blake Pettit
Quality Assurance Manager
Ph 805-979-3875
Fx 805-979-9399
www.ergomotion.com

3
BREAK IN PERIOD:
You can speed up the break-in period by simply spending time in the
adjustable bed through activities such as reading, watching TV or playing
with the kids or grandkids. The extra movement will help the adjustable
base respond to weight and temperature changes. Some of the materials
in our adjustable bases such as the woods, metals and plastics used in the
platform, frame and components are sensitive to moisture content and
temperature and may make sounds in colder environments.
PAIRED OPERATION:
When operating a “paired” split base setup there may be a time latency
up to 1.5 seconds between each bases articulation.
WEAR AND TEAR:
Wear and tear is damage that naturally and inevitably occurs as a result
of normal use or aging.
FABRIC CARE:
To prolong the life of your fabric, protect from direct sunlight whenever
possible. For spot cleaning, wipe area with a light damp sponge or
vacuum with a soft brush attachment to remove particles. Keep at a
minimum of 30cm (12 inches) away from direct heat sources. For a
deeper cleaning, blot liquid spills with a clean dry cloth. Wipe with a clean
cloth dampened with warm water. Do not wet excessively. A soft bristle
brush may be used to remove ingrained soil. Avoid scratching by gentle
brushing. Wipe with a clean cloth dampened with warm water to remove
residues. Dry in shade away from direct heat. If persistent marks remain
visible after cleaning, seek professional advice.
PRODUCT RATINGS:
The lift motors are not designed to operate continuously for more than
[2] minutes in an [18] minute time period or approximately 10% duty
cycle. Attempting to circumvent or exceed this rating will shorten the
life expectancy of the product and may void the warranty. The massage
motors are not designed to operate continuously for more than 30
minutes at a time. Please allow the massaging system to rest for 30
minutes after automatic massage shut o before restarting.
WEIGHT LIMITS:
This product is not rated to support weights in excess of 750 pounds. The
base will structurally support this weight, provided it is evenly distributed
across the bed base. The adjustable base is not designed to support or
lift this amount in the head or foot sections alone. Exceeding this weight
restriction could damage the bed and/or cause injury and will void the
warranty.
SAVE THESE INSTRUCTIONS.
FCC Compliance:
This device complies with part 15 of the FCC Rules. Operation
is subject to the following two conditions: (1) This device
may not cause harmful interference, and (2) this device must
accept any interference received, including interference that
may cause undesired operation.
To comply with the FCC RF exposure requirements, no
change to the antenna or the device is permitted. Any
change to the antenna or the device could result in the device
exceeding the RF exposure requirement and void user’s right
to operate the device.
Radio Frequency: 2.4 GHz
safety precautions and usage statements

4
parts list
All electronics and components that need to be installed are
located in boxes under the base or attached to the frame.
A) Wired Remote Control (1)
B) Mattress Retainer Bar (1)*
C) Legs (6)
D) Power Cord (1)
E) Power Supply
F) Y-Cord ‡
Misc Parts (not included):
G) Connecting Strap†
H) Surge Protector
Headboard Bracket Components:
I) Headboard Bracket (2)
J) T-Bracket (2)
K) Spacer (2)
L) Long Bolts (8)
M) Short Bolts (10)
N) Nuts (18)
* These items are attached to the base for shipping purposes.
Carefully remove from base and set aside.
‡ Only included in Twin Long and Cal King Split bases.
† This is an optional item and can be purchased
by calling 1-844-534-3676.
Before discarding the packing materials - ensure all the parts are accounted for.
A) B)* C)
D) E) F)‡*
G)†H)†
HEADBOARD BRACKET COMPONENTS
I) J) K) L) M) N)

5
base and remote overview
Head Motor
Lowers head
portion of the
base.
Lifts head portion
of the base.

6
quick reference guide
Not to scale. For illustration purposes only. Read all instructions before beginning installation.
ELECTRONICS OVERVIEW
If installing a split unit - see pages 9-10.
Remote
Head Motor
Power Cord
Power Supply

7
installation guide
Always use two people when setting up the base.
For customer support, visit www.ergomotion.com or call: 1-844-534-3676
To install the legs, thread the washer over the bolt of the leg with
the recessed side facing the leg, and tighten by hand.
Do not over tighten.
9 inch leg
9 inch leg install 3 or 6 inch leg install
3 inch leg
6 inch leg
STEP 1
STEP 2
With the help of an able-bodied assistant, place the carton on the
floor with the arrows pointing downwards.
Remove the binding straps and packing materials, making sure not
to puncture the box with any sharp objects.
Remove the bed base from the box keeping the bottom of the
base facing upwards.
STEP 3
To install headboard brackets see instructions on page 11.
Install short (1 inch) leg spacer onto frame mounting points.
Do not over tighten.
STEP 4

8
installation guide
STEP 7
STEP 8
STEP 9
STEP 10
Carefully flip the base over on to its legs. Important: Two people are
required to move the bed base. Do not drag across the floor. Do not
rest frame on its side, excessive pressure may damage the legs.
Plug the power cord into a power source.
A surge protector is recommended.
Quickly test remote functions to verify proper setup before placing
mattress on base. Return the base to a flat position before placing
the mattress on top.
Setup is now complete! Test all functions on remote.
Slide the left side of the mattress retainer bar into the bracket.
Pull the retainer bar to the opposite bracket and secure the right
side.
For customer support, visit www.ergomotion.com or call: 1-844-534-3676
STEP 5
STEP 6
Uncoil power connection cord from
the head actuator and plug into Power
Supply.
Uncoil the Power Cord and connect to the
Power Supply. Place Power Supply on the
ground and extend from the base. Ensure
that the Power Supply and all attached
cords are directed toward the desired surge
protector.

9
With the bases in their desired location, slightly loosen both legs to
allow the strap to fit on the leg bolt, between the leg washer and
frame.
Slide side (a) of the connecting strap onto leg bolt. Swing the
strap and connect side (b) to the leg bolt. Secure the strap by
shifting to the left.
Re-tighten legs. Do not over tighten. Use the remaining strap and
repeat on other end of the base.
STEP 2
STEP 1
STEP 3
connecting strap (optional)
ab
If a split setup is being installed, optional plastic connecting straps can be used to help secure the bases
together. To purchase optional accessories, please call 1-844-534-3676.

10
A Y-Cord is included with Twin Long and Split Cal King bases only (not available on Queen, Full or Full-Long size
bases). The Y-Cord connects two bases to a single remote for the synchronization of two bases.
Locate the wired control plug (connected to the motor). Plug end
of y-cord into wired control plug. Repeat for other end of cord and
wired control plug from second motor.
Once the remote has been connected to the control box with the
y-cord, plug bases into power outlet and test all functions.
Plug remote into Y-Cord
Unplug bases from power source.
STEP 3
STEP 2
STEP 1 STEP 4
syncing two bases (optional)
Remote
Y-Cord
Motor
Bed A
Motor
Bed B
To Power
Supply
To Power
Supply

11
headboard bracket installation guide (optional)
STEP 1
a.) Align the bracket and to the holes in the frame with the tabs
facing outward. Loosely secure the bracket to the leg post with
two bolts, nuts and washers.
b.) Loosely secure the bracket to the frame with one bolt, nut
and washer. The bracket can be moved forward or backward
to adjust spacing between the head of the base and the
headboard.
Once the bracket has been spaced to accommodate the
headboard, secure and tighten the bolts, nuts and washers.
Headboard Brackets are an optional accessory.
A 9/16” (14 mm) & 1/2” (13 mm) socket and crescent wrench are necessary to complete installation.
a
b
a
b
STEP 2
Attach the plastic spacer and T-Bracket.
a.) Measure the distance between the mounting holes on the
headboard and install the spacer and attachment plate to
accommodate the headboard.
b.)To install the plastic spacer and attachment plate, you will need
(2) long bolts and (2) nuts. Place the spacer and attachment
plate in the desired location and slip the bolts through the holes
with the head of the bolt facing outward. Position the bolts
diagonally on the spacer. Use the 9/16” (14 mm) socket and
wrench to tighten the bolts.
You may now connect your headboard to the attachment plates
using the remaining short bolts and nuts to secure it to the
brackets. The heads of the bolts will face outward. Use a 9/16"
(14mm) socket and 1/2" (13mm) wrench to tighten the bolts.
STEP 3

12
troubleshooting
• Check under the bed base to verify that the wired connections are secure and that there are no cords or bedding obstructing the
movement of the base.
• Check to ensure the green LED light is illuminated on the power supply. If there is no light, verify that the input and power cords are
properly connected.
• Unplug the base for 1 hour to reset the electronic components.
• Plug bed base into a dierent electrical outlet, or test current outlet with another working appliance (a grounded, electrical surge
protector is recommended).
If issue is not resolved by following the instructions above, locate serial number on warranty card or back of remote and call
Ergomotion Customer Service: US 1-844-534-3676
If one or more functions on the bed base have stopped operating:

13
notes

14
español
Pg. 1 - Sobre las precauciones y el uso
Atención: Restricciones importantes sobre la seguridad.
Lea todas las instrucciones antes de usar su base ajustable. Guarde estas instrucciones.
Para reducir el riesgo de un shock eléctrico, quemaduras, incendio o heridas:
Siempre desconecte la base del tomacorrientes antes de trabajar en cualquier
componente de la base. Para reducir el riesgo de shock eléctrico, desconecte la base
antes de limpiarla. Para desconectarla con seguridad, asegúrese que la base esté
en posición horizontal y todos los motores estén apagados y desconectados de la
electricidad. Mantenga el cable eléctrico alejado de superficies calientes. Nunca opere
la base cuando estén obstruidos los orificios de ventilación; manténgalos limpios de
pelusas, pelos, etc.
Deje de usar la base de la cama y contacte un centro de servicio calificado si tiene un
cable o enchufe dañado, si no funciona adecuadamente o si ha tenido contacto con
agua. Sólo use esta base para su fin específico como lo describe este manual. No use
accesorios o acoplamientos que no estén recomendados por el fabricante.
Deberá mantener supervisión cuando la cama sea usada por niños, personas
convalecientes o discapacitadas, o esté ubicada cerca de éstos.
Seguridad del tomacorrientes:
Para la seguridad y funcionamiento óptimos de esta cama, conecte la base a un
protector de sobrecarga eléctrica (no incluido).
La base de la cama sólo debe conectarse directamente a un tomacorrientes de la
pared o a un protector de sobrecargas (que es lo más recomendable). Conectar
el equipo incorrectamente puede causar un shock eléctrico, un incendio o un mal
funcionamiento de la cama. Si el enchufe no cabe en el tomacorrientes, contacte a un
electricista calificado para instalar el tomacorrientes adecuado.
Si no usa un protector de sobrecargas o el tomacorrientes de la pared o cualquier
modificación indebida que se le haga a éste último anulará su garantía en la parte que
concierne a electricidad.
Advertencia sobre la garantía:
No abra ni la manipule indebidamente la caja de control, los motores ni el control
remoto (a excepción del compartimiento para las pilas). La garantía quedará anulada
si se alteran las funciones internas de estos componentes. Para una información
completa sobre la garantía, visite www.ergomotion.com o lea la tarjeta de garantía
incluida en la base.
Uso doméstico y renuncia de responsabilidad legal por uso en hospitales:
Las camas de base ajustable de Enso están diseñadas solamente para uso doméstico.
Esta cama no fue diseñada para su uso en hospitales y no está diseñada según las
normas de los hospitales. No use esta cama con equipos como cámaras para terapia de
oxígeno o cerca de gases explosivos.
Mascotas y niños pequeños:
Elimine de inmediato todos los materiales de empaque ya que son un gran riesgo
para niños pequeños y animales domésticos. Para evitar accidentes, no permita que
los niños ni las mascotas pequeñas jueguen encima o debajo de la cama. Los niños no
deben operar la base de la cama sin la supervisión de un adulto.
Dispositivos de seguridad:
Las rueditas (accesorio opcional para las patas de la cama) están equipadas con
ruedas de cierre automático para evitar cualquier movimiento no deseado. Aún
con este freno para que no rueden, pueden tener un deslizamiento. Los motores
de liberación de la cabecera y de los pies están diseñados para bajar el colchón
retractando sólo con la fuerza de gravedad y nunca halando hacia abajo, lo cual
disminuye los puntos de riesgo de pinzamiento.
Pg. 2 - Sobre las precauciones y el uso (seguido)
Potencia del producto:
Los motores de alzamiento no están diseñados para funcionar continuamente por más
de (2) minutos durante un período de tiempo de (18) minutos o aproximadamente el
10% de su ciclo de operación. Tratar de ignorar o exceder esta potencia acortará la vida
útil del producto y anulará su garantía.
Restricciones de peso:
Este producto no está clasificado para soportar un peso de más de 340 kg incluyendo
colchones y ropa de cama. La base celebrará este peso estructural si se distribuye por
igual a lo largo de la cama. La base ajustable no está diseñado para soportar o levantar
todo ese peso en la cabeza o parte de los pies. Al exceder estos límites de peso puede
dañar el alojamiento y / o causar un accidente y anular la garantía.
Acústica:
En el funcionamiento normal de la base, las ruedas que permiten que la cama se
mantenga separada de la pared harán contacto con los apoyos de la plataforma de
acero de la base creando un ruido de contacto. Al entrar, salir o mover el peso sobre la
base se oye este ruido de contacto a medida que las ruedas entran en contacto. Esto
es normal.
Cuidado de tela: Para cuidar la vida de su tela, proteja la tela de la luz del sol directo lo

15
español
maximo posible. Para la limpieza de manchas, limpie la área con una esponja húmeda o
use una aspiradora con un accesorio con cepillo suave para quitar partículas. Mantenga
un mínimo de 30 cm (12 pulgadas) lejos de fuentes de calor.
Para la limpieza más profunda. Para secar liquidos limpie con una tela limpia y seca.
Para limpiar es importante de utilizer una tela limpia y mojada con agua tibia. No moje
excesivamente. Con un cepillo de cerda suave puede ser usado para quitar la tierra.
Evite rasguñar por eso es importante de
cepillar suavemente. Limpie con una tela limpia y mojada con la agua tibia para quitar
el residuo. Es importante de Secar bajo sombra y lejos del calor.
Si las marcas spermanecen visibles después de la limpieza, busce consejo profesional.
GUARDE ESTAS INSTRUCCIONES.
Cumplimiento con la FCC: Este dispositivo cumple con la Parte 15 de las Regulaciones
de la Comisión Federal de Comunicaciones (FCC, en inglés). Su funcionamiento está
sujeto a las dos condiciones siguientes: 1) Este dispositivo no puede causar ninguna
interferencia perjudicial y 2) Este dispositivo deberá aceptar cualquier interferencia
recibida, incluso si la interferencia causara un funcionamiento indeseado. Para cumplir
los requerimientos sobre exposición humana a la radiofrecuencia (RF) de la FCC, no
se permite ningún cambio en la antena o dispositivo. Cualquier cambio en la antena o
dispositivo puede provocar que el dispositivo exceda el requerimiento de exposición a
la RF y quede anulado el derecho del usuario de operar el dispositivo.
Radiofrecuencia: 2.4 GHz
Pg. 4 - Componentes:
Antes de eliminar los materiales de empaque, verifique que tiene todos los componentes.
Todas las partes electrónicas y los componentes que necesitan instalarse están en
cajas debajo de la base o adheridos al marco.
A) Wired Remote Control (1) = Con cables Contro Remoto (1)
B) Mattress Retainer Bar (1)* = Barra de retención del colchón (1)*
C) Legs (6) = Patas (6)
D) Power Cord (1) = Cable eléctrico (1)
E) Power Supply (1) = Fuente de energía (1)
F) Y-Cord ‡ = Y-Cable (1) ‡
Misceláneos (no incluidos):
G) Connecting Strap†= Correa de conexión†
H) Surge Protector (1) = Protector de sobrecargas
Cabecero piezas de sujeción:
I) Headboard Bracket (2) = La cabecera del soporte (2)
J) T-Bracket (2) = T-soporte (2)
K) Spacer (2) = Spacer (2)
L) Long Bolts (8) = Tirafondos (8)
M) Short Bolts (10) = Pernos cortos (10)
N) Nuts (18) = Frutos secos (18)
* Estos componentes están adheridos a la base sólo para el envío. Retírelos con
cuidado de la base y sepárelos.
‡ Sólo se incluyen con las siguientes bases: individual, individual larga, Queen dividida
y Cal King dividida.
† Este es un elemento opcional y puede adquirirse llamando al 1-844-534-3676.
Pg. 5 - Resumen sobre la base y Contro Remoto
(Las agujas del reloj desde la parte superior)
La base:
Head motor = Motor de la cabecera
Remoto:
▲ ▼ Eleva y baja la cabecera
Pg. 6 - Guía de referencia rápida:
No llevar a escala. Este diagrama sólo tiene el fin de ilustrar. Lea las instrucciones antes
de comenzar la instalación.
Resumen sobre la cajade control (Izquierda a Derecha)
Head Motor = Motor de la cabecera
Remote = Remoto
Power Cord = Cable de alimentación
Power Supply = Fuente de alimentación
Resumen sobre la electrónica
(Las agujas del reloj desde la parte superior)
Head motor = Motor de la cabecera
Wired Remote = Con cables Contro Remoto
Input Power Cord = Cable de entrada de electricidad
Power Supply = Fuente de energía
Power Cord = Cable de electricidad

16
español
Si va a instalar una unidad de división - ver páginas 10-11.
Pg. 7 - Guía de instalación: Siempre use a dos personas para instalar la base.
PASO 1: Coloque la caja de la base de la cama en el lugar deseado, con la parte de
abajo de la cama para arriba.
Quite las cintas de seguridad y los materiales de empaque con cuidado de no perforar
la caja con algún objeto afilado.
PASO 2: Saque la base de la cama de la caja, dejando la parte de abajo de la base
hacia arriba.
PASO 3: Para instalar los soportes de la cabecera, vea las instrucciones detalladas en la
página 12 para su instalación.
Instalar corto (1 pulgada) de la pierna espaciador sobre los puntos de fijación del
marco.
No apriete en exceso.
PASO 4: Para instalar las patas, el hilo de la arandela sobre el perno de la pierna con la
parte ahuecada mirando hacia la pierna, y apriete con la mano.
No apriete en exceso
Pg. 8 - Guía de instalación
PASO 5: Desenrosque el cable de entrada (conectado al puerto de energía de la caja
de control) y conéctelo a la fuente de energía.
PASO 6: Desenrosque el cable de electricidad y conéctelo a la fuente de energía.
Ponga la fuente de energía en el piso y extiéndala desde la base. Verifique que la
fuente de energía y todos los cables relacionados con ésta vayan directamente hacia el
protector de sobrecargas deseado.
PASO 7: Con cuidado voltee la base y póngala con las patas sobre el piso. Importante:
Hacen falta dos personas para mover la base de la cama. No la arrastre por el piso. No
deje descansar el marco de lado ya que la presión excesiva puede dañar las patas.
Para servicio al cliente, visite www.ergomotion.com o llame al 1-888-550-3746.
PASO 8: Conecte el cable de alimentación a una fuente de alimentación. Se
recomienda el uso de un protector de sobrecargas.
PASO 9: Pruebe rápidamente funciones remotas para verificar la instalación correcta
antes de colocar el colchón en la base. Vuelva la base de una posición plana antes de
colocar el colchón en la parte superior.
PASO 10: Deslizar el lado izquierdo de la barra de retención en el soporte de colchón.
Tire de la barra de retención en el soporte opuesto y lograr la derecha.
La configuración habrá finalizado! Pruebe todas las funciones de control remoto.
Para asistencia al cliente, visite www.ergomotion.us o llame a:
1-844-534-3676
Pg 9 - Correa de conexión (opcional)
Un Y-Cable se incluye con bases largas gemelas (no disponibles en Queen, Full o bases
de tamaño completo de largo).
El Y-Cable conecta dos bases a un único mando a distancia para la sincronización de
dos bases.
RESUMEN
Si se va a instalar una configuración de división, correas de plástico de conexión
opcionales se pueden utilizar para ayudar a asegurar las bases
juntos. Para adquirir accesorios opcionales, por favor llame al 1-844-534-3676.
PASO 1: Con las bases en su ubicación deseada, aflojar ligeramente las dos piernas
para permitir que la correa para que quepa en el perno de la pierna, entre la arandela
de la pierna y el marco.
PASO 2: lado de diapositivas (a) de la tira de conexión sobre el perno de la pierna.
Girar la correa y conectar lado (b) de perno de la pata. Asegure la correa desplazando
hacia la izquierda.
PASO 3: Vuelva a apretar las piernas. No apriete demasiado. Utilice la correa restante y
repetir en el otro extremo de la base.
Pg 10 - Sincronización de dos bases (opcional)
Un Y-Cable se incluye con Twin largo y bases de Split Cal King (no disponibles en
Queen, Full o Full-largas bases de tamaño). El Y-Cable conecta dos bases a un único
mando a distancia para la sincronización de dos bases.
PASO 1: Desconecte bases de toma de corriente.
PASO 2: Localice la caja de control debajo de la base. Conecte el extremo y-cable en el
puerto remoto con cable en la caja de control. Repita para el otro extremo del cable y
la segunda caja de control.
PASO 3: Conecte remoto en Y-Cord.

17
español
PASO 4: Una vez que el control remoto se ha conectado a la caja de control con las
bases y-cable, el enchufe en la toma de corriente y probar todas las funciones.
Pg 11 - Guía de instalación del soporte cabecero (opcional
Soportes de Cabecera son un accesorio opcional y no está incluido.
Un conector de 9/16 “y 1/2” y llave inglesa son necesarios para completar la instalación.
PASO 1:
a.) Alinear el soporte y a los agujeros en el marco con las lengüetas hacia afuera. Fije
sin apretar el soporte al poste pierna con dos tornillos, tuercas y arandelas.
b.) asegurar sin apretar el soporte a la estructura con un tornillo, tuerca y arandela. El
soporte se puede mover hacia delante o atrás para ajustar el espaciado entre el jefe de
la base y la cabecera.
Una vez que el soporte ha sido espaciados para acomodar el cabecero, segura y
apriete los pernos, tuercas y arandelas.
PASO 2: Conecte el espaciador de plástico y T-Bracket.
a.) Mida la distancia entre los orificios de montaje en la cabecera e instale el
espaciador y placa de fijación para dar cabida a la cabecera.
b.) Para instalar el separador de plástico y placa de fijación, deberá (2) tornillos largos
y (2) tuercas. Coloque el espaciador y la placa de fijación en la ubicación deseada y
el deslizamiento de los pernos a través de los agujeros con la cabeza del perno hacia
afuera. Coloque los tornillos en diagonal sobre el separador. Utilice la opción “toma y
llave de 9/16 para apretar los tornillos.
PASO 3: Ahora puede conectar el cabecero de las placas de fijación usando los tornillos
cortos restantes y tuercas para fijarlo a los soportes. Las cabezas de los tornillos se
enfrentarán exterior. Use un “enchufe y 1/2”, 9/16 llave para apretar los tornillos.
PG - 12 Solución de problemas
Si una o más funciones de la base de la cama han dejado de funcionar:
• Revise debajo del somier para verificar que las conexiones de cable son seguras y
que no haya cables o ropa de cama obstruyendo el movimiento de la base.
• Compruebe que la luz LED verde se ilumina la fuente de alimentación. Si no
hay luz, verificar que los cables de entrada y de alimentación estén conectados
correctamente.
• Desconecte la base durante 1 hora para reponer los componentes electrónicos.
• Plug base de la cama a una toma eléctrica diferente, o toma de corriente de
prueba con otro aparato de trabajo (se recomienda un protector de sobretensión
eléctrica con conexión a tierra).
Si el problema no se resuelve, siguiendo las instrucciones anteriores, busque el número
de serie en la tarjeta de garantía o la parte de atrás de distancia y llame
Ergomotion Servicio al cliente: EE.UU. 1-844-534-3676

18
français
Pg. 1 - Précautions de sécurité et déclarations d’utilisation
Attention : Avertissement de SécuritéLisez toute les instructions avant d’utiliser votre
base ajustable. Gar dez les instructions.
Réduire le risque de choc, brûlure, feu, ou blessure: Débranchez toujours votre base
de la prise avant d’ajuster la base. Pour réduire le risque de décharge électrique,
débranchez la base avant de la nettoyer. Pour débrancher prudemment, faites attention
que le sommier soit étendu par terre et éteint, et après débranchez-le de la prise. Tenez
le cordon d’alimentation loin de surfaces chauées. Ne mettez jamais en marche la
base quand les trous d’aération sont bloqués. Tenez les trous d’aération propres et sans
peluches et cheveux. N’introduisez jamais aucun objet dans les trous d’aération.
Cessez l’utilisation du sommier et contactez le service clientèle si: le cordon
d’alimentation est endommagé, le sommier ne marche pas correctement, ou il est
mouillée.
Employez la base du lit seulement pour les utilisations prévues dans ce manuel.
N’employez pas les accessoires/attachements qui ne sont pas recommandés par le
fabricant.
Surveillance est recommandée quand la base est utilisée près des enfants, des
convalescents, ou les handicapés.
Sécurité de la prise: Pour la sécurité optimale, branchez la base dans une multiprise
(pas incluse).
La base doit être branchée directement dans la prise ou dans une multiprise
(recommandée). Le branchement incorrect peut causer la décharge électrique, le feu
électrique, ou l’opération défectueuse de la base du lit.
Si la fiche n’entre pas dans votre prise, contactez un électricien pour installer une prise
appropriée. Les modifications non autorisées ou l’utilisation du sommier sans une prise
ou une multiprise peuvent annuler la partie électrique de votre garantie.
Avertissement de la garantie:
N’ouvrez pas et ne touchez pas la boîte de contrôle, les moteurs, ou la télécommande
(sauf le compartiment de la batterie). Votre garantie sera annulée si ces composants
sont modifiés. Pour information à propos de la garantie, visitez le site web www.
ergomotion.com ou regardez la carte de garantie incluse avec le sommier.
Utilisation à la maison et limitation de responsabilité pour les hôpitaux:
Les lits ajustables de Enso sont créés pour l’utilisation individuelle à la maison. Cette
base n’est pas créée pour l’utilisation comme lit d’hôpital et elle ne satisfait pas les
critères d’hôpital. N’utilisez pas cette base avec l’équipement de l’oxygénothérapie ou
près des gazes explosives.
Les animaux domestiques et les enfants:
Jetez immédiatement les matériaux d’emballage parce qu’ils posent un risque d’asphyxie
pour les animaux domestiques et les enfants. Pour éviter les blessures, ne laissez pas
que les enfants ou les animaux domestiques jouent sous le lit. Les enfants ne doivent
pas faire marcher le sommier sans la surveillance d’un adulte.
Les traits de sécurité:
Les roulettes sont équipées avec les roues verrouillables pour empêcher les mouvements
non désirés. Même quand les roues sont verrouillées, il est possible que les roulettes
glissent. Les moteurs de tête et de pied sont créés pour descendre le matelas seulement
en employant la gravité, et sans la traction vers le bas car elle réduit les points qui
peuvent pincer.
Pg. 2 - Précautions de sécurité et déclarations d’utilisation
Classement du produit:
Les moteurs qui soulèvent le lit ne sont pas conçus pour fonctionner continuellement
plus de deux [2] minutes dans une période de temps de dix-huit [18] minutes ou
environs 10% du rapport cyclique. La tentative d’outrepasser cette limite réduira la durée
de vie probable du produit et peut annuler votre garantie.
Limites de poids:
Ce produit n’est pas conçu pour supporter des poids excédant 340 kgs. Ce produit
n’est pas conçu pour supporter des poids de plus de 340 kgs inclusivement du matelas
et la literie. La base sera structurellement supporter ce poids, à condition qu’il soit
uniformément répartie sur la base du lit. La base réglable est pas conçu pour supporter
ou soulever ce montant dans les sections de tête ou un pied seulement. Le dépassement
de cette limite de poids pourrait endommager le lit et / ou causer des blessures et
annule la garantie.
Acoustique:
En fonctionnement de base normale, les roues qui permettent le lit pour maintenir sa
distance de la paroi, seront en contact avec la plate-forme de supports en acier de la
base de la création d’un bruit de contact. Lors de la saisie, en sortant ou en transférant le
poids sur la base, ce bruit de contact peut être audible lorsque les roues sont en contact.
Ceci est normal.
Entretien des produits: Pour prolonger la vie de votre tissu, éviter le soleil direct autant
Table of contents
Languages:
Other Enso Indoor Furnishing manuals
Popular Indoor Furnishing manuals by other brands

Regency
Regency LWMS3015 Assembly instructions

Furniture of America
Furniture of America CM7751C Assembly instructions

Safavieh Furniture
Safavieh Furniture Estella CNS5731 manual

PLACES OF STYLE
PLACES OF STYLE Ovalfuss Assembly instruction

Trasman
Trasman 1138 Bo1 Assembly manual

Costway
Costway JV10856 manual
