Entempo Rubato User manual

RUBATO MAN2/1/2005
Entempo
1
User’s Guide
RUBATO
PLAYER
RUBATO MAN2/1/2005
Entempo
2
IMPORTANT NOTES
Avoid installing the unit in locations described below.
• Places exposed to direct sunlight or close to heat radiating appliances such as
electric heaters.
• On top of other stereo equipment that radiates too much heat.
• Places lacking ventilation or dusty places.
• Humid or moist places.
• Strong magnetic fields
CAUTION : TO REDUCE THE RISK OF ELECTRIC
SHOCK, DO NOT REMOVE COVER (OR BACK). NO
USER-SERVICEABLE PARTS INSIDE. REFER
SERVICINGTOQUALIFIEDSERVICEPERSONNEL.
RISK OF ELECTRIC SHOCK
DO NOT OPEN
CAUTION
DANGEROUSVOLTAGE
ATTENTION
UninsulatedDangerousVoltage, that may be
of sufficient magnitude to constitute a risk of
electric shock to personsis presentwithin this
product’senclosure.
The Owner’s Manual contains important
operatingandmaintenanceinstructions.
For your safety, it is necessary to refer to the
manual.
WARNING: TO PREVENTFIRE OR SHOCKHAZARD,
DO NOT EXPOSETHISUNITTO RAINORMOISTURE.
IT IS NOT ALLOWABLE TO MODIFY THIS UNIT BY
USER.
WARNING:
ANY ATTEMPT TO OPEN THE DEVICE WILL
RENDER THE WARRANTY NULL OR VOID.

RUBATO MAN2/1/2005
Entempo
3
Table of Contents
CHAPTER 1 - SETTING UP THE RUBATO...................................................................... 4
1.1 RUBATO AND ACCESSORIES......................................................................................... 4
1.2 CHARGING THE BATTERY .............................................................................................. 4
1.3 POWER ON AND OFF ..................................................................................................... 4
1.4 CLOCK ............................................................................................................................. 5
1.5 RUNNING THE RUBATO WHILE PLUGGED IN .............................................................. 5
1.6 SOFTWARE INSTALLATION & USAGE: .......................................................................... 5
1.7 ENJOYING DIGITAL RIGHTS MANAGEMENT OR COPYRIGHTED MUSIC.................... 7
1.8 CREATING INSTANT MUSIC MIXES WITH MUSICMAGICTM MIX (ON THE DEVICE). 10
CHAPTER 2 – USING RUBATO ONCE CHARGED ...................................................... 11
2.1 RUBATO BUTTON LAYOUT ........................................................................................ 11
2.2 MENU SCREEN .............................................................................................................. 14
2.3 MUSICMAGIC MIX (CREATING) .................................................................................. 17
2.4 FM AND AUXILIARY AUDIO SOURCES ........................................................................ 17
2.5 SETTINGS ....................................................................................................................... 20
CHAPTER 3 - RUBATO SPECIFICATION AND INFORMATION ............................. 22
3.1 PC SYSTEM REQUIREMENTS ...................................................................................... 22
3.2 AUDIO SPECIFICATIONS ............................................................................................... 22
3.3 KEY FEATURES ............................................................................................................. 22
CHAPTER 4 - PRECAUTIONS FOR USE ........................................................................ 24
CHAPTER 5 - TROUBLE SHOOTING ............................................................................. 25
CHAPTER 6 - WARRANTY ............................................................................................... 26
RUBATO MAN2/1/2005
Entempo
4
Chapter 1 - Setting Up the RUBATO
1.1 RUBATO and accessories
• RUBATO Player
• Software Installation CD
• USB Cable
• Universal AC Adapter /Charger
• Stereo Earphones with Microphone
• Carrying case
• Quick Start Guide Booklet
As delivered, the RUBATO battery is not charged. To start using your RUBATO
first charge the battery as outlined in 1.2 below.
1.2 Charging the Battery
Charging during ON
Your RUBATO comes supplied with an integral rechargeable Lithium-Ion Polymer
battery. It is recommended that the battery be fully charged before you use the Player
for the first time. To charge the battery, connect the Universal AC Adapter/Charger to
the main AC supply and the DC (5V) plug to the “DC-In” socket on the bottom edge of
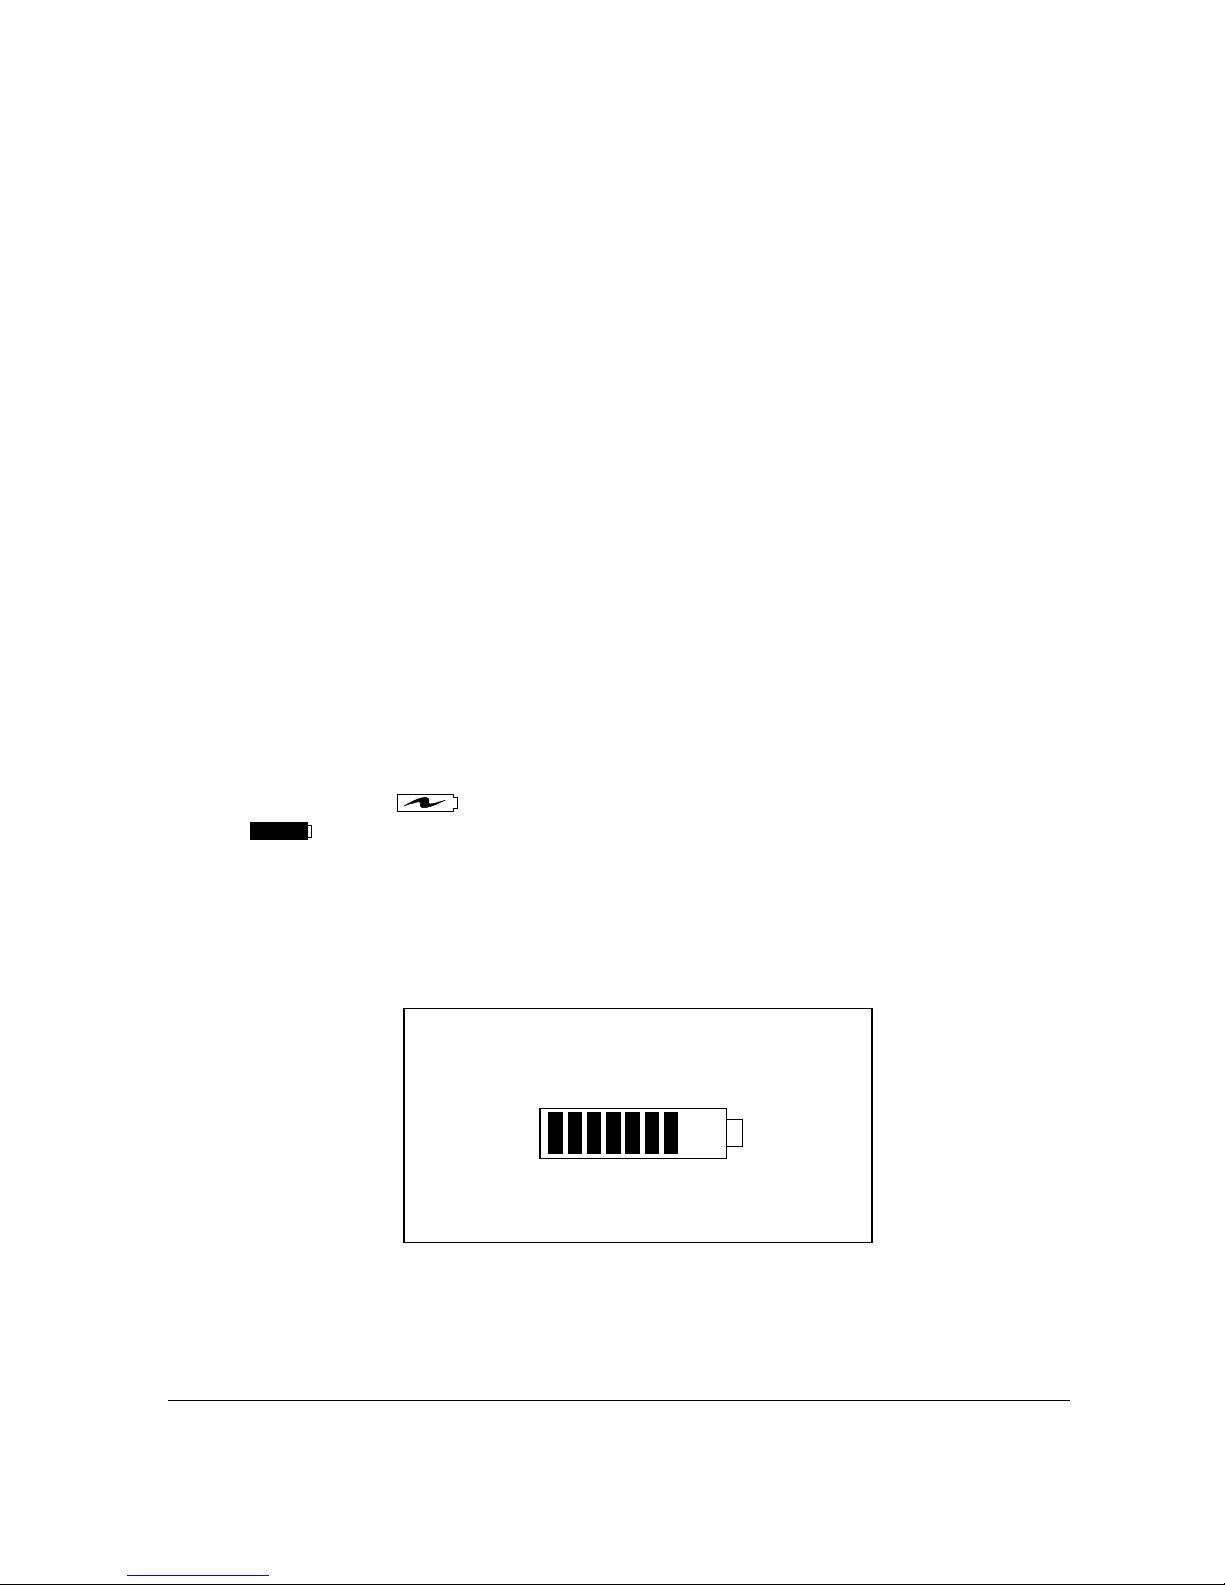
the RUBATO. It will take approximately 3 hours to fully charge the battery. The
battery indicator, at the top right hand corner of the display, will show that the Player is
being charged, .After 3 hours, unplug the charger; RUBATO will indicate
when the battery is fully charged.
Charging during OFF
If the device is OFF, the display will show the battery-being-charged animated icon,
real-time clock, date and the word “CHARGING” to indicate that the battery is being
charged. When the battery is full, a battery-full icon and the word “FULL” will be
displayed instead.
1.3 Power ON and OFF
To switch the RUBATO on, press the “Power” button, and the main menu options
will be displayed on the screen.
31 Dec, 2004 Monday
12:40 AM
CHARGING … (or FULL)

RUBATO MAN2/1/2005
Entempo
5
To switch the RUBATO off press and hold the “Power” button for four seconds. The
display will become blank.
If the RUBATO is not in the play mode, it will automatically power off after a period.
This period is a user-controlled setting, accessed from the Settings Menu >> Power
Saving.
1.4 Clock
The RUBATO incorporates a real time digital clock. The user can change the value of
the date and time via Settings >> Clock >> Time & Date.
Use the “SKIP FORWARD” and “SKIP BACKWARD” buttons, to jump across the
value that needs changing (Day, Month, Year, Hour, Minute). Then, use the 3-way
switch to adjust to the values desired.
User can choose the time display via Settings >> Clock >> Clock Display. If user
chooses to display the clock, then the window title of the display will be replaced by
date DD-MM-YYYY and a real time digital clock showing the hour (HH), minute (MM),
seconds (SS) of the day in HH:MM:SS AM/PM format.
1.5 Running the RUBATO while plugged in
If operating the Player indoors and power is available, it is advisable to operate the
Player through the Universal AC Adapter/Charger. This will preserve battery life,
especially during power intensive operations such as downloading files from your PC
to the Player.
Reset
If the RUBATO is not responding to any button presses then it is possible to restart it
using the reset switch. Before resetting, check that, the unit has a fully charged
battery or is running from the AC Adapter.
Resetting Sequence
Press the reset button with a paperclip.
1.6 Software Installation & Usage:
The CD that comes with the player contains -
• Windows MediaTM Player Software in many languages (English, French, German,
Spanish, Italian, Swedish and Portuguese). You can use Windows Media TM
Player to download, copy, rip and play your music.
• Mixman StudioTM Software enables the budding musicians to create their own
music by “mixing” various predetermined sounds, adding voice and then
synchronizing it to a desired beat. Visit the Mixman’s official website for detailed
information (www.mixman.com).
• MusicMagic MixerTM software is a powerful music library tool that allows users to
create dynamic and interesting playlists, or mixes. MusicMagic automatically
analyses your music collection. Analysed songs are used to build custom mixes
for hours of listening enjoyment. Visit MusicMagic’s official website for detailed
information (www.music.predixis.com).
• Soft copy of RUBATO Manual and Quick Start Guide
• Drivers for Windows 98SE

RUBATO MAN2/1/2005
Entempo
6
• Registration form
1.6.1 Installation of RUBATO Device on your computer
For Win98 users, please connect device to the PC using USB connection. Wait for
PC to detect the new hardware. When it asks for the installation CD, insert the CD
and follow onscreen commands. Windows 98 will then install necessary drivers.
Power on the RUBATO and connect the RUBATO to your PC using the USB cable
provided. Launch Windows Explorer on the PC, and click on the “My Computer”
folder. Windows will automatically recognise the RUBATO as a removable storage
device available to Windows. The RUBATO will be allocated a drive letter (as with the
existing storage devices on your PC) and will be listed among the other storage
devices. You can treat this drive like any other system drive. Windows supports the
full range of file handling functions including: drag and drop, copy, paste and delete.
You can organize the drive space by creating folders and sub folders, as you require.
1.6.2 WAV, MP3 and WMA formats
The RUBATO supports WAV files for low bit rate voice radio and auxillary audio
recording and two compressed music file formats: MP3 and WMA. The RUBATO will
play files in either file format automatically. MP3 and WMA extensions denote that
these are compressed files.
The RUBATO is shipped with a few tracks loaded on the HDD. Your choice of format
and compression standard will affect the quality of the music and the corresponding
file size.
1.6.3 Managing Music with Windows Media Player
With Windows Media TM Player installed on your PC, you can either build a library of
music files on your PC by “ripping” your audio CD collection or by adding already
encoded MP3 or WMA files to your PC. (If you do not have Windows Media TM Player
installed on your PC, load the copy supplied with the RUBATO CD. Follow the
installation instructions, which will be automatically presented when the CD is installed
in the drive.)
To load music from the PC, connect the RUBATO to the PC using the USB cable
provided. The USB socket is on the bottom edge of the RUBATO. Select the
Windows Media Application on your PC and follow the Application instructions for the
transfer of files.
For DRM and copy protected music adding please referred to 1.7
1.6.4 Managing Music with Windows Explorer Software
With the player connected as in 1.6.1. Windows supports the full range of file
handling functions including: drag and drop, copy, paste and delete. You can
organize the drive space by creating folders and sub folders, as you require.
Drag and drop files from your desktop to the folder of your choice on the device. You
can also use standard windows copy commands to transfer these files. Wait until all
files are transferred – this can take a few seconds after the copying window has
closed.

RUBATO MAN2/1/2005
Entempo
7
Now remove the USB cable from the RUBATO, the Player will restart automatically.
The PLAYER will now index the new files you have downloaded; during this process,
RUBATO will display progress information on the display. This process may take
several minutes, after which the top-level menu will be displayed and you can now
access your music.
You can also transfer data files this way, and use your RUBATO as backup, or
standard file storage. The data files are not visible in the RUBATO display. All
management of these files must be done with the player connected to a computer.
For DRM and copy protected music adding please referred to 1.7
1.6.5 Creating New Folders and Sub-folders on the RUBATO from your PC
New folders and sub folders can be created on the RUBATO from your PC. This is
done through the Windows operating system, with the player connected as in 1.6.1.
Launch the Windows Explorer and select the RUBATO drive by selecting
“FILE | NEW > FOLDER”. A new folder can be created at any point in the directory
structure. Refer to the Windows Help for further information about file management.
1.6.6 Copying and Moving Data Files to the RUBATO from your PC
Files can be copied and moved to the RUBATO from your PC. This is done over USB
connection using the Windows operating system with the player connected as in 1.6.1
above. Launch the Windows Explorer and select the RUBATO drive, select the file or
folder to be moved and drag and drop to the new location. A “Move” will be the
default action if the source and destination are on the same drive, a “Copy” will be
the default operation if the source is on a different drive from the destination. Refer to
the Windows Help for further information about file management.
Data files will not be listed with the music file in the index but should be organised and
managed with the RUBATO attached to the PC.
1.6.7 Deleting Files from the RUBATO using Windows
Files can be deleted from the RUBATO during PC connected session. This is done
from the Windows operating system with the player connected over USB as in 1.6.1
Launch the Windows Explorer and select the RUBATO drive. Select the file you wish
to delete and press the delete key. Multiple files can be selected by holding down the
control key while selecting files to delete.
Refer to the Windows Help for further information about file management.
1.7 Enjoying Digital Rights Management Or Copyrighted Music
There are several major Digital Rights Managers (DRMs) for music. The two major
DRMs are Windows Media Agent (WMA) and Fairplay from iTunes. These systems
are non-compatible. Whilst Apple’s iPods and iTunes both have devices and music
for the Windows platform, these devices and musical offerings are not compatible
with Windows DRM and/or other Windows based devices. This music may, however,
be played on the desktop.
As of December 2004.
Check www.entempo.com
for updates
Mac
Devices
Windows
Devices
Desktop Export to
MAC
Portable
Device
Export to
Windows
Portable
Device

RUBATO MAN2/1/2005
Entempo
8
ITunes Yes Yes Yes Yes No
Windows WMA Based
Providers include
- MSN
- Napster
- Wallmart
- Musicmatch
No Yes Yes No Yes
There has been much talk of copyrights in the past, and discussion over legitimate
downloads. Many companies offer these services at low prices. Artists and
composers have adopted a system of encryption or DRMs in order to protect their
work. This simply takes the format of “permissions” which gives the purchaser
specific rights: e.g. to have unlimited plays or, conversely, limited to 30 days from
date of download or 5 plays (e.g. in free sample tracks). These permissions also
include the right to burn CDs, export to portable devices and other restrictions. The
user must adhere to these permissions in order to enjoy the music. Any violation will
cause the track to be “dead” and unplayable.
Entempo’s RUBATO allows the user to enjoy his downloaded music from legitimate
Windows based sites on the desktop as well as on portable devices. In order that this
music can be played on the portable device, this music must be exported in a
certain manner from the desktop using Windows Media Player (WMP)
1.7.1 Window Media Player (WMP)
Go to Microsoft’s Windows Media Player Site for valuable tips and information
before you start to export music to your portable device
http://www.microsoft.com/windowsmobile/portablemediacenter/tips.mspx
Microsoft has developed an informative presentation with the features of its WMP.
http://www.microsoft.com/windowsmobile/portablemediacenter/windowsmedia.mspx
WMP is Microsoft’s Music Player and Digital Rights Manager based on their Windows
Media Agent. This sophisticated player offers a variety of features and is able to
manage and optimise your total music collection: through ripping of CDs (converting
the format). It will also allow the creation of Playlists as well as editing incorrect track
names. WMP 10 offers the user the possibility to synchronize the music on the PC’s
hard drive with the device. (see 1.7.4 Synchronization and Playlists)
WMP is the agent for exporting music to the RUBATO portable player. The latest
version of WMP is included on the accompanying CD. Go to the CD, choose the
language of your choice and install the player. In some cases you may need to
download the latest software from Microsoft’s website. At this time, or even later, you
may ask WMP to search your hard disk and insert all your musical tracks to the
library. We draw from this library to create Play Lists or smaller selections or groups
of music
1.7.2 Non-DRM Music
Music can be added to the library in several ways. If there are no DRM tracks (i.e.
music from official download sites) tracks can be dragged in their folders from the PC
to your device. The RUBATO appears as a new drive letter with the word “RUBATO”.

RUBATO MAN2/1/2005
Entempo
9
The songs will be visible in the tracks, artists and genre menus if the information is
available (ID3 headers – see below). Tracks and Artists will be organized in
alphabetical order. By using the playlist manager, or Music Magic mixer, playlists can
be created on the device. [See 1.7.4 Synchronization and Playlists section of this
manual]
1.7.3 DRM Music
This music must be exported to the device using Windows Media Player in order to
preserve format and copyright integrity. DRM tracks can be sequenced with MP3 or
WMA tracks. RUBATO plays these tracks seamlessly for greater music enjoyment.
Mixed Music Collections (MP3, Unprotected WMA and DRM WMA)
This collection must be managed in a manner that provides the user with greatest
flexibility in creating playlists. It is suggested that a special folder for new DRM music
be created. This folder can then be synchronized to the device so that the device is
always updated with the latest music.
1.7.4 Synchronization and Playlists
Synchronizing
Window media player offers users the ability to synchronize the library of music in
WMP 10 with your portable device. In order to do this, ensure that the library in WMP
is updated. Music can be easily added through WMP. [File>>>Add to library>>>
Folders or search hard drive]
Synchronization will store your music by artist in a separate folder called “Music” on
your portable device.
Synchronization may be made automatically every time to connect RUBATO or
manually. Options such as the synchronization of ALL Music in your library, selected
tracks may be chosen prior to synchronization.
Creating Playlists via MusicMagicTM Mixer Software (on the PC)
Create playlists on the device directly via the Playlist Manager, or for a faster way,
use the included MusicMagicTM Mixer Software installed on the PC.
First, make sure that the device is attached properly to and recognized by the PC.
Open the MusicMagicTM Mixer Software. If the RUBATO is not already in the
Filters/Playlist window on the left, go to File >> Devices >> Scan for New Devices,
and it should appear.
Right click on the RUBATO and choose “New Playlist”. Name your new playlist. You
should be able to now browse the RUBATO device and drag and drop tracks into the
playlist. Once you are done, right click on the playlist name and select “Save Playlist”.
Make sure also that the “Use Extended M3U Format” and “Use Short Filenames”
options are checked. If you disconnect the RUBATO device properly from the PC,
you should be able to see your newly saved Playlist in the Main Menu >> Playlist of
the device. Select it to playback the tracks on the playlist.

RUBATO MAN2/1/2005
Entempo
10
1.8 Creating Instant Music Mixes with MusicMagicTM Mix (on the device)
Select MusicMagicTM Mix from the Main Menu of the device. This will allow users to
choose the reference track from which MusicMagicTM will automatically create a
playlist containing songs that have close “likeness” to that reference track. This
special playlist, called a mix, is accessible from Main Menu >> Playlist. You can edit
this mix, just like any other playlist, using the Playlist Manager.
For more extensive mix, you can use the PC version of the MusicMagicTM Mixer
software to create playlists based on multiple criteria (see the MusicMagic Mixer
Software manual for further details).
Note: For this feature to work properly, please ensure that all music tracks have been
ANALYZED by Music Magic Mixer software on the PC, prior to transferring to the
device via Drag-n-Drop method or Windows Media Player's Synchronization function.
Please see the Music Magic Mixer Software manual for further details on music
analysis.

RUBATO MAN2/1/2005
Entempo
11
Chapter 2 – Using RUBATO Once Charged
2.1 RUBATO Button Layout
AUX
INPUT
INTERNAL
MICROPHONE
V
O
L
U
ME
U
P
V
O
L
U
ME D
O
WN
SKIP
BACKWARD
S
KIP F
O
RWARD
POWER ON/OFF
PLAY/PAUSE/
STOP
RESET
SWITCH/HOLE
NAVIGATE
UP
NAVIGATE
DOWN
SELECT
HEADPHONE
JACK
RE
CO
RD
USB 2.0 CABLE
CONNECTION
A
C ADAPTER/CHARGER
CONNECTION (DC IN)
BACK
HOLD
SWITCH
MEN
U
B
U
TT
O
N

RUBATO MAN2/1/2005
Entempo
12
Volume Up Increases the volume level; progress bar on Playback
screen converts to volume indicator
Volume Down Decreases the volume level; progress bar on Playback
screen converts to volume indicator
3-way Select button
Navigate Up (slide up) In menus, moves cursor up; in FM radio, moves across
frequency range
Navigate Down (slide down) In menus, moves cursor down; in FM radio, moves across
frequency range
Select (Press in) Brings up the top level menu from play, else navigates
down one level; in radio selects frequency as new preset.
Menu Shows top level menu.
Play/Pause/Stop Starts playback, else pauses playback, and else Stop. In
FM radio or AUX starts and stops the recording.
Skip Forward Fast forward or skips to next track, navigates down one
menu level, in radio step forward through presets.
Skip Backward Fast backward or skips to previous track, navigates up
one menu level, in radio steps back through presets.
Record Starts and stops a voice recording from the internal
microphone.
Reset Resets the player under error conditions.
POWER ON/OFF Power ON or OFF.
HOLD Switch Disables/Enables all button functions.
BACK Moves back menu level.
Note: If you have entered the top-level menu from playing a track, pressing the “BACK”
button will take you back to play. “MENU” button always takes you back to top menu.
2.1.1. Power ON and OFF
See section 1.2.1
2.1.2. Volume
During play mode, the headphone volume can be adjusted by pressing the “Volume
Up” button or the “Volume Down” button. A volume level indicator will be displayed
on the screen, for several seconds, indicating the new volume level.
2.1.3 Hold/Button Lock
The button pad may be locked to prevent unintentional pressing of buttons or the
unintended activation of functions. To lock the buttons, push the HOLD switch
downward and users will see a “LOCK” icon on the top left corner of the display, next
to the “Transport Control” icon. To unlock, push the HOLD switch upward.
2.1.4. Title Bar
This is the top line of the display and is used to indicate what the player is currently
doing. If the user is browsing through the menu system, the title bar will display the
name of the menu or “RUBATO 20” if it is the top-level menu. If the player is in play
mode then the title bar will display “Now playing”. If the user has set the real time
clock to be displayed, then the title bar will display the Date and Real Time clock (see
2.5.2 Clock for more information)
RUBATO MAN2/1/2005
Entempo
13
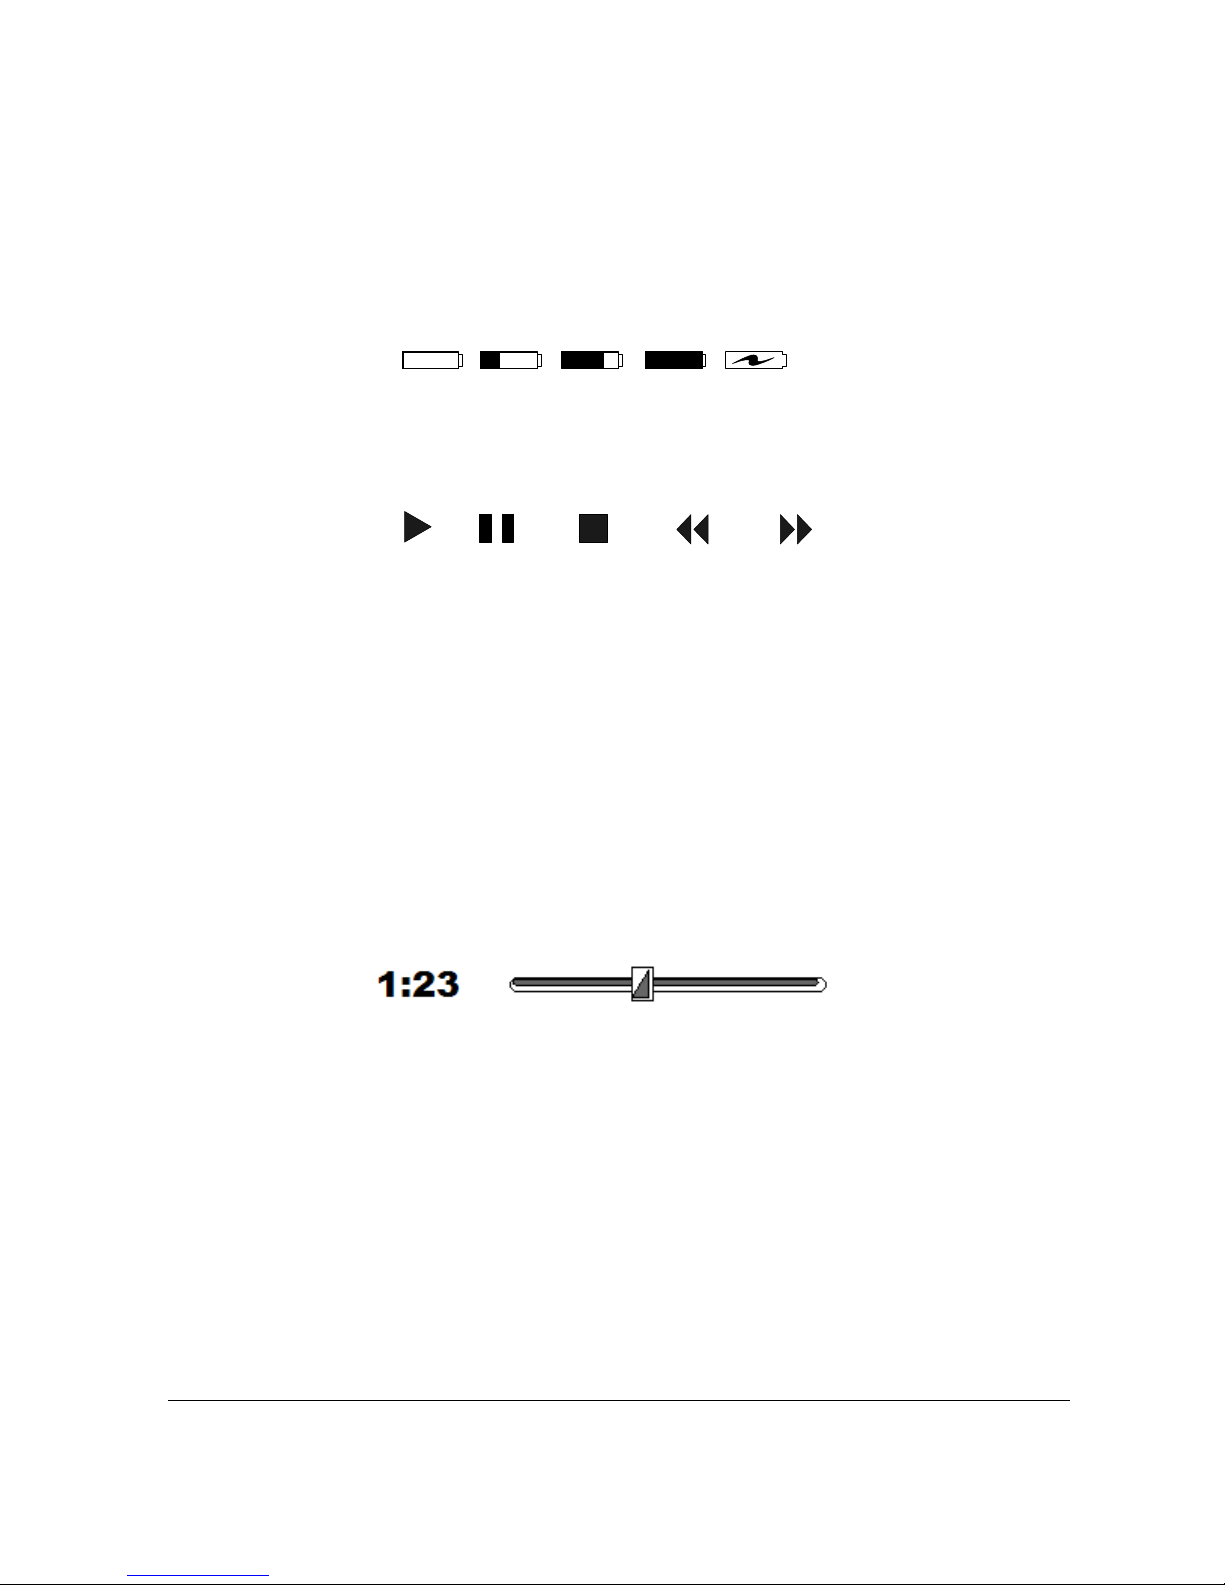
2.1.5 Battery Indicator
When the player is switched on, this icon will display the status of the battery. This
will show the battery as either: full, half or empty. When the player is being
recharged, this icon will change into a DC 5V icon when the player is turned on.
When the player is switched off and not being recharged, this icon will not be
displayed. See section 1.2 for charging during off.
EMPTY 33% 66% FULL DC 5V
2.1.6 Transport Control Icons
During play mode the status icon will be displayed as either: play, pause or stop
depending on the current activity performed by the player.
PLAY PAUSE STOP REWIND FFWD
2.1.7 Vertical Scroll Bar
At any time, if the amount of information to be displayed exceeds the size of the
screen, a vertical scroll bar will be displayed on the right hand edge. This will indicate
the current position into the information to be displayed. Use the “Navigate Up” and
“Navigate Down” buttons to view information before or after the current view
respectively.
2.1.8 Track Progress Bar
When a track is being played, a progress bar is displayed showing how much of the
track has been played and how much remains; the amount of time elapsed in minutes
and seconds is displayed to the left of the progress bar in minutes and seconds.
When the RUBATO is playing a music file, pressing the “Navigate down” button will
display the total track duration. The display will return to the play back screen after 3
seconds.

RUBATO MAN2/1/2005
Entempo
14
2.2 Menu Screen
This screen will display the contents of the current menu or sub-menu and will vary
according to the type of submenu selected.
The RUBATO Menus
2.2.1 Top-level Menu
• Artists
• Albums
• Tracks
• Genres
• Playlists
• Playlist Manager
• MusicMagic Mix
• Radio
• Voice
• Settings

RUBATO MAN2/1/2005
Entempo
15
Note: If you have entered the top-level menu from playing a track pressing the
“BACK” button will take you back to play. “MENU” button will always take you back
to top-level menu.
2.2.2 Selecting and Playing Music Files
All music stored on the RUBATO can be referenced by any of the following: Album
name, Artist name, Track name or Genre. A music file can be located by initially
selecting any of these categories from the main menu. Playlists can also be created
and accessed.
If the RUBATO is displaying a menu other than the top-level menu, by pressing the
“MENU” button will bring back the top-level menu. The “ Back ” button will display the
previous menu until the top-level menu is displayed.
The “Navigate Up” and “Navigate Down” buttons can be used to highlight a menu
item, and then press the ”Select” button to select that item from the current list. If
there is a “…” symbol to the right of the item then pressing the “Select” button will
display a sub menu related to the item. Each sub menu can be searched using the
“Navigate Up” and “Navigate Down” buttons. Once the item of interest has been
found, press the “Select” or “Play” button to start playing your choice.
When the RUBATO is playing a music file, pressing the “Navigate down” button will
display the total track duration. The display will return to the play back screen after 3
seconds.
2.2.3 Artists
This menu selection allows you to view the available list of artists that have been
loaded onto the RUBATO. Selecting an artist and then pressing the:
• “Play” button will cause the player to enter play mode and play the first album
found by the selected artist. Albums are stored alphabetically. If any of the
play modes (Random, Repeat, Intro) are switched on, then this will be applied
to the selection.
• “Select” button will display a list of albums by the selected artist. The list of
albums will be displayed in alphabetical order. An album can be selected
from this list and played by pressing the “Play” button.
2.2.4 Albums
This menu selection allows you to view the available list of albums that have been
loaded onto the RUBATO. Selecting an album and then pressing the “Play” button
will cause the player to enter play mode and play from the selected album. If any of
the play modes (Random, Repeat, Intro) are switched on, then this will be applied to
the selected album.
2.2.5 Tracks
This menu selection allows you to view the available list of tracks that has been
loaded onto the RUBATO. Selecting a track and then pressing the “Play” button will
cause the player to enter play mode and play the selected track. If any of the play
modes (Random, Repeat, Intro) are switched on, then this will be applied to the
selected track.

RUBATO MAN2/1/2005
Entempo
16
2.2.6 Genre
This menu selection allows you to view the available list of genre that has been
loaded onto the RUBATO. Selecting a genre and then pressing the:
• “Play” button will cause the player to enter play mode and play the first album
found by the selected genre. Albums are stored alphabetically. If any of the
play modes (Random, Repeat, Intro) are switched on then this will be applied
to the selection.
• “Select” button will display a list of tracks in the selected genre. The list of
tracks will be displayed in alphabetical order. A track can be selected from
this list and played by pressing the “Play” button.
2.2.7 Playlists
Selecting Playlists will display a list of all current Playlists stored on the RUBATO.
Use the “Navigate Up” and “Navigate Down” buttons to highlight the desired Playlist.
Press “Play” to start the playing the tracks on the Playlist.
2.2.8 Playlist Manager
In the Playlist Manager, Playlists can be created and stored.
Selecting Playlist Manager will display a sub menu as below:
• Create New Playlist
• Modify Existing Playlist
• Delete Existing Playlist
• “Create New Playlist”: Select this option by pressing the “Select” button. The
RUBATO will display the next available play list number automatically. The
RUBATO will display a further submenu of Artist, Album, and Tracks. Select
one of these options using the “Navigate Up” and “Navigate Down” buttons
and pressing the “Select” button. Proceed down through the listed music
using the “Navigate Up” and “Navigate Down” buttons to locate the music
you want to add to the Playlist. Pressing, “Play” will add the highlighted
selection to the Playlist. Multiple presses of the “Play” button will add multiple
copies of the track to the Playlist. When the Playlist is completed, use the
“Back” button until the top-level menu is displayed.
“Modify Existing Playlist“: Select this option by pressing the “Select” button.
The RUBATO will display a sub menu “Add track”/“Delete track”. The action
selected will be displayed at the bottom of the screen, i.e. “< Modify – Add>” or
“<Modify – Delete>”. Using the “Navigate Up” and “Navigate Down” buttons
select the Playlist to be modified by pressing “Select”.
• Add Track: RUBATO will offer Albums, Artists, Tracks as options. To add
tracks proceeds as in “Create New Playlist”
• Delete Track: The RUBATO will display the contents of the Playlist. Use the
“Navigate Up” and “Navigate Down” buttons to highlight the track that is to
be deleted. Press “Select” to confirm the selection of track and then press
and hold the “Play” button to delete the track.
• “Delete Existing Playlist“: Select this option by pressing the “Select”
button. The RUBATO will display the current list of Playlists. Using the
“Navigate Up” and “Navigate Down” buttons highlight the Playlist to be

RUBATO MAN2/1/2005
Entempo
17
deleted. Press “Select “ to confirm the selection of the playlist. Then press
and hold the “Play” to delete the Playlist.
• Use the “Menu” button to get back to the top-level menu.
Creating Playlists via MusicMagicTM Mixer Software (on the PC)
Please see section 1.7.4 Synchronization and Playlists
2.3 MusicMagic Mix (Creating)
PLEASE READ THE PREDIXIS MagicMusic MANUAL BEFORE USING
MusicMagic in the RUBATO
Press Menu Button to reach the top-level menu.
Use 3Way key (Up/ Down) to select MusicMagic Mix item, and press Select to enter
into next submenu.
User will be given the familiar Artists, Albums, Tracks and Genres folders to choose
ONE Song.
Once the ONE Song is chosen, the Predixis algorithm will automatically generate a
list of X number of songs based on the “similarity” of these songs with that ONE song
selected by the user. X is a user set number accessed in Settings > MusicMagic Mix .
While MusicMagic is creating the mix, it will notify the user to wait. Once the mix is
ready, user can start playing the mix, or exit to Main Menu
Once the mix is created, it is automatically saved as “MIXyy” (where yy is 01-10, this
mix will be treated like a normal playlist and is available for retrieval in the Playlist
Menu. The player will reuse the number 01-10 and overwrite existing MIXES if user
has more than 10 MIXES created.
The user can access and edit these playlists from the Playlist Manager (in section
2.2.8)
2.4 FM and Auxiliary Audio Sources
Note: The FM radio feature is NOT available for devices sold in EU countries.
Select Radio/AUX from the top-level menu using the “Navigate Up” and the
“Navigate Down” buttons. The RUBATO will offer a further submenu of
·AUX…
· FM…
2.4.1 FM
The RUBATO has an integral FM tuner with 10 preset capabilities.
Select FM from the menu using the “Navigate Up” and the “Navigate Down” buttons.
The RUBATO will offer a further submenu of
. FM Tuner…
. FM Recordings…
Select FM Tuner for FM Radio.

RUBATO MAN2/1/2005
Entempo
18
• Auto-Tuning
Your player will attempt to automatically tune and preset 10 different stations upon
entering the Tuner mode the first time. The auto-tuning function will stop once all 10
presets are populated. If you would like to interrupt the auto-tuning process, pressing
the "Select" or "Menu" button once will stop it and take you back up to the Radio
menu. Press "Select" again to re-enter Tuner mode. If you would like the device to
automatically do preset again, pressing the "Skip Backward" and "Skip Forward"
buttons simultaneously will trigger the auto-tuning function.
• Tuner: Adjusting the Radio
You can manually tune the FM radio frequencies in increments of 100kHz using the
“Navigate Up” and “Navigate Down” buttons. Stopping at a point will play the radio
station on that FM frequency. However, a long press using the "Navigate Up" or
"Navigate Down" buttons will cause the Tuner to search up or down the next
available station.
• Setting Presets
Once you are tuned to the station of your choice, by using the “Navigate Up” and the
“Navigate Down” buttons, pressing and holding the “Select” button will add that FM
station of that frequency to the preset on the player. The preset is shown as “PO1” …
“P10”
Note: If you would like to change the station assigned to a particular Preset, select
the Preset (see 2.4.1.5 below) and adjust to the new frequency. Once you are tuned
to the right station, pressing and holding the "Select" button will replace the old
station with the current station that you are listening.
• Selecting Presets
Tuner allows you to move through the preset of FM radio frequencies. Using the
“Skip Forward” and the “Skip Backward” buttons will move you through the presets
already stored on the RUBATO.
• Record
To record from an FM station, press “Play” button to begin recording while listening to
the station. Press "Play" button again to stop recording and to start saving the
recording to the drive.
• Listening to FM Recordings
After you have recorded the music of the station of your choice, you can choose to
listen to the recordings by going to the RECORDINGS sub menu. The recordings are
listed in an increasing numerical manner. Thus, the latest recordings will be at the
bottom of the list. The recordings will be named “Rxxx” (where xxx is an increasing
number 000-999).
Main Menu >> RADIO/AUX…>> FM…>>FM Recordings…, from a list that looks like
the following: The recordings are retrieved from
R001
R002
…
• Exiting FM
To leave the FM radio sub menu, press either the "Back" button or the "Menu" button
once.

RUBATO MAN2/1/2005
Entempo
19
2.4.2 Auxiliary Audio
The RUBATO allows the user to listen to any auxiliary audio sources via its built-in
3.5mm AUX Line-in jack. Just plug in the external audio source into the jack and go to
Main Menu>> Radio/AUX… >>AUX… >> AUX to listen to it.
• Recording
The user can record AM/Auxiliary Audio while listening to the source. Just press,
“Play” to initiate a recording and press “Play” again to stop.
• Listening to Auxiliary Audio Recordings
After you have recorded the music from the auxiliary audio your choice, you can
choose to listen to the recordings by going to the RECORDINGS sub menu. The
recordings are listed in an increasing numeric order. Thus, the latest recordings will
be at the bottom. The recordings are retrieved from the Main Menu >> Radio/Aux…
>> AUX… >> Recordings sub menu. The recordings will be named “Axxx” (where xxx
is an increasing number 000-999).
The recordings are retrieved from
Main Menu >> RADIO/AUX…>> AUX…>>AUX Recordings… from a list that looks
like the following.
A001
A002
…
• Exiting Auxiliary Audio Recordings
To leave this mode, press either the "Back" button or the "Menu" button once
2.4.3 Voice
The RUBATO has an integral voice record capability.
• Voice: Recording voice
There are two ways to record voice on the RUBATO digital audio player.
These are:
a) By activating the switch on the microphone built into the ear-bud and the
recording will be done via the microphone in the ear bud.
b) By activating the record button and the recording will done via the microphone
built directly into the device.
The voice record buttons on the unit and the headset both operate in a toggle mode.
Press these buttons to activate recording and press again to stop recording. The
player will then store the recording in the Recordings list and resume operation from
its state before record was initiated.
• Voice: Replaying voice recordings
Select Voice from the top-level menu and select “Recordings …”. This will display a
list of recordings stored on the player. Use the “Navigate Up” and the “Navigate
Down” buttons to select the recorded voice. To replay the recorded message presses
the “Select” or “PLAY” button. During replay, you can press “Select” to leave the
recording and Back to previous menu. Pressing “Menu” will bring back to the top-
level menu.

RUBATO MAN2/1/2005
Entempo
20
2.5 Settings
The settings menu contains the adjustable settings for the player and allows you to
customise your RUBATO’s mode of operation.
2.5.1 Backlight
The RUBATO has a backlight for the display, which helps viewing in poor lighting
conditions. Selecting “Backlight” toggles the backlight on and off.
2.5.2 Clock
• SETTING CLOCK
The RUBATO incorporates a real time digital clock. The user can change the value of
the date and time via
.Settings…
>> .Clock…
>> .Time & Date…
Use the “SKIP FORWARD” and “SKIP BACKWARD” buttons to jump across the
values that need changing (Day, Month, Year, Hour, Minute,Second). Then, use the
3-way switch to adjust to the values desired.
• CLOCK DISPLAY (ON/OFF)
User can choose whether to display the time or not via
.Settings…
>> .Clock…
>> .Display ---- this will toggle Clock display ON or OFF
>> Time Format --- this will toggle 12 or 24 hour format display.
If user chooses to display the clock, then the window title of the display will be
replaced by date DD-MM-YYYY and a real time digital clock showing the hour (HH),
minute (MM), seconds (SS) of the day in HH:MM:SS AM/PM format.
2.5.3 MusicMagic Mix (Setting the number of tracks in a mix)
To set the number of tracks that MusicMagic creates in a mix, go to Settings >>
MusicMagic Mix. Use the “Navigate Up” and “Navigate Down” buttons to choose the
number of tracks that the user wants. If the number of tracks in the device is less than
the wanted number of tracks in the mix, MusicMagic will automatically try to create a
mix with the number of tracks as close as possible to the intended number.
For example: If the number is set to 50, and MusicMagic cannot find 50 tracks to
populate the mix, it will try to get as close to 50 as possible
2.5.4 Equalizer
The RUBATO has preset equalization settings and a built in graphic equalizer. The
graphic equalizer allows you to adjust the signal strength of different portions of the
audio spectrum (frequencies) so that you can get "equal" performance across the
audible spectrum. A graphic equalizer divides the entire spectrum into pieces. This
lets you set the signal strength for a specific frequency section (called bands) and lets
you adjust the strength (volume) of each band up or down from the original signal.
Select “Settings | Equalizer | Graphic EQ” to customize the equalizer settings to your
own preference. Use the “Skip Forward “ and the “Skip Backward” buttons to
select a frequency range and adjust the level using the “Navigate Up” and
“Navigate Down” buttons. Press “Select or Menu” to leave the graphic equalizer.
Table of contents
Other Entempo MP3 Player manuals


