ENYA MUSIC NEXG 2 User manual

USER MANUAL

CONTENTS
7 GET TO KNOW THE NEXG 2
7OVERVIEW
8 SPECIFICATIONS
12 ASSEMBLY INSTRUCTIONS
13 I/O PANEL
15 CONTROL PANEL
17 CHARGING
19 DISPLAY
19 LANGUAGE AND ACTIVATION
20 MAIN MENU
CONTENTS
24 TUNER
24 HOW TO TUNE YOUR NEXG 2
27 TUNING ALERT
28 EFFECTS
33 SWITCH PRESETS
30 DRUM MACHINE
30 OPERATING DRUM MACHINE
33 FOLLOW MODE
35 LOOPER
36 WIRELESS FOOTSWITCH OVERVIEW
2 MANUAL MANUAL 3
To obtain the PDF manual
Enter the following URL in your
browser:
Before using this unit, it's rec-
ommended to read "IMPORT-
ANT NOTES" on page 82.

CONTENTS
53 EFFECT PRESETS MANAGEMENT
54 REPLACING EFFECT PRESETS
55 EDITING EQ
56 EDITING EFFECT PRESETS
62 EDITING EFFECT CHAIN
63 EFFECT PARAMETERS
68 ADVANCED ACOUSTIC PROFILING
69
70
4 MANUAL MANUAL 5
CONTENTS
37 WIRELESS FOOTSWITCH PAIRING
39 WIRELESS FOOTSWITCH INSTRUCTIONS
43 WIRELESS FOOTSWITCH INDICATOR LIGHTS
47 REPLACING STRINGS
49 TRUSS ROD ADJUSTMENT
50 MICROPHONE
51 APP
51 APP INSTALLATION
52 SWITCH EFFECT PRESETS IN THE APP
6 MANUAL MANUAL 7
CONTENTS
71 MIXER
73 VOCAL SETTINGS
75 AUDIO SETTINGS
76 SYSTEM SETTINGS
78 LOOPER AND DRUM MACHINE IN APP
79 DRUM MACHINE IN APP
80 LOOPER IN APP
82 IMPORTANT NOTES
84 WARRANTY
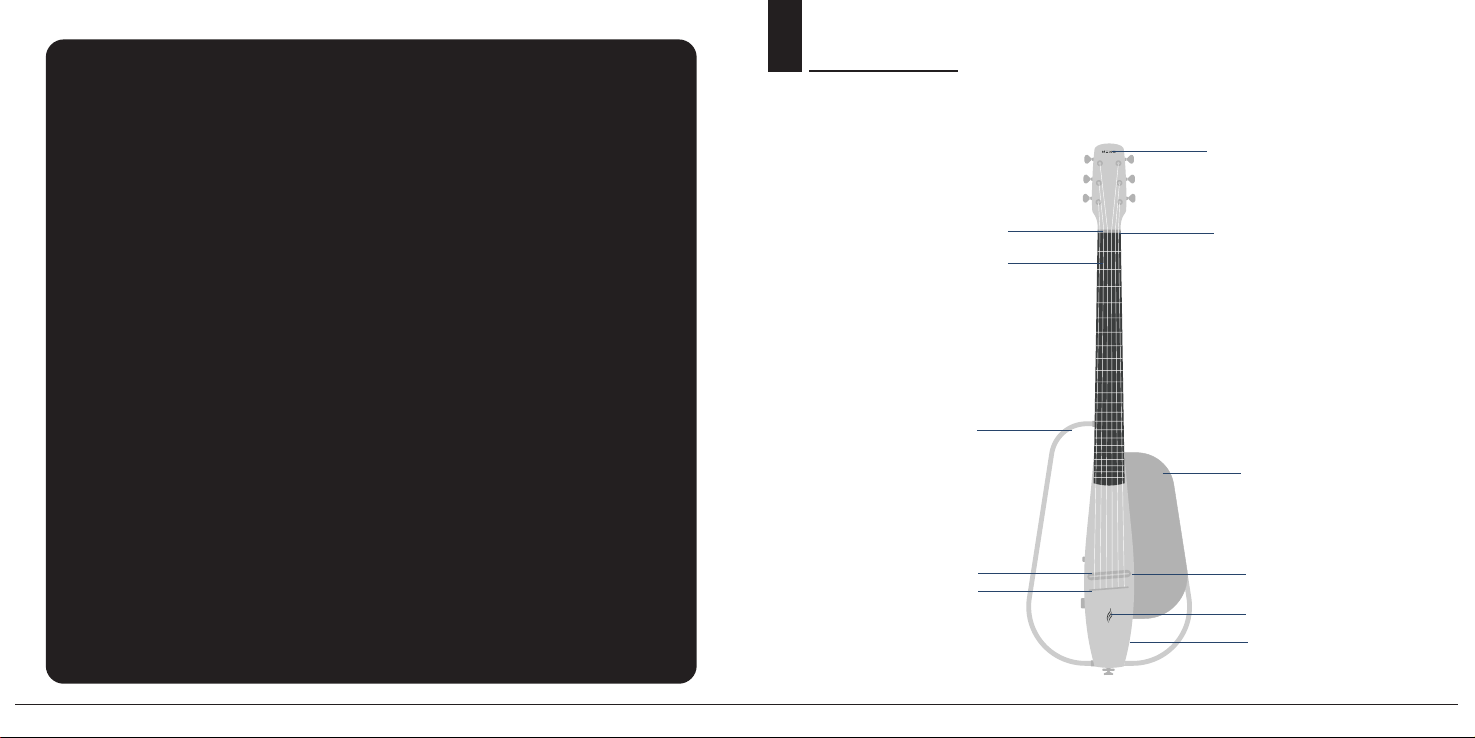
Nut
OVERVIEW

8 MANUAL
NEXG 2 Smart Audio Guitar
Size 38-inch Detachable Body
SPECIFICATIONS
MANUAL 9

10 MANUAL MANUAL 11
23.7 Inches
Round-End Nickel Silver
Carbon Fiber Composite
Carbon Fiber Composite
Carbon Fiber Composite
Enya 1:21 Steel Tuning Peg
Nut Carbon Fiber & Zero Fret Design
Nubone
D’Addario® YP-XS
Satin
16.8V/2600mAh
30W
V5.1
2.0 inch color touch screen display
Enya AR technology speaker,
rated power 50W, peak power 80W
SNR >85dB
Enya ES3 Smart Audio
6.4 lbs
12 MANUAL MANUAL 13
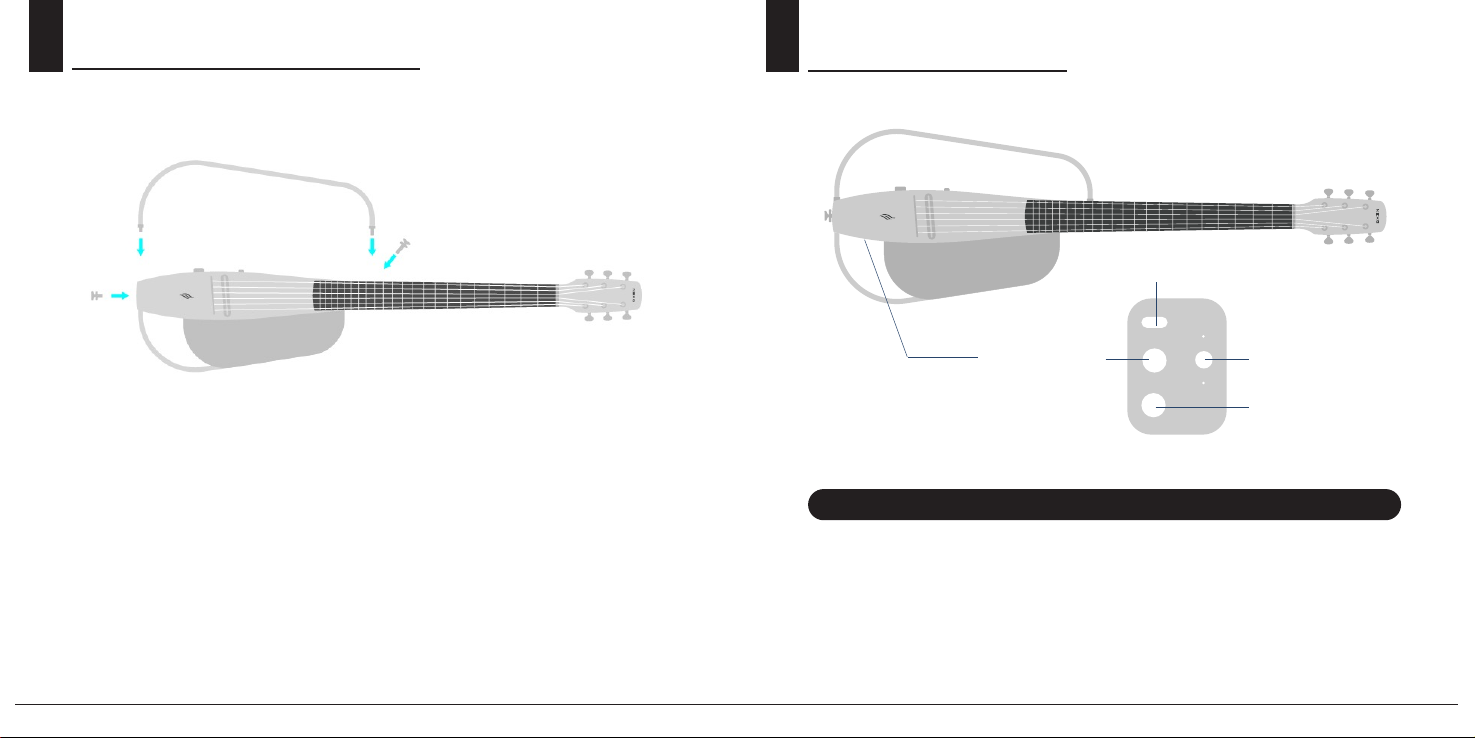
ASSEMBLY INSTRUCTIONS
-
ing it into the grooves near the headstock and bridge.
2. Secure the body frame with the provided screws, using the lon-
ger screw for the headstock and the shorter screw for the bridge.
to unlock.
I/O PANEL
A USB Type-C port for charging and data transfer, including OTG*
14 MANUAL MANUAL 15
-
ically muted. To avoid hearing damage, make sure to set an appro-
priate volume level before use.
Connect to external speakers, amps, mixers, or audio interfaces
using a 6.35mm TS cable. The built-in speaker system will be auto-
signal transmission.
6.5mm input for external microphones and instruments. Imped-
instruments.
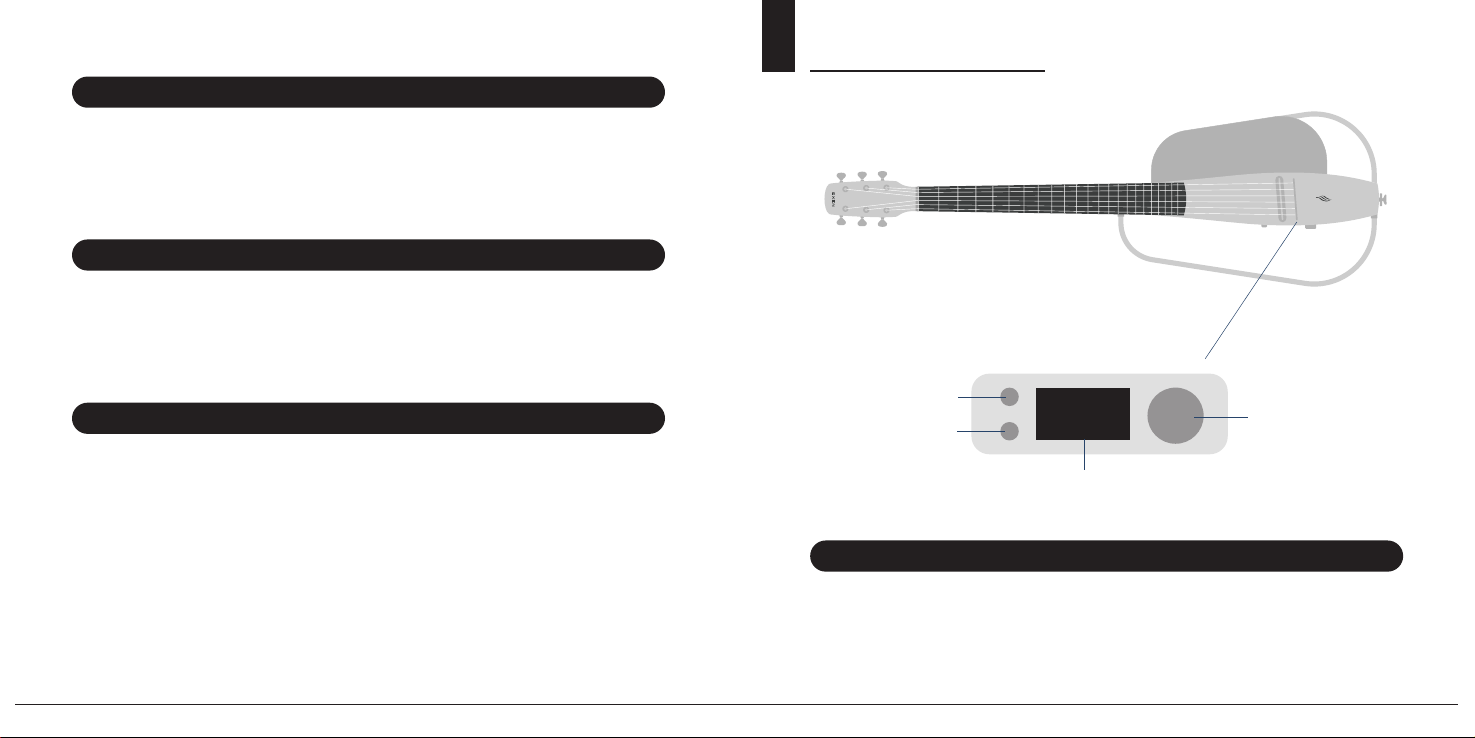
CONTROL PANEL
Main Knob
Press for Tuner Mode. Hold to remove vocals when using NEXG 2
as a Bluetooth speaker.

16 MANUAL MANUAL 17
Main Knob
and connect smartphones for audio playback.
Use this knob to adjust values by turning it clockwise or counter-
clockwise.
• Turn to change the master volume.
• Press the knob to switch between preset banks.
•
A color touch screen for easy access and control.
NOTE: If the NEXG 2 system crashes, hold down the main knob
to perform a forced shutdown control.
It is recommended to use
the provided power adapter or a
PD charger to charge your NEXG 2.
Using other chargers may cause a
charging issue or product damage.
CHARGING
18 MANUAL MANUAL 19
1. Connect the provided power adapter to the NEXG 2's charging
port. Or place the NEXG 2 on the charging stand, and connect
the adapter to stand’s charging port.
2. Plug the power adapter into a wall outlet.
process.
4. The power indicator light on the NEXG 2 will illuminate, indi-
solid or the charging process is complete.
6. You can now power on your NEXG 2 and enjoy uninterrupted
performance.
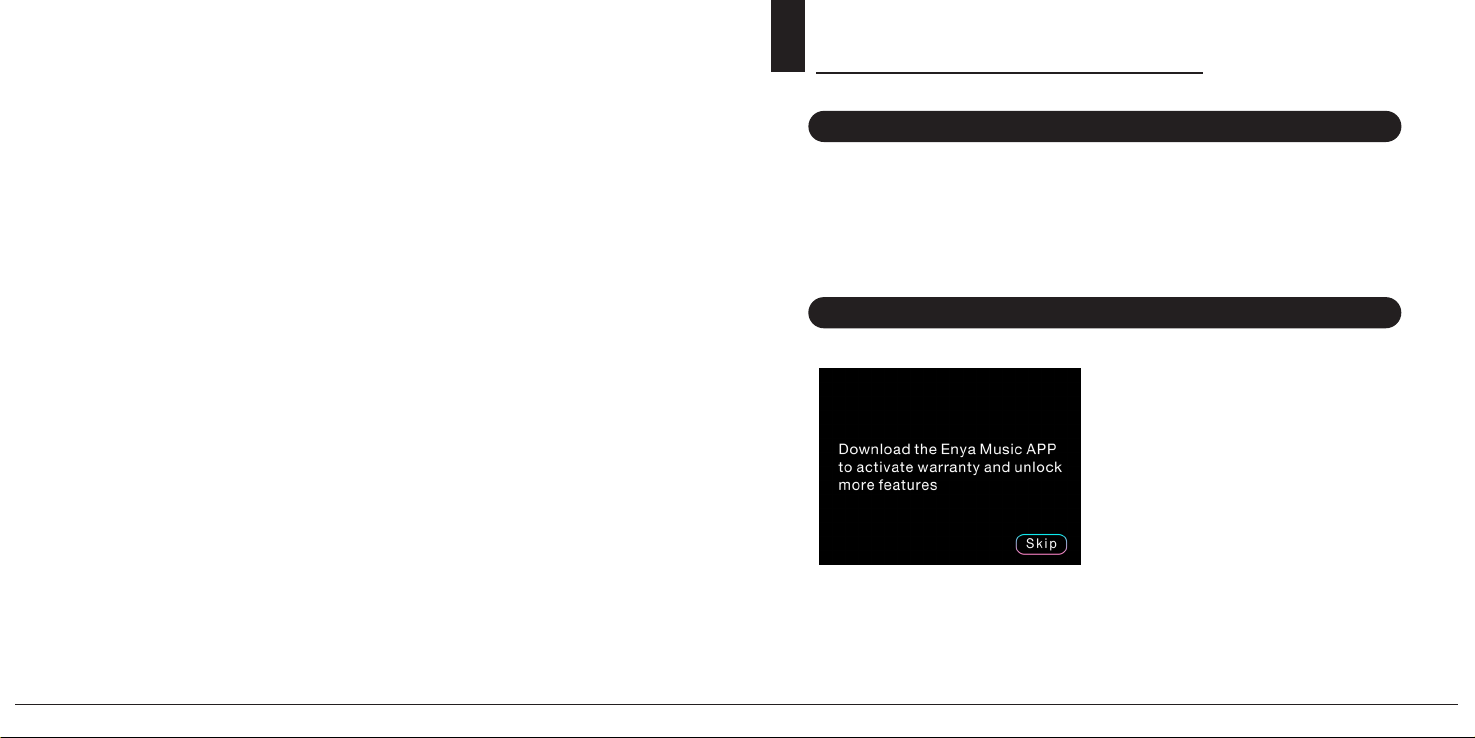
LANGUAGE AND ACTIVATION
-
load Enya Music App and connect
-
-
the main menu.
Select your preferred language on the NEXG 2 when prompted
-
ports both Chinese and English.
in APP.

20 MANUAL MANUAL 21
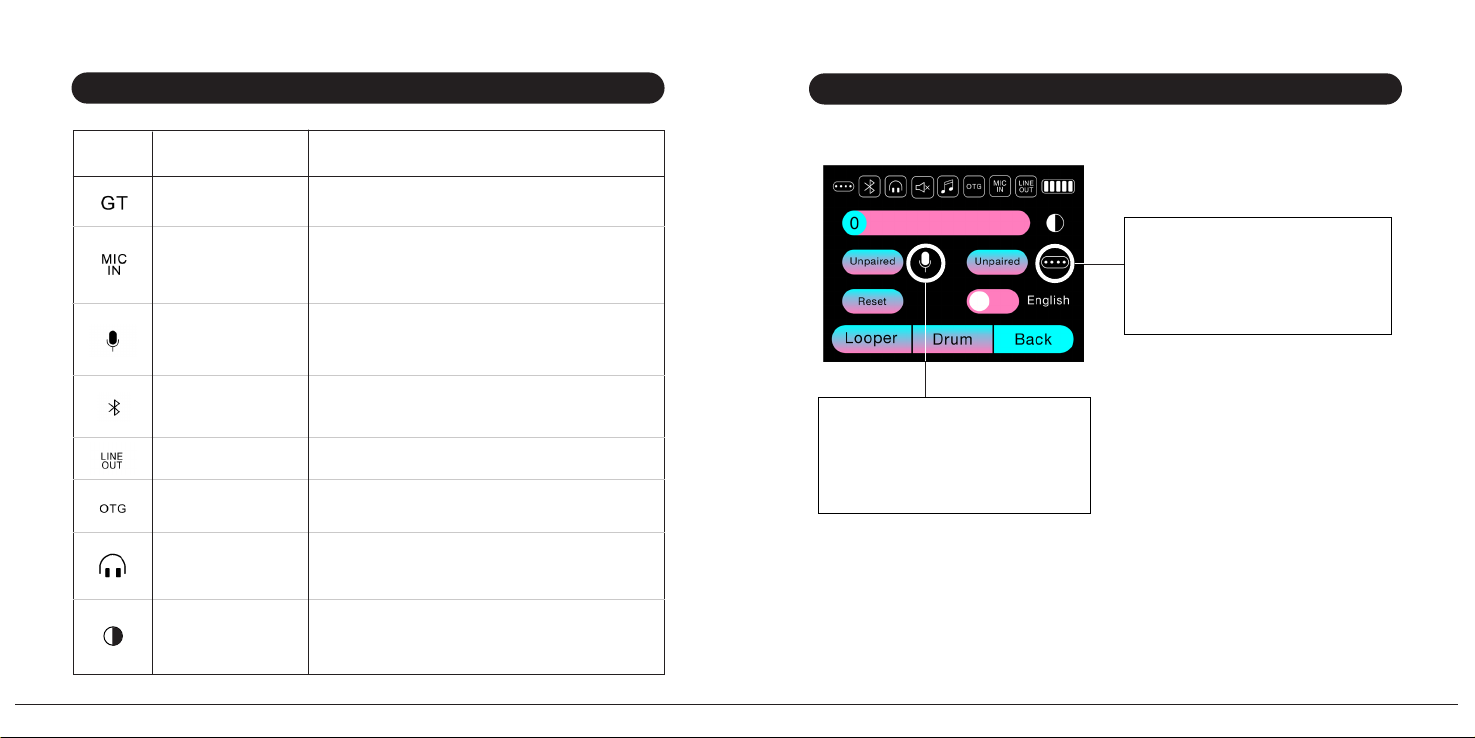
MAIN MENU
Displays device status
External footswitch pairing or paired
Wireless audio pairing or paired.
Headphone connected.
OTG device connected.
Mic In jack connected.
Line Out jack connected.
Music mode on
(Mutes guitar pickup signal.)
Vocal removal mode on
(Removes vocal signal from audio played through
wireless audio.)
(If a non-complementary adapter is used to
charge NEXG 2, the system may mistake it for an
OTG device and display the corresponding icon
on the status bar.)
22 MANUAL MANUAL 23
Name
Adjust the output level of the guitar.
Adjust the output level of output jack.
Guitar Output
Line Out
Mic In
OTG Out
Phones Out
Display
Brightness
Wireless Mic
Wireless Audio
Adjust the input level of line-in micro-
phones.
Adjust the output level of USB OTG.
Adjust the output level of headphones
jack.
Adjust the brightness of display.
Adjust the input level of wireless
microphones.
Adjust the input level of wireless
audio.
Wireless Microphone status
is indicated as "paired" when
it successfully connects.
Wireless Footswitch status
is indicated as "paired" when
it successfully connects.

24 MANUAL MANUAL 25
TUNER
To tune your smart audio guitar, play a string and turn the tuning peg
contact support if needed.
your guitar is fully tuned. Refer to the manual or contact support
for help if needed.
6th string: Low E;
5th string: A;
4th string: D;
3rd string: G;
2nd string: B;
1st string: High E.

26 MANUAL MANUAL 27
your guitar is fully tuned. Refer to the manual or contact support
for help if needed.
There are three alerts of Tuner available on your NEXG 2 guitar,
which can be selected directly on the touch screen or via the Enya
Music app.
Mute
When the pitch is in tune, there
When the pitch is in tune, there will
Provides vocal guidance throughout the tuning
process. It only supports standard tuning.

28 MANUAL MANUAL 29
EFFECTS
patches in each bank.
simply press the main knob
,
and select the desired patch
-
face.
same as in the main menu.
If you don't want to save the
patch, press "Cancel" to re-
turn to the main menu without
making changes to the bank.
30 MANUAL MANUAL 31
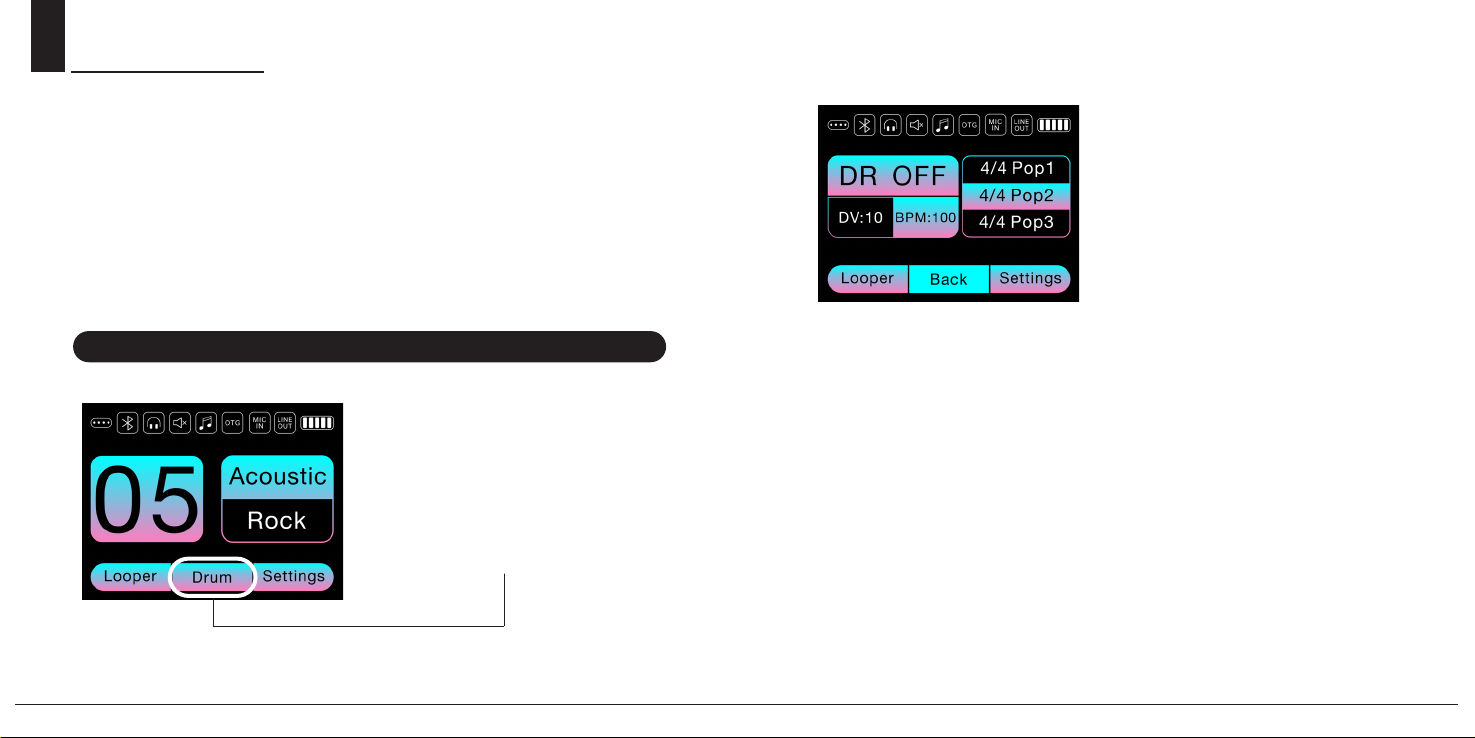
Drum Machine
The NEXG 2 guitar's Drum Machine uses real drum kit samples to re-
produce the beats of a live drummer. With a tempo range of 40BPM
-
that the Drum Machine tempo cannot be changed when Looper is
To access the Drum Machine
interface, navigate to the
Main Menu, press the "Drum"
Volume
-
-

32 MANUAL MANUAL 33
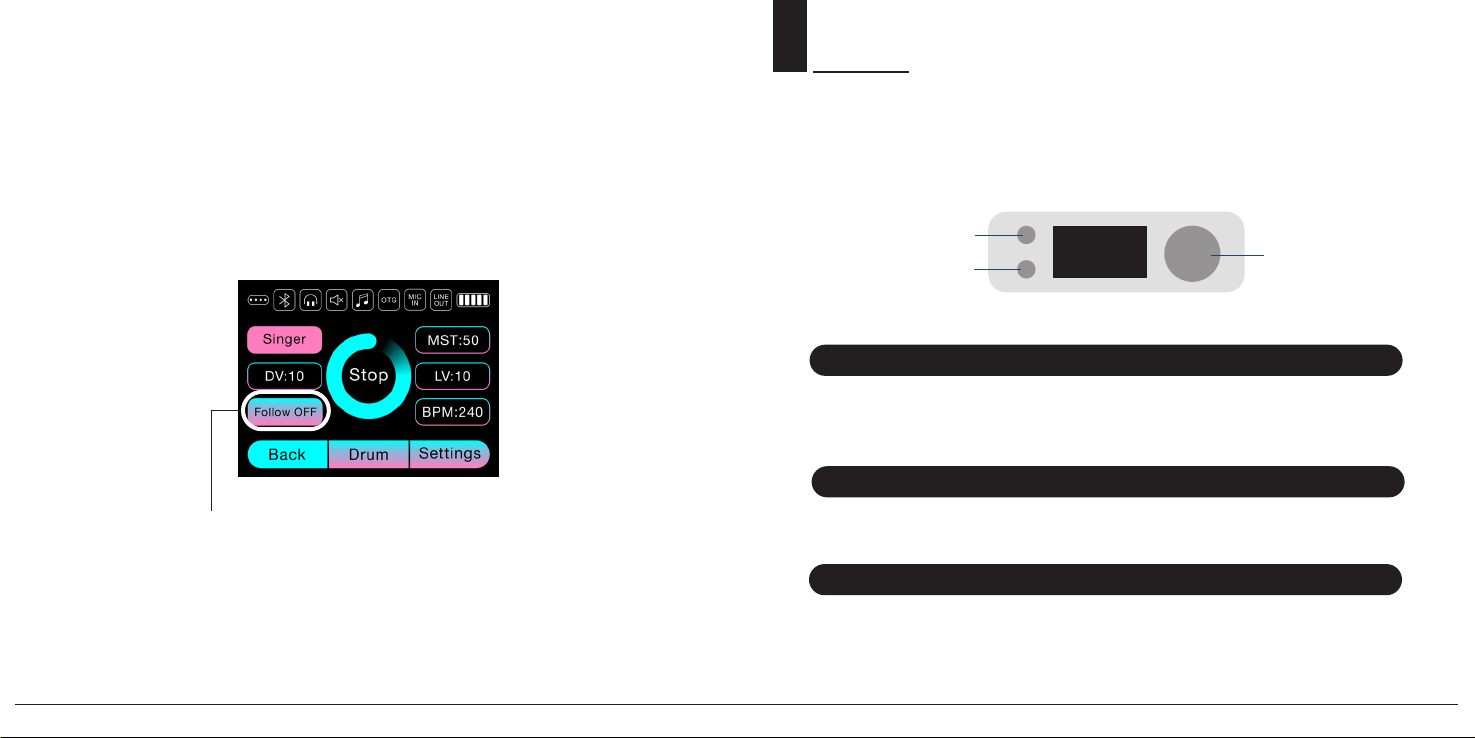
use.
To exit the Drum Machine interface and return to the Main
Menu, press "Return". To enter the Looper interface, press
When the FOLLOW mode is on in the Drum Machine, there will
be one measure of metronome click sound before the Drum Ma-
chine kicks in when you start recording. Once you stop recording
playing along with the loop.
34 MANUAL MANUAL 35
The number of measures played will be determined by the sys-
-
cording before the current measure ends, the system will cut the
-
maining part of the current measure.
while you're recording, and it will stop when you stop recording.
Looper
Main Knob
Main Knob
Press to record, stop recording, dub, or stop dubbing. Hold to undo
or redo.
Press to stop or play, hold to clear.
Turn to adjust the value of the selected parameter, press to switch
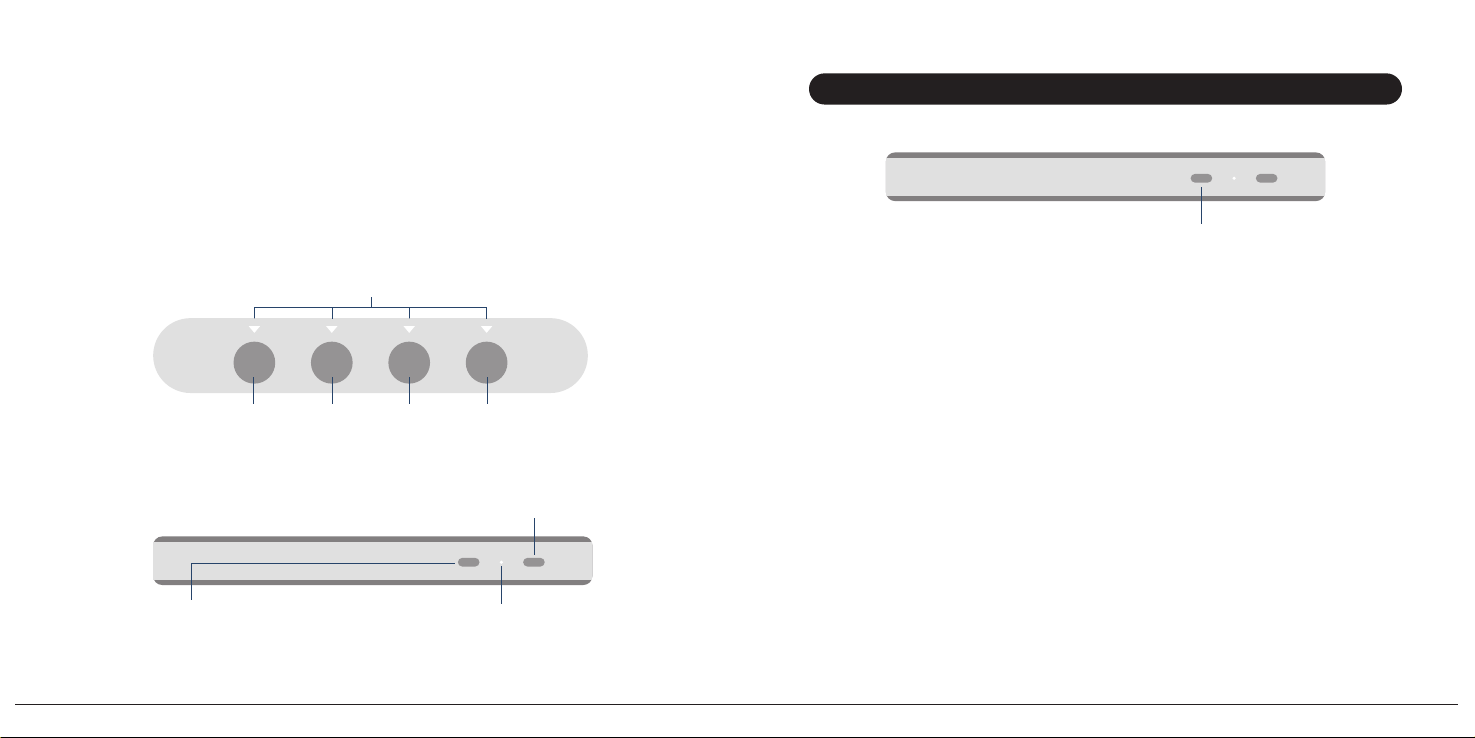
36 MANUAL MANUAL 37
feature can be accessed through wireless Footswitch.
FS4FS1 FS2 FS3
While we pair the devices before shipping, in some cases, you may
devices:
1. Power on the NEXG 2 and the Wireless Footswitch, ensuring
they are within 1m of each other.
During this
process, make sure the NEXG 2 is not connected to another Wire-
less Footswitch.
interface and pressing "FS Pairing." The pairing process will com-

38 MANUAL MANUAL 39
3.If the pairing process is successful, the indicators of the Wire-
less Footswitch will switch from the breathing state to the Presets
Mode (only one indicator will be on).
the pairing process.
-
tween modes:
Press FS1 + FS2 to .
Press FS2 + FS3 to .
when it is fully charged.
The Power Switch side should face the user when using the
Footswitch.
FS4FS1 FS2 FS3
Table of contents
Other ENYA MUSIC Musical Instrument manuals


