7. We now have to remove the bracket and pulley from the motor to get the
motor completely out of the assembly.
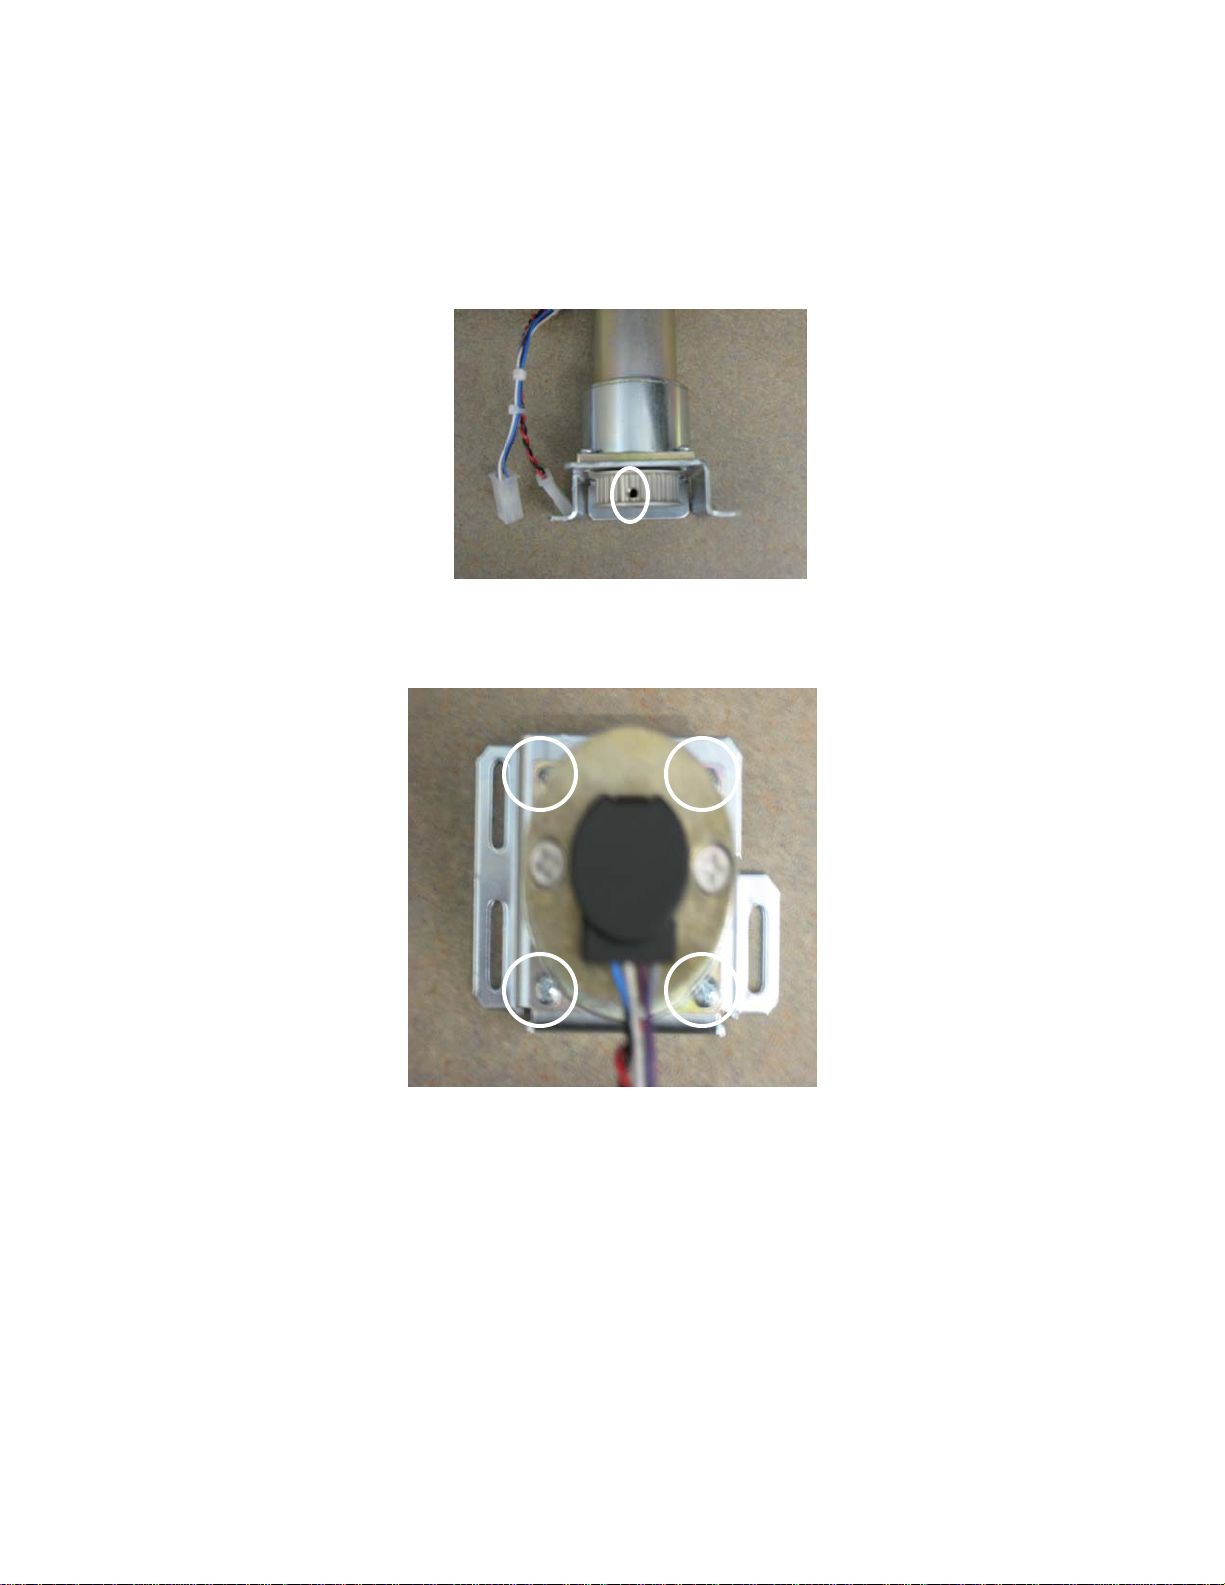
8. To remove the pulley you will need to loosen the set screw with an 3/32
Hex wrench. See picture 4 below to see where the set screw is located.
Picture 4
9. Now we’re ready to remove the bracket. To remove the bracket, remove
the four Phillip screws. The bracked Look at the arrows on Pic#5 and see
the location of the screws
Picture 5
10. Install the motor on the bracket and tighten the 4 Phillips head screws.
11. On the motor shaft there is a flat spot that has been machined in to the
shaft. This flat spot is intended for the set screw. The pulleys set screw
needs to be positioned over the flat spot on the shaft. When the set screw
is tightened, the flat spot keeps the pulley from spinning on the shaft.
Tighten the set screw.
12. Position the new motor assembly in the machine. Remember to slip the
belt around the pulley. Make sure the belt is squarely on the pulley.