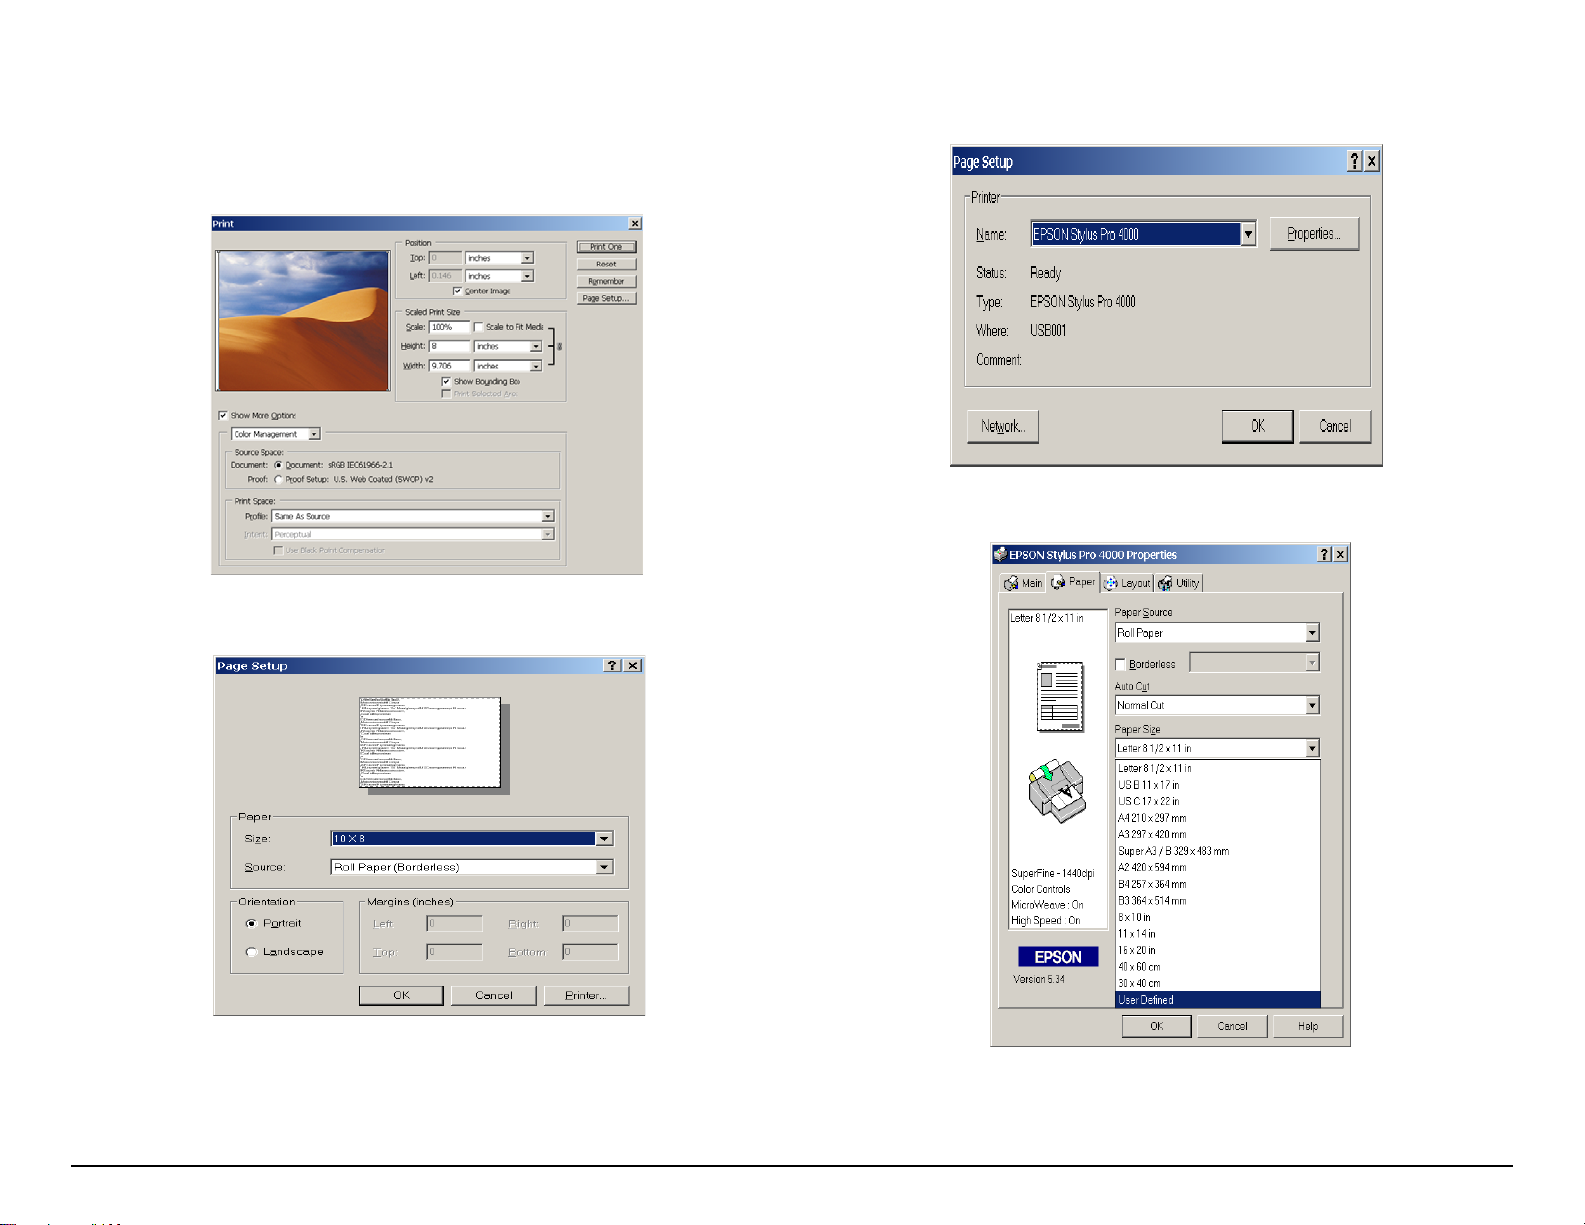
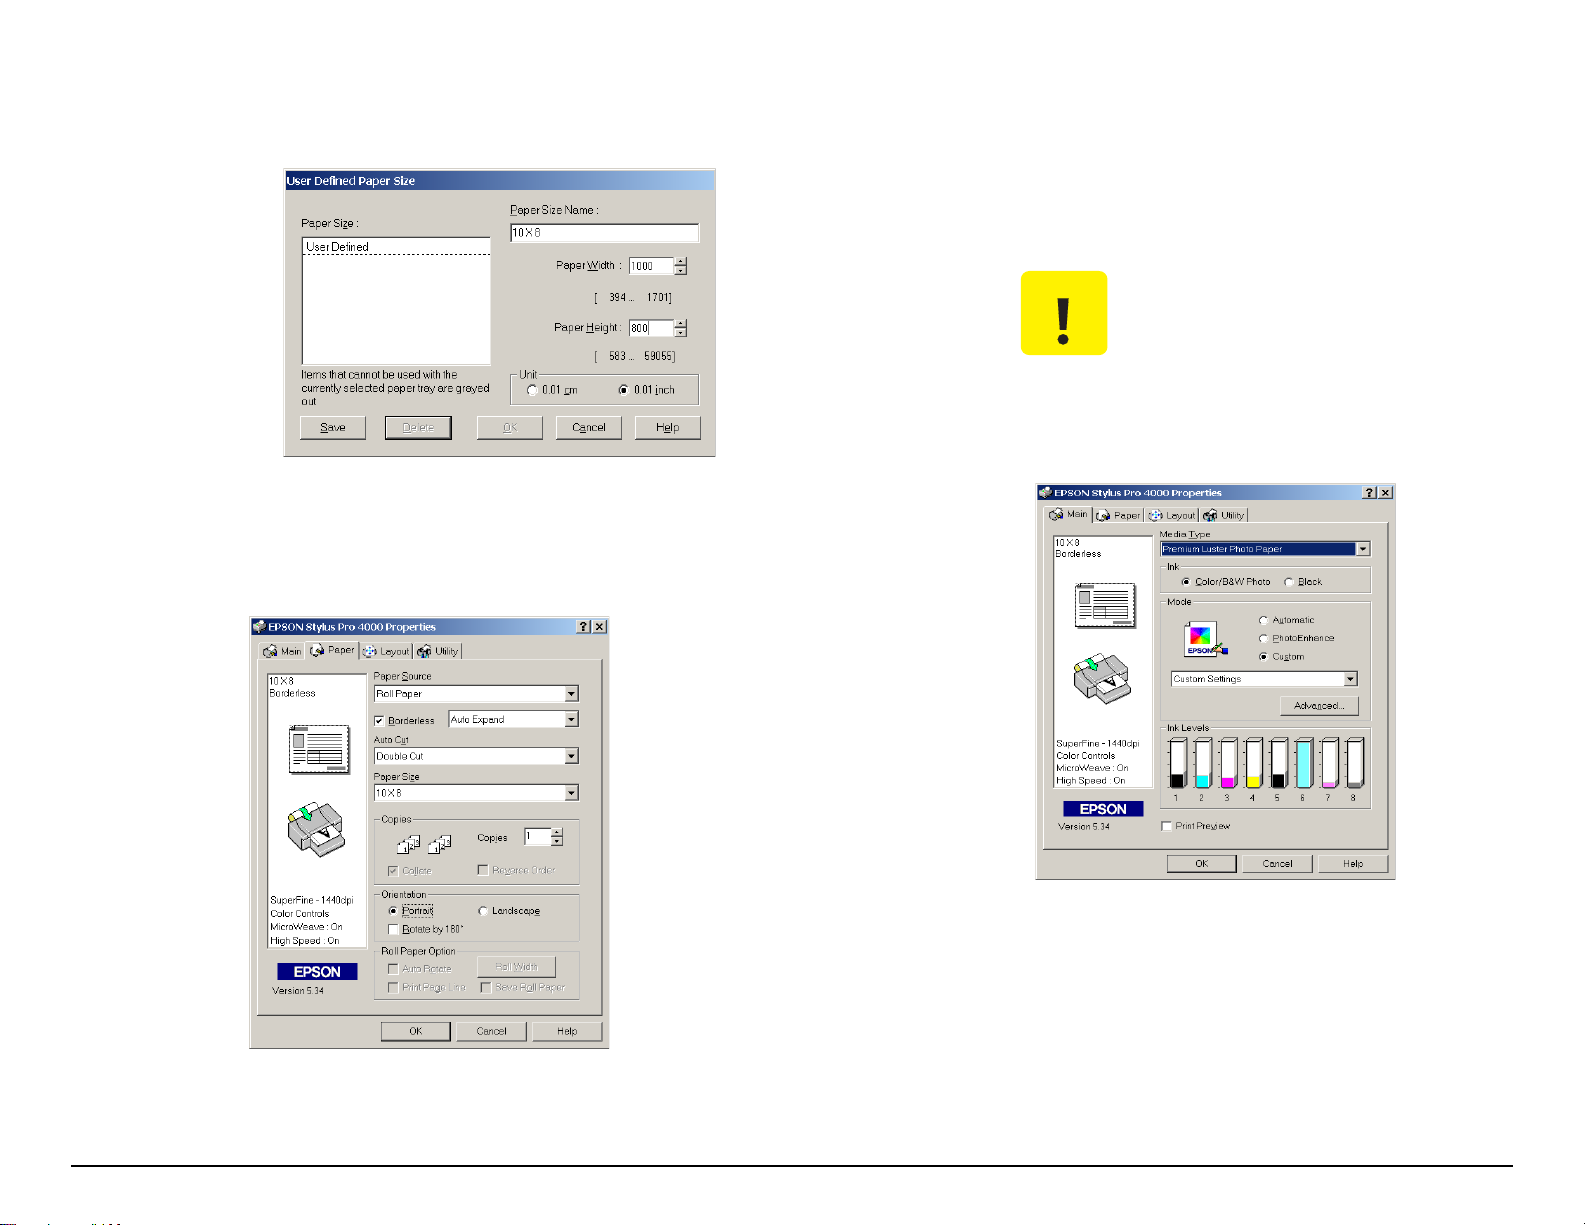
Epson 4000 - Stylus Pro Color Inkjet Printer Dimensions
Other Epson Software manuals

Epson
Epson EasyMP Network Projection User manual

Epson
Epson S01-00 User manual

Epson
Epson 836XL - Expression - Flatbed Scanner User manual

Epson
Epson SED 1520 Series User manual

Epson
Epson EMP 7800 User manual

Epson
Epson Software Film Factory User manual

Epson
Epson C300011B - Stylus Pro 5500 Color Inkjet... User manual

Epson
Epson Progression NX Dimensions

Epson
Epson BrightLink 455Wi User manual

Epson
Epson H6000IIP - TM Two-color Thermal Line User manual

Epson
Epson Software Film Factory v3.0 User manual

Epson
Epson Scanner A3 User manual

Epson
Epson M00002112 Manual

Epson
Epson Stylus Pro 10000 Series User manual

Epson
Epson BrightLink 455Wi User manual

Epson
Epson FX-1180 - Impact Printer User manual

Epson
Epson BrightLink 455Wi Dimensions

Epson
Epson WorkForce Pro WP-4015 DN User manual

Epson
Epson PhotoPC 700 User manual

Epson
Epson PowerLite 955W User manual