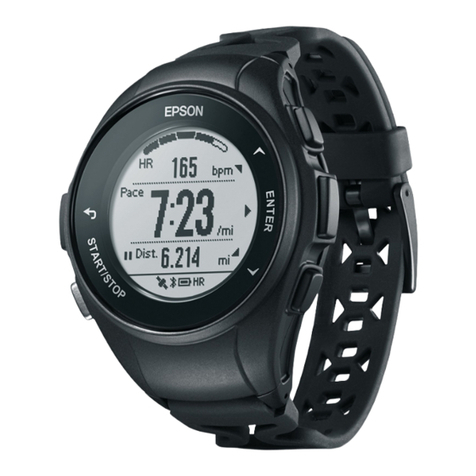
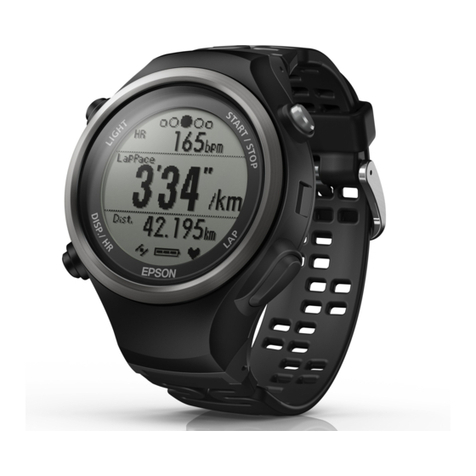
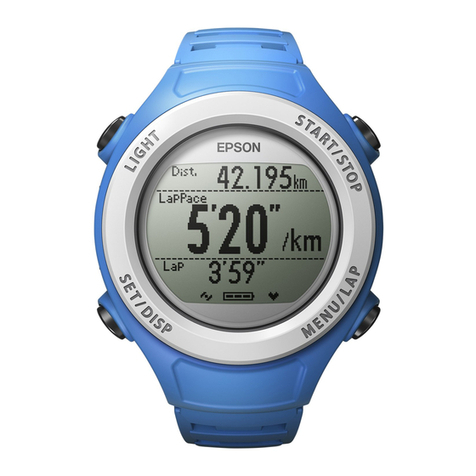
Epson SF-180 User manual

UserManual
GPSSportsMonitor
8
8

Introduction
Thank you very much for purchasing this GPS Sports Monitor "RUNSENSE".
To use the device correctly, make sure you read the User Manual along with the supplied Quick Start Guide.
Keep the supplied Quick Start Guide handy to help you resolve any problems.
By using a built-in GPS sensor and stride sensor, this device can measure runningdistance, pace, elapsed time, altitude,
and calories burnt. You can also upload recorded data to a dedicated Web site allowing you to look back over previous
workouts. You can plan more effectively for a more enjoyable running experience.
Descriptions in the User Manual
c
Important Indicates things you must or must not do. Ignoring these instructions or
mishandling this device couldcausemalfunctionor operational problems
to the device.
Note Indicates additional explanations and related information.
Menu Name Indicates menu items displayed on the screen of the device.
A/B/C/DIndicates the device buttons.
UIndicates related pages. Click the link in blue text to display the related
page.
Trademarks
EPSON and EXCEED YOUR VISION are registered trademarks of the Seiko Epson Corporation.
Microsoft and Windows are registered trademarks of the Microsoft Corporation in the United States of America and
other countries.
The Bluetooth
®
word mark and logos are the registered trademarks owned by Bluetooth SIG, Inc. and any use of such
marks by the Seiko Epson Corporation is under license.
Other product names are the trademarks or registered trademarks of their respective companies.
Caution:
❏Unapproved copying of part or all of this guide is strictly forbidden.
❏The content of this guide is subject to change without prior notice.
❏Although every effort has been made to ensure the accuracy of this guide, contact us if you have any questions or
notice any errors in descriptions in the content of this guide.
❏Despite the preceding clause, we cannot accept any responsibility for mishandling due to errors in this guide.
❏We cannot accept any responsibility for malfunctions and so on that occur due to ignoring the content of this
guide, the device being handled inappropriately, repairs or modifications performed by a third party that is not
our company or appointed by our company.
User Manual
Introduction
2

Features
Heart rate measurement is only possible with the built-in sensor. This allows you to easily perform heart rate training
for running or jogging.
Chronograph function
Allows you to measure running data such as distance and time.
You can measure split and lap times, as well as using the GPS signal to measure distance
and pace.
U“Measuring Time, Distance, and Speed (Chronograph Function)” on page 38
Split Time: Elapsed time from the start
Lap time: Time taken for each lap
You can use the history screen to check recorded measurement data.
U“Checking Measurement Data” on page 63
Interval function
Allows you to perform interval training.
Interval training:
Training method in which you repeat sets of light and hard exercise to increase your
athletic ability. An exercise menu is created using combinations of hard (sprint) and
light (recovery) exercise. An alarm sounds when it is time to change between sprinting
and recoverying.
U“Setting a Time and Distance for Hard and Light Workouts(Interval Function)” on
page 43
Goal function (timed race)
Allows you to set a time as your goal and measure the time taken until that goal is
reached.
You can exercise while checking the elapsed time. You can also calculate the estimated
distance until the goal is reached.
U“Measure until the time or distance set in advance is reached (Goal function)” on
page 51
You can use the history screen to check recorded measurement data.
U“Checking Measurement Data” on page 63
User Manual
Introduction
3

Goal function (distance race)
Allows you to set a distance as your goal and measure the time taken until that goal is
reached.
You can exercise while checking the distance. You can also calculate the estimatedtime
until the goal is reached.
U“Measure until the time or distance set in advance is reached (Goal function)” on
page 51
You can use the history screen to check recorded measurement data.
U“Checking Measurement Data” on page 63
Measure set.
Allows you to change the measurement settings.
❏Automatically records laps when a time or distance set in advance has been
reached (AT Lap function)
U“Recording Laps Automatically (AT Lap Function)” on page 56
❏Automatically stops measuring when you stop running, and resumes when you
continue running (AT Pause function)
U“Automatically Start/Stop Measuring (AT Pause Function)” on page 58
❏Sets and measures the target time for one kilometer (Target Pace function)
U“Setting a Pace and Measuring (Target Pace Function)” on page 60
❏Measuring Heart Rate (HR function)
U“Measuring Heart Rate” on page 67
❏You can change the items and layout of the measurement screen display (Screen
settings function)
U“Screen” on page 104
❏Tap to display a set function (Tap function)
U“Tap” on page 20
User Manual
Introduction
4

Settings
Allows you to change the settings for the device.
❏Communicates with external devices (Communication function)
U“Comm. Settings” on page 101
❏Inverts the screen's display (Invert function)
U“Sys. Settings” on page 102
❏Adjusts the screen's contrast (Adjust contrast function)
U“Sys. Settings” on page 102
❏Turns on the light automatically when the screen changes (Auto Light function)
U“Sys. Settings” on page 102
❏Sets an alarm (Alarm function)
U“Sys. Settings” on page 102
❏Turns off operation tones (Operation Tones function)
U“Sys. Settings” on page 102
❏Resets configuration information in the device's memory (Initialize function)
U“Sys. Settings” on page 102
Other features
❏Supports the Quasi-Zenith Satellite System (QZSS).
U“Supports the Quasi-Zenith Satellite System” on page 33
❏You can measure pitch and stride using the built-in stride sensor.
U“Educating Your Stride Sensor” on page 34
❏You can skip GPS positioning if it is taking too long.
U“Skipping GPS positioning” on page 31
❏You can take measurements without performing GPS positioning.
U“Indoor mode” on page 32
❏You can manage recorded data using the dedicated Web application "RUNSENSE
View".
U“Data Management Using the Web Application (RUNSENSE View)” on
page 68
User Manual
Introduction
5

Contents
Introduction
Features.................................3
Using this Device Safely
SymbolsinthisManual......................8
NotesonUsage............................9
AbouttheDeviceandAccessories............9
AbouttheCradle.......................10
NotesonStorage..........................10
NotesonElectromagneticWaves..............10
Preparing and Basic Operations
CheckingtheItemsProvided.................13
BasicOperations..........................14
Changingscreens.......................14
Functionofeachbutton..................16
Tap.................................20
Alarm(Tones/Vib.)......................20
Charging...............................22
BeforeUse............................22
Charging.............................23
InitialSettings............................26
AbouttheBattery.......................28
Wearingthedevice........................29
SpecifyingaGPS(GPSPositioning)............30
MeasuringFunctionfortheDevice..........30
GPSPositioning........................31
MakingPreciseMeasurements..............33
SupportstheQuasi-ZenithSatelliteSystem.....33
EducatingYourStrideSensor................34
AbouttheStrideSensor...................34
EducatingtheStrideSensor................34
Measurableitems.........................35
Measure
Measuring Time, Distance, and Speed
(ChronographFunction)....................38
Whatisthechronographfunction?..........38
Measuring............................39
ScreenDisplay.........................41
Setting a Time and Distance for Hard and Light
Workouts(IntervalFunction).................43
WhatistheIntervalFunction?..............43
Setting Interval Conditions and Measuring. . . . . 44
Loading Interval Conditions that have Already
beenSet..............................48
ScreenDisplay.........................50
Measure until the time or distance set in advance
isreached(Goalfunction)...................51
Whatisthegoalfunction?.................51
Measuring by Setting the Time or Distance. . . . 52
ScreenDisplay.........................55
Recording Laps Automatically (AT Lap
Function)...............................56
Automatically Start/Stop Measuring (AT Pause
Function)...............................58
Setting a Pace and Measuring (Target Pace
Function)...............................60
Checking Measurement Data (History
Function)
CheckingMeasurementData.................63
Measurement Data that can be Checked in
History...............................63
Deleteunnecessarymeasurementdata........64
Measuring Heart Rate
MeasuringHeartRate......................67
Displaying the Measured Heart Rate Screen. . . . 67
Data Management Using the Web
Application (RUNSENSE View)
What is the Web Application (RUNSENSE
View)?.................................69
InstallingRunConnect.....................72
Creating an Account (When Using for the First
Time)..................................73
UploadingMeasurementData................75
CheckingUploadedMeasurementData.........78
Measurement Settings in the PC
Application (Run Connect)
What is the PC Application (Run Connect). . . . . . 82
Starting Run Connect and Displaying the Settings
Screen.................................84
SettingtheATLapFunction.................86
SettingATLap.........................86
User Manual
Contents
6
Measuring............................87
SettingtheTargetPaceFunction..............88
SettingtheTargetPace...................88
Measuring............................90
SettingtheIntervalFunction.................91
SettingIntervals........................91
Measuring............................92
Settings
MakingSettings..........................94
Measureset..............................96
ChangingtheMeasureset..................96
Measureset.Table.......................98
Settings................................100
ChangingtheSettings................... 100
SettingsTable......................... 101
Screen.................................104
ScreenSettings........................ 104
ScreenPatternTable.................... 105
MeasurementDisplayItemsTable.......... 107
ChangingtheMeasurementScreen.........110
ChangingtheLap...................... 115
SettingExamples.......................117
Maintenance
PerformingMaintenance...................119
PerformingAfterCare...................119
Aboutthestrap........................119
ReplacingtheBattery......................120
About the Device's Built-in Rechargeable
Battery.............................. 120
UpdatingtheFirmware.................... 121
CheckingtheFirmwareVersion............121
UpdatingtheFirmware.................. 121
Troubleshooting
Caution:............................... 123
ProblemSolving......................... 124
ResettingtheSystem...................... 127
ContactingusAboutthisProduct............128
AfterService............................129
Appendix
UnderstandingtheIcons................... 131
ProductSpecifications.....................133
DeviceSpecifications....................133
Cradlespecifications.................... 134
ACadapterspecifications(optional).........134
Glossary............................... 135
Index
User Manual
Contents
7

Using this Device Safely
To use this device safely, make sure you read the user manuals before use (the supplied Quick Start Guide and this User
Manual).
If you do not follow the content of the user manuals, a malfunction or accident could occur.
❏Keep the user manuals (supplied Quick Start Guide and this User Manual) handy to help you resolve any
problems.
❏This is not a medical device. Use for exercising only.
Symbols in this Manual
This User Manual uses the following symbols to prevent injury to the user or to others, or damage to property when
using this device, as well as preventing dangerous usage. Make sure you understand these symbols before reading the
guide.
!
Warning
Ignoring these instructions and mishandling this device could cause serious injury or death.
!
Caution
Ignoring these instructions and mishandling this device could cause injury or damage to property.
This symbol indicates operations (instructions and actions) you must perform.
This symbol indicates forbidden actions.
User Manual
Using this Device Safely
8

Notes on Usage
About the Device and Accessories
Warning
Exercise according to your own physical condition. It is dangerous to exercise suddenly or
excessively. If you feel nauseous or if your physical condition alters while exercising, stop
exercising and contact a doctor.
Do not keep your eyes on the device while exercising; otherwise you could fall or cause a traffic
accident. Pay close attention to your surroundings while using the device.
Do not look directly into the sensor section on the back of the device as it emits LED light.
Do not use while scuba diving.
This device is made using precision parts and electronic components. Do not use or store in the
following locations; otherwise an electric shock, fire, problem, or malfunction could occur.
❏Locations subject to large changes in temperature and humidity
❏Near volatile substances
❏Sooty or dusty places
❏Near a fire
❏Locations close to powerful magnetic devices (near speakers and so on)
Do not disassemble or perform repairs yourself; otherwise an electric shock or an accident could
occur.
Do not leave this device in reach of children.
Caution
If you suffer from any allergies or rashes when wearing the device, stop using it immediately and
contact a medical specialist such as a dermatologist.
The device is water resistant at 5 barometric pressures. Although you can use the device for
swimming and so on, do not perform button operations in water or when it is wet. This may effect
the quality of the waterproofing.
Do not directly apply high pressure water from a faucet. Water pressure from a faucet is high and
could affect the quality of the waterproofing.
Do not use in the bath or in a sauna. Steam and materials in soap or hot springs could affect the
quality of the waterproofing or cause rust.
User Manual
Using this Device Safely
9

About the Cradle
Warning
Do not use a damaged cradle; otherwise a problem or fire could occur. If it is damaged, contact a
repair center.
Do not use them if you notice any abnormalities such as smoke, strange odors, or noises;
otherwise a fire could occur.
Ifany abnormalitiesoccur,disconnect thecable from the cradle immediately,and contact arepair
center.
Do not use if any foreign substances or liquids such as water get inside the device; otherwise an
electric shock or fire could occur. Disconnect the cable from the cradle immediately, and contact
a repair center.
Do not use the cable for the cradle if any foreign substances such as dust are stuck to the
connector; otherwise a fire could occur.
Do not use the cradle to charge any other devices. Only use the cradle provided to charge the
device; otherwise a problem, electric shock, or fire could occur.
Notes on Storage
Caution
Do not place in a location subject to magnetic fields or electromagnetic waves, such as on top of a
television. Otherwise, data may be corrupted or lost.
Do not leave the device unattended in locations where it could come into contact with chemicals,
or in locations where chemical substances are emitted. If gasoline, nail varnish, or any spray-on
liquid such as cosmetics, as well as cleaning liquid, toilet detergent, adhesives, and so on, comes
into contact with the device or the strap, they could cause discoloring or damage.
Notes on Electromagnetic Waves
This device is equipped with Bluetooth
®
Smart technology. When operating supported smartphones, this function
wirelessly sends and receives heart rate measurement data to the device.
This device has been classified as a low electronic data communication system based on Radio Law. Therefore, this
device does not require a radio station license. The following acts may be punishable by law.
❏Disassembling or remodeling the device
❏Removing the verification or certification number for the device
User Manual
Using this Device Safely
10

VCCI Class B Information Technology Device
This device is a class B information technology device. This device is designed for home
use, but interference could occur when using in close proximity to radios or television
antennas.
Frequency
This device uses the frequency bands 2.402 to 2.480 GHz. Other wireless devices may
use the same frequency. Note the following points to avoid wireless interference with
other wireless devices.
Precautions when performing wireless communication
This device operates on the 2.4 GHz band.
This device operates in the same frequency bandwidth as industrial, scientific, and medical devices such as microwave
ovens and mobile object identification (RF-ID) systems (licensed premises radio stations, amateur, and unlicensed
specified low-power radio stations (hereafter "other radio stations")) used in factory production lines.
1. Before using this device, make sure there are no "other radio stations" being used in the vicinity.
2. If this device causes RF interference between the device and "other radio stations", promptly move to a different
location, stop using the device, and contact your local dealer to ask for advice on preventing interference (for example
setting up partitions).
3. In addition, when harmful radio wave interference occurs between the device and "other radio stations", and refer to
"Contacting us about this product" to contact our information center.
U“Contacting us About this Product” on page 128
Warning
If you notice any abnormalities on your skin and so on, stop using the device immediately and
contact a specialist.
In areas in which usage is restricted, such as on airplanes and in hospitals, follow the rules and
regulations provided (such as in-flight announcements).
Do not use the device if you have a surgically implanted medical device such as a cardiac
pacemaker.
Do not bring the device into an operating room, intensive care unit, and so on, and do not use the
device near medical equipment. Radio waves from the device may interfere with electronic
medical equipment causing the equipment to malfunction and cause an accident.
User Manual
Using this Device Safely
11

Preparing and Basic Operations
You need to make the following preparations before use.
U“Checking the Items Provided” on page 13
U“Basic Operations” on page 14
U“Charging” on page 22
U“Initial Settings” on page 26
U“Wearing the device” on page 29
Once preparations are complete, check the method and important points when performing GPS satellite positioning.
U“Specifying a GPS (GPS Positioning)” on page 30
U“Educating Your Stride Sensor” on page 34
U“Measurable items” on page 35
User Manual
Preparing and Basic Operations
12

Checking the Items Provided
Make sure you check that all of the following items have been supplied with this product. If there is anything missing,
contact your local dealer.
This device
Cradle Quick Start Guide Warranty
Options
You can purchase the following optional extras. Contact your local dealer for more information.
AC Adapter (Model No.: SFAC01)
User Manual
Preparing and Basic Operations
13

Basic Operations
Changing screens
This device is comprised of a Time screen, Measurement screen, Settings screen (Settings menu and Measure set.
menu), and History screen, and you can perform operations with the following buttons.
Operation buttons
: Short press
: Long press (two seconds or more)
User Manual
Preparing and Basic Operations
14

Settings menu
A
B
Time screen
C
A/C
Measurement screen
U“Setting screen
(Settings menu/Measure
set. menu)” on page 18
U“Time screen” on
page 16
U“Measurement screen”
on page 17
D
AA
B
See the following pages for information
on making settings for each screen.
U“Making Settings” on page 94
History screen Measure set. menu
U“History screen” on
page 19
U“Setting screen
(Settings menu/Measure
set. menu)” on page 18
Note:
❏When you leave the device for a while, it enters sleep status and the time display turns off. This is not a malfunction as
the display is restored the next time a button is pressed or you move the device. You can also turn off the sleep function.
U“Sys. Settings” on page 102
❏The time screen is displayed if no operations are made for a specified length of time. The time varies depending on the
screen displayed.
Sys. Settings/User Settings/History Screen: 3 mins.
Measurement Screen (while not measuring): 60 mins.
❏When three minutes have passed without any operations being performed on the Measure set. menu screen, the
measurement screen is displayed.
User Manual
Preparing and Basic Operations
15

Function of each button
The function for each button changes depending on which screen is displayed.
Time screen
Operation buttons
Button Operation Explanation
A
Short press Measures heart rate.*
Long press (two
seconds or more)
Turns the power on or off.
B
Short press Turns the light on or off. The light turns on for approximately 10
seconds.
Long press (two
seconds or more)
Displays the Settings menu.
U“Setting screen (Settings menu/Measure set. menu)” on
page 18
C
Short press Performs GPS positioning, and displays the measurement screen.
U“Measurement screen” on page 17
Long press (two
seconds or more)
Changes to indoor mode (GPS off).
U“Indoor mode” on page 32
D
Short press Displays a record of the measurement history (history screen).
U“History screen” on page 19
Long press (two
seconds or more)
Performs Bluetooth
®
communication. Use this when uploading
measurement data.
* Measures your heart rate when worn on your arm.
U“Wearing the device” on page 29
User Manual
Preparing and Basic Operations
16

Measurement screen
Operation buttons
Button Operation Explanation
A
Short press You can display up to four measurement screens and switch the
screens using this button.
Long press (two
seconds or more)
Displays the time screen.
Not available while measuring.
B
Short press Turns the light on or off. The light turns on for approximately 10
seconds.
Long press (two
seconds or more)
Displays the Measure set. menu.
Not available while measuring.
C
Short press Starts, stops, or resumes measuring.
Long press (two
seconds or more)
Displays the time screen.
Displays the time screen if you use reset* while measuring is stopped.
Not available while measuring.
D
Short press Records laps while measuring.
Long press (two
seconds or more)
Resets* while measuring is stopped.
Not available while resetting measurements.
* When you reset the display, it returns to the status before measuring started allowing you to start the next
measurement. Data that has been measured up to that point is stored in the device's memory.
User Manual
Preparing and Basic Operations
17

Setting screen (Settings menu/Measure set. menu)
Operation buttons
Button Operation Explanation
A
Short press Confirm a selection.
Long press (two
seconds or more)
From the Settings menu, the time screen is displayed.
From the Measure set. menu, the measurement screen is displayed.
B
Short press Turns the light on or off. The light turns on for approximately 10
seconds.
Long press (two
seconds or more)
-
C
Short press Selects the upper item.
Increases the value.
Long press (two
seconds or more)
Selects the upper item.
Speeds through the values.
D
Short press Selects the lower item.
Decreases the value.
Long press (two
seconds or more)
Selects the lower item.
Speeds through the values.
User Manual
Preparing and Basic Operations
18

History screen
Operation buttons
Button Operation Explanation
A
Short press Confirm a selection.
Long press (two
seconds or more)
Displays the time screen.
B
Short press Turns the light on or off. The light turns on for approximately 10
seconds.
Long press (two
seconds or more)
-
C
Short press Selects the upper item.
Long press (two
seconds or more)
Selects the upper item.
D
Short press Selects the lower item.
Long press (two
seconds or more)
Selects the lower item.
User Manual
Preparing and Basic Operations
19

Tap
You can perform one of the following operations by tapping the screen once while measuring.
Function Explanation
Lap Records the lap.
The same operation as pressing Dwhile measuring.
Light Turns on the light. The light turns on for approximately 10 seconds.
The same operation as pressing B.
Screen Chg. Changes between the four measurement screens.
The same operation as pressing A.
OFF (default) Turns off tap operations.
Note:
❏When you want to change functions operated by tapping, set Tap from the Measure set. menu.
U“Measure set.” on page 96
❏The operation may not be recognized if you tap the screen rapidly in succession. Leave a gap of approximately one
second between taps.
❏When bike mode is selected, the tap function may operate automatically depending on the condition of the road surface.
If this occurs, we recommend setting OFF.
Alarm (Tones/Vib.)
This function allows you to sound an alarm when pausing a lap, setting the target pace, and so on.
The following shows the alarm timing. A long alarm sounds when the lap is paused, and a short alarm sounds at other
times.
User Manual
Preparing and Basic Operations
20
Table of contents
Other Epson Watch manuals

Epson
Epson Smart Canvas User manual

Epson
Epson SOLAR Series User manual

Epson
Epson Runsense SF-810 User manual

Epson
Epson SOLAR Series Guide

Epson
Epson YM04A Guide

Epson
Epson YM12A User manual

Epson
Epson YM82A Guide

Epson
Epson SOLAR Series User manual

Epson
Epson Runsense SF-110 User manual

Epson
Epson ProSense 17 User manual

Epson
Epson VR43B User manual

Epson
Epson SOLAR Series Guide

Epson
Epson SF-510 User manual

Epson
Epson ProSense 17 User manual

Epson
Epson Solar VS76A User manual

Epson
Epson ProSense 347 User manual

Epson
Epson YM24A User manual

Epson
Epson SOLAR VS37A User manual

Epson
Epson Solar Series User manual

Epson
Epson VS42A User manual