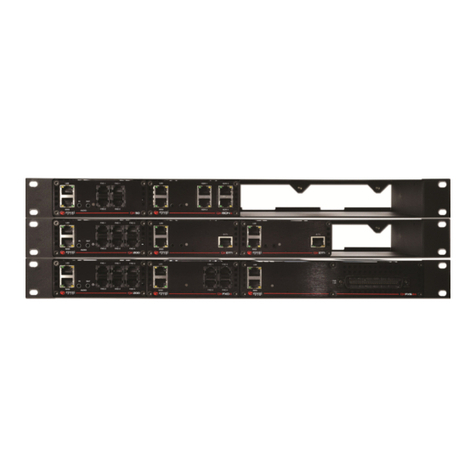
Epygi Quadro16x User manual

Epygi Technologies
Increasing Quadro16x PSTN Capacity
with QuadroE1/T1
Revision Revised By Date
Initial AskanazK, AshotS
LianaB
Quadro variants:
valid for
SW-version:
tested with
SW version:
Filename: Document2
Version:
Template: SupportTemplate.dot
Last saved: 4/26/2006 3:51:00 PM
Abstract: This document describes how to connect a QuadroE1/T1
to a Quadro16x and configure both devices so that the QuadroE1/T1
can be used as a PSTN trunk extension for the Quadro16x.
Please Note: This document contains confidential and proprietary information owned by Epygi Technologies Ltd. Any copying, use or disclosure of
the document or the information contained herein without the written permission of Epygi Technologies Ltd. is strictly prohibited.

Epygi Technologies Increasing Quadro16x PSTN Capacity with QuadroE1/T1
Table of Contents:
1Introduction....................................................................... 3
2References ......................................................................... 3
3Requirements..................................................................... 3
3.1 Requirements to Quadro16x...................................................3
3.2 Requirements to QuadroE1/T1................................................3
4Preparations ...................................................................... 4
4.1 Preconfiguration of Quadro16x................................................4
4.1.1 Ensure DHCP server is enabled.........................................4
4.1.2 Obtain an IP address ......................................................5
4.1.3 Remove default PSTN routing rules...................................6
4.2 Preconfiguration of QuadroE1/T1.............................................7
4.2.1 LAN settings configuration of QuadroE1/T1 ........................7
5Connecting QuadroE1/T1 to Quadro16x............................. 9
6Call Routing Configuration ............................................... 10
6.1 Routing PSTN calls from Quadro16x to QuadroE1/T1................ 10
6.2 Routing calls from QuadroE1/T1 to PSTN................................ 13
6.2.1 Routing emergency calls from QuadroE1/T1 to PSTN ......... 13
6.2.2 Routing regular PSTN calls from QuadroE1/T1 to PSTN ...... 15
6.3 Routing PSTN calls from QuadroE1/T1 to Quadro16x................ 17
7Summary.......................................................................... 20
PAGE 2 27-Apr-06

Epygi Technologies Increasing Quadro16x PSTN Capacity with QuadroE1/T1
1Introduction
This document describes how to connect a QuadroE1/T1 to a Quadro16x and configure both
devices so that the QuadroE1/T1 can be used as a PSTN trunk extension for the Quadro16x. This
will allow the users of the Quadro16x to have up to 30 emulated PSTN lines.
The QuadroE1/T1 is a VoIP gateway that allows connectivity between the PSTN and a VoIP network
via its E1/T1 lines using CAS/CCS signaling. E1, the European system, allows 30 active timeslots
both for CAS and CCS. T1, the United States system, allows 24 timeslots if CAS is used and 23 if
CSS is used.
This document describes only the configuration procedures required for the described scenario. For
more information on the setup of the Quadro16x or the QuadroE1/T1, please refer to
Administrator’s Guide for the corresponding device found in the Downloads section of Epygi’s
Technical Support Center (www.epygi.com).
2References
•Manual II: Administrator’s Guide for QuadroE1/T1
•Manual II: Administrator’s Guide for Quadro4x, Quadro4xi, Quadro16x and Quadro16xi
3Requirements
3.1 Requirements to Quadro16x
SW-Version 3.1.12, or higher running on the Quadro16x. red.
•
•The Quadro16x is connected to the network and appropriately configu
•DHCP server functionality is activated on the LAN of the Quadro16x.
•trunk and appropriately
configured. It is possible to make/accept calls to/from the provider.
3.2 Requirements to QuadroE1/T1
•SW-Version 3.1.4, or higher running on the QuadroE1/T1.
The QuadroE1/T1 is connected with the service provider via an E1/T1
PAGE 3 27-Apr-06

Epygi Technologies Increasing Quadro16x PSTN Capacity with QuadroE1/T1
4Preparations
Before integrating the QuadroE1/T1 into the LAN of the Quadro16x, both devices must be
appropriately pre-configured. The required steps are detailed below.
4.1 Preconfiguration of Quadro16x
1. Ensure that the Quadro16x acts as a DHCP server on its LAN. (see 4.1.1)
2. Obtain an IP address from the DHCP IP address range of the Quadro16x. This address will be
assigned to the LAN interface of the QuadroE1/T1 (see 4.1.2).
3. Remove the default PSTN routing rules from the routing table of the Quadro16x (see 4.1.3). This
is required if the FXO ports on the Quadro16x are not connected to PSTN to decrease call setup
time.
4.1.1 Ensure DHCP server is enabled
1. Log in to the Quadro16x as the administrator.
2. From the LAN services menu, select DHCP Settings for the LAN Interface.
3. Make sure the Enable DHCP Server checkbox is selected and the IP Address Range is
configured (by default 172.30.0.100 – 172.30.0.254, see Figure 1).
Figure 1 DHCP Settings, Quadro16x
PAGE 4 27-Apr-06

Epygi Technologies Increasing Quadro16x PSTN Capacity with QuadroE1/T1
4.1.2 Obtain an IP address
To integrate the QuadroE1/T1 into the LAN of the Quadro16x, an IP address from the Quadro16x
LAN IP address range (see Figure 1) must be assigned to the LAN interface of the QuadroE1/T1. Note
that this IP address must not be within the DHCP IP address range of the Quadro16x to ensure no
IP address conflict occurs when adding new IP phones to the LAN of the Quadro16x.
To eliminate the possibility of an IP address conflict on the LAN of the Quadro16x, decrease its
DHCP IP address range by one from the end of the range and click on Save (see Figure 2). Write this
excluded IP address (172.30.0.254) down on a piece of paper and have it handy when configuring
the LAN settings of the QuadroE1/T1. This IP address will be assigned to its LAN interface.
For the configuration of the QuadroE1/T1 LAN settings, the subnet mask of the Quadro16x LAN will
also be required. To view it, open the SystemÆStatus page and click on the Network Status tab
(see Figure 3).
Figure 2 DHCP Settings page, Quadro16x
Figure 3 Quadro Status – Network Status page, Quadro16x
PAGE 5 27-Apr-06

Epygi Technologies Increasing Quadro16x PSTN Capacity with QuadroE1/T1
4.1.3 Remove default PSTN routing rules
The scenario outlined in this document assumes that no FXO port on the Quadro16x will be
connected to the service from PSTN, i.e. all outgoing PSTN calls should flow through the E1/T1 trunk
of the QuadroE1/T1.
If this is the case it is recommended either to disable FXO lines on the Quadro16x or remove default
PSTN routing rules from its routing table. Otherwise, the call setup for outgoing PSTN calls may take
longer time. The reason is that the Quadro16x will first try to make PSTN calls using its own FXO
lines and will route the calls to the E1/T1 only after a non-response timeout expires (the timeout
during which the Quadro waits for a dial-tone from the PSTN). This results in an increase in call
setup time.
To decrease call setup time, either disable the FXO lines on the Quadro16x or remove the default
PSTN routing rules from its routing table.
For the first option, select TelephonyÆFXO SettingsÆFXO1 (FXO2) and clear the Enable FXO
checkbox.
For the second option (recommended), follow these steps:
1. From the System menu, select System Configuration Wizard.
2. In the System Configuration Wizard, click on Next until you reach the Emergency
Codes and PSTN Access Code Settings page (see Figure 4).
3. From the PSTN Access Code drop-down list, select the blank space. This will prevent the
Quadro from creating default routing rules for outgoing PSTN calls.
4. Click on Next, then Finish.
Figure 4 System Configuration Wizard – Emergency Codes and PSTN Access Code Settings page, Quadro16x
PAGE 6 27-Apr-06

Epygi Technologies Increasing Quadro16x PSTN Capacity with QuadroE1/T1
4.2 Preconfiguration of QuadroE1/T1
Disable the DHCP server functionality on the QuadroE1/T1 and configure its LAN settings. These can
be done with System Configuration Wizard (see 4.2.1).
4.2.1 LAN settings configuration of QuadroE1/T1
Please note: It is assumed that the QuadroE1/T1 is in its default configuration.
To configure the LAN settings of the QuadroE1/T1
1. Run a browser on a PC locally connected to the LAN interface of the QuadroE1/T1.
2. Enter “http://172.30.0.1” into the address filed of the browser and press Enter.
3. In the displayed Login page of the Quadro, enter admin as the Username and 19 as the
Password to log in as the administrator.
4. From the System menu, select the System Configuration Wizard and click on Next.
5. Enter the IP address and the subnet mask you have marked down (see 4.1.2) into the IP
Address and Subnet Mask text fields respectively (see Figure 5). Click on Next.
Figure 5 System Configuration Wizard-System Configuration page, QuadroE1/T1
PAGE 7 27-Apr-06

Epygi Technologies Increasing Quadro16x PSTN Capacity with QuadroE1/T1
6. On the DHCP Settings for the LAN Interface page, clear the Enable DHCP checkbox (see
Figure 6). Click on Next.
Figure 6 System Configuration-DHCP Settings for the LAN page, QuadroE1/T1
7. On the Regional settings and Preferences page, specify Your locale and Timezone
settings and choose your desired GUI theme.
Please note: It is strongly recommended that the regional settings on the QuadroE1/T1
match those on the Quadro16x.
8. Click on Next twice to reach the last page of the wizard, then click on Finish to complete
the wizard.
The QuadroE1/T1 can now be connected to the LAN of the Quadro16x.
PAGE 8 27-Apr-06

Epygi Technologies Increasing Quadro16x PSTN Capacity with QuadroE1/T1
5Connecting QuadroE1/T1 to Quadro16x
After all the preparations are fully completed, connect the QuadroE1/T1 to the LAN of the
Quadro16x via straight Cat5 cable with a RJ 45 connector (see Figure 7).
Please note: The QuadroE1/T1 and IP phones must be in the same subnet.
Figure 7 Network configuration
PAGE 9 27-Apr-06

Epygi Technologies Increasing Quadro16x PSTN Capacity with QuadroE1/T1
6Call Routing Configuration
To allow placing PSTN calls from the Quadro16x to the PSTN via the QuadroE1/T1
•Create a routing rule on the Quadro16x to route PSTN calls to the QuadroE1/T1 (see 6.1).
•Create two routing rules on the QuadroE1/T1 to route calls received from the Quadro16x to
PSTN (see 6.2 ). One of those rules will be used for emergency calls (see 6.2.1), the other for
regular PSTN calls (see 6.2.2).
To allow receiving calls from the PSTN on the Quadro16x via the QuadroE1/T1
•Create a routing rule on the QuadroE1/T1 to route calls from PSTN to the Auto Attendant of
the Quadro16x (see 6.3).
6.1 Routing PSTN calls from Quadro16x to QuadroE1/T1
This rule is created in the Local Routing table of the Quadro16x.
1. Log in to the Quadro16x as the administrator and select Call Routing from the Telephony
menu.
2. On the Call Routing page, click on the Call Routing Table link to display the Call Routing
Table (see Figure 8).
3. Click the Add button to start the Call Routing Wizard.
Figure 8 Call Routing Table, Quadro16x
PAGE 10 27-Apr-06

Epygi Technologies Increasing Quadro16x PSTN Capacity with QuadroE1/T1
4. dd
•9* into the Pattern
•ngs to
values.
Click on Next.
On the Routing Call Type - A
Enter
Entry page in the wizard (see Figure 9).
field.
•Set the Call Type to SIP.
Leave the other setti
their default
Figure 9 Call Routing Wizard – Routing Call Type page, QuadroE1/T1
5.
•
ed to the
•
.
er settings to
ues.
lick on Next.
On the Routing Call Settings -
Enter the LAN IP address of
the QuadroE1/T1 into the
Destination Host text field.
This is the IP address that
was manually assign
LAN interface of the
QuadroE1/T1
Add Entry page in the wizard (see Figure 10).
(172.30.0.254).
Enter the UDP port of the
QuadroE1/T1 into the
Destination Port text field.
The setting defaults to 5060.
•Set the Fail Reason to Any
•Leave the oth
their default val
C
Figure 10 Call Routing Wizard – Routing Call Settings page, QuadroE1/T1
PAGE 11 27-Apr-06

Epygi Technologies Increasing Quadro16x PSTN Capacity with QuadroE1/T1
6. The last page of the wizard gives the summary of the rule to be created. Click on Finish to
complete the wizard. The rule with the specified settings will be added to the Routing Table
(see Figure 11).
Figure 11 Call Routing Table with the new rule added, QuadroE1/T1
How this rule works: When the user dials “9” followed by any number, the call will be routed to
the QuadroE1/T1.
PAGE 12 27-Apr-06

Epygi Technologies Increasing Quadro16x PSTN Capacity with QuadroE1/T1
6.2 Routing calls from QuadroE1/T1 to PSTN
According to the rule created in 6.1, calls from the Quadro16x that match the pattern “9*” will be
routed to the QuadroE1/T1. Note that two types of calls fit into this pattern: 1) emergency calls -
the user dials “911”, and 2) regular PSTN calls - the user dials “9+a PSTN number”. Therefore, two
routing rules are to be created on the QuadroE1/T1:
The first - for emergency calls - will route the received calls directly to PSTN (see 6.2.1).
The second - for regular PSTN calls - will discard the first digit (the PSTN access code), and then
route the call (the corresponding digits) to PSTN (see 6.2.2).
6.2.1 Routing emergency calls from QuadroE1/T1 to PSTN
This rule is created in the Local Routing table of the QuadroE1/T1.
1. Log in to the QuadroE1/T1 as the administrator and select Call Routing from the Telephony
menu.
2. On the Call Routing page, click on the Call Routing Table link to display the Call Routing
Table (see Figure 12).
3. Click the Add button to start the Call Routing Wizard.
Figure 12 Call Routing Table, QuadroE1/T1
PAGE 13 27-Apr-06

Epygi Technologies Increasing Quadro16x PSTN Capacity with QuadroE1/T1
5. On the Routing Call Type - Add Entry page in the wizard (see Figure 13).
•Enter 911 into the Pattern
field.
•Set the Call Type setting
to E1/T1.
•Leave the other settings to
their default values.
Click on Next.
Figure 13 Call Routing Wizard – Routing Call Type page, QuadroE1/T1
4. Follow the prompts in the wizard until you complete it. The rule with the specified settings will
be added to the Call Routing Table (see Figure 14).
Figure 14 Call Routing Table with the new rule added, QuadroE1/T1
How this rule works: Calls incoming to QuadroE1/T1 that match the pattern “911” will be routed
to the PSTN.
PAGE 14 27-Apr-06

Epygi Technologies Increasing Quadro16x PSTN Capacity with QuadroE1/T1
6.2.2 Routing regular PSTN calls from QuadroE1/T1 to PSTN
This rule is created in the Local Routing table of the QuadroE1/T1.
1. Select Call Routing from the Telephony menu.
2. On the Call Routing page, click on the Call Routing Table link to display the Call Routing
Table (see Figure 14).
3. Click the Add button to start the Call Routing Wizard.
4. On the Routing Call Type - Add Entry page of the wizard (see Figure 15).
•Enter 9* into the Pattern
field.
•Enter 1into the Number
of Discarded Symbols
text field.
•Set the Call Type setting
to E1/T1.
•Leave the other settings to
their default values.
Figure 15 Call Routing Wizard – Routing Call Type page, QuadroE1/T1
5. Follow the prompts in the wizard until you complete it. The rule with the specified settings will
be added to the Call Routing Table (see Figure 16).
PAGE 15 27-Apr-06

Epygi Technologies Increasing Quadro16x PSTN Capacity with QuadroE1/T1
Figure 16 Call Routing Table with the new rule added, QuadroE1/T1
How this rule works: Calls incoming to the QuadroE1/T1 that match the pattern “9*” will be
routed to PSTN after discarding the prefix “9” from their pattern. Note that emergency calls “911”
also match this pattern, but for those calls the previous rule will be used as their pattern has more
matching digits with that rule (see 6.2.1).
PAGE 16 27-Apr-06

Epygi Technologies Increasing Quadro16x PSTN Capacity with QuadroE1/T1
6.3 Routing PSTN calls from QuadroE1/T1 to Quadro16x
The rules created in the previous paragraphs are to allow making PSTN calls from the Quadro16x to
PSTN via the QuadroE1/T1. In this paragraph, a rule will be created to allow routing PSTN calls
received on the QuadroE1/T1 to the Auto Attendant of the Quadro16x. Note that the rule is created
on the QuadroE1/T1.
Please Note: It is assumed that all incoming SIP calls on the Quadro16x are routed to the default
Auto Attendant – 00.
1. Select Call Routing from the Telephony menu.
2. On the Call Routing page, click on the Call Routing Table link to display the Call Routing
Table (see Figure 16).
3. Click the Add button to start the Call Routing Wizard.
4. On the Routing Call Type - Add Entry page in the wizard (see Figure 17)
•Enter *into the Pattern
field.
•Enter 99 into the Number
of Discarded Symbols.
•Set the Call Type setting
to SIP.
•Select the Filter on
Caller/Call Type/Modify
Caller ID checkbox.
Click on Next button.
Figure 17 Call Routing Wizard – Routing Call Type page, QuadroE1/T1
PAGE 17 27-Apr-06

Epygi Technologies Increasing Quadro16x PSTN Capacity with QuadroE1/T1
5. On the Routing Call Settings - Add Entry page in the wizard (see Figure 18)
•Enter the LAN IP address
of the Quadro16x into the
Destination Host text field.
By default it is 172.30.0.1.
•Enter UDP port of
Quadro16x into the
Destination Port text field.
The setting defaults to
5060.
Click on Next button.
Figure 18 Call Routing Wizard, Page 2 – Routing Call Settings, QuadroE1/T1
6. On the Inbound Call type - Add Entry page of the wizard (see Figure 19)
•Enter *into the Inbound
Caller Pattern text field.
•Select E1/T1 from the
Inbound Call Enter
dropdown list.
Click on Next button, then
Finish.
The new rule with the
specified settings will be
added to the Call Routing
Table (see Figure 20).
PAGE 18 27-Apr-06

Epygi Technologies Increasing Quadro16x PSTN Capacity with QuadroE1/T1
Figure 19 Call Routing Wizard, Page 3 – Inbound Call Type, QuadroE1/T1
Figure 20 Call Routing Table with the new rule added, QuadroE1/T1
How this rule works: Calls from the PSTN received on the QuadroE1/T1 will be routed the Auto
Attendant of the Quadro16x.
PAGE 19 27-Apr-06

Epygi Technologies Increasing Quadro16x PSTN Capacity with QuadroE1/T1
7Summary
The following tables summarize the dial plan according the call routing configuration described in
this document.
Quadro16x
Pattern NDS Prefix Call Type
Destination Address Description
9* SIP
172.30.0.254 Path to Quadro E1/T1
QuadroE1/T1
Pattern NDS Prefix Call Type
Destination
Address Inbound
Call
Type
Description
911 E1/T1 Path to PSTN for
emergency calls
9* 1 E1/T1 Path to PSTN
* 99 00 SIP 172.30.0.1 E1/T1 Path to AA of Quadro16x
PAGE 20 27-Apr-06
This manual suits for next models
1
Table of contents
Other Epygi Network Hardware manuals
Popular Network Hardware manuals by other brands

Lowrance
Lowrance General information Pamplet General information

Arista
Arista 5000 Series quick start guide

Allegro Packets
Allegro Packets Network Multimeter 1500 installation guide

Huawei
Huawei HW-TX-5000 quick guide

Leviton
Leviton 3x8 CATV Module installation instructions

Alcatel-Lucent
Alcatel-Lucent 9764 Series manual