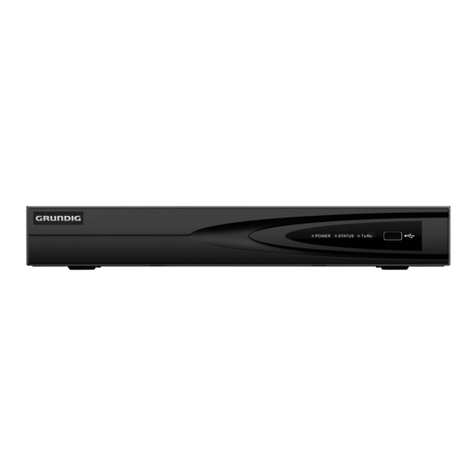
Grundig GD-RN-AC2004P User manual

___________________________________________________________________________
User Guide
Network Video Recorders
English
___________________________________________________________________________
UG-GD-CI-xxxxxxx-2018-10-31-V1-EN © Abetechs GmbH

2
Content__________________________________________________________________
1.Introduction ...........................................................................................................7
1.1Model Overview .........................................................................................................7
1.2Key Features of the NVRs.........................................................................................8
1.3Front Panel View......................................................................................................12
1.4Remote Control........................................................................................................20
1.5USB Mouse...............................................................................................................26
1.6OSD Keyboard .........................................................................................................27
1.7Rear Panel View.......................................................................................................28
2.Getting Started.....................................................................................................33
2.1 Recorder Startup ...........................................................................................................33
2.2 Using the Wizard for Basic Configuration ..................................................................40
2.3 Adding and Connecting the IP Cameras.....................................................................45
2.3.1 Activating the IP Camera .........................................................................................................45
2.3.2 Adding the Online IP Cameras.................................................................................................46
2.3.3 Editing the Connected IP Cameras and Configuring Customized Protocols........................... 49
2.3.4 Editing the IP Cameras Connected to the PoE Interfaces.......................................................52
2.3.5 Configuring the PoE Interface.................................................................................................. 54
3.Live View..............................................................................................................56
3.1 Introduction of Live View..............................................................................................56
3.2 Operations in the Live View mode...............................................................................57
3.3 Adjusting the Live View Settings.................................................................................64
3.4 Channel-zero Encoding ................................................................................................66
4.PTZ Controls........................................................................................................67
4.1 Configuring PTZ Settings.............................................................................................67
4.2 Setting PTZ Presets, Patrols & Patterns .....................................................................69
4.3 PTZ Control Panel .........................................................................................................76
5.Recording and Capture Settings........................................................................78
5.1 Configuring Parameters................................................................................................78
5.2 Configuring Recording and Capture Schedule ..........................................................82
5.3 Configuring Motion Detection Recording and Capture .............................................86
5.4 Configuring Alarm-Triggered Recording and Capture...............................................87
5.5 Configuring VCA Event Recording..............................................................................89
5.6 Manual Recording and Continuous Capture ..............................................................90
5.7 Configuring Holiday Recording and Capture .............................................................92
5.8 Configuring Redundant Recording and Capture........................................................94

3
5.9 Configuring the HDD Group for Recording and Capture...........................................96
5.10 Files Protection............................................................................................................97
5.10.1 Locking the Recording Files................................................................................................... 97
5.10.2 Setting the HDD Property to Read-only.................................................................................99
6.Playback.............................................................................................................100
6.1Playing Back Record Files....................................................................................100
6.1.1 Instant Playback.....................................................................................................................100
6.1.2 Playing Back by Normal Search ............................................................................................100
6.1.3 Playing back by Smart Search...............................................................................................104
6.1.4 Playing Back by Event Search...............................................................................................106
6.1.5 Playing Back by Tag...............................................................................................................107
6.1.6 Playing Back by Sub-periods .................................................................................................109
6.1.7 Playing Back by System Logs................................................................................................ 110
6.1.8 Playing Back External File ..................................................................................................... 111
6.1.9 Playing Back Pictures ............................................................................................................ 111
6.2 Auxiliary Functions of Playback ................................................................................ 112
6.2.1 Playing Back Frame by Frame............................................................................................... 112
6.2.2 Thumbnails View.................................................................................................................... 113
6.2.3 Fast View ............................................................................................................................... 113
6.2.4 Digital Zoom ........................................................................................................................... 114
6.2.5 File Management ................................................................................................................... 114
7.Backup ...............................................................................................................116
7.1 Backing up Record Files............................................................................................. 116
7.1.1 Quick Export........................................................................................................................... 116
7.1.2 Backing up by Normal Video/Picture Search......................................................................... 118
7.1.3 Backing up by Event Search.................................................................................................. 120
7.1.4 Backing up Video Clips or Captured Playback Pictures ........................................................121
7.2 Managing Backup Devices.........................................................................................122
7.3 Hot Spare Device Backup...........................................................................................124
7.3.1 Setting the Hot Spare Device.................................................................................................124
7.3.2 Setting the Working Device.................................................................................................... 124
7.3.3 Managing the Hot Spare System ...........................................................................................125
8.Alarm Settings...................................................................................................126
8.1 Setting a Motion Detection Alarm ..............................................................................126
8.2 Setting Sensor Alarms................................................................................................128
8.3 Detecting a Video Loss Alarm....................................................................................131

4
8.4 Detecting a Video Tampering Alarm ..........................................................................133
8.5 Handling an Exceptions Alarm...................................................................................135
8.6 Setting Alarm Response Actions...............................................................................136
8.7 Triggering or Clearing an Alarm Output Manually....................................................139
9.POS Configuration ............................................................................................140
9.1 Configuring the POS Settings....................................................................................140
9.2 Configuring the Overlay Channel ..............................................................................145
9.3 Configuring the POS Privacy Information Filtering .................................................146
9.4 Configuring the POS Alarm ........................................................................................146
10.VCA Alarm ......................................................................................................149
10.1 Face Detection...........................................................................................................149
10.2 Vehicle Detection.......................................................................................................150
10.3 Line Crossing Detection...........................................................................................151
10.4 Intrusion Detection....................................................................................................153
10.5 Region Entrance Detection.......................................................................................155
10.6 Region Exiting Detection..........................................................................................156
10.7 Unattended Baggage Detection...............................................................................156
10.8 Object Removal Detection........................................................................................156
10.9 Audio Exception Detection.......................................................................................157
10.10 Sudden Scene Change Detection..........................................................................158
10.11 Defocus Detection...................................................................................................158
10.12 PIR Alarm .................................................................................................................158
10.13 Loitering Detection..................................................................................................159
10.14 People Gathering Detection ...................................................................................159
10.15 Fast Moving Detection............................................................................................160
10.16 Parking Detection....................................................................................................160
11.VCA Search ....................................................................................................161
11.1 Face Search................................................................................................................161
11.2 Behavior Search ........................................................................................................161
11.3 Plate Search...............................................................................................................162
11.4 People Counting........................................................................................................162
11.5 Heat Map.....................................................................................................................163
11.6 Advanced Search.......................................................................................................164
12.Network Settings............................................................................................165
12.1 Configuring General Settings...................................................................................165
12.2 Configuring Advanced Settings...............................................................................167
12.2.1 Configuring DDNS ...............................................................................................................167

5
12.2.2 Configuring the NTP Server.................................................................................................169
12.2.3 Configuring SNMP ...............................................................................................................170
12.2.4 Configuring More Settings ...................................................................................................171
12.2.5 Configuring the HTTPS Port ................................................................................................172
12.2.6 Configuring Email.................................................................................................................174
12.2.7 Configuring the NAT............................................................................................................. 176
12.2.8 Configuring the Virtual Host .................................................................................................179
12.3 Checking Network Traffic .........................................................................................181
12.4 Configuring Network Detection................................................................................182
12.4.1 Testing the Network Delay and Packet Loss ....................................................................... 182
12.4.2 Exporting the Network Packet..............................................................................................182
12.4.3 Checking the Network Status...............................................................................................183
12.4.4 Checking the Network Statistics...........................................................................................184
13. RAID.....................................................................................................................185
13.1 Configuring an Array.................................................................................................185
13.1.1 Enable RAID ........................................................................................................................186
13.1.2 One-touch Configuration......................................................................................................186
13.1.3 Manually Creating the Array................................................................................................. 187
13.2 Rebuilding the Array .................................................................................................188
13.2.1 Automatically Rebuilding the Array ......................................................................................188
13.2.2 Manually Rebuilding the Array .............................................................................................188
13.3 Deleting the Array......................................................................................................189
13.4 Checking and Editing the Firmware ........................................................................189
14. HDD Management...............................................................................................190
14.1 Initializing HDDs........................................................................................................190
14.2 Managing the Network HDD .....................................................................................192
14.3 Managing eSATA........................................................................................................194
14.4 Managing a HDD Group ............................................................................................195
14.4.1 Setting HDD Groups ............................................................................................................195
14.4.2 Setting the HDD Property ....................................................................................................195
14.5 Configuring the Quota Mode....................................................................................196
14.6 Configuring the Disk Clone......................................................................................198
14.7 Checking the HDD Status .........................................................................................199
14.8 HDD Detection ...........................................................................................................201
14.9 Configuring HDD Error Alarms.................................................................................203
15. Camera Settings .................................................................................................204

6
15.1 Configuring the OSD Settings..................................................................................204
15.2 Configuring the Privacy Mask..................................................................................205
15.3 Configuring the Video Parameters ..........................................................................207
16. NVR Management and Maintenance.................................................................208
16.1 Viewing the System Information..............................................................................208
16.2 Searching & Exporting Log Files.............................................................................209
16.3 Importing/Exporting the IP Camera Info.................................................................. 211
16.4 Importing/Exporting Configuration Files ................................................................212
16.5 Upgrading the System ..............................................................................................213
16.5.1 Upgrading by Local Backup Device..................................................................................... 213
16.5.2 Upgrading by FTP................................................................................................................213
16.6 Restoring the Default Settings.................................................................................214
17. Others..................................................................................................................215
1.1 Configuring the RS-232 Serial Port............................................................................215
17.2 Configuring the General Settings............................................................................215
17.3 Configuring the DST Settings ..................................................................................217
17.4 Configuring More Settings .......................................................................................218
17.5 Managing the User Accounts ...................................................................................219
17.5.1 Adding a User.......................................................................................................................219
17.5.2 Deleting a User ....................................................................................................................222
17.5.3 Editing a User.......................................................................................................................223
18. Glossary..............................................................................................................226
19. Compatible IP Cameras......................................................................................227
20. Troubleshooting .................................................................................................246

7
1. Introduction
Thank you for purchasing a Grundig product. Before installing or connecting the product,
please read first the following documents which you can find on the CD Rom in the product
package:
- Legal Disclaimer
- Safety Instructions
- Installation Manual for the respective product model
Further information about the product like Data Sheets, CE Documents, etc. can also be found
on the CD Rom in the product package.
This User Guide is a user manual for IP Recorders (NVRs). Please see in the table of 1.1
Model Overview the applicable models.
Please read this User Guide carefully and retain it for future use.
1.1 Model Overview
This User Guide is for the following products:
GD-RN-AC2004P
GD-RN-AC2416N
GD-RN-AC2416P
GD-RN-AP8616P
GD-RN-AP8632P
GD-RN-AT8864N
GD-RN-AT819128N

8
1.2 Key Features of the NVRs
General:
‒Connectable to network cameras, network dome and encoders.
‒Connectable to third-party network cameras like ACTI, Arecont, AXIS, Bosch, Brickcom,
Canon, PANASONIC, Pelco, SAMSUNG, SANYO, SONY, Vivotek and ZAVIO, and cameras
that adopt the ONVIF or PSIA protocol.
‒<H.265+>/<H.265>/ <H.264+>/<H.264>/<MPEG4> video formats (plus <MJEPG> for the GD-
RN-AT819128N, only for some IP cameras).
‒<PAL>/<NTSC> adaptive video inputs.
‒Each channel supports <Dual-stream>.
‒Up to 8/16/32/64 network cameras can be added according to different models.
‒Independent configuration for each channel, including <Resolution>, <Frame Rate>, <Bit
Rate>, <Image Quality>, etc.
‒The quality of the input and output record is configurable.
Local Monitoring:
‒HDMI/VGA1 and HDMI2/VGA2 outputs are provided for GD-RN-AT8864N.
‒HDMI 1, HDMI 2, and VGA outputs are provided for GD-RN-AT819128N (HDMI 2 video output
at up to a 4K resolution).
‒HDMI and VGA outputs provided for GD-RN-AC2004P, GD-RN-AC2416N, GD-RN-AC2416P,
GD-RN-AP8616P and GD-RN-AP8632P.
‒HDMI video output at up to a 4K resolution and VGA video output at up to a 2K resolution.
‒Multiple screen display in <Live View> is supported and the display sequence of channels is
adjustable.
‒<Live View> screen can be switched in a group. <Manual Switch> and <Auto-switch> are
provided and the <Auto-switch> interval is configurable.
‒<3D Positioning> is supported by GD-RN-AP8616P, GD-RN-AP8632P, GD-RN-AT8864N in the
<Live View>.
‒<POS Information Overlay> on the <Live View> by GD-RN-AP8616P, GD-RN-AP8632P, GD-
RN-AT8864N.
‒Configurable <Main Stream> and <Sub-stream> for the <Live View>.
‒<Quick Setting> menu is provided for the <Live View>.
‒<Motion detection>, <Video Tampering>, <Video Exception Alert> and <Video Loss Alert>
functions.
‒<Privacy Mask>.
‒Multiple <PTZ> protocols are supported; <PTZ Preset>, <Patrol> and <Pattern>.
‒Zooming in by clicking the mouse and <PTZ Tracing> by dragging the mouse.
HDD Management:
‒Up to 16 SATA hard disks and 1 eSATA disk can be connected for GD-RN-AT819128N, up to 8
SATA hard disks and 1 eSATA disk can be connected for GD-RN-AT8864N, 4 SATA hard
disks for GD-RN-AP8616P and GD-RN-AP8632P, 2 SATA hard disks for GD-RN-AC2416N
and GD-RN-AC2416P, and 1 SATA hard disk for GD-RN-AC2004P.

9
‒Up to a 6TB (8TB for GD-RN-AT819128N) storage capacity is supported for each disk.
‒Supports 8 network disks (NAS/IP SAN disk).
‒Supports <S.M.A.R.T.> and <Bad Sector Detection>.
‒<HDD Group> Management.
‒Supports <HDD Standby> function.
‒HDD Property: <Redundancy>, <Read-only>, <Read/Write (R/W)>.
‒HDD Quota Management; different capacity can be assigned to different channels.
‒For GD-RN-AT8864N and GD-RN-AT819128N, <RAID0>, <RAID1>, <RAID5>, <RAID6> and
<RAID 10> are supported.
‒<Hot-swappable RAID Storage Scheme> which can be enabled and disabled on your demand.
16 arrays can be configured.
‒GD-RN-AT8864N and GD-RN-AT819128N support the disk clone to the eSATA disk.
Recording, Capture and Playback:
Note:
<Capture> is supported by GD-RN-AP8616P, GD-RN-AP8632P, GD-RN-AT8864N and GD-RN-
AT819128N only.
‒<Holiday Recording Schedule> configuration.
‒<Continuous> and <Event> video recording parameters.
‒Multiple recording types: <Manual>, <Continuous>, <Alarm>, <Motion>, <Motion | alarm>,
<Motion & alarm VCA>, and <POS> (<POS> for GD-RN-AP8616P, GD-RN-AP8632P and GD-
RN-AT8864N only).
‒8 recording time periods with separated recording types.
‒POS Information Overlay on an image by GD-RN-AP8616P, GD-RN-AP8632P and GD-RN-
AT8864N.
‒Pre-record and Post-record for <Alarm>, <Motion Detection> for recording, and <Pre-record>
time for <Schedule> and <Manual Recording>.
‒Searching record files and captured pictures by events (<Alarm Input>/<Motion Detection>).
‒<Tag> adding for record files, searching and playing back by tags.
‒Locking and unlocking record files.
‒<Local Redundant Recording> and <Capture>.
‒Provide new <Playback> interface with easy and flexible operation.
‒Searching and playing back record files by <Channel Number>, <Recording Type>, <Start
Time>, <End Time>, etc.
‒Supports the <Playback> by <Main Stream> or <Sub-stream> (GD-RN-AP8616P, GD-RN-
AP8632P, GD-RN-AT8864N).
‒<Smart Search> for the selected area in the video.
‒Zooming in during <Playback>.
‒Reverse Playback of Multi-channel.
‒Supports <Pause>, <Play Reverse>, <Speed Up>, <Speed Down>, <Skip Forward> and <Skip
Backward> during <Playback> and locating by dragging the mouse.
‒Supports a <Thumbnails> view and a <Fast> view during <Playback>.

10
‒Up to 16-ch <Synchronous Playback> at 1080p real time (up to 20-ch <Synchronous
Playback> at 1080p real time for GD-RN-AT819128N).
‒Supports <Playback by Transcoded Stream>.
‒<Manual Capture>, <Continuous Capture> of video images and <Playback> of captured
pictures.
‒Supports enabling <H.264+> to ensure high video quality with a lowered bitrate.
Backup:
‒Export video data by USB, SATA or eSATA device (for GD-RN-AT8864N and GD-RN-
AT819128N only).
‒Export video clips during <Playback>.
‒Management and maintenance of backup devices.
‒Either <Normal> or <Hot Spare> working mode is configurable to constitute an N+1 Hot Spare
system.
Alarm and Exception:
‒Configurable Arming Time of Alarm Input/Output.
‒Alarm for <Video Loss>, <Motion Detection>, <Tampering>, <Abnormal Signal>, <Video
input/output Standard Mismatch>, <Illegal Login>, <Network Disconnected>, <IP Confliction>,
<Abnormal Record/Capture>, <HDD Error>, and <HDD Full>, etc.
‒<POS Triggered Alarm> supported by GD-RN-AP8616P, GD-RN-AP8632P and GD-RN-
AT8864N.
‒VCA Detection Alarm is supported.
‒VCA Search for <Face Detection>, <Vehicle Plate>, <Behavior Analysis>, <People Counting>
and <Heat Map>.
‒Connectable to a thermal network camera (for GD-RN-AP8616P, GD-RN-AP8632P and GD-
RN-AT8864N). Supports the advanced search for fire/ship/temperature/temperature difference
detection triggered alarm and the recorded video files and pictures (for GD-RN-AP8616P, GD-
RN-AP8632P and GD-RN-AT8864N).
‒Alarm triggers <Full Screen Monitoring>, <Audio Alarm>, <Notifying Surveillance Center>,
<Sending Email> and <Alarm Output>.
‒Automatic restore when system is abnormal.
Other Local Functions:
‒Operable by front panel, mouse, remote control or control keyboard.
‒Three-level user management; The Admin User is allowed to create many operating accounts
and define their operating permission, which includes the limit to access any channel.
‒Admin password resetting by exporting/importing the GUID file (may not be available for GD-
RN-AT819128N).
‒Operation, Alarm, Exceptions and Log recording and searching.
‒Manually triggering and clearing alarms.
‒Import and Export of device configuration information.
Network Functions:
‒Four self-adaptive 10M/100M/1000M Network interfaces for GD-RN-AT819128N and the
<Multi-address>, <Load Balance> and <Network Fault-tolerance> working modes are
configurable.

11
‒Two self-adaptive 10M/100M/1000M Network interfaces for GD-RN-AT8864N, and the <Multi-
address> and <Network Fault-tolerance> working modes are configurable.
‒One self-adaptive 10M/100M/1000M Network interface for GD-RN-AC2416N, GD-RN-
AC2416P, GD-RN-AP8616P and GD-RN-AP8632P.
‒One self-adaptive 10M/100M Network> interface for GD-RN-AC2004P.
‒Four independent PoE Network interfaces are provided for GD-RN-AC2004P and sixteen
independent PoE Network interfaces for GD-RN-AC2416P, GD-RN-AP8616P and GD-RN-
AP8632P.
‒Long distance (100-300 m) network transmission via PoE (for GD-RN-AC2416P, GD-RN-
AP8616P, GD-RN-AP8632P and GD-RN-AC2004P).
‒<IPv6> is supported.
‒<TCP/IP Protocol>, <DHCP>, <DNS>, <DDNS>, <NTP>, <SMTP>, <SNMP>, <NFS>, and
<iSCSI> are supported.
‒<TCP>, <UDP> and <RTP> for unicast.
‒<Auto>/<Manual> Port Mapping by UPnP™.
‒Support access by <Cloud P2P>.
‒Remote web browser access by <HTTPS> ensures high security.
‒The <ANR (Automatic Network Replenishment)> function is supported, it enables the IP
Camera to save the recording files in the local storage when the network is disconnected and
it synchronizes the files to the NVR when the network is resumed.
‒Remote <Reverse Playback> via <RTSP>.
‒Supports accessing by the platform via ONVIF.
‒Remote <Search>, <Playback>, <Download>, <Locking> and <Unlocking> of the record files
and also supports <Downloading Files Broken Transfer Resume>.
‒Remote <Parameters Setup>; remote <Import>/<Export> of <Device Parameters>.
‒Remote viewing of the <Device Status>, <System Logs> and <Alarm Status>.
‒Remote keyboard operation.
‒Remote HDD formatting and program upgrading.
‒Remote system restart and shutdown.
‒<RS-232> and <RS-485> transparent channel transmission for GD-RN-AP8616P, GD-RN-
AP8632P and GD-RN-AT819128N. RS-232 transparent channel transmission for GD-RN-
AT8864N.
‒Alarm and exception information can be sent to the remote host.
‒Remotely <Start>/<Stop> recording.
‒Remotely <Start>/<Stop> output.
‒Remote <PTZ Control>.
‒Remote JPEG capture.
‒<Virtual Host> function is provided to get access to and to manage the IP Camera directly.
‒<Two-way Audio> and <Voice Broadcasting>.
‒Embedded WEB server.
Development Scalability:
‒<SDK> for the Windows system.

12
‒Source code of the application software for demo.
‒Development support and training for the application system.
1.3 Front Panel View
GD-RN-AT8864N:
GD-RN-AT8864N
Panel Description:

13
No. Name Function Description
1 Status
Indicators
ALARM Turns red when a Sensor Alarm is detected.
READY Turns blue when the device is functioning
properly.
STATUS
Turns blue when device is controlled by an IR
Remote.
Turns red when controlled by a keyboard and
purple when IR Remote and keyboard is used
at the same time.
HDD Flickers red when data is being read from or
written to HDD.
MODEM Reserved for future usage.
Tx/Rx Flickers blue when network connection is
functioning properly.
GUARD
Turns blue when the device has an armed
status; at this time, an alarm is enabled when
an event is detected.
Turns off when the device is unarmed. The
<Arm>/<Disarm> status can be changed by
pressing and holding on the <ESC> button for
more than 3 seconds in the <Live View> mode.
2 IR Receiver Receiver for IR Remote control.
3 Front Panel Lock Locks or unlocks the panel by the key.
4 DVD-R/W Slot for DVD-R/W disk.
5 Alphanumeric Buttons
Switches to the corresponding channel in the
<Live View> or in the <PTZ Control> mode.
Inputs numbers and characters in the <Edit>
mode.
Switches between different channels in the
<Playback> mode.
Turns blue when the corresponding channel is
recording; turns red when the channel has a
<Network Transmission> status; turns pink
when the channel is recording and transmitting.
6 USB Interfaces
Universal Serial Bus (USB) ports for additional
devices such as a USB mouse and a USB Hard
Disk Drive (HDD).
7 Composite
Keys ESC
Returns to the previous menu.
Presses for arming/disarming the device in the
<Live View> mode.

14
No. Name Function Description
REC/SHOT
Enters the <Manual Record> settings menu.
Presses this button followed by a numeric
button to call a <PTZ Preset> in <PTZ Control>
settings.
Turns audio on/off in the <Playback> mode.
PLAY/AUTO
Enters the <Playback> mode.
Automatically scans in the <PTZ Control>
menu.
ZOOM+ Zooms in the PTZ Camera in the <PTZ Control>
settings.
A/FOCUS+
Adjusts the focus in the <PTZ Control> menu.
Switches between input methods (upper and
lower case alphabet, symbols and numeric
input).
EDIT/IRIS+
Edits text fields. When editing text fields, it also
deletes the character in front of the cursor.
Checks the checkbox in the checkbox fields.
Adjusts the iris of the camera in the <PTZ
Control> mode.
Generates video clips for backup in the
<Playback> mode.
Enters/exits the folder of a USB device and an
eSATA HDD.
MAIN/SPOT/Z
OOM-
Switches between <Main> and <Spot> output.
Zooms out the image in the <PTZ Control>
mode.
F1/ LIGHT
Selects all items on the list when used in a list
field.
Turns on/off the <PTZ> light (if applicable) in
the <PTZ Control> mode.
Switches between <Play> and <Reverse Play>
in the <Playback> mode.
F2/ AUX
Cycles through tab pages.
Switches between channels in the
<Synchronous Playback> mode.
MENU/WIPER
Returns to the <Main> menu (after successful
login).
Presses and holds the button for five seconds

15
No. Name Function Description
to turn off the audible key beep.
Starts the wiper (if applicable) in the <PTZ
Control> mode.
Shows/hides the control interface in the
<Playback> mode.
PREV/FOCUS-
Switches between Single-screen and Multi-
screen mode.
Adjusts the focus in conjunction with the
A/FOCUS+ button in the <PTZ Control> mode.
PTZ/IRIS-
Enters the <PTZ Control> mode.
Adjusts the iris of the PTZ Camera in the <PTZ
Control> mode.
8 Control
Buttons
DIRECTION
Navigates between different fields and items in
menus.
In the <Playback> mode, use the Up and Down
buttons to speed up and slow down a recorded
video. Use the Left and Right buttons to select
the next and previous video files.
Cycles through channels in the <Live View>
mode.
Controls the movement of the PTZ Camera in
the <PTZ Control> mode.
ENTER
Confirms selection in any of the <Menu>
modes.
Checks the checkbox fields.
Plays or pauses the video playing in the
<Playback> mode.
Advances the video by a single frame in the
Single-frame <Playback> mode.
Stops/starts <Auto-switch> in <Auto-switch>
mode.
9 JOG SHUTTLE Control
Moves the active selection up and down in a
menu.
Cycles through different channels in the <Live
View> mode.
Jumps 30s forward/backward in video files in
the <Playback> mode.
Controls the movement of the PTZ Camera in
the <PTZ Control> mode.

16
No. Name Function Description
10 POWER ON/OFF Press the button for more than 3 seconds to
turn on/off the NVR.
GD-RN-AP8616P and GD-RN-AP8632P:
GD-RN-AP8616P and GD-RN-AP8632P
Panel Description:

17
No. Name Function Description
1 Status
Indicators
POWER Turns green when the NVR is powered up.
HDD Blinks red when the HDD is reading/writing.
Tx/Rx Blinks green when the network connection is
functioning normally.
2 ENTER
The <Enter> button is used to confirm selection
in menu mode; or used to check checkbox fields
and ON/OFF switch.
In the <Playback> mode, it can be used to play
or pause the video.
In the Single-frame Play mode, pressing the
<Enter> button will play the video by a single
frame.
In the Auto Sequence View mode, the buttons
can be used to pause or resume the auto
sequence.
The <Enter> button is used to confirm a selection
in the <Menu> mode; or used to check checkbox
fields and as an ON/OFF switch.
3 DIRECTION
In the <Menu> mode, the direction buttons are
used to navigate between different fields and
items and to select setting parameters.
In the <Playback> mode, the Up and Down
buttons are used to speed up and to slow down
the record playing; the Left and Right buttons are
used to move the recording 30 seconds forward
or backwards.
In the Image Setting interface, the up and down
button can adjust the level bar of the image
parameters.
In the <Live View> mode, these buttons can be
used to switch channels.
4 Back Back to the previous menu.
5 POWER ON/OFF Power on/off switch.
6 MENU Access the <Main> menu interface.
7 USB Interface
Universal Serial Bus (USB) ports for additional
devices such as a USB mouse and a USB Hard
Disk Drive (HDD).

18
GD-RN-AC2004P, GD-RN-AC2416N and GD-RN-AC2416P:
GD-RN-AC2004P, GD-RN-AC2416N and GD-RN-AC2416P
Panel Description:
GD-RN-AT819128N:
GD-RN-AT819128N
Panel Description:
No. Name Description
1 Panel lock Locks or unlocks the panel by the key.
2 Shortcut
buttons Exit
●Returns to the previous menu.
●Press it twice quickly to switch the main and
auxiliary port.
●In the <Live View> mode, press it to enter the
No. Name Connections
1 POWER Turns green when the NVR is powered up.
2 HDD Flickers red when data is being read from or written to the
HDD.
3 Tx/Rx Flickers blue when the network connection is functioning
properly.
4 USB Interface Universal Serial Bus (USB) port for additional devices such
as a USB mouse and a USB Hard Disk Drive (HDD).

19
No. Name Description
<PTZ Control> interface.
Menu
●Press it to bring up the <Main> menu.
●Hold it for 5 seconds to turn on/off the button
sound.
●During <Playback>, press it to show/hide the
Control Panel.
3 Status
indicators
HDD
●Solid red: at least one HDD is installed
●Unlit: no HDD is detected.
●Blinking red: HDD is reading/writing.
Tx/Rx Blinking blue indicates that the network communication
is normal.
4 Power switch
Powers the device on/off. Solid blue indicates that the
device is powered on. Solid red indicates that the
device is shut down.
5 Control
buttons
ENTER
●Confirms a selection in any of the <Menu> modes.
●Checks the checkbox fields.
●Switches on/off status.
●Plays or pauses the video playing in the
<Playback> mode.
●Advances the video by a single frame in the Single-
frame <Playback> mode.
●Stops/starts <Auto-switch> in the <Auto-switch>
mode.
DIRECTION
●Navigates between different fields and items in
menus.
●In the <Playback> mode, use the Up and Down
buttons to speed up and to slow down a recorded
video. Use the Left and Right buttons to select the
next and previous video files.
●Cycles through channels in the <Live View> mode.
●Controls the movement of the PTZ Camera in the
<PTZ Control> mode.
6 USB interfaces Universal Serial Bus (USB) ports for additional devices
such as a USB mouse and a USB Hard Disk Drive

20
No. Name Description
(HDD).
1.4 Remote Control
The NVR may also be controlled with the included IR remote control, shown in 0.
Note:
Batteries (2×AAA) must be installed before operation.
The IR Remote is set at the factory to control the NVR (using default Device ID# 255) without
any additional steps. Device ID# 255 is the default universal device identification number
shared by the NVRs. You may also pair an IR Remote to a specific NVR by changing the
Device ID#, as follows:
Pairing (Enabling) the IR Remote to a Specific DVR (optional):
You can pair an IR Remote to a specific private DVR by creating a user-defined Device ID#.
This feature is useful when using multiple IR Remotes and DVRs.
On the DVR:
Steps:
1. Go to General > More Settings.
2. Type a number (255 digits maximum) into the <Device No.> field.
3. On the IR Remote:
4. Press the <DEV> button.
5. Use the Number buttons to enter the <Device ID#> that was entered into the DVR.
6. Press the <Enter> button to accept the new <Device ID#>.
Other manuals for GD-RN-AC2004P
2
This manual suits for next models
6
Table of contents
Other Grundig Network Hardware manuals