manuals.online logo
Brands
  1. Home
  2. •
  3. Brands
  4. •
  5. Ergonomyx
  6. •
  7. Indoor Furnishing
  8. •
  9. Ergonomyx Workspace Fitness User manual

Ergonomyx Workspace Fitness User manual

Assembly
Manual
Enjoy your new SIT STAND DESK
SSD-M-1-7
IMPORTANT SAFETY INSTRUCTIONS
DANGER: 
TO REDUCE THE RISK OF ELECTRICK SHOCK:
 Always unplug his furnishing from he elec rical ou le before cleaning
or servicing
WARNING:
TO REDUCE THE RISK OF BURNS, FIRE, ELECTRIC SHOCK, OR
INJURY TO PERSONS
 Unplug from ou le before pu ing on or aking off par s
 Close supervision is necessary when his furnishing is used by, or near
children
 Use his furnishing only for i s in ended use as described in hese
ins ruc ions
 Never opera e his furnishing if i has a damaged cord or plug, if i is no
working properly, if i has been dropped or damaged, or if i has been
submerged in wa er. Re urn he furnishing o a service cen er for
examina ion and repair
 Keep he cord away from hea sources
Read all instructions before using (this furnishing
When using an electrical furnishing, basic precautions should
always be followed, including the following:
Page 2 of 8
SAVE THESE INSTRUCTIONS
WARNING DANGE
CONDITIONS OF USE FOR THE ERGONOMYXSTANDING DESK Small ofce Home ofcefurnishing:The
elec ronics componen s are ra ed for indooruse only. The elec ronics are no in ended o beused
ou side, in ex reme empera ure condi ions,or survive a ood even in your home orworkplace. The
elec rical cables may absorbwa er if submerged for ex ended periods andwill resul in an elec rical re
if plugged in o anou le . If a ood is likely o occur or is in progress,unplug your desk from he ou le
and secure he cable above he desk. Ergonomyx TechnologiesCanada Inc. recommends afxing your
cables o he underside of he desk duringnormal use such ha hey do no hang andpresen a snag
risk. An addi ional safe y coverhas been included o reduce he risk of personalinjury from he ro a ing
drive shaf s undernea h he desk. Make sure ha he desk is clear ofobs acles o avoid impac s during
raising andlowering he desk. The desk has func ionalsafe y fea ures o de ec impac s and ippingbu
hese fea ures should no be misused orrelied upon. The au oma ic lif and lower rou inefea ures
included wi h he mobile applica ionshould only be used once he desk environmen has been se up o
preven any risks of hazard. Ifyou are sufcien ly far away from he desk when he rou ine con rols he
desk, i is recommended ha you cancel he immedia e opera ionusing he mobile no ica ion
con ex ual menuun il you re urn o your desk where you canensure no hazards are likely o occur
Follow he recommended assembly and useins ruc ions o ensure your inves men in yourErgonomyx
S anding Desk will be preserved formany years beyond he conven ional warran yperiod.
IMPORTANT SAFETY INSTRUCTIONS
WARNIN
RISK OF ELECTRIC SHOCK, FIRE, A D I JURY. REVIEW THE ASSEMBLY
I STRUCTIO S TO CO FIRM THAT THE APPROPRIATE CRITICAL
COMPO E TS A D ACCESSORIES ARE BEI G USED WITH THE
FUR ISHI 
WARNIN
IMPROPER USE MAY CAUSE I JURY OR DAMAG
WARNIN
O USER SERVICEABLE PARTS I SID
WARNIN
RISK OF ELECTRIC SHOCK, FIRE OR I JUR
WARNIN
RISK OF I JURY- MAXIMUM LOAD 100lb
DOUBLE I SULATE
CO TACT ERGO OMYX TECH OLOGIES CA ADA I C. FOR REPLACEME T
PARTS
Page 3 of 8
SAVE THESE INSTRUCTIONS
SPECIFICATIONS AND CARE:
1. Power and or current supply: AC 100V-240V: 50/60HZ 
2. Ideal temperature to operate in: 0-40C 
3. The electronic components must be disposed of according to each country’s environmental
regulations, do not mix with household waste.
4. Do not use the product if any cord or any other electrical component is damaged. Contact
the manufacturer for a replacement
5. Check carefully to ensure correct and complete assembly before using.
6. Ensure space above, below, and around the desk is clear of obstructions to avoid collisions
7. Familiarize yourself with all functions and settings prior to use of the product
8. Children should not use, clean, or maintain the product without suitable supervision
9. To clean, rst unplug the power cord. Wipe all surfaces with a damp cloth making sure to
avoid exposed electronics
10. Corrosive or abrasive materials are not recommended for cleaning the equipment, these
chemicals will strip varnish and paint.
SERVICING OF DOUBLE INSULATED PRODUCTS
In a double-insulated product, two systems of insulation are provided instead of grounding. o
grounding means is provided on a double-insulated product, nor is a means for grounding to
be added to the product. Servicing a double-insulated product requires extreme care and
knowledge of the system, and is to be done only by a qualied service personnel. Replacement
parts for a double-insulated product must be identical to the parts they replace.
No. Name Qty
ST4.2 Wood Screw
6 Rounded Head
6 Socket Head
6 Flat Head
Technical Data
Column Qty Voltage
Loading Capacity ax Speed
Control Box Tray
Support Legs
Control Box
Power Cable
Capacitive Touch
Controlle
(Preinstalled)
Side Support
Crossbar
Crossbar (#1) Extension Range
49.8 kg / 100 lbs
(0 - 40°C) 32 - 104°FTemperature
(990-1490mm) 39in - 58 5/8in
100 - 250V
(1 in/s) 25 mm/s
2
(710- 1210mm) 28in - 47 5/8in
Crossbar (#1) Length Range
etric
:
(1100 - 1600mm) x (600 - 800mm)

I
mperial
:
(43
1
/
4
in - 63in) x (23
⁵
/
₈
in - 31
¹
/
₂
in)
Recommended
Tabletop
Dimensions
Fre
q
uency aximum 2 minutes o
f
mo
v
ement with 18 minutes o
f
rest
I
ma
g
e
DA
N
GE
R
ead all instructions be
f
ore using

N
o.
N
o.
N
o.
N
o.
N
o.
N
o.
N
o.
N
o.
N
o.
N
o.
Qty Qty
Qty
Qty
Qty
Qty
P
art
P
art
P
art
P
art
P
art
P
art
P
art
P
art
P
art
P
art
Qty
Qty
Qty
Qty
21
2
1
1
1
2
1
1
1
Tabletop
M
otor Cover
#1 #2
#4
#5 #6
#7
#10
#8
#9
Th
a
nk
yo
u f
o
r ch
oo
sing Erg
o
n
omy
x! W
e
a
r
e
e
xci
te
d
to
b
e
p
a
r
t
o
f
yo
ur n
e
w
a
nd i
m
pr
o
v
e
d
o
fc
e
sp
a
c
e
, w
e
w
a
n
t
to
h
e
lp
yo
u g
et
t
h
e
mo
s
t
o
u
t
o
f
yo
ur w
o
rking d
ay
!
Sc
a
n M
e
F
eet
4mm
A
llen Wrenc

5mm
A
llen and
P
hillips
Combo Wrench
#1
#2
#3
#4
#6
#10
#7
#5
#9
#8
P
age 4 o
f
8
Includ
e
d
H
a
rdw
a
r
e
C
om
p
o
n
e
n
t
L
is
t
#3
2
3
#1
Attach upport Legs (#3) to Crossbar using the
provided bolts. Use the provided 4mm allen
wrench (E) to tighten the bolts (B)
Twisting the legs (#3)
back and forth will help
seat them into place
Insert
Install upport Legs (#3)
using provided M6 rounded
head bolts (B)
4mm
4mm
Install ide upports (#2) using the
provided M6 athead bolts (D)
Attach ide upports (#2) to Crossbar (#1) with
provided bolts. Use the 4mm allen wrench to
tighten the bolts (D)
#2
#1
#3
Install Feet (#4) using the
provided M6 ocket head
bolts (C)
#10
Attach Feet to upport Legs using
provided M6 bolts. Use 5mm allen
wrench (E) to tighten the bolts (C)
nap the Motor Cover (#10) into
the Crossbeam (#1) by rst sliding
the at tab into the motor hole
and pressing the opposite side
down into position
The Motor Cover may be
preinstalled before you
receive the desk
Flat Tab
Motor Cover
 Insert
2. Rotate
#3
#4
#1
Page 5 of 8
1
Align the Crossbeam #1 and Side Support
#2 holes to the holes drilled in the desk (#3)
by loosening the 2 top bolts and removing
the 4 side bolts as shown below
Loosen these 2 sc ews
Remove these 4 sc ews
completely
Install the Control Box Tray
(#6) and Control Box (#5)
Note: If using under desk
accessories, or needing
additional knee clearance,
use the mounting location
shown in the following step
Place control box on
top of control box tray
Tighten afte extending C ossbeam
4mm
4
6
5
No. 2
On ergonomic
desktops, only two
screws are required for
the Side Supports
This step is not
required for medium
desktops, only large
and ergonomic
5mm
OR
2.
Power Cord
Motor Cable
Capactive
Touch

Cable
Connect all the cables onto the Control box (#5)
Screw Tabletop #3 onto support
plates using ST4.2
W
ood Screws
(A) and the Phillips end of the
5mm Allen
W
rench (
E
) or a drill
with a Phillips No. 2 bit
#3
#2
A
#6
#6
#5
#
7
#
9
Alternate mounting position
(uses ST4.2
W
ood Screws (A))
#5
#1
Page 6 of
8
Assemble the desk according to the instructions
included in this booklet. Clear space above and
below the desk to avoid collisions during startup.
Connect the desk to a power outlet and wait f r 4
sec nds bef re attempting t m ve the desk.
The desk starts locked. Grip the edge of the desk
over the electronic components until you feel a
vibration sequence.
Move the desk to the bottom by placing your
hand above the electronics until the desk
vibrates, signifying the lowest setting.
Y ur desk setup is n w c mplete.
Move the desk up to the desired setting by
placing your hand below the electronics for
upward motion, and on top for downward
motion.
Once at the desired position, grip the desk to
lock it ensuring it is not moved by accident.
To move the desk using your phone, download the
Erognomyx App on through either app store and
create an Ergonomyx account or login as guest.
NOTE:
To control the desk with a different smart phone, you
must rst disconnect the desk from any previously
connected devices
If you have bluetooth connectivity issues after
following the above steps, please force close the app
on the device/restart your phone as needed.
U
se the Ergonomyx app to connect to the desk
after it appears under
“
Nearby
D
evices
”
. Match
the desk serial number in the app to that of the
sticker on the underside of the desktop.
Y
ou will
need to give
B
luetooth and/or
L
ocation
permissions to the app

After connecting, press
“
Ad
j
ust
D
esk
”
. In the
“D
esk
R
emote
”
screen you will be able to
control the desk
’
s movements to go up and
down by pressing the
“+”
and
“-”
symbols.
Y
ou
can lock the desk in place pressing the lock
symbol.
COMMON ISSUES POSSIBLE SOLUTION
No response when pressing up or
down on sensors  Check if desk is unlocked via Quick Start Guide step 
 Grip the desk top and bottom for 20 seconds, release after
vibration stop
 Unplug the desk, wait for 10 seconds, complete the Quick
Start Guide steps 2-
 Desk may be overheating, unplug, wait for 18min, then
complete the Quick Start Guide steps 2-4
Moves down, but not up  Move the desk to the lowest point to reset (vibration),
then attempt to move upward
Moving slower than usual  Check if under max loading capacity (125kg/275lb MAX)
Motor constantly moves 1. Check to see if under load capacit
Desk does not vibrate when locking/
unlocking  Check the app settings to ensure vibration is o

 Grip the desk top and bottom for 20 seconds, release after
vibration stops
T
he following tips will help you detect and eliminate the most common faults and errors.
I
f the fault
you encounter is not listed below, please contact our Customer Service.
S
h rt vibration followed by l ng vibration:
L
ng vibration followed by sh rt vibration:
U
nl cked
L
cked
A
pp
C
ntr l
G
uide
Q
uick
S
tart
G
uide
P
age 7 of 8
Ergonomyx Technologies Canada INC
SMART-SIT-AND-STAND-DES
Model: SSD-ESp32Desk_V2.7
Input: VDC 130mA MAX
AN-CES-D038/NMB-003B
Contains RF Transmitter
Module:FCC-2AC7Z-
ESPWROOM32IC-21098-
ESPWROOM32
Conrms to UL 96
Certied to CSA. C22.2 NO. 68
WARNING: IMPROPER USE
MAY CAUSE INJURY OR DAMAGE
WARNING: NO USER
SERVICEABLE PARTS INSIDE.
Designed in Victoria, BC
Made in China
COPYRIGHTED CODE AND PARTS CONTAINED HEREIN
COPYRIGHT ERGONOMYX 2022
This marking indicates that this product should not be disposed with other household wastes.
To prevent possible harm to the environment or human health from uncontrolled waste
disposal, recycle it responsibly to promote the sustainable reuse of material resources. To return
your used device, please use the return and collection systems or contact the retailer where the
product was purchased. They can take this product for environmentally safe recycling.
DOUBLE INSULATED
Scan Me
Scan Me
You can nd a detailed breakdown and
instructions on all of our app’s features in the
instruction manual on our website.
To get the most out of you Sit-Stand Desk, connect
it to our Ergonomyx App once you have assembled
and plugged in the desk. Our App allows you to
unlock awesome features.
For more information please visi
https://www.ergonomyx.com/desk-resources
Page 8 of 8
Waste Disposal
The App

Other Ergonomyx Indoor Furnishing manuals

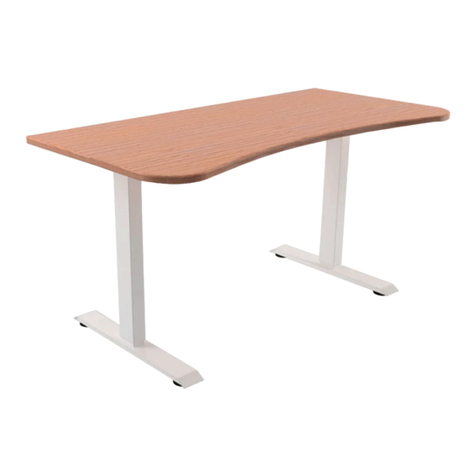
Ergonomyx Workspace Fitness Smart Sit-Stand Desk Installation instructions

Ergonomyx

Ergonomyx Workspace Fitness Smart Sit-Stand Desk Installation instructions

Popular Indoor Furnishing manuals by other brands

EKVIP 021168 operating instructions

EKVIP

EKVIP 021168 operating instructions

Furnlink AVOCA Assembly instructions

Furnlink

Furnlink AVOCA Assembly instructions

Whittier Wood 1121GACe Assembly instructions

Whittier Wood

Whittier Wood 1121GACe Assembly instructions

Donco 2188 Assembly instructions

Donco

Donco 2188 Assembly instructions

Foundations Serenity 1771047 manual

Foundations

Foundations Serenity 1771047 manual

Northridge Home 403295 Assembly instructions

Northridge Home

Northridge Home 403295 Assembly instructions

Prepac HFQ-0500-1 Assembly instructions

Prepac

Prepac HFQ-0500-1 Assembly instructions

Interstuhl Büromöbel VINTAGE IS5 operating instructions

Interstuhl Büromöbel

Interstuhl Büromöbel VINTAGE IS5 operating instructions

Furniture of America CM7550EK Assembly instructions

Furniture of America

Furniture of America CM7550EK Assembly instructions

calligaris BASIL CS/1348 quick start guide

calligaris

calligaris BASIL CS/1348 quick start guide

Seconique STOCKHOLM Assembly instructions

Seconique

Seconique STOCKHOLM Assembly instructions

Sepsion DZ-SK09-QU quick start guide

Sepsion

Sepsion DZ-SK09-QU quick start guide

Furniture of America CM7302EK Assembly instructions

Furniture of America

Furniture of America CM7302EK Assembly instructions

Furniture of America Teagan CM3911T Assembly instructions

Furniture of America

Furniture of America Teagan CM3911T Assembly instructions

Ceriotti BOTE P57163 Assembly instructions

Ceriotti

Ceriotti BOTE P57163 Assembly instructions

Novogratz Ottoman DA037OT instruction manual

Novogratz

Novogratz Ottoman DA037OT instruction manual

PROGRESSIVE DESK ST-02 user manual

PROGRESSIVE DESK

PROGRESSIVE DESK ST-02 user manual

Furniture of America NFA-1963C2 Assembly instructions

Furniture of America

Furniture of America NFA-1963C2 Assembly instructions

manuals.online logo
manuals.online logoBrands
  • About & Mission
  • Contact us
  • Privacy Policy
  • Terms and Conditions

Copyright 2025 Manuals.Online. All Rights Reserved.