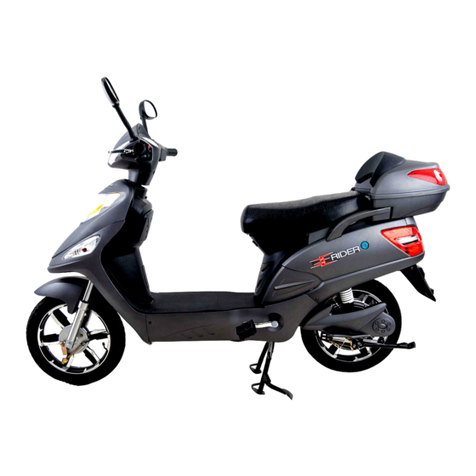
eRider RONDO User manual

E RIDER RONDO USER MANUAL AND ASSEMBLY INSTRUCTIONS
Congratulations, once again, on buying an ERIDER RONDO!!!!
USER MANUAL
We are sure you will be excited by the delivery of your brand new bike
and you will be eager to start using your ERIDER as soon as possible.
However you will need to be a little patient as there are some
important things to be done before you can ride it.
Firstly, the bike cannot be fully assembled for safe delivery so please
refer to our Assembly Instructions below and follow them closely to
put your bike together safely.

Secondly, during the time your ERIDER has been in transport and
storage, its battery will have lost some charge.
Before using the bike you must put the battery on charge. Plug the
charger to a power socket and you should get a green light on the
transformer. Attach the charger to the battery and this should turn
red. Wait until it turns green again and it is now fully charged.
The other important thing you must do is inflate your tyres to the
correct pressure of 40psi. This can be done with any pump or
compressor fitted with a Schrader fitment (same as for a car tyre).
General Usage:
With proper use and care your ERIDER will give many years of
pleasurable service. The maximum load your bike is designed to carry
is 135 kilograms. This should not be exceeded because it could make
the bike unsafe to drive and doing so will invalidate your warranty.
The ERIDER can be used in the wet or snow, but braking distances
will be longer in adverse conditions and you should take care to allow
for this. It is alright for the bike to get wet, but please make sure
that the motor is never submerged in water. This may cause it to
short circuit and result in serious damage which would not be covered
by warranty.
It is also good practice to fully charge your battery every three days in
cold weather. If your ERIDER is unused for a long period or if you
have a spare battery, which is not regularly used, you must fully
charge the battery at least every two months.

To charge the bike unlock the seat and remove the internal plug from
the underside of the battery and plug in the charger.
After charging, replace the battery in the bike making sure you plug it in
once again and lock the battery in place.
Please DO NOT use any other charger than the one supplied with
your bike. Also do not modify the bike in any way or replace any parts
from other suppliers. We cannot accept responsibility for damage or
failure caused by products which are not specifically made for use
with the ERIDER.
Operation:
When you are ready to ride your ERIDER you should sit on the bike
to adjust your mirrors and check that you can see behind you from
your riding position.

The bike can now be started using either the ignition key or
the remote control.
To switch on the bike with the key, locate the power key socket below
and to the right of the handlebars. Select the ignition key. Insert the
key and turn to the 'ON' position. The information display will light up
and you are ready to go. The throttle is operated by the right handle
on the handlebar.
To start your ERIDER without inserting the key, press the start key
button (lightning flash) on your remote twice. You will see the panel
light up and you are ready to go by turning the throttle on the right
handlebar handle as above.

On the left handlebar handle you will find three control buttons:
Top: High beam/Low beam
Middle: Slider switch to operate the indicators
Bottom: Warning horn
On the right hand handlebar you have the lights switch and hazard
warning switch

When riding downhill you must have the Rondo switched on even if
you are not using the throttle and even if the battery is not in the
bike. Otherwise the motor will generate enough electricity to damage
the controller beyond repair and this damage would not be covered by
the warranty.
The Rondo will travel along flat roads at about 21 -23 kilometers per
hour. It will slow down as you go uphill and may increase speed a
little downhill.
On a full charge your Rondo has a range of approximately one and a
half riding hours, but again this will depend on many factors such as
terrain, temperature and weight carried.
ASSEMBLY INSTRUCTIONS
For its safe transit, your Rondo has been supplied in sturdy
packaging and with the wheel off the bike.

Carefully unpack the bike and put it on its centre stand.
Inside the small box you will find the charger, pedals and a tool kit
containing the tools necessary to complete the assembly. There is
another box which contains the wing mirrors.
Remove the front axle. Please ensure you do not operate the brakes
prior to completely fitting the front wheel.

Next fit the front mudguard using the four bolts on the forks
Insert the brake disk on the front wheel between the brake calipers
and re-fit the front axle. As you look at the picture below the correct
order is RIGHT FORK/LARGE SPACER/WHEEL/SMALL SPACER/LEFT
FORK
Tighten the axle using the spanners provided

Fit the pedals. Please note that one will screw on clockwise and the other
anti-clockwise.
You will see the speed restrictor cable hanging down and this should be
tucked up inside the frame. Please do not separate the cable as this may
allow the bike to travel faster than the legal limit.
That's it!!! Check the brakes are working, charge your battery is fully
charged and you are ready for your first ride.
Enjoy your bike!!!
Table of contents
Other eRider Scooter manuals
