618 Cartridge Filter Housing
3
Operation
A. ELEMENT INSTALLATION INSTRUCTIONS
1. Remove lid from housing by turning eye nuts
NOTE: eye nuts do not need to be fully
removed from housing.
2. Check inner housing and pipe connections for
foreign material and discard any items that
have entered during shipping or unpacking.
3. Place housing and connect pipe connections.
4. Tighten housing with proper tension to seal
housing on existing pipe or flange.
5. Place required element into housing and hand
tighten top seal plate nut.
6. Close lid and tighten eye nuts until lid is fully
seated to o-ring.
7. Loosen vent plug to allow air to escape from
housing when liquid pressure begins to flow
into housing.
8. Housing is now ready for operation.
B. REMOVAL OF SPENT ELEMENT
1. When element reaches your pre-determined
differential pressure; 25-35 PSI (1.6-2.4bar).
Stop flow to the housing and relieve housing
pressure through housing drain or vent.
2. Loosen eye nuts on housing and tilt lid back
on hinged bolt.
3. Remove element and discard the element
in accordance with any required local and
federal laws.
4. Replace element into housing as noted in
A-5 above.
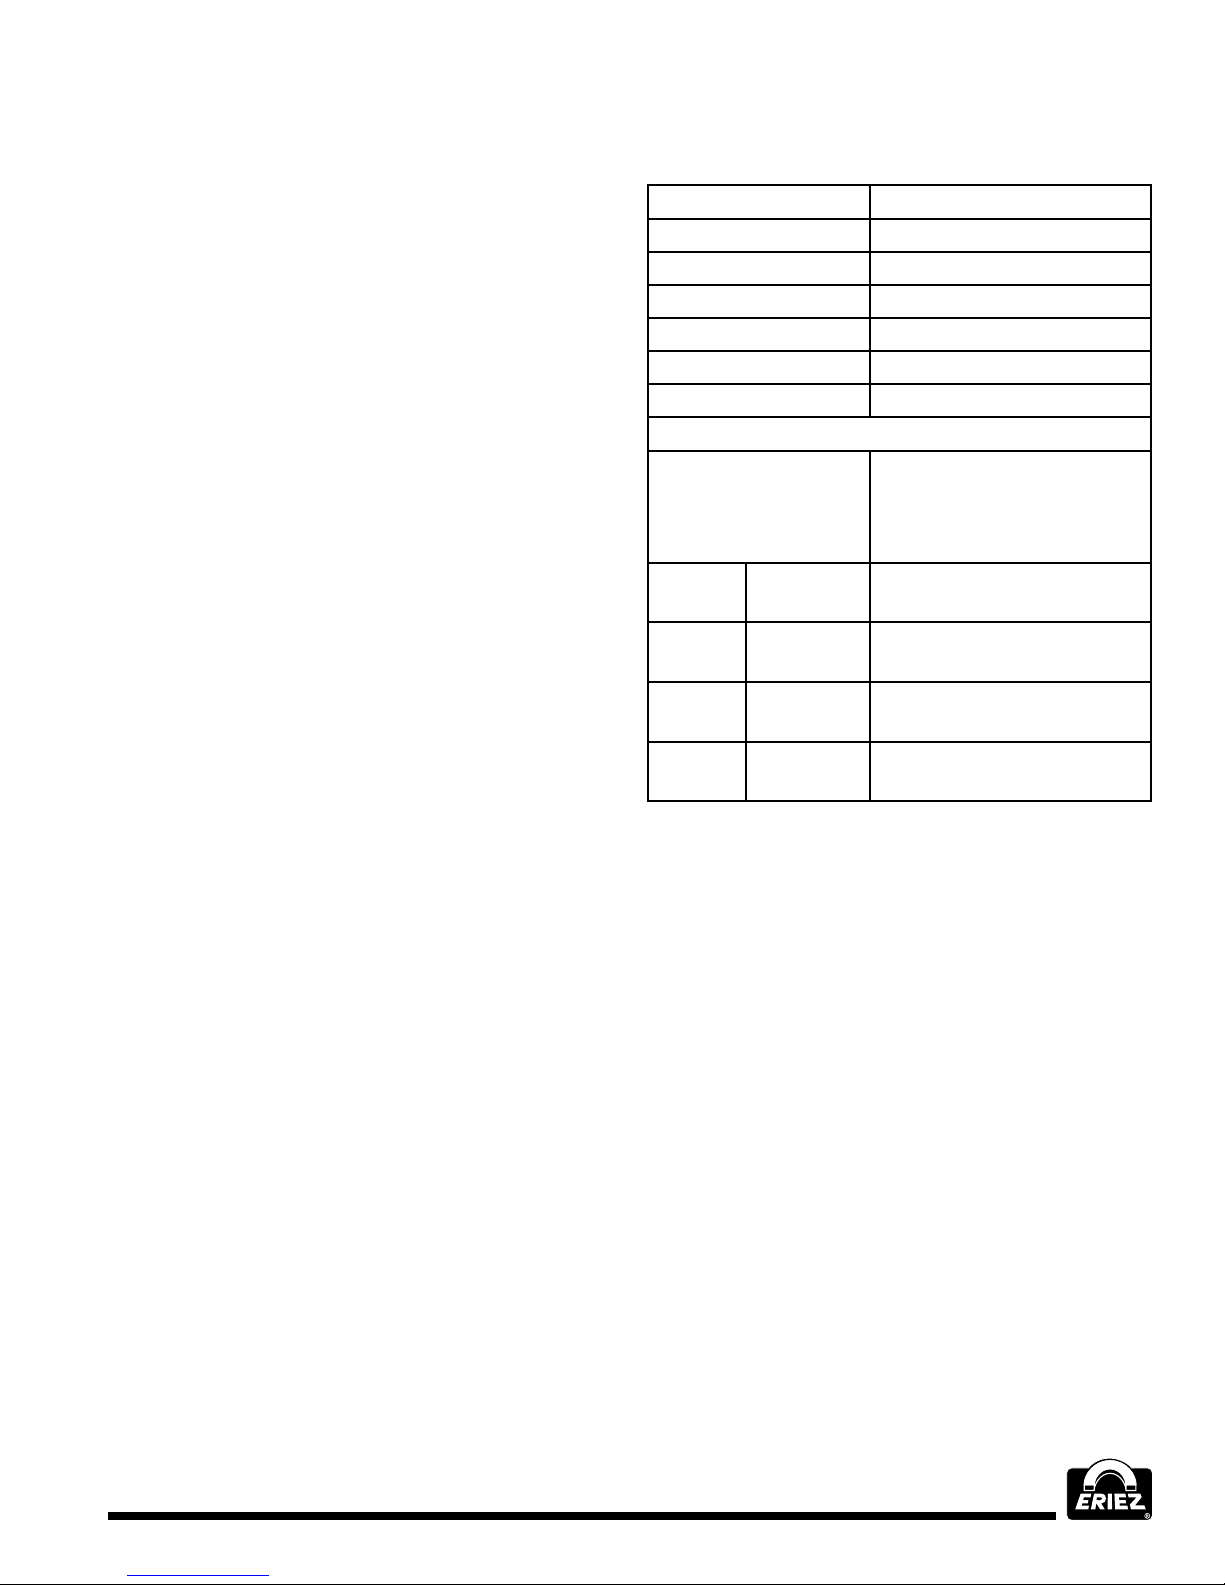
Optional Replacement Parts
PART NUMBER DESCRIPTION
744B Buna lid O-Ring
4RE Rod End
4EN Eye Nut
4CPA Clevis Bolt Assembly
L8LLC Carbon Steel Lid Cover
L8LC4 Stainless Steel Lid Cover
REPLACEMENT ELEMENTS
ERIEZ
Part Number/
Manufacturers
Part ID
Element Description/
Micron Rating
70-1370 718-5 Particulate Removal, 18",
5-Micron
460377 718-10 Particulate Removal, 18",
10-Micron
70-1380 718-20 Particulate Removal, 18",
20-Micron
NONE 718-30 Particulate Removal, 18",
30-Micron