manuals.online logo
Brands
  1. Home
  2. •
  3. Brands
  4. •
  5. Esatto
  6. •
  7. Cooktop
  8. •
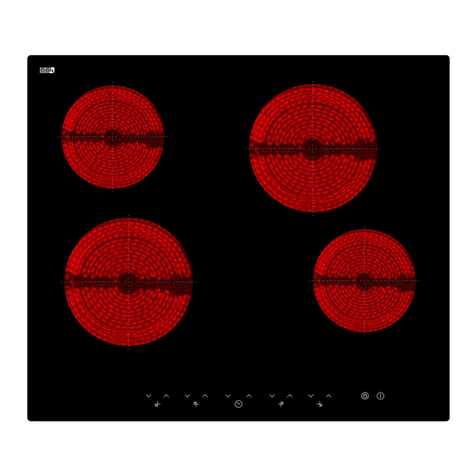
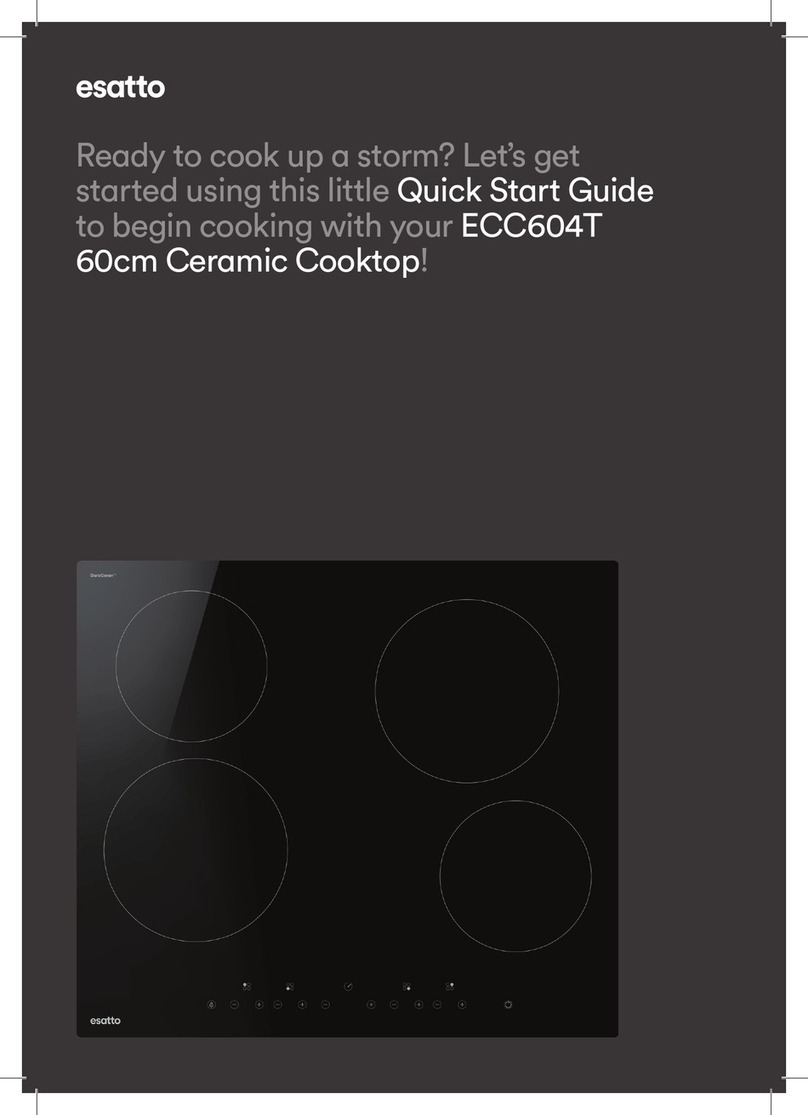
  9. Esatto ECC604T User manual

Esatto ECC604T User manual

1
Version
V 1.0 | 0822
Everything you need
for your 60cm Cermic
Cooktop is in this
User Mnul
Model/s
ECC604T
Welcome
Congrtultions on purchsing your new Cermic Cooktop. The Estto
brnd is proudly distributed within Austrli by Residenti Group Pty Ltd.
Plese refer to the wrrnty crd t the rer of this mnul for
informtion regrding your product’s prts nd lbour wrrnty, or visit
us online t: www.residenti.group
At Residenti Group, we re customer obsessed nd our Support Tem
re there to ensure you get the most out of your pplince. Should you
wnt to lern more bout your new cooktop, it's fetures or importntly
tking cre of the pplince, our Support Tem re here to help.
You cn use our online Support Centre t nytime by visiting:
http://support.residentigroup.com.u
Or you cn contct us vi phone by diling: 1300 11 HELP (4357).
It is importnt tht you red through the following use nd cre mnul
thoroughly to fmilirise yourself with the instlltion nd opertion
requirements of your pplince to ensure optimum performnce.
Agin, thnk you for choosing n Estto pplince nd we look forwrd
to being of service to you.
Kind Regrds,
The Residenti Tem
Residenti roup
—
Head Office
165 Brkly Avenue
Burnley, Victori
Austrli 3121
—
ACN
600 546 656
—
Online
residenti.group
www.estto.house
@estto.house
—
Postage
PO Box 5177
Burnley, Victori
Austrli 3121
—
Telephone
1300 11 4357
www.estto.house
Pge 2
Welcome
Pge 4
Sfety
Instructions
Pge 7
You Estto
Cooktop
Pge 8
Before First Use
Pge 9
Using Your
Cooktop
Pge 10
Opertion
Instructions
Pge 12
Instlltion
Instructions
Pge 16
Clening 
Mintennce
Pge 17
Troubleshooting
Pge 18
Technicl
Specictions
Contents
Pge 19
Purchse Detils
Pge 20
Wrrnty
Informtion
User Manual
4
IMPORTANT INFORMATION
The following statements you will see in this booklet have
these meanings:
WARNING!
Indicating information concerning your personal safety.
CAUTION
Indicating information on how to avoid damaging
the appliance or cabinetry.
IMPORTANT
Indicating tips and information about use of
the cooktop.
CONDITIONS OF USE
This appliance is intended to be used in domestic
environments (i.e. households) and similar applications
such as:
• Sta kitchen areas in shops, oces and other working
environments
• By clients in hotels, motels and other residential
type environments
• Farm houses
• Bed and breakfast type environments
• Catering and similar non-retail applications
BEFORE USING YOUR APPLIANCE
Before you use the appliance, we recommend that
you read through the relevant sections of this manual,
which provides the description of your appliance and
its functions.
To avoid the risks that are always present when you use
an appliance, it is important that the appliance is installed
correctly and that you read the safety instructions
carefully to avoid misuse and hazards.
We recommend that you keep this instruction booklet for
future reference and pass it on to any future owners.
This appliance complies with requirements of Australian
Standard AS/NZS 60335.2.6
INSTALLATION
Electrical Shock Hazard
• Disconnect the appliance from the mains
electricity supply before carrying out any work or
maintenance on it.
• Connection to a good earth wiring system is essential
and mandatory.
• Alterations to the domestic wiring system must only
be made by a qualied electrician.
• Failure to follow this advice may result in electrical
shock or death.
Cut Hazard
• Take care - panel edges are sharp.
• Failure to use caution could result in injury or cuts.
Important safety instructions
• Read these instructions carefully before installing or
using this appliance.
• No combustible material or products should be placed
on this appliance at any time.
• Please make this information available to the person
responsible for installing the appliance as it could
reduce your installation costs.
• In order to avoid a hazard, this appliance
must be installed according to these instructions
for installation.
• This appliance is to be properly installed and earthed
only by a suitably qualied person.
• This appliance should be connected to a circuit
which incorporates an isolating switch providing full
disconnection from the power supply.
• Failure to install the appliance correctly could
invalidate any warranty or liability claims.
• This appliance can be used by children aged from 8
years and above and persons with reduced physical,
sensory or mental capabilities or lack of experience
and knowledge if they have been given supervision or
instruction concerning use of the appliance in a safe
way and understand the hazards involved.
• Children shall not play with the appliance. Cleaning
and user maintenance shall not be made by children
without supervision.
• If the supply cord is damaged, it must be replaced
by the manufacturer, its service agent or similarly
qualied persons in order to avoid a hazard.
• Warning: If the surface is cracked, switch o the
appliance to avoid the possibility of electric shock, for
cooktop surfaces of glass-ceramic or similar material
which protect live parts
Sfety Instructions
esatto.house
5
• Metallic objects such as knives, forks, spoons and lids
should not be placed on the cooktop surface since
they can get hot.
• A steam cleaner is not to be used.
• Do not use a steam cleaner to clean your cooktop.
• The appliance is not intended to be operated by
means of an external timer or separate remote-control
system.
• WARNING Danger of re: do not store items on the
cooking surfaces.
• The cooking process has to be supervised.
A short term cooking process has to be supervised
continuously.
• WARNING Unattended cooking on a cooktop with fat
or oil can be dangerous and may result in re. NEVER
try to extinguish a re with water, but switch o the
appliance and then cover ame e.g. with a lid or a re
blanket.
OPERATION AND MAINTENANCE
Electrical Shock Hazard
• Do not cook on a broken or cracked cooktop. If the
cooktop surface should break or crack, switch the
appliance o immediately at the mains power supply
(wall switch) and contact a qualied technician.
• Switch the cooktop o at the wall before cleaning
or maintenance.
• Failure to follow this advice may result in electrical
shock or death.
Health Hazard
• This appliance complies with electromagnetic
safety standards.
• However, persons with cardiac pacemakers or
other electrical implants (such as insulin pumps) must
consult with their doctor or implant manufacturer
before using this appliance to make sure that their
implants will not be aected by the electromagnetic
eld.
• Failure to follow this advice may result in death.
Cut Hazard
• The razor-sharp blade of a cooktop scraper is exposed
when the safety cover is retracted. Use with extreme
care and always store safely and out of reach of
children.
• Failure to use caution could result in injury or cuts.
Hot Surface Hazard
• During use, accessible parts of this appliance will
become hot enough to cause burns.
• Do not let your body, clothing or any item other
than suitable cookware contact the ceramic glass until
the surface is cool.
• Keep children away.
• Handles of saucepans may be hot to touch.
Check saucepan handles do not overhang other
cooking zones that are on. Keep handles out of
reach of children.
• Failure to follow this advice could result in
burns and scalds.
Important safety instructions
• Never leave the appliance unattended when in use.
Boil over causes smoking and greasy spillovers that
may ignite.
• Never use your appliance as a work or storage surface.
• Never leave any objects or utensils on the appliance.
• Do not place or leave any magnetic objects (e.g.
credit cards, memory cards) or electronic devices (e.g.
computers, MP3 players) near the appliance, as they
may be aected by its electromagnetic eld.
• Never use your appliance for warming or heating
the room.
• After use, always turn o the cooking zones and the
cooktop as described in this manual (i.e. by using the
controls). Do not rely on the pan detection feature to
turn o the cooking zones when you remove the pans.
• Do not allow children to play with the appliance or sit,
stand, or climb on it.
• Do not store items of interest to children in cabinets
above the appliance. Children climbing on the cooktop
could be seriously injured.
• Do not leave children alone or unattended in the area
where the appliance is in use.
• Children or persons with a disability which limits their
ability to use the appliance should have a responsible
and competent person to instruct them in its use.
The instructor should be satised that they can use
the appliance without danger to themselves or their
surroundings.
• Do not repair or replace any part of the appliance
unless specically recommended in the manual. All
other servicing should be done by a
qualied technician.
• Do not place or drop heavy objects on your cooktop.
• Do not stand on your cooktop.
User Manual
6
• Do not use pans with jagged edges or drag pans
across the ceramic glass surface as this can scratch
the glass.
• Do not use scourers or any other harsh abrasive
cleaning agents to clean your cooktop, as these can
scratch the ceramic glass.
• WARNING The appliance and its accessible parts
become hot during use.
• Care should be taken to avoid touching
heating elements.
• Children less than 8 years of age shall be kept away
unless continuously supervised
IMPORTANT Check for any damage or marks. If you
nd the appliance is damaged or marked, you must report
it within 7 days if you wish to claim for damage/ marks
under the manufacturer’s warranty. This does not aect
your statutory rights. A damaged cooktop should never be
installed.
INFORMATION ON DISPOSAL FOR USERS
• Most of the packaging materials are recyclable. Please
dispose of these materials through your local recycling
depot or by placing them in appropriate collection
containers.
• If you wish to discard this product, please contact
your local authorities and ask for the correct method
of disposal.
WARNING! Read the following carefully to avoid
damage or injury.
• Do not allow pots to boil dry, as damage to both pan
and cooktop may result.
• Do not operate the cooktop for an extended period
without a pot or pan on the burner.
• Do not allow large cookware to overhang the cooktop
onto adjacent benchtop. This will cause scorching to
the benchtop surface.
• Do not allow cooking pots or pans to intrude into the
area which is close to the controls.
• In the event of faults with the appliance or damage
to the glass ceramic (cracks, scratches or splits), the
appliance must be switched o and disconnected
from the electrical supply, to prevent the possibility of
an electric shock.
• Repairs to the appliance must only be carried out by
trained registered service engineers.
CAUTION:
Read the following carefully to avoid an electric shock
or re.
It is important to use your cooktop safely. Check these
safety points before using your cooktop.
• This appliance is not intended for use by persons
(including children) with reduced physical, sensory
or mental capabilities, or lack of experience and
knowledge,unless they have been given supervision
or instruction concerning use of the appliance by a
person responsible for their safety.
• Children should be supervised to ensure they do not
play with this appliance.
• During use, this appliance becomes hot. Care should
be taken to avoid touching hot surfaces. To avoid
burns, young children should be kept away.
• Do not leave the appliance unattended
during operation.
• This appliance should be used only for normal
domestic cooking and frying of food.
• The appliance must not be used as a work surface or
as a storage surface.
• Additions or modications to the appliance are
not permitted.
• Do not place or store ammable liquids, highly
inammable materials or fusible objects (e.g. plastic
lm, plastic, aluminium) on or near the appliance.
• Keep vents clear of obstructions.
• In order to avoid a re, this appliance must
be kept clean.
• Do not spray aerosols in the vicinity of this appliance
while it is in operation.
• Do not place anything, e.g. asbestos mat between
pan and trivet as serious damage to the cooktop may
occur.
• Handles should be turned away from the front of the
bench to avoid accidents.
• Do not modify this appliance.
• Other than the connection point in the terminal
block, do not let the electrical supply cord touch the
appliance or hot cookware. Ensure electrical supply
cord is not tangled.
Sfety Instructions (Continued)
esatto.house
7
Your Estto Cooktop
PRODUCT
LEGEND
1. Max. 1200 W zone
2. Max. 1800 W zone
3. Max. 1200 W zone
4. Max. 1800 W zone
5. Glass plate
6. Control panel
CONTROL PANEL
LEGEND
1. ON/OFF control
2. Power regulating controls
3. Keylock control
4. Timer regulating controls
1
2
3
4
5
6
1
23
4
222
User Manual
8
Before First Use
BEFORE FIRST USE
• Before using this appliance read this manual, taking
special note of the ‘Safety Instructions’ section.
IMPORTANT! You should clean the ceramic
cooktop surface (refer to the “Cleaning and Maintenance”
section).
• Before using the appliance, ensure that all packing
materials are removed from the appliance.
• You should switch on one cooking zone at a time, for
5 minutes at the maximum setting. This will help to
eliminate any new smell that exists and evaporate any
humidity that has formed on the heating elements
during transit.
• Do not burn o more than one zone at once.
• You must place a saucepan lled half full with cold
water on each cooking zone as you burn it o.
INSTALLATION
• In order to avoid any potential hazard, the installation
instructions in this booklet, and any labels on the
appliance must be followed.
• Installation may only be carried out by a qualied
electrician. The minimum distances to other
appliances and units are to be observed.
• The laws, ordinances, directives and standards in
force in the country of use are to be followed (safety
regulations, proper recycling in accordance with the
regulations, etc.)
• Ensure that all specied vents, openings and air
spaces are not blocked.
• Anti-shock protection must be provided by the
installation, for example drawers may only be installed
with a protective oor directly underneath the
appliance.
• The cut surfaces of the worktop are to be protected
against moisture using a suitable sealant. The sealant
seals the appliance to the work top with no gap. Do
not use silicon sealant between the appliance and the
work top.
• Avoid installing the appliance next to doors and under
windows. Otherwise hot cookware may be knocked
o the cooktop when doors and windows are opened.
• Where the appliance is built into a benchtop,
the benchtop material must be capable of
withstanding 85°C.
SERVICING
• Servicing MUST only be carried out by authorised
personnel.
• To maintain safe operation, it is recommended that the
product be inspected every ve years by an authorised
service person.
• If the supply cord is damaged, it must be replaced
by the manufacturer, its service agent or similarly
qualied persons in order to avoid a hazard.
WARNING! Never install a cooktop that has been
damaged. Please contact our Customer Care team for
further assistance.
CLEANING
• Always ensure the appliance is turned o before
cleaning and allowed to cool.
• Do not use steam cleaners as this may cause moisture
build up on electrical components.
• Always clean the appliance immediately after any food
spillage.
• Refer to the Cleaning and Maintenance section of
this user manual for instructions on cleaning and
maintaining your ceramic glass cooktop.
esatto.house
9
GENERAL USE INSTRUCTIONS
• Do not use cookware with jagged edges or a curved base.
• Make sure that the base of your pan is smooth, sits at against the glass, and is the same size as the cooking zone.
Always centre your pan on the cooking zone.
• Always lift pans o the ceramic cooktop – do not slide, or they may scratch the glass.
Using Your Cooktop
User Manual
10
TOUCH CONTROLS
All operations are performed by means of the touch
controls that can be found on the control panel at the front
USING THE TOUCH CONTROLS
• The controls respond to touch, so you don’t need to
apply any pressure.
• Use the ball of your nger, not its tip.
• You will hear a beep each time a touch is registered.
Make sure the controls are always clean, dry, and that
there is no object (e.g. a utensil or a cloth) covering them.
Even a thin lm of water may make the controls dicult to
operate.
TO START COOKING
IMPORTANT! Do not use cookware with jagged edges or
a curved base.
• After powering on, the buzzer beeps once, all the
indicators light up for 1 second then go out, indicating
that the ceramic cooktop has entered the state of
standby mode.
1. Touch the ON/OFF control all the indicators
show “-”.
2. Place a suitable pan on the cooking zone that you
wish to use. Make sure the bottom of the pan and the
surface of the cooking zone are clean and dry.
• Select a heat setting by touching the “-” or “+” button
controls.
• If you don’t choose a heat setting within 1 minute, the
ceramic cooktop will automatically switch o. You will
need to start again at step 1
• You can modify the heat setting at any time
during cooking.
• You can modify the power level between 0-9 using the
touch control buttons.
WHEN YOU HAVE FINISHED COOKING
1. Turn a specic cooking zone o by scrolling down to
“0” or touching the “-” and “+” controls at the same
time
2. Turn the whole cooktop o by touching the ON/OFF
control.
• After a zone is switched o, the corresponding
cooking zone will show an “H” in the control panel.
This means that the temperature of the zone still high
enough to cause injury.
• The residual heat indicator will go out when the
surface has cooled down to a safe temperature.
• The residual heat also can be used as an energy saving
function if you want to heat further pans,use the
hotplate that is still hot.
IMPORTANT! The residual heat indicator will disappear if
the mains supply to the product is cut.
WARNING! It is still possible to burn yourself on a cooktop
zone, even when the residual heat indicator has gone o.
Always use caution when using the cooktop.
LOCKING THE CONTROLS
• You can lock the controls to prevent unintended use
(for example children accidentally turning the cooking
zones on).
• When the controls are locked, all the controls except
the ON/OFF control are disabled.
To lock the controls
• Touch the lock symbol. The timer indicator
will show “Lo“.
To unlock the controls
• Make sure the ceramic cooktop is turned on.
• Touch and hold the lock symbol for a few seconds.
• The cooktop will unlock and you can now start using
your ceramic hob.
WARNING! When the cooktop is in the lock mode, all the
controls are disable except the ON/OFF, you can always
turn the ceramic cooktop o with the ON/OFF control in
an emergency, but you shall unlock the cooktop rst in the
next operation.
Opertion Instructions
esatto.house
11
OVER TEMPERATURE PROTECTION
A temperature sensor equipped can monitor the
temperature inside the ceramic hob. When an excessive
temperature is monitored, the ceramic hob will stop
operation automatically.
AUTOMATIC SHUTOFF
Your ceramic cooktop features a safety feature for
automatic power-o occurring whenever you forget to
switch o a cooking zone.
The default shutdown times are shown in the
table below:
USING THE TIMER
You can use the timer in two dierent ways:
• You can use it as a minute minder. In this case, the
timer will not turn any cooking zone o when the set
time is up.
You can set it to turn one or more cooking zones o after
the set time is up.
Note: You can set the timer up to 99 minutes.
Using the timer as a minute minder timer.
If you are not selecting any cooking zone:
• Make sure the cooktop is turned on.
Note: you can use the minute minder even if you’re not
selecting any cooking zone.
• Adjust the timer setting by touch the “-” or “+”
controls. The minute minder indicator will start
ashing and will show in the timer display.
• Touching the “-” and “+” together, will cancel the timer,
and “--” will show in the minute display.
• When the time is set, it will begin to count down
immediately. The display will show the remaining time
and the timer indicator will ash for 5 seconds
• The buzzer will beep for 30 seconds and the timer
indicator shows “- -” when the timer has nished.
Note:
• Touch the “-” or “+” control of the timer once to
decrease or increase by 1 minute.
• Touch and hold the “-” or “+” control of the timer to
decrease or increase by 10 minutes.
• If the setting time exceeds 99 minutes, the timer will
automatically return to 0 minute.
Setting a timer to turn o one or more cooking zones
• Touch the “-” or “+” of the corresponding cooking zone
you want to set the timer for.
• Set the time by touching the “-” or “+” controls of the
timer.
• Touching the “-” and “+” together, the timer is
canceled, and the “--” will show in the minute display.
• When the time is set, it will begin to count down
immediately. The display will show the remaining time
and the timer indicator will ash for 5 seconds
• When cooking timer expires, the corresponding
cooking zone will be switched o automatically;
the display will show ”H” which means hot.
Note:
• The red dot next to power level indicator will
illuminate indicating that zone is selected.
• If you want to change the time after the timer is set,
you have to start from the start .
Setting a timer for more than one zone
• Use the same steps above to set timers against
multiple zones.
• When you set the time for several cooking zones
simultaneously, a red dot will illuminate next to the
power level indicator for each relevant zone.
• When setting or adjusting a timer against a zone, the
red dot indicating the zone being adjusted, will ash
intermittently.
• If more than one heating zone uses this function, the
timer indicator will show the lowest time.
(e.g. zone #1 remaining time of 5 minutes, zone #2
remaining time of 15 minutes, the timer indicator
shows “5”.)
• Once the countdown timer expires for the shorter
timer (zone #1), the corresponding zone will switch
o. Then it will show the new minute timer and the dot
of the new corresponding zone will ash.
• When the next cooking timer expires, the
corresponding cooking zone will be switch o
automatically.
User Manual
12
Instlltion Instructions
WARNING This user manual must be read! The laws,
ordinances, directives and standards in force in the
country of use are to be followed (safety regulations,
proper recycling in accordance with the regulations, etc.)
IMPORTANT!
Installation may only be carried out by a qualied
electrician. The minimum distances to other appliances
and units are to be observed.
Anti-shock protection must be provided by the
installation, for example drawers may only be installed
with a protective oor directly underneath the appliance.
The cut surfaces of the worktop are to be protected
against moisture using a suitable sealant. The sealant seals
the appliance to the work top with no gap. Do not use
silicon sealant between the appliance and the work top.
Avoid installing the appliance next to doors and under
windows. Otherwise hot cookware may be knocked o
the rings when doors and windows are opened.
WARNING! Risk of injury from electrical current.
• The electrical mains terminal is live.
• Make electrical mains terminal free of voltage.
• Follow connection schematic.
• Observe electrical safety rules.
• Ensure anti-shock protection by installing correctly.
• The appliance must be connected to the electrical
supply by a qualied electrician.
• Loose and inappropriate plug and socket connections
can make the terminal overheat.
• Have the clamping connections correctly installed by
a qualied electrician.
• Use strain relief clamp on cable.
WARNING! The surface temperature exceeds 90°C. To
avoid a hazard, under bench access must be restricted.
• Be aware that the glue that join the plastic or wooden
material to the furniture, has to resist to temperatures
of up to 150°C, to prevent panelling from unsticking
• The rear wall, adjacent and surrounding surfaces must
therefore be able to withstand a temperature of 90 °C.
WARNING! Once connected to the mains supply
check that all cooking zones are ready for use by briey
switching each on in turn at the maximum setting.
• A duplicate rating label is supplied with this unit. For
easy identication of this unit after installation, stick it
to a readily available surface adjacent to the cooktop.
INSTALLATION
Cut out the work surface according to the sizes shown in
the drawing.
For the purpose of installation and use, a minimum of 5cm
space shall be preserved around the hole.
Be sure the thickness of the work surface is at least
30mm. Please select heat-resistant and insulated work
surface material (wood and similar brous or hygroscopic
material shall not be used as work surface material
unless impregnated) to avoid the electrical shock and
larger deformation caused by the heat radiation from the
hotplate. As shown below: (FIG. 1)
L: 590mm W: 520mm
H: 55mm D: 51mm
A: 560+4mm minimum B: 490+4mm minimum
X: 50mm minimum F: 3mm minimum
FIG. 1
NOTE:
• The safety distance between the sides of the cooktop and the inner surfaces of the worktop should be at least 3mm.
• Under any circumstances, make sure the cooktop is well ventilated and the air inlet and outlet are not blocked.
Ensure the cooktop is in good work state. As shown below:
• WARNING The safety distance between the hotplate and the cupboard above the hotplate should be at least 650 mm.
esatto.house
13
CLEARANCES
Under any circumstances, make sure the ceramic cooktop is well ventilated and the air inlet and outlet are not
blocked. Ensure the ceramic cooktop is in good working state as shown below.
A (mm) B (mm) C (mm) D (mm) E (mm)
Refer to your
rangehood installation
guidelines*
50 minimum 20 minimum Air intake Air ventilation 5mm
*Please refer to your rangehood’s user manual for minimum clearances from the top of the cooktop surface
to your rangehood.
WARNING Ensuring Adequate Ventilation
Make sure the ceramic cooktop is well ventilated and that air inlet and outlet are not blocked. In order to avoid
accidental touch with the overheating bottom of the cooktop, or getting unexpected electric shock during working, it
is necessary to put a wooden insert, xed by screws, at a minimum distance of 50mm from the bottom of the cooktop.
Follow the requirements below:
• Be aware that the glue that join the plastic or wooden material to the furniture, has to resist temperatures above
150°C, to avoid the panelling becoming unstuck.
• The rear wall, adjacent and surrounding surfaces must therefore be able to withstand an temperature of 90°C.
A
Wall
Min. 50mm
Max. 5mmMax. 5mm
User Manual
14
Instlltion Instructions (Continued)
LOCATING THE FIXING BRACKETS
The unit should be placed on a stable, smooth surface (use the packaging or a towel). Do not apply
force onto the controls protruding from the cooktop.
Fix the cooktop on the work surface by screw four brackets on the bottom of cooktop(see picture)
after installation.
A B C D
Screw Bracket Screw Hole Base
Adjust the bracket position to suit for dierent work surface thickness’.
Under any circumstances, the brackets cannot touch with the inner surfaces of the worktop after installation (see
above).
CAUTIONS
• The ceramic cooktop must be installed by qualied personnel or technicians: Please never conduct the operation
by yourself.
• The ceramic cooktop shall not be mounted to cooling equipment, dishwashers and rotary dryers.
• The ceramic cooktop shall be installed such that better heat radiation can be ensured to enhance its reliability.
• The wall and induced heating zone above the work surface shall withstand heat.
• To avoid any damage, the sandwich layer and adhesive must be resistant to heat.
• A steam cleaner is not to be used.
esatto.house
15
ELECTRICAL CONNECTION
IMPORTANT The cooktop must NOT be connected to the mains supply by means of a 10A or 15A plug and socket.
The power supply should be connected in compliance with the relevant standard, or a single-pole circuit
breaker. The method of connection is shown in the gures below.
If the total number of heating units of the appliance is no less than 4, the appliance can be connected directly to the
mains by single-phase electric connection, as shown below.
Notes: The bottom surface and the power cord of the cooktop are not accessible after installation.
• If the cable is damaged or needs replacing, this should be done by an after-sales technician using the proper tools,
so as to avoid any accidents.
• If the appliance is being connected directly to the mains supply, an omnipolar circuit breaker must be installed with
a minimum gap of 3mm between the contacts.
• The installer must ensure that the correct electrical connection has been made and that it complies
with safety regulations.
• The cable must not be bent or compressed.
• The cable must be checked regularly and only replaced by a properly qualied person.
User Manual
16
By ensuring proper cleaning and maintenance of your
Esatto cooktop, you can ensure that it will have a long and
fault free operation.
GENERAL CLEANING INSTRUCTIONS
WARNING Do not start cleaning the cooktop until it has
completely cooled.
WARNING Sharp objects and abrasive cleaning materials
will damage the appliance. Clean with water and
washing up liquid.
• Any residues that are left on the cooktop surface from
cleaning agents will damage it. You should remove any
residues with warm water mixed with a little washing
up liquid.
• Abrasive cleaners or sharp objects will damage the
cooktop surface; you should clean it using warm water
mixed with a little washing up liquid.
• Although it is easier to clean some deposits whilst the
cooktop surface is still warm, you should take care not
to burn yourself if cleaning the cooktop surface when
it is still warm.
After each use:
• Wipe the cooktop over with a damp cloth.
• Dry the cooktop by rubbing the surface with a clean
cloth.
TYPES OF SPILLS
Everyday soiling on glass (ngerprints, marks, stains left
by food or non-sugary spillovers on the glass)
1. Switch the power to the cooktop o.
2. Apply a cooktop cleaner while the glass is still
warm (but not hot!)
3. Rinse and wipe dry with a clean cloth or paper
towel.
4. Switch the power to the cooktop back on.
• When the power to the cooktop is switched o, there
will be no ‘hot surface’ indication but the cooking zone
may still be hot! Take extreme care.
• Heavy-duty scourers, some nylon scourers and harsh/
abrasive cleaning agents may scratch the glass.
Always read the label to check if your cleaner or
scourer is suitable.
• Never leave cleaning residue on the cooktop: the glass
may become stained.
• Boil overs, melts, and hot sugary spills on the glass
Remove these immediately with a sh slice, palette
knife or razor blade scraper suitable for ceramic
glass cooktops, but beware of hot cooking zone
surfaces:
1. Switch the power to the cooktop o at the wall.
2. Hold the blade or utensil at a 30° angle and
scrape the soiling or spill to a cool area of the
cooktop.
3. Clean the soiling or spill up with a dish cloth or
paper towel.
4. Follow steps 2 to 4 for ‘Everyday soiling on glass’
above.
• Remove stains left by melts and sugary food or
spillovers as soon as possible. If left to cool on
the glass, they may be dicult to remove or even
permanently damage the glass surface.
• Cut hazard: when the safety cove is retracted, the
blade in a scraper is razor-sharp. Use with extreme
care and always store safely and out of reach of
children.
USING A SPECIALIST CERAMIC COOKTOP CLEANER
It is possible to purchase a specialist ceramic cooktop
cleaner/conditioner. You should follow the instructions
given by the manufacturer of the cleaner and ensure that it
is suitable for use on your appliance.
NOTE Scratches or dark stains on the glass ceramic that
cannot be removed will not aect the functioning
of the appliance.
IMPORTANT Residues from cleaning agents will damage
the appliance. Remove residues with water and
washing up liquid.
Clening  Mintennce
esatto.house
17
Troubleshooting
USING A SPECIALIST CERAMIC COOKTOP CLEANER
It is possible to purchase a specialist ceramic cooktop cleaner/conditioner.
You should follow the instructions given by the manufacturer of the cleaner and ensure that it is suitable for
use on your appliance.
NOTE Scratches or dark stains on the glass ceramic that cannot be removed will not aect the functioning
of the appliance.
IMPORTANT Residues from cleaning agents will damage the appliance. Remove residues with water and
washing up liquid.
Some minor faults can be xed by referring to the instructions given below. Please do not disassemble the unit by
yourself to avoid any dangers and damages to the ceramic cooktop. Instead contact our customer care team on
1300 11 4357 or visit our self help portal online www.support.residentiagroup.com.au.
Problem Possible Cause Remedy
The cooking zones are not
functioning or will not switch on
The mains electrical connection may
be incorrect or lose.
The appliance was left inactive for too
long after switching on and has since
powered o.
Have your installer check their
connection. Check the mains fuse box
to ensure a fuse has not been tripped
or blown.
Try powering the cooktop on once
more.
A humming sound is heard when a
cooking zone is selected
This is normal for all ceramic
cooktops.
The sound should disappear when the
zone has heated up.
Pitting of ceramic glass surface. Spill-overs of liquid with high sugar
content.
These types of spills must be
removed immediately with a special
scraper for the glass. If not permanent
damage to the cooktop glass can
occur which is not covered under
warranty.
Red rings, Limescale, water rings,
shiny metallic or other discolouration,
scratches, shadows, bubbles, or other
marks or stains have appeared on the
ceramic glass surface
Cooktop surface has not been
cleaned correctly. Cleaning/
maintenance of the cooktop surface
is not covered under warranty. If a
service call is placed to clean the
cooktop surface, you will be charged
for the visit.
Use a ceramic glass cleaner such as
Cerapol available from most
supermarkets or for purchase from our
Customer Care team.
The residual heat indicator is not
displaying anything.
The cooking zone was only on for a
short time and is therefore not hot.
If the cooking zone is hot and has been
in operation for at least 30 seconds
and still no residual heat indicator
active, call the Customer Service
Department.
The touch controls are unresponsive. The controls are locked. Unlock the controls. See section
‘Using your ceramic cooktop’ for
instructions.
The touch controls are dicult to
operate.
There may be a slight lm of water
over the controls or you may be using
the tip of your nger when touching
the controls.
Make sure the touch control area is dry
and use the ball of your nger when
touching the controls.
User Manual
18
MODEL ECC604T
RATED VOLTAGE 220-240V~ 50Hz or 60Hz
INSTALLED ELECTRIC POWER 5500-6600W
PRODUCT SIZE (W × D × H mm) 590 × 520 × 55mm
BUILT IN DIMENSIONS (W × D mm) 560 × 490mm
Technicl Specictions
esatto.house
19
For future reference, please record the following information in the form below. The product details can be found on the
rating plate, and purchase details which can be found on your sales invoice.
Purchse Detils
STORE DETAILS
STORE NAME
|
ADDRESS
|
TELEPHONE
|
PURCHASE DATE
|
PRODUCT DETAILS
MODEL NO.
|
SERIAL NO.*
|
Attch your receipt to this pge
User Manual
20
Wrrnty Informtion (AU)
AUSTRALIAN WARRANTY TERMS CONDITIONS
COOKING APPLIANCES
This document sets out the terms and conditions of the
product warranties for Residentia Group Appliances. It is
an important document. Please keep it with your proof of
purchase documents in a safe place for future reference
should you require service for your Appliance.
1. IN THIS WARRANTY
(a) ‘acceptable quality’ as referred to in clause 10 of
this warranty has the same meaning referred to in
the ACL;
(b) ‘ACL’ means Trade Practices Amendment
(Australian Consumer Law) Act (No.2) 2010;
(c) ‘Appliance’ means any Residentia Group product
purchased by you accompanied by this document;
(d) ‘ASR’ means Residentia Group authorised service
representative;
(e) ‘Residentia Group’ means Residentia Group Pty Ltd
of 165 Barkly Avenue Burnley VIC, ACN 600 546 656
in respect of Appliances purchased in Australia;
(f ) ‘major failure’ as referred to in clause 10 of this
warranty has the same meaning referred to in the
ACL and includes a situation when an Appliance
cannot be repaired or it is uneconomic for
Residentia Group, at its discretion, to repair an
Appliance during the Warranty Period;
(g) ‘Warranty Period’ means:
(i) where the Appliance is used for personal,
domestic or household use (i.e. normal
single family use) as set out in the instruction
manual, the Appliance is warranted against
manufacturing defects for 24 months (or 36
months where a valid extended warranty
registration has occurred), following the date
of original purchase of the Appliance;
(h) ‘you’ means the purchaser of the Appliance not
having purchased the Appliance for re-sale, and
‘your’ has a corresponding meaning.
2. This warranty only applies to Appliances purchased
and used in Australia and is in addition to (and does
not exclude, restrict, or modify in any way) any non-
excludable statutory warranties in Australia.
3. During the Warranty Period Residentia Group or its
ASR will, at no extra charge if your Appliance is readily
accessible for service, without special equipment and
subject to these terms and conditions, repair or replace
any parts which it considers to be defective. Residentia
Group or its ASR may use remanufactured parts to
repair your Appliance. You agree that any replaced
Appliances or parts become the property of Residentia
Group. This warranty does not apply to light globes,
batteries, lters or similar perishable parts.
4. Parts and Appliances not supplied by Residentia Group
are not covered by this warranty.
5. You will bear the cost of transportation, travel and
delivery of the Appliance to and from Residentia Group
or its ASR. If you reside outside of the service area, you
will bear the cost of:
(a) travel of an authorised representative;
(b) transportation and delivery of the Appliance to and
from Residentia Group or its ASR, in all instances,
unless the Appliance is transported by Residentia
Group or its ASR, the Appliance is transported at
the owner’s cost and risk while in transit to and
from Residentia Group or its ASR.
6. Proof of purchase is required before you can make a
claim under this warranty.
7. You may not make a claim under this warranty unless
the defect claimed is due to faulty or defective parts
or workmanship. Residentia Group is not liable in the
following situations (which are not exhaustive):
— THIS WARRANTY IS VALID IN AUSTRALIA ONLY —

Other manuals for ECC604T

1

Other Esatto Cooktop manuals

Esatto ECGG905W User manual

Esatto

Esatto ECGG905W User manual

Esatto ECC604K User manual

Esatto

Esatto ECC604K User manual

Esatto ECC604T.1 User manual

Esatto

Esatto ECC604T.1 User manual

Esatto ECC905T User manual

Esatto

Esatto ECC905T User manual

Esatto ECGW61F User manual

Esatto

Esatto ECGW61F User manual

Esatto ECGW60S User manual

Esatto

Esatto ECGW60S User manual

Esatto ECI604T User manual

Esatto

Esatto ECI604T User manual

Esatto EE62T User manual

Esatto

Esatto EE62T User manual

Esatto ECI604T User manual

Esatto

Esatto ECI604T User manual

Esatto ECG604E User manual

Esatto

Esatto ECG604E User manual

Esatto ECG604WS User manual

Esatto

Esatto ECG604WS User manual

Esatto ECC604T User manual

Esatto

Esatto ECC604T User manual

Esatto ECC905T User manual

Esatto

Esatto ECC905T User manual

Esatto ECC604K User manual

Esatto

Esatto ECC604K User manual

Esatto ECG604WS User manual

Esatto

Esatto ECG604WS User manual

Esatto ECG6F User manual

Esatto

Esatto ECG6F User manual

Esatto ECGG604W User manual

Esatto

Esatto ECGG604W User manual

Esatto EE60T User manual

Esatto

Esatto EE60T User manual

Popular Cooktop manuals by other brands

Viking VGSU SERIES installation instructions

Viking

Viking VGSU SERIES installation instructions

Summit B41601 instruction manual

Summit

Summit B41601 instruction manual

GE JGP633SETSS installation instructions

GE

GE JGP633SETSS installation instructions

Orbegozo PE 2710 instruction manual

Orbegozo

Orbegozo PE 2710 instruction manual

USR Brands Cookline IC-3600F user manual

USR Brands

USR Brands Cookline IC-3600F user manual

Dacor Discovery DYTT305N installation instructions

Dacor

Dacor Discovery DYTT305N installation instructions

Salton ID2066 Instruction booklet

Salton

Salton ID2066 Instruction booklet

KitchenAid KGCD807XBL00 Use and care guide

KitchenAid

KitchenAid KGCD807XBL00 Use and care guide

Jenn-Air JEC8536BDB10 parts list

Jenn-Air

Jenn-Air JEC8536BDB10 parts list

Haier HCC2230AGS user manual

Haier

Haier HCC2230AGS user manual

BSH Thermador CEM456 Service manual

BSH

BSH Thermador CEM456 Service manual

TriStar KP-6190 instruction manual

TriStar

TriStar KP-6190 instruction manual

Kuppersbusch EKI9350.2 Instructions for use

Kuppersbusch

Kuppersbusch EKI9350.2 Instructions for use

Fagor VFA-70 S Specifications

Fagor

Fagor VFA-70 S Specifications

IKEA ICR500XB00 installation instructions

IKEA

IKEA ICR500XB00 installation instructions

Meyer Prestige PR60HOBE Instructions for use

Meyer

Meyer Prestige PR60HOBE Instructions for use

Daniela DAN90AGG instruction manual

Daniela

Daniela DAN90AGG instruction manual

Kenmore 3247 - Elite 36 in. Gas Cooktop installation instructions

Kenmore

Kenmore 3247 - Elite 36 in. Gas Cooktop installation instructions

manuals.online logo
manuals.online logoBrands
  • About & Mission
  • Contact us
  • Privacy Policy
  • Terms and Conditions

Copyright 2025 Manuals.Online. All Rights Reserved.