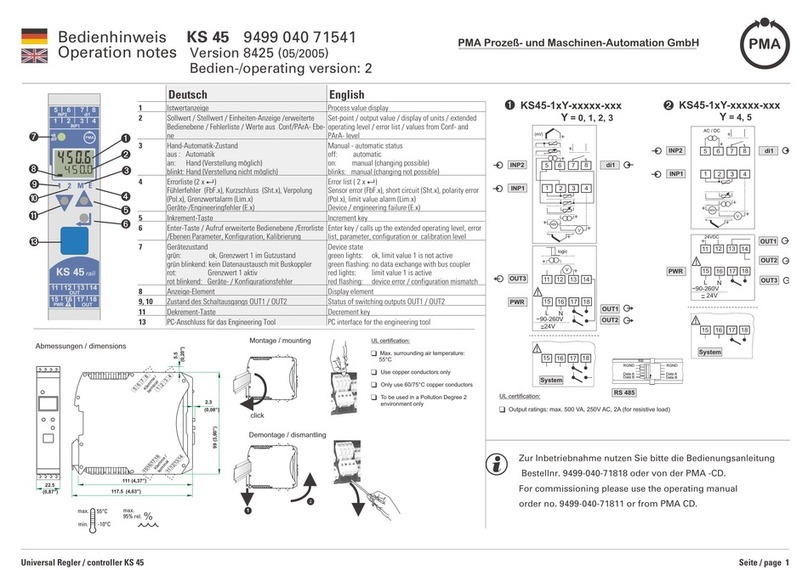
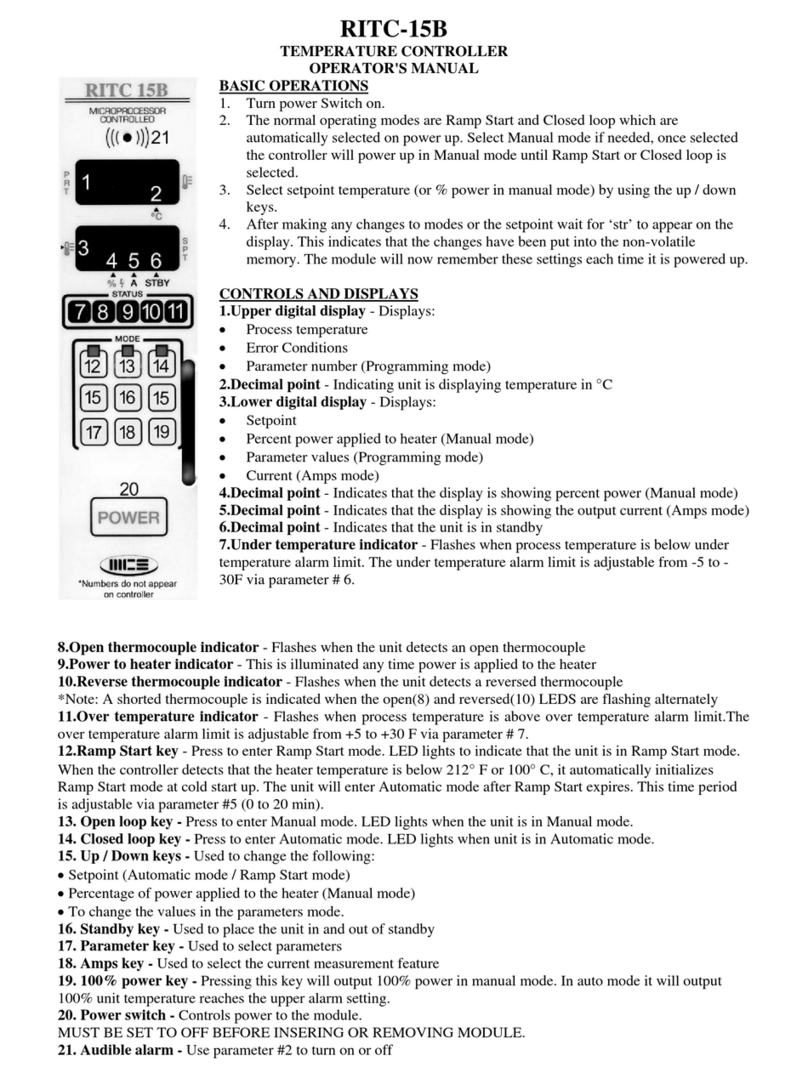
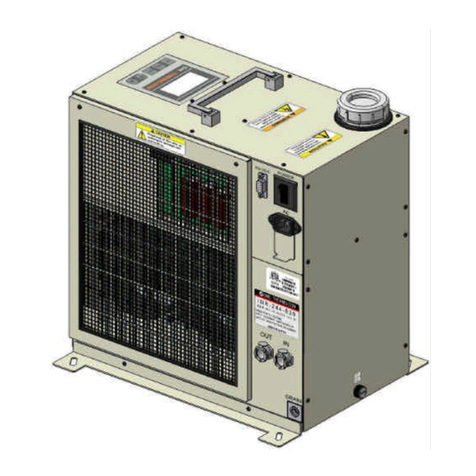
ESD 92 Series User manual

Digital Temperature Controller
ESD 92 series
1. Introduction
The Inside Stuff
Version - 12
Date - 25 April 08
Temperature Indicators and Controllers
play an important part in any process
industry. Quick and accurate measurement
and control of process temperature will
improve the final product quality, reliability
and reduce rejection. Temperature
indication and control is therefore one of the
prime considerations in any process
industry.
The ESD 92 series is a On / Off type Digital
Temperature Controller designed for fast
and accurate measurement and control. The
instrument is designed using highly reliable
electronic components. Process
temperature is displayed directly in digits,
giving better resolution compared to analog
indicators.
The ESD 92 series accepts all types of
Thermocouples, Pt - 100, 0 to 20 mA, 4 - 20
mAas well as 0-2/5/10 V DC as input . Wide
ranges of measurements are available.
The instrument is immune to mechanical
vibrations. Even the mounting position will
not affect the measurement accuracy. The
large bright red LED seven segment display
allows long distance readability. Use of
highly reliable electronic components with
low temperature coefficient ensure long and
trouble free service. The instrument is
tested for its performance under various
climatic conditions.
1. Introduction
2. Principle of
Operation
3. Features
4. Specifications
5. Block Diagram
6. Schematic
7. Installation
8. Calibration
9. Look-up Table
10. Fault Diagnosis
11. As you unpack
12. Warranty
Certificate
13. Ordering
Information
14. Health Tips
15. Definitions

2. Principle of Operation
3. Features
The ESD 92 series is based on the principle of a high input impedance
amplifier feeding a comparator followed by a relay and an analog to
digital convertor. The input signal generated by the transducer is fed to
a sensor compensation circuit, where automatic ambient
compensation in case of thermocouple & lead resistance
compensation in case of Pt-100 is achieved.
Duly compensated signal is fed to a signal conditioning amplifier,
output of which is given to digital display as well as to a comparator.
This comparator compares the process value with the desired value
(Set point). Output of the comparator is given to the relay which
switches ON or OFF depending upon the process value as compared to
the setpoint.
Linearisation of the input signal from the transducer is done by
hardware in the input circuit. This gives a standardized signal to the
analog to digital convertor which drives the LED display, indicating
the temperature directly.
Proven field performance
Highly compact
Dust and vermin proof enclosure with epoxy powder coating
LED display gives better long distance readability
Feather touch Push buttons
Fast response
Available in different DIN standard cutouts
Designed for Thermocouples, RTD, mA, mV input
Fail safe relay logic
Maximum MTBF and minimum MTTR

Model : ESD - 9213 / ESD - 9223
Control action : On / Off
Ranges : Refer Ordering Information chart
Input : Thermocouples / Pt - 100 (3 wire sys) / 4 - 20 mA
Indication accuracy : +/- 0.5 % of FS +/- 1 digit
4. Specifications
ooo o
Least count : 0.1 C upto 200 C, 1 C above 200 C
Accuracy deviation
oo
a) Temperature change : +/- 0.01 % / C , reference at 25 C
b) Supply Variation : +/- 0.005 % /V from rated supply
Set point : One / Two (through ten turns potentiometer)
Set point Read : By pressing respective self release switch on front panel
Set point Read & Adjust : By pressing self release switch and simultaneously
(on front panel) turning corresponding set potentiometer
Outputs : One set of Relay change over contact 5 Amp resistive
at 230 V AC per setpoint
Relay logic : 1. Actual temp. < set point - Relay ON for
Heating application (Factory set)
2. Actual temp. > set point - Relay ON for
Cooling application (On demand)
Relay ON indication : By Red LED per setpoint
Control Sensitivity : 0.25% of FS
Display : 3 & 1/2 digit 7 segment 12.5 mm Red LED
Power supply : 230 V AC, +/- 10 % , 50 Hz
o
Ambient Temp. range : 0 to 55 C
o
Amb. Temp. Compensation: Built in upto 55 C only for thermocouple input.
Sensor break indication : Up scale [i___] (Down scale on demand )
Sensor break protection : Relay ‘Off’ (Relay ‘On’ by demand)
Relative Humidity : 90 % Non-condensing
Power consumption : 6 VA
Input impedance : > 10 Mohms, (only for thermocouple input )
Weight : 800 grams approximately
Mounting : Flush Panel
2
Termination : PUT 2.5 mm / PBT
Dimensions (mm) Panel Cutout Front Facia Depth
92 x 92 (+1,-0) 96 x 96 80

1. Transducer : This block consists of either a Thermocouple, Pt- 100 (RTD) or
a 4 - 20 mA current signal. It senses the temperature and sends a signal to the
sensor compensation circuit.
2. Signal conditioner : consists of a bridge generating mV signal corresponding
to the ambient temperature. In case of thermocouple input this is added to input
mV signal for automatic ambient temperature compensation. In case of Pt-100
input, it gives constant current for Pt-100 excitation and provides 3 wire system
for lead wire compensation.
3. Amplifier : reads the signal from the sensor and calculates the temperature. It
consists of a bridge and an amplifier. The signal from the sensor causes an
unbalance in the bridge. This unbalance is proportional to the temperature being
measured. The output of the bridge is amplified and calibrated suitably. The
amplifier o/p is fed to the display circuit and the comparator.
4. ADC & Display : consists of an analog to digital convertor (ADC), a digital
voltmeter and 4 seven segment LED displays. The ADC converts the analog
output of the amplifier to a digital signal which is read by the digital voltmeter
and displayed on the seven segment displays, directly in terms of process
parameter.
5. Setpoints : consists of ten turn highly stable potentiometer excited by
precision regulated power supply for setting desired set values.
6. Comparator : compares the output of the amplifier (process value), with the
set point set by the user. Depending on whether the process value is greater than
or less than the set point the comparator output is either -ve or +ve. For ‘n’ set
points we have ‘n’comparators.
7. Relay : The relay switches ON or OFF depending on comparator output. For
‘n’set points we have ‘n’relays.
5. Block Diagram
Signal
Conditioner Amplifier ADC &
Display
Comparator-1
Comparator-2
Relay -1
Relay -2
Setpoint -1
Setpoint -2
Field
Field
Control
through
Contactors
Transducer
&
Transmitter

6.1 Schematic & Connection Diagram for ESD 9213
E N P
NC PNO
RL1
C
RC1
1 2 3 4 5 6 7 8 9
Pt 100
+
-
TC
SUPPLY
VOLTAGE
Pt-100 (3 WIRE RTD)
TC - THERMOCOUPLE
2II
Display board
ESD - 9123DPM-R3
CONTROL SET PRESS
DISPLAY
7 Pin connector
Secondary
Sensitivity Span
Zero
Transformer
ESD - 189
Relay
Sensor
Primary
Backcard
ESD - 9123BK-R3
E N P NC PNO R G B
Relay1
Mother board
ESD - 9213MB4
TB
User Terminals
1 2 3 4 5 6 7 8 9
CONTROL - Red LED's for Relay
Status
SET - Potentiomenters for
setpoint adjust
PRESS - Press Switches to
read set values
DISPLAY - 12.5 mm 7 segment
RED LED
VSEN - ‘Sensitivity’
adjust Potentiometers
SPAN -‘Span’ adjust
Potentiometer
ZERO -‘Zero’ adjust
Potentiometer
IC1 - Amplifier
IC2 - Comparator
RL - 12 V DC Relays
TB -PBT Terminal board

6.2 Schematic & Connection Diagram for ESD 9223
CONTROL - Red LED's for Relay
Status
SET - Potentiomenters for
setpoint adjust
PRESS - Press Switches to
read set values
DISPLAY - 12.5 mm 7 segment
RED LED
VSEN1/ VSEN2 - ‘Sensitivity’
adjust Potentiometers
SPAN -‘Span’ adjust
Potentiometer
ZERO -‘Zero’ adjust
Potentiometer
IC1 - Amplifier
IC2 - Comparator
RL1, RL 2 - 12 V DC Relays
Pt-100 (3 WIRE RTD)
TC - THERMOCOUPLE
EN P
NC PNO NC PNO
CC
RR
C1 C2
1 2 3 4 5 6 7 8 9
SUPPLY
VOLTAGE
10 11 12
Pt 100
+
TC
Relay 1 Relay 2
2ii
Display board
ESD - 9223DPM-R1
CONTROL SET PRESS
DISPLAY
10 Pin connector
Secondary
Sensitivity
Span
Zero
Transformer
ESD - 189
Relay2
Relay
Sensor
Primary
Backcard
ESD - 9223BK-R2
E N P NC PNO R G B
Relay1
NC PNO
Mother board
ESD - 9223MB-R2
TB -PBT Terminal board
TB
User Terminals
1 2 3 4 5 6 7 8 9 10 11 12

7. Installation Procedure
$Also observe Instrumentation Health Tips chapter 14
105 mm
CONTROL
ESD - 9223
TEMPERATURE CONTROLLER
PRESS
I
II
542
E L E C T R O N I C S
SYSTEMS AND DEVICES
C
The instrument should be mounted in a place where it is clearly visible and
accessible.
1. Insert the instrument in the cutout and fix it using the bracket pair.
2. Depending on the type of instrument make connections as shown in
Connection diagram ( Chapter 6 ).
3. In case of Pt-100 sensor Red wire is to connected to the terminal indicated
with a Box.
4. In case of thermocouple input : (a) for ESD-9213 terminal no.8 has no
connection. (b) for ESD-9223 terminal no. 11 has no connection.
5. Use correct compensating cables for thermocouple type instruments.
6. Ensure proper earthing to the instrument.
7. Output loads connected through the relay change over contact should be
less than the maximum specified value.
8. Connect a series combination of 0.1 F /600 V non polar capacitor & 2 20
1/2 Wresistor across phase & neutral.
9. For setting set values as per your requirement, press the push button and
rotate respective potentiometer with proper size screw driver.
10. If factory set control sensitivity (0.25% of FS) is not suitable for your
application, then adjust it by the potentiometer marked SENSITIVITY
(inside the instrument).
i) If relay chattering is observed, reduce the sensitivity by turning the
potentiometer Counter Clock Wise (CCW) .
ii) If over-shoots and under-shoots are observed increase the sensitivity by
turning the potentiometer Clock Wise (CW) .

8. Calibration Procedure
Warning: Procedure to be carried out strictly by technical persons.
MFollow instructions given in this manual.
The instrument is calibrated at the factory using accurate calibrating
equipment traceable to international standards. No recalibration should
be required in normal course, however if the instrument requires
recalibration, follow the procedure given below:
i. Remove the cover of the instrument, by removing the fixing
screws on the back side of the instrument.
ii. Switch on the supply and allow 5 min. to achieve thermal stability.
iii. For uniform error distribution calibration points should be at 20%
of Full Scale (FS) for ZERO calibration and at 80% of FS for SPAN
o
calibration. i.e. If the range is 0 to 1000 C, the ZERO calibration
o
should be done at 200 C (20% of FS) and SPAN calibration should be
o
done at 800 C (80% of FS).Depending on the type of input proceed as
follows :
8.1) Thermocouple input
1. Remove the thermocouple from its terminals and connect a stable
mV source in its place with proper polarity.
2. Feed ambient compensated mV corresponding to 20 % of FS.
The display should show corresponding temperature. If the
displayed temperature is incorrect turn the potentiometer marked
'ZERO' to display correct reading (CW to increase & CCW to
decrease).
o
eg.: Cr-Al thermocouple - Ambient compensated mV for 200 C
oo
at ambient temp 30 C will be mV corresponding to 200 C
o
(8.137mV) minus mV corresp to 30 C (1.203 mV) = 6.934 mV

3. Feed ambient compensated mV corresponding to 80 % of FS.
The display should show corresponding temperature. If the
displayed temperature is incorrect turn the potentiometer marked
'SPAN' to display correct reading (CW to increase & CCW to
decrease).
o
eg.: Cr - Al thermocouple - Ambient compensated mV for 800 C
oo
at ambient temp 30 C will be mV corresp. to 800 C (33.277 mV)
o
minus mV corresponding to 30 C (1.203 mV) = 32.074 mV
Repeat steps 2 and 3 to get zero error at both calibration points.
8.2) Pt - 100 input ( 3 wire system)
1. Remove the Pt - 100 from its terminals and connect a resistance
decade box with 3 wire system in its place.
2. Feed resistance corresponding to 20 % value of FS (eg.resistance
oo
corresponding to 20 C for 0 to 100 C range) The display should
show corresponding temperature. If the displayed temperature is
incorrect turn the potentiometer marked 'ZERO' to display correct
reading. (CW to increase and CCWto decrease)
3. Feed resistance corresponding to 80 % value of FS (eg. resistance
oo
corresponding to 80 C for 0 - 100 C range). The display should
show corresponding temperature. If the displayed temperature is
incorrect adjust the potentiometer marked 'SPAN' to display
correct reading. (CW to increase and CCWto decrease).
Repeat steps 2 and 3 to get zero error at both calibration points.
Check the calibration of the instruments every six months.
In case of error recalibrate using certified calibrators only.
6

Temp. in
Deg. C
Output in mV (Reference junction at 0 Degree Celcius)
Fe - Ko
( J )
Cr - Al
( K )
Pt-Pt,13% Rh
( R )
Pt-Pt,10% Rh
( S )
oo
KC= 273.15 + oo
F C= (1.8 x ) + 32
Charts for higher resolution on demand
Pt-100
resis.
in ohms
-100 60.25 -4.63 -3.55 - -
-50 80.31 -2.43 -1.89 - -
-25 90.13 -1.24 -0.37 - -
0 100.00 0.00 0.00 0.00 0.00
10 103.90 0.51 0.40 0.11 0.05
20 107.79 1.02 0.80 0.17 0.11
22 108.57 1.12 0.88 0.12 0.13
24 109.35 1.23 0.96 0.14 0.14
26 110.12 1.39 1.04 0.15 0.15
28 110.90 1.43 1.12 0.16 0.16
30 111.67 1.54 1.20 0.23 0.17
32 112.45 1.64 1.29 0.18 0.19
34 113.22 1.75 1.37 0.20 0.20
36 113.99 1.85 1.47 0.21 0.21
38 114.77 2.00 1.53 0.22 0.22
40 115.54 2.06 1.61 0.30 0.24
50 119.40 2.59 2.02 0.36 0.30
60 123.24 3.12 2.44 0.43 0.37
80 130.89 4.19 3.27 0.57 0.50
100 138.50 5.27 4.10 0.72 0.65
120 146.06 6.36 4.92 0.88 0.80
140 153.58 7.46 5.73 1.04 0.95
160 161.04 8.56 6.54 1.21 1.11
180 168.46 9.67 7.34 1.38 1.27
200 175.84 10.78 8.14 1.56 1.44
250 194.07 13.55 10.15 2.02 1.87
300 212.02 16.33 12.21 2.50 2.32
350 229.67 19.09 14.29 3.00 2.79
400 247.04 21.85 16.40 3.51 3.26
500 280.90 27.39 20.64 4.58 4.23
600 313.59 33.10 24.90 5.70 5.24
700 345.13 39.13 29.13 6.86 6.27
800 - - 33.28 8.07 7.35
900 - - 37.33 9.20 8.45
1400 - - - 16.04 14.37
1600 - - - 18.84 16.77
1000 - - 41.27 10.50 9.59
1200 - - 48.83 13.22 11.95
9. Look-up Table Temperature vs Sensor output

10. Fault Diagnosis
Problem Likely cause
No Indication Supply connections not as per connection
diagram or no Supply voltage .
Over range Sensor not connected
Sensor not connected properly.
Sensor Open
Irrelevant
Indication
Loose Sensor Connections
Noise pickup on sensor / sensor cable
Excessive Abmbient temperature
Improper sensor type
Fluctuations in
Indication Or
Setpoint not steady
Supply voltage not within specified limit.
Excessive Abmbient temperature
Error in
Indication
Improper Sensor Location
Improper Sensor type
Calibration error.
Excessive Abmbient temperature
Commonly observed problems and their likely causes. Please read
Installation Procedure and Instrumentation health prior to this.
In case the problem persists, please refer the service manual of the product
or get in touch with our Customer Support division.
No relay
Output
Improper Setpoint
Changeover tracks on PCB burnt due to
overload
Relay faulty
Temp. Overshoot/
Undershoot
Relay chattering
Improper Sensitivity Adjustment

11. As you unpack
Congratulations on buying
ESD - 92 series
Digital Temperature Controller
As you unpack kindly ensure that
1. The material received is in good condition
2.You have received following material
i) ESD - 92 series Digital Temperature Controller as
per your purchase order.
ii) Mounting bracket pair.
iii) This manual along with Warranty Certificate.
iv) Test Certificate.
v) Small size screw driver for setpoint adjustment.
In case of any discrepancies contact our customer support
department immediately.
We are sure you will get long and troublefree service
from our instrument.
Every attempt is made to make this Manual clear and easy to
understand. We believe that you will feel confident to install, use
and maintain our product. ESD welcomes your suggestions,
which will help us improve this product as well as the document
and make them more user friendly.
+We need your feedback :

This instrument is warranted against any
manufacturing defects for a period of twelve
months from the date of installation or
eighteen months from the date of purchase,
which ever is early.
Digital Temperature Controller ESD-92 series
Customer: _________________________
__________________________________
__________________________________
Model No. : ESD 9213 ESD 9223
Serial No.:____________ Date: _______
Warranty Certificate
E
L
E
C
T
R
O
N
I
C
S
S
Y
S
T
E
M
S
A
N
D
D
E
V
I
C
E
S
P
U
N
E
1
3
1. The warranty is limited to repairing the instrument and no responsibility
is taken for any other damage resulted.
2. The warranty will be void if the instrument is tampered with in any way.
3. The faulty instrument has to be returned to our factory, carriage prepaid.
Authorised signatory

ESD 92 X1 X2 X3 X4 X6
No of
Setpoints
0 - 92 x 45
1 - 45 x 92
2 - 67 x 67
3 - 92 x 92
4 - 138 x 67
5 - 67 x 138
6 - 186 x 92
Panel Cut-
out (mm)
1
2
3
4
1 - Pt - 100
2 - J type T/C
3 - K type T/C
4 - R type T/C
5 - S type T/C
6 - 0 to 20 mA
7 - 4 to 20 mA
8 - 0 to 2V DC
9 - Other
Input
0 - -50 to 50
1 - 0 to 100
2 - 0 to 200
3 - 0 to 100 %
4 - 0 to 400
5 - 0 to 600
6 - 0 to 800
7 - 0 to1000
8 - 0 to1200
9 - Other
o
Range ( C )
13. Ordering Information
Ordering eg. ESD 9213 - 1011
Digital Temp. Controller ESD 92
No of setpoints- One (1)
Panel cutout - 92 x 92 mm (3)
Input - Pt - 100 (1)
oo
Range - -50 C to 50 C (0)
Relay Output - 1 C/O 5 Amp (1)
Power Supply - 230 V AC (1)
0 - 200
800 -1600
Input
0 to 100 % or process value
mA / mV
Standard Ranges in oC
K
R, S
0 - 400 0 - 600
0 - 800 0 -1000 0 - 1200
J
Pt-100 -50 - 50
0 - 100 0 - 200
0 - 200
0 - 400 0 - 600
1 - 230 V AC
2 - 110 V AC
3 - 48 V AC
4 - 24 V AC
5 - 24 V DC
6 - Other
Power
Supply
X5
1 - 1 C/O 5 A
2 - 1 C/O 10 A
3 - 2 C/O 5 A
4 - Other
Relay
Output
Cutout (mm) V /s Setpoints suffix
No. of
Setpoints
Cutout
1
2
3
4
0 1 2 3 4 5 6

14. Instrumentation Health Tips
Taking care of your equipment is just as important as buying the best equipment.
So simply take the following precautions and ensure a long, trouble-free service
from your measurement and control system.
Use
Three wire system for connecting Pt-100 sensor to the instrument.
Same area of cross section for all the three wires for Pt-100.
Appropriate compensating cables for connecting T/c to an instrument
Appropriate thermally conductive media between Thermowell &
sensor sheath.
Proper sheathing material as per application and environment.
Proper size screw driver for making connections to the terminations
and also while adjusting calibration and set points.
Fuses of correct ratings for mains.
Do’s
Sensor cables must be isolated from power cables.
Insert minimum required sensitive length in the measurement object.
Operating temperature should be 80 % of the maximum specified
temperature.
Check that all the wiring is firm and as per wiring diagram.
Loads connected should be within specified limits.
Provide proper Earthing to Instrument / Instrumentation Panel.
Avoid
Terminal joints or junction boxes for sensor cables.
o
Exposure of T/c head to temperatures greater than 90 C.
Sharp objects for operating front panel membrane keys.
Magnetic field / inductive pick up / noise.
Excessive ambient temperature at installation place.
Corrosive gases in the surroundings.
Chemical or pressure wash for cleaning instruments.

15. Important Definitions
Accuracy : Closeness of reading or
indication of a measurement device to
the actual value of the quantity being
measured.
Ambient Compensation : The
design of an instrument such that the
changes in the ambient temperature
do not affect the readings of the
instrument.
Calibration : The process of
adjusting an instrument or compiling
a deviation chart so that it's reading
can be correlated to the actual value
being measured.
Differential : For an on / off
controller, it refers to the temperature
difference between the temperature at
which the controller turns the heat off
and the temperature at which the heat
is turned back on. It is expressed in
degrees.
DIN : Deutsche International Norms.
A German agency which sets
engineering and dimensional
standards. These now have worldwide
recognition.
Deviation : The difference between
the value of the controlled variable
and the value at which it is being
controlled
Drift : A change in the reading or a set
point value over long periods due to
factors like ambient temperature,
time, line voltage etc.
...
...
Error : The difference between the
correct or desired value and the actual
value or the value being measured.
Explosion-proof enclosure : An
enclosure that can withstand an
explosion of gases within it and
prevent the explosion of gases
surrounding it due to sparks, flashes or
the explosion of the container itself
and maintain an external temperature
which will not ignite the surrounding
gases.
Linearity : A deviation of an
instruments response from a straight
line.
Precision : The measure of the degree
with which successive measurements
of the same variable differ from one
another.
Sensitivity : The minimum change in
input signal to which an instrument
can respond.
Stability : The quality of an
instrument or sensor to maintain a
consistent output when a constant
input is applied.
Thermocouple : A junction of two
dissimilar metals / alloys which has a
voltage output proportional to the
difference in temperature between the
hot junction and cold junction.
Transducer : A device which
converts a parameter being measured
into another form. e.g. a thermocouple
transforms heat into millivolt output.
This manual suits for next models
2
Table of contents
Popular Temperature Controllers manuals by other brands
Azbil
Azbil Neosensor Series Specifications & instructions

Mitsubishi
Mitsubishi PAC-SE41TS-E installation manual

Paragon
Paragon Sentry 3.0 instructions

nano sensorics
nano sensorics TEMPHU Operation and installation manual

Comelit
Comelit Home 20004100 Technical manual

Engineered Comfort
Engineered Comfort Fan Coil Controller EZstat Installation and operation manual